Silvercrest TRITACARNE SFW 350 D3 Operating Instructions Manual
Hide thumbs
Also See for TRITACARNE SFW 350 D3:
- Operating instructions manual (166 pages) ,
- Operating instructions manual (75 pages) ,
- Operating instructions manual (171 pages)

Related Manuals for Silvercrest TRITACARNE SFW 350 D3


Summary of Contents for Silvercrest TRITACARNE SFW 350 D3
- Page 1 TRITACARNE SFW 350 D3 TRITACARNE PICADORA DE CARNE Istruzioni per l'uso Manual de instruções MINCER FLEISCHWOLF Operating instructions Bedienungsanleitung IAN 314659...
- Page 2 Prima di leggere aprire la pagina con le immagini e prendere confidenza con le diverse funzioni dell'apparecchio. Antes de começar a ler abra na página com as imagens e, de seguida, familiarize-se com todas as funções do aparelho. Before reading, unfold the page containing the illustrations and familiarise yourself with all functions of the device.
-
Page 4: Table Of Contents
Indice Introduzione . . . . . . . . . . . . . . . . . . . . . . . . . . . . . . . . . . . . . . . . . . . . . . . . . . 2 Diritto d'autore . -
Page 5: Introduzione
Introduzione Congratulazioni per l’acquisto del nuovo apparecchio . Lei ha scelto un prodotto di alta qualità . Il manuale di istruzioni è parte integrante del presente prodotto . Esso contiene importanti indicazioni per la sicurezza, l’uso e lo smaltimento . Prima di utilizzare il prodotto, si familiarizzi con tutte le indicazioni relative ai comandi e alla sicurezza . -
Page 6: Volume Della Fornitura / Descrizione Dei Componenti
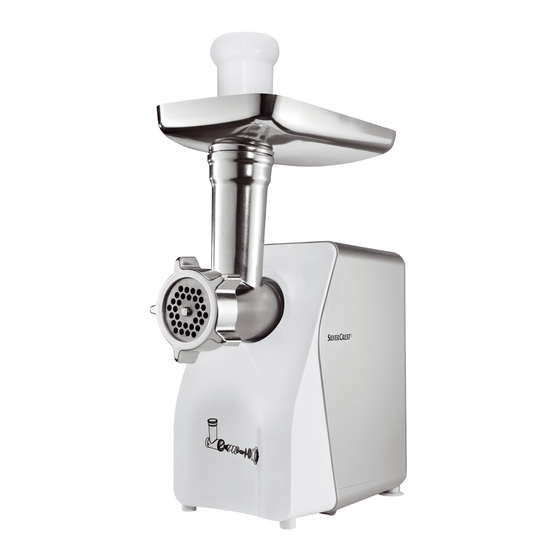
Volume della fornitura / Descrizione dei componenti Figura A: 1 Accessorio per pasticceria con striscia decorativa 2 Pressino 3 Vaschetta di riempimento 4 Avvolgimento cavo 5 Blocco motore 6 Accessorio per tritacarne in metallo 7 Fascetta di chiusura 8 Uscita dei pomodori 9 Coclea di plastica 0 Setaccio q Coclea di trasporto... -
Page 7: Dati Tecnici
Dati tecnici Tensione 220 - 240 V ∼ (corrente alternata), 50 Hz Assorbimento di potenza 250 - 350 W Classe di protezione II / (doppio isolamento) Tutte le parti di questo apparecchio che ven- gono a contatto con gli alimenti sono adatte per alimenti . - Page 8 ATTENZIONE! PERICOLO DI LESIONI! Non toccare mai le aperture dell'apparecchio . Non inserire ► mai alcun tipo di oggetto all'interno – a eccezione del pressino e degli alimenti da lavorare . In caso contrario, si corre il rischio di infortuni! Scollegare la spina dalla presa prima di inserire o rimuovere ►...
- Page 9 ATTENZIONE! PERICOLO DI LESIONI! Questo apparecchio può essere utilizzato da persone con ► capacità fisiche, sensoriali o mentali ridotte o insufficiente esperienza o conoscenza, solo se sorvegliate o istruite sull’uso sicuro dell’apparecchio e qualora ne abbiano compreso i pericoli associati . I bambini non devono giocare con l’apparecchio .
-
Page 10: Montaggio / Smontaggio
Montaggio / smontaggio ATTENZIONE - DANNI MATERIALI! ► Tutti gli accessori sono stati ricoperti di un sottile strato d'olio per proteggerli dalla corrosione . Prima del primo impiego pulire accuratamente tutte le parti come descritto dettagliatamente nel capitolo "Pulizia" . Strofinare quindi tutte le parti metalliche con un po' di olio alimentare . -
Page 11: Montaggio Dell'accessorio Per Salsicce
5) Collocare il disco forato r selezionato nell’accessorio per tritacarne 6 in modo tale che i fissaggi del disco forato r poggino negli intagli dell’acces- sorio per tritacarne 6 . 6) Dopo aver inserito tutto correttamente, avvitare saldamente l'anello di chiusura t . -
Page 12: Montaggio Dell'accessorio Per Kubbe
Montaggio dell'accessorio per kubbe Aprire la pagina pieghevole: in essa è rappresentata visivamente la sequenza di montaggio . 1) Rimuovere l'accessorio tritacarne 6, come descritto alla voce "Montaggio del tritacarne" . 2) Rimuovere eventuali altri accessori e pulire l'accessorio tritacarne 6 . AVVERTENZA ►... -
Page 13: Montaggio Dell'accessorio Per Passati
7) Reinserire la striscia decorativa 1 sul davanti nell'accessorio per pasticceria 1 . Assicurarsi che la maniglia della striscia decorativa 1 sia orientata lontano dall'apparecchio . In caso contrario, non sarà possibile inserire il motivo che si trova direttamente sulla maniglia . 8) Rimuovere l'accessorio tritacarne 6, come descritto alla voce "Montaggio del tritacarne"... -
Page 14: Uso
9) Chiudere la fascetta di chiusura 7 in modo tale che si posizioni attorno all’accessorio tritacarne 6 . 10) Fissare la fascetta di chiusura 7 posizionando il fissaggio sopra alla fascetta di chiusura 7 . PERICOLO DI FOLGORAZIONE ► Non aprire mai l'alloggiamento del blocco motore 5 – in esso non si trovano elementi di comando . -
Page 15: Funzionamento Dell'apparecchio
Funzionamento dell'apparecchio Dopo aver montato gli accessori desiderati: 1) Posizionare l'apparecchio in modo da garantirne l'assoluta stabilità, evitando inoltre assolutamente (per es . a causa di vibrazioni o intralcio con il cavo di rete) che cada dal tavolo o finisca nelle vicinanze di acqua corrente . Le vibrazioni sono inevitabili mentre l'apparecchio è... -
Page 16: Lavorazione Delle Salsicce
Lavorazione delle salsicce 1) Lavorare la carne due volte nel tritacarne, prima di trasformarla in salsiccia . 2) Per il ripieno, aggiungere alla carne macinata cipolle tritate, spezie e altri ingredienti in base alla ricetta, impastando bene il composto . Collocare in fri- gorifero l'impasto ottenuto per circa 30 min . -
Page 17: Produzione Di Pasticceria
Produzione di pasticceria Dopo aver preparato un impasto per la pasticceria seguendo la relativa ricetta e dopo aver montato l'accessorio 1: 1) Rivestire una piccola piastra con carta da forno e collocarla sotto l'apertura di uscita sul davanti dell'apparecchio . 2) Premere uniformemente l'impasto nell'accessorio tritacarne 6 –... -
Page 18: In Caso Di Guasti
In caso di guasti Se il motore si blocca a causa dell'accumulo di alimenti: ■ Premere il tasto "0" a per arrestare il tritacarne . ■ Tenere premuto il tasto "<" s . Il motore funzionerà a ritroso . In tal modo è possibile spostare gli alimenti all'indietro per sbloccare il motore . -
Page 19: Pulizia Del Blocco Motore
Pulizia del blocco motore ■ Pulire tutte le superfici esterne e il cavo di rete con un panno leggermente inumidito . In caso di sporco ostinato utilizzare un detersivo delicato applicato su un panno . Per rimuovere eventuale residui di detersivo strofinare poi con un panno leggermente inumidito solo con acqua corrente . -
Page 20: Conservazione
Conservazione ■ Avvolgere il cavo di rete in senso orario intorno all’avvolgicavo 4 presente sotto il fondo dell’apparecchio e fissarlo come illustrato qui sotto . In tal modo rimane protetto da danneggiamenti: ■ Riporre l'apparecchio in un luogo asciutto . ■... -
Page 21: Smaltimento
Smaltimento Non gettare per alcun motivo l'apparecchio insieme ai normali rifiuti domestici . Questo prodotto è soggetto alla Direttiva europea 2012/19/EU (Rifiuti da apparecchiature elettriche ed elettroniche) . Smaltire l'apparecchio presso un'azienda autorizzata o presso l'ente comunale di smaltimento . Rispettare le prescrizioni attualmente in vigore . In caso di dubbio mettersi in contatto con l'ente di smaltimento competente . -
Page 22: Garanzia Della Kompernass Handels Gmbh
Garanzia della Kompernass Handels GmbH Egregio Cliente, Questo apparecchio ha una garanzia di 3 anni dalla data di acquisto . Qualora questo prodotto presentasse vizi, Le spettano diritti legali nei confronti del venditore del prodotto . La garanzia qui di seguito descritta non costituisce alcun limite a tali diritti legali . -
Page 23: Assistenza
Trattamento dei casi di garanzia Per garantire una rapida evasione della Sua richiesta, La preghiamo di seguire le seguenti istruzioni: ■ Tenga a portata di mano per qualsiasi richiesta lo scontrino di cassa e il codice dell’articolo (per es . IAN 12345) come prova di acquisto . ■... -
Page 24: Ricette
Ricette Quibe Ingredienti per il ripieno di carne 400 g di carne bovina magra o di agnello 2 cipolle 10 g di farina 25 g di pinoli tritati grossolanamente 1/2 cucchiaino di pimento in polvere, di cannella, di cumino, di cumino in polvere, di chiodi di garofano in polvere, di noce moscata in polvere Sale e pepe Ingredienti per l’impasto... -
Page 25: Involtini Di Carne
Involtini di carne Ingredienti per l’impasto di carne 450 g di carne magra di montone, vitello o manzo 150 g di farina 1 cucchiaino di pimento (pepe garofanato) 1 cucchiaino di noce moscata 1 presa di chili in polvere 1 presa di pepe Ingredienti per il ripieno 700 g di carne di montone 1 cucchiaio e 1/2 di olio d’oliva... -
Page 26: Salsiccia Arrosto
Salsiccia arrosto Ingredienti: 300 g di carne bovina magra 500 g di carne suina magra 200 g di spalla di maiale 20 g di sale 1/2 cucchiaio di pepe bianco macinato 1 cucchiaino di cumino 1/2 cucchiaio di noce moscata Lavorare due volte la carne bovina, suina e la pancetta con il tritacarne . - Page 27 │ IT │ MT SFW 350 D3 ■ 24 ...
- Page 28 Índice Introdução . . . . . . . . . . . . . . . . . . . . . . . . . . . . . . . . . . . . . . . . . . . . . . . . . . . 26 Direitos de autor .
-
Page 29: Introdução
Introdução Parabéns pela compra do seu aparelho novo . Decidiu-se, assim, por um produto de elevada qualidade . O manual de instruções é constituinte deste produto . Este contém indicações importantes para a segu- rança, utilização e eliminação . Antes da utilização do produto, famializa-se com todas as indicações de utilização e de segurança . -
Page 30: Volume De Fornecimento / Descrição Dos Componentes
Volume de fornecimento / Descrição dos componentes Figura A: 1 Acessório para biscoitos com barra com formas 2 Empurrador 3 Recipiente para enchimento 4 Dispositivo de enrolamento do cabo 5 Bloco do motor 6 Aplicação frontal da picadora de carne em metal 7 Braçadeira de fecho 8 Saída do tomate 9 Transportador de plástico helicoidal... -
Page 31: Dados Técnicos
Dados técnicos 220 - 240 V ∼ (corrente alternada), Tensão 50 Hz Consumo de energia 250 - 350 W Classe de protecção II / (isolamento duplo) Todas as peças deste aparelho que entram em contacto com alimentos são adequadas para uso alimentar . Tempo de funcionamento descontínuo 15 minutos Tempo de funcionamento descontínuo... - Page 32 AVISO! PERIGO DE FERIMENTOS! Nunca introduza as mãos nas aberturas do aparelho . Nunca ► insira quaisquer objectos – com excepção dos respectivos empurradores dos acessórios e dos alimentos a serem prepa- rados . Caso contrário, pode existir perigo de acidente! Retire a ficha da tomada antes de encaixar ou retirar os ►...
- Page 33 AVISO! PERIGO DE FERIMENTOS! Este aparelho pode ser utilizado por pessoas com capacidades ► físicas, sensoriais ou mentais reduzidas, ou com falta de experiência e/ou conhecimento, caso sejam vigiadas ou instruídas sobre a utilização segura do aparelho e tenham compreendido os perigos daí resultantes . As crianças não podem brincar com o aparelho .
-
Page 34: Montagem / Desmontagem
Montagem / Desmontagem ATENÇÃO - DANOS MATERIAIS! ► Todos os acessórios possuem uma fina camada de óleo, com a finalidade de os proteger contra corrosão . Por isso, antes da primeira colocação em funcionamento, limpe bem as peças todas como descrito detalhadamente no capítulo "Limpeza"... -
Page 35: Montar O Acessório Para Enchimento De Salsichas
5) Coloque o disco perfurado selecionado r na aplicação frontal da picadora de carne 6 de forma que as fixações no disco perfurado r encaixem nos entalhes da aplicação frontal da picadora de carne 6 . 6) Quando tudo se encontrar correctamente colocado, aparafuse manualmente o anel de fecho t . -
Page 36: Montar O Acessório Em Forma De Cúpula
Montar o acessório em forma de cúpula Desdobre a parte desdobrável - encontra lá a descrição da sequência de mon- tagem apresentada através de imagens . 1) Retire a aplicação frontal da picadora de carne 6, como descrito em "Montar a picadora de carne" . 2) Retire eventuais acessórios e limpe a aplicação frontal da picadora de carne 6 . -
Page 37: Montar O Adaptador Do Passe-Vite
7) Volte a encaixar a barra com formas 1 à frente no acessório para biscoitos 1 . Certifique-se de que a pega na barra com formas 1 fica virada para o lado oposto ao do aparelho . Caso contrário não consegue ajustar o padrão que se encontra directamente na pega . -
Page 38: Funcionamento
9) Feche a braçadeira de fecho 7 de forma a envolver a aplicação frontal da picadora de carne 6 . 10) Fixe a braçadeira de fecho 7, fechando a pequena fixação por cima da braçadeira de fecho 7 . Funcionamento PERIGO DE CHOQUE ELÉCTRICO ►... -
Page 39: Operar O Aparelho
Operar o aparelho Quando já tiver montado os acessórios pretendidos: 1) Coloque o aparelho de forma a que este fique completamente estável e não caia da mesa (em caso de, por exemplo, vibrações ou cabos de rede presos) ou caia à água . A trepidação durante o funcionamento é inevitável . PERIGO DE CHOQUE ELÉCTRICO ►... -
Page 40: Preparar Salsichas
2) Quando tiver lido todas as indicações relativamente ao tema "Carne", pode aplicar agora o aparelho como descrito no capítulo "Operar o aparelho" . Preparar salsichas 1) Passe a carne primeiro duas vezes pela picadora de carne, antes de preparar a salsicha . -
Page 41: Fabricar Biscoitos
Fabricar biscoitos Quando tiver preparado uma massa para biscoitos de acordo com a sua receita e tiver montado o acessório para biscoitos 1: 1) Coloque um tabuleiro revestido com papel vegetal por baixo da abertura de saída na frente do aparelho . 2) Pressione a massa uniformemente na aplicação frontal da picadora de carne 6 –... -
Page 42: Em Caso De Erro
Em caso de erro Se o accionamento estiver bloqueado por alimentos: ■ Prima o botão "0" a para parar a picadora de carne . ■ Mantenha o botão "<" s premido . O accionamento funciona agora para trás . Dessa forma, os alimentos são transportados no sentido contrário para voltar a libertar o accionamento . -
Page 43: Limpar O Bloco Do Motor
Limpar o bloco do motor ■ Limpe todas as superfícies exteriores e o cabo de rede com um pano leve- mente humedecido . Em caso de sujidade entranhada, coloque um detergen- te suave da loiça no pano . Limpe depois com um pano humedecido apenas com água limpa, para eliminar eventuais resíduos de detergente . -
Page 44: Guardar
Guardar ■ Enrole o cabo de alimentação, no sentido dos ponteiros do relógio, à volta do dispositivo de enrolamento do cabo 4, na base do aparelho, e fixe o cabo como demonstrado em baixo . Deste modo, fica protegido de danos: ■... -
Page 45: Eliminação
Eliminação Nunca coloque o aparelho no lixo doméstico normal . Este produto é abrangido pela Directiva Europeia 2012/19/EU (Waste Electrical and Electronic Equipment) . Elimine o aparelho através de um serviço de eliminação autorizado ou das entidades de eliminação locais . Tenha atenção aos regulamentos actualmente em vigor . -
Page 46: Garantia Da Kompernass Handels Gmbh
Garantia da Kompernass Handels GmbH Estimada Cliente, Estimado Cliente, Este aparelho tem uma garantia de 3 anos a contar da data de compra . No caso deste produto ter defeitos, tem direitos legais contra o vendedor do produto . Estes direitos legais não são limitados pela nossa garantia que passamos a transcrever . -
Page 47: Assistência Técnica
Procedimento em caso de acionamento da garantia Para garantir um processamento rápido do seu pedido, siga, por favor, as seguintes instruções: ■ Para todos os pedidos de esclarecimento, tenha à mão o talão de compra e o número do artigo (p . ex . IAN 12345) como comprovativo da compra . ■... -
Page 48: Receitas
Receitas Quibe Ingredientes para o recheio de carne 400 g de carne magra de vaca ou de borrego 2 cebolas 10 g de farinha 25 g de pinhões picados grosseiramente 1/2 colher de chá de pimenta em pó, canela, cominhos, sementes de alcaravia em pó, cravinho em pó, noz-moscada em pó... -
Page 49: Rolinhos De Carne
Rolinhos de carne Ingredientes para a cobertura de carne 450 g carne magra de carneiro, vitela ou de vaca 150 g de farinha 1 colher de chá de pimenta (cravinho) 1 colher de chá de noz moscada 1 pitada de chili em pó 1 pitada de pimenta Ingredientes para o recheio de carne 700 g de carne de borrego... -
Page 50: Salsicha De Churrasco Fresca
Salsicha de churrasco fresca Ingredientes: 300 g de carne magra de vaca 500 g de carne magra de porco 200 g de toucinho 20 g de sal 1/2 colher de sopa de pimenta branca, moída 1 colher de chá de cominhos 1/2 colher de chá... - Page 51 │ SFW 350 D3 ■ 48 ...
- Page 52 Index Introduction . . . . . . . . . . . . . . . . . . . . . . . . . . . . . . . . . . . . . . . . . . . . . . . . . . 50 Copyright .
- Page 53 Introduction Congratulations on the purchase of your new appliance . You have clearly decided in favour of a quality product . These operating instructions are a part of this product . They contain important information in regard to safety, use and disposal . Before using the product, familiarise yourself with all of these operating and safety instructions .
- Page 54 Items supplied / Component description Figure A: 1 Biscuit attachment with pattern strips 2 Stodger 3 Feeding tray 4 Cable retainer 5 Motor unit 6 Meat grinder casing made of metal 7 Locking clamp 8 Tomato outlet 9 Plastic screw 0 Strainer sieve q Transport screw w Spring...
- Page 55 Technical data Voltage 220 - 240 V ∼ (AC), 50 Hz Power consumption 250 - 350 W Protection class II / (Double insulation) All of the parts of this appliance that come into contact with food are food-safe . C .O . Time 15 minutes C.O.
- Page 56 WARNING! RISK OF INJURY! Never put your hand into the openings of the appliance . Do ► not insert any objects of any kind into the openings – except for the appropriate stodger and the foodstuff to be processed . If you do, there will be a serious risk of accidents! Unplug the appliance from the power source before attaching ►...
- Page 57 Assembly / Disassembly CAUTION - PROPERTY DAMAGE! ► All accessories are coated with a thin film of oil to protect them from corrosion . Therefore, carefully clean all of the parts before using the appliance for the first time, as described in detail in the chapter "Cleaning" . After subsequent usage, always apply a light coating of cooking oil to the metallic components .
- Page 58 5) Place your selected cutting disc r into the meat grinder casing 6 so that the fixings on the cutting disc r are located in the openings in the meat grinder casing 6 . 6) After everything has been correctly assembled, screw the ring clamp t back on hand-tight .
- Page 59 Assembling the kubbe attachment Unfold the fold-out side . There you will find the step-by-step illustrations for as- sembling the appliance . 1) Remove the meat grinder casing 6 as described under “Assembling the meat grinder” . 2) Disassemble any attachments that might be fitted and clean the meat grinder casing 6 .
- Page 60 7) Replace the pattern strips 1 back in to the front of the biscuit attachment 1 . Ensure that the grip on the pattern strips 1 points away from the appliance . If it does not, you will not be able to adjust the pattern, which is located directly on the grip .
- Page 61 9) Fasten the locking clamp 7 so that it grips the meat grinder casing 6 . 10) Close the locking clamp 7 by flipping the small closure over the locking clamp 7 . Operation RISK OF ELECTRIC SHOCK ► NEVER open the housing of the motor unit 5 – it does not contain any user-serviceable elements .
- Page 62 Operating the appliance Once the appropriate attachments have been fixed: 1) Place the appliance where it will at all times be absolutely stable and under no circumstances could it fall off of the work surface or in any way come into contact with water (due to vibrations or becoming snagged in the power cable) .
- Page 63 Processing sausage meat 1) Pass meat through the meat grinder twice before using it as sausage stuffing . 2) To make sausage stuffing, add some chopped onions, spices and other ingredients to the minced meat, as per your recipe, and knead the mixture well .
- Page 64 Making biscuits After you have made the biscuit pastry according to your recipe, and after having fixed the biscuit attachment 1: 1) Line a small baking tray with greaseproof paper and place or hold it directly under the exit opening at the front of the appliance . 2) Press pastry evenly into the meat grinder casing 6 –...
- Page 65 Non-functionality If the drive is blocked by accumulated food: ■ Press the button “0” a to stop the meat grinder . ■ Press and hold the button “<” s . The appliance will now run in the reverse direction . This enables you to transport the food which has become stuck a short way backwards, and the motor to run freely again .
- Page 66 Cleaning the motor block ■ Clean the exterior surfaces and the power cable with a slightly damp cloth . For stubborn dirt, add mild detergent to the cloth . Afterwards, wipe with a cloth moistened only with fresh water to ensure that all detergent is removed . Dry the appliance well before re-using it .
- Page 67 Storage ■ Wind the mains cable clockwise around the cable retainer 4 on the underside of the appliance and fasten it in place as shown below . This keeps it safe from damage: ■ Store the appliance at a dry location . ■...
- Page 68 Disposal Do not dispose of the appliance in your normal domestic waste . This product is subject to the provisions of European Directive 2012/19/EU (Waste Electrical and Electronic Equipment) . Dispose of the appliance through an approved disposal centre or at your com- munity waste facility .
- Page 69 Kompernass Handels GmbH warranty Dear Customer, This appliance has a 3-year warranty valid from the date of purchase . If this product has any faults, you, the buyer, have certain statutory rights . Your statutory rights are not restricted in any way by the warranty described below . Warranty conditions The validity period of the warranty starts from the date of purchase .
- Page 70 Warranty claim procedure To ensure quick processing of your case, please observe the following instructions: ■ Please have the till receipt and the item number (e .g . IAN 12345) available as proof of purchase . ■ You will find the item number on the type plate, an engraving on the front page of the instructions (bottom left), or as a sticker on the rear or bottom of the appliance .
- Page 71 Recipes Kibbeh Ingredients for the mince filling 400 g lean beef or lamb 2 onions 10 g flour 25 g coarsely chopped pine nuts 1/2 tsp . each of ground allspice, cinnamon, cumin, caraway, cloves, nutmeg Salt and pepper Ingredients for the shell 500 g bulgur wheat (soaked) 500 g lean beef or lamb 1 onion...
- Page 72 Meat rolls Ingredients for the mince shell 450 g of lean Lamb, Veal or Beef 150 g Flour 1 Tsp Pimento (type of pepper) 1 Tsp Nutmeg 1 Pinch Chili powder 1 Pinch Pepper Ingredients for the meat filling 700 g Mutton 1 1/2 Tbsp Olive oil 1 1/2 Tbsp Onions, finely chopped 1/2 Tsp Pimento (type of pepper)
- Page 73 Fresh Grill Sausages Ingredients: 300 g lean Beef 500 g lean Pork 200 g Shoulder bacon 20 g Salt 1/2 Tsp ground white Pepper 1 Tsp Caraway 1/2 Tsp Nutmeg Pass the beef, pork and bacon through the meat grinder twice . Add the mixed spices and salt and thoroughly knead for 5 minutes .
- Page 74 Inhaltsverzeichnis Einleitung . . . . . . . . . . . . . . . . . . . . . . . . . . . . . . . . . . . . . . . . . . . . . . . . . . . . 72 Urheberrecht .
-
Page 75: Einleitung
Einleitung Herzlichen Glückwunsch zum Kauf Ihres neuen Gerätes . Sie haben sich damit für ein hochwertiges Produkt entschieden . Die Bedienungs- anleitung ist Bestandteil dieses Produkts . Sie enthält wichtige Hinweise für Sicherheit, Gebrauch und Entsorgung . Machen Sie sich vor der Benutzung des Produkts mit allen Bedien- und Sicherheitshinweisen vertraut . -
Page 76: Lieferumfang / Teilebeschreibung
Lieferumfang / Teilebeschreibung Abbildung A: 1 Spritzgebäck - Aufsatz mit Musterstreifen 2 Stopfer 3 Einfüllschale 4 Kabelaufwicklung 5 Motorblock 6 Fleischwolfvorsatz aus Metall 7 Verschluss - Schelle 8 Tomatenauswurf 9 Plastikschnecke 0 Passier - Sieb q Transportschnecke w Feder e Kreuzmesser r grobe und feine Lochscheibe t Verschlussring z Wurst - Stopf - Aufsatz u Wurstscheibe... -
Page 77: Technische Daten
Technische Daten Spannung 220 – 240 V ∼ (Wechselstrom), 50 Hz Leistungsaufnahme 250 – 350 W Schutzklasse II / (Doppelisolierung) Alle Teile dieses Gerätes, die mit Lebensmitteln in Berührung kommen, sind lebensmittelecht . KB-Zeit 15 Minuten KB - Zeit Die KB - Zeit (Kurzzeitbetrieb) gibt an, wie lange man ein Gerät betreiben kann, ohne dass der Motor überhitzt und Schaden nimmt . - Page 78 WARNUNG! Verwenden Sie das Gerät niemals für andere Zwecke, als ► hier beschrieben . Es besteht erhebliche Unfallgefahr, wenn Sie durch Fehlverwendung die Schutzvorrichtungen am Gerät außer Funktion setzen! WARNUNG! VERLETZUNGSGEFAHR! Fassen Sie niemals in Öffnungen am Gerät . Führen Sie niemals ►...
- Page 79 WARNUNG! VERLETZUNGSGEFAHR! Missbrauchen Sie das Gerät nicht für andere Zwecke, als in ► dieser Anleitung beschrieben . Vorsicht: das Kreuzmesser ist sehr scharf! Gehen Sie beim ► Umgang und Reinigen des Gerätes stets vorsichtig vor . Das Gerät ist bei nicht vorhandener Aufsicht und vor dem ►...
-
Page 80: Zusammenbauen / Zerlegen
Zusammenbauen / Zerlegen ACHTUNG ‒ SACHSCHADEN! ► Sämtliche Zubehörteile sind mit einem dünnen Ölfilm versehen, um diese vor Korrosion zu schützen . Reinigen Sie vor dem ersten Gebrauch daher sämtliche Teile sorgfältig, wie im Kapitel „Reinigen“ ausführlich beschrie- ben . Reiben Sie danach alle Metallteile mit etwas Speiseöl ein . HINWEIS ►... -
Page 81: Wurst - Stopf - Aufsatz Montieren
5) Legen Sie die ausgewählte Lochscheibe r so in den Fleischwolfvorsatz 6 ein, dass die Fixierungen an der Lochscheibe r in den Aussparungen am Fleischwolfvorsatz 6 liegen . 6) Wenn alles richtig eingesetzt ist, schrauben Sie den Verschlussring t handfest auf . 7) Der fertig montierte Fleischwolfvorsatz 6 wird über einen Bajonett - ... -
Page 82: Kebbe - Aufsatz Montieren
Kebbe - Aufsatz montieren Klappen Sie die Ausklappseite aus ‒ Sie finden dort die Zusammenbau - Reihenfolge bildlich dargestellt . 1) Nehmen Sie den Fleischwolfvorsatz 6, wie unter „Fleischwolf zusammen- bauen“ beschrieben, ab . 2) Nehmen Sie eventuelle Aufsätze ab und reinigen Sie den Fleischwolfvorsatz 6 . HINWEIS ►... -
Page 83: Passier - Aufsatz Montieren
7) Stecken Sie den Musterstreifen 1 wieder vorne in den Spritzgebäck - Aufsatz 1 . Achten Sie darauf, dass der Griff am Musterstreifen 1 vom Gerät weg zeigt . Ansonsten können Sie das Muster, welches sich direkt am Griff befindet, nicht einstellen . -
Page 84: Bedienen
9) Die Verschluss - Schelle 7 schließen Sie so, dass diese um den Fleischwolf- vorsatz 6 greift . 10) Fixieren Sie die Verschluss - Schelle 7 indem Sie die kleine Fixierung über die Verschluss - Schelle 7 klappen . Bedienen STROMSCHLAGGEFAHR ► Öffnen Sie niemals das Gehäuse des Motorblocks 5 – es befinden sich keinerlei Bedienelemente darin . -
Page 85: Das Gerät Bedienen
Das Gerät bedienen Wenn Sie die gewünschten Aufsätze montiert haben: 1) Stellen Sie das Gerät so auf, dass es absolut stabil steht und auf keinen Fall (z . B . durch Vibrationen oder Verfangen im Netzkabel) vom Tisch stürzen oder in die Nähe von offenem Wasser gelangen kann . Erschütterungen sind bei laufendem Betrieb unvermeidlich . -
Page 86: Wurst Verarbeiten
Wurst verarbeiten 1) Drehen Sie das Fleisch erst zweimal durch den Fleischwolf, bevor Sie dieses zur Wurst verarbeiten . 2) Für die Wurstfüllung fügen Sie dem Hackfleisch klein geschnittene Zwiebeln, Gewürze und weitere Zutaten nach Ihrem Rezept hinzu und kneten die Mas- se gut durch . -
Page 87: Spritzgebäck Herstellen
Spritzgebäck herstellen Wenn Sie einen Spritzgebäck - Teig gemäß Ihrem Rezept vorbereitet und den Spritzgebäck - Aufsatz 1 montiert haben: 1) Legen Sie ein kleines Backblech mit Backpapier aus und stellen Sie es unter die Austrittsöffnung vorne am Gerät . 2) Drücken Sie gleichmäßig Teig in den Fleischwolfvorsatz 6 – die Transport- schnecke q drückt diesen dann durch das gewählte Motiv am Motivstreifen des Spritzgebäck - Aufsatzes 1 . -
Page 88: Im Fehlerfall
Im Fehlerfall Wenn der Antrieb durch anstauende Lebensmittel blockiert ist: ■ Drücken Sie die Taste „0“ a, um den Fleischwolf zu stoppen . ■ Halten Sie die Taste „<“ s gedrückt . Der Antrieb läuft nun rückwärts . Damit können Sie die Lebensmittel ein Stück rückwärts transportieren, um den Antrieb wieder freizubekommen . -
Page 89: Motorblock Reinigen
Motorblock reinigen ■ Reinigen Sie alle Außenflächen und das Netzkabel mit einem leicht an- gefeuchteten Spültuch . Geben Sie bei hartnäckigen Verschmutzungen ein mildes Spülmittel auf das Tuch . Wischen Sie danach mit einem nur mit klarem Wasser befeuchteten Tuch nach, um eventuelle Spülmittelreste zu entfernen . Trocknen Sie das Gerät gut ab, bevor Sie es erneut verwenden . -
Page 90: Aufbewahren
Aufbewahren ■ Wickeln Sie das Netzkabel im Uhrzeigersinn um die Kabelaufwicklung 4 unter dem Geräteboden und fixieren Sie das Kabel wie unten dargestellt . So bleibt es geschützt vor Beschädigungen: ■ Lagern Sie das Gerät an einem trockenen Ort . ■... -
Page 91: Entsorgung
Entsorgung Werfen Sie das Gerät keinesfalls in den normalen Hausmüll . Dieses Produkt unterliegt der europäischen Richtlinie 2012/19/EU (Waste Electrical and Electronic Equipment) . Entsorgen Sie das Gerät über einen zugelassenen Entsorgungsbetrieb oder über Ihre kommunale Entsorgungseinrichtung . Beachten Sie die aktuell geltenden Vorschriften . -
Page 92: Garantie Der Kompernaß Handels Gmbh
Garantie der Kompernaß Handels GmbH Sehr geehrte Kundin, sehr geehrter Kunde, Sie erhalten auf dieses Gerät 3 Jahre Garantie ab Kaufdatum . Im Falle von Mängeln dieses Produkts stehen Ihnen gegen den Verkäufer des Produkts gesetz- liche Rechte zu . Diese gesetzlichen Rechte werden durch unsere im Folgenden dargestellte Garantie nicht eingeschränkt . -
Page 93: Service
Abwicklung im Garantiefall Um eine schnelle Bearbeitung Ihres Anliegens zu gewährleisten, folgen Sie bitte den folgenden Hinweisen: ■ Bitte halten Sie für alle Anfragen den Kassenbon und die Artikelnummer (z . B . IAN 12345) als Nachweis für den Kauf bereit . ■... -
Page 94: Rezepte
Rezepte Kebbe Zutaten für die Fleischfüllung: 400 g mageres Rindfleisch oder Lammfleisch 2 Zwiebeln 10 g Mehl 25 g grob zerkleinerte Pinienkerne Je 1/2 TL Piment - Pulver, Zimt, Kreuzkümmel (Cumin), Kümmel - Pulver, Nelken - Pulver, Muskatnuß - Pulver Salz und Pfeffer Zutaten für die Hülle: 500 g Bulgur - Weizen (eingeweicht) 500 g mageres Rindfleisch oder Lammfleisch... -
Page 95: Fleischröllchen
Fleischröllchen Zutaten für die Fleischhülle: 450 g mageres Hammel-, Kalb- oder Rindfleisch 150 g Mehl 1 TL Piment (Nelkenpfeffer) 1 TL Muskatnuss 1 Prise Chilipulver 1 Prise Pfeffer Zutaten für die Fleischfüllung: 700 g Hammelfleisch 1 1/2 EL Olivenöl 1 1/2 EL Zwiebeln feingehackt 1/2 TL Piment (Nelkenpfeffer) 1/2 TL Salz 1 1/2 EL Mehl... -
Page 96: Frische Rostbratwurst
Frische Rostbratwurst Zutaten: 300 g mageres Rindfleisch 500 g mageres Schweinefleisch 200 g Schulterspeck 20 g Salz 1/2 Esslöffel weißer, gemahlener Pfeffer 1 Teelöffel Kümmel 1/2 Teelöffel Muskatnuss Rindfleisch, Schweinefleisch und Speck zweimal durch den Fleischwolf drehen . Gemischte Gewürze sowie Salz zugeben und 5 Minuten durchkneten . Wurstfüllung für ca . - Page 97 │ DE │ AT │ CH SFW 350 D3 ■ 94 ...
- Page 98 KOMPERNASS HANDELS GMBH BURGSTRASSE 21 DE - 44867 BOCHUM GERMANY www.kompernass.com Versione delle informazioni · Estado das informações Last Information Update · Stand der Informationen: 01 / 2019 · Ident.-No.: SFW350D3-012019-2 IAN 314659...
Need help?
Do you have a question about the TRITACARNE SFW 350 D3 and is the answer not in the manual?
Questions and answers