Table of Contents
Advertisement
Quick Links
Orion HDX110 EQ-G Equatorial
Providing Exceptional Consumer Optical Products Since 1975
All Rights Reserved. No part of this product instruction or any of its contents may be reproduced, copied, modified or adapted,
insTrucTiOn Manual
GoTo Mount
#10011 HDX110 Mount with Tripod Pier
#10044 HDX110 Mount only
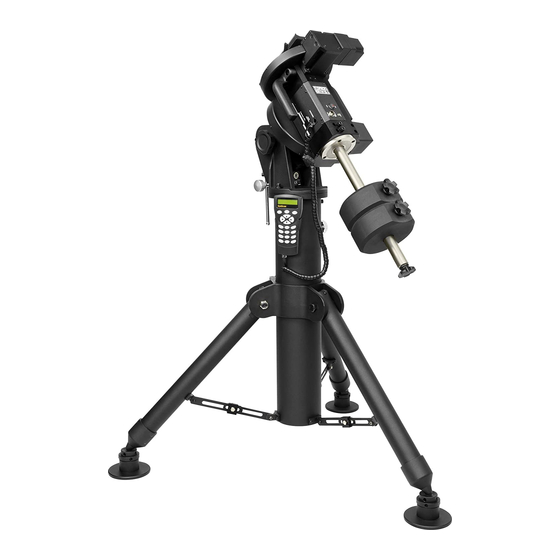
Figure 1. The HDX110 EQ-G mount with Tripod Pier
Copyright © 2014 Orion Telescopes & Binoculars
without the prior written consent of Orion Telescopes & Binoculars.
Customer Support:
www.OrionTelescopes.com/contactus
Corporate Offices:
89 Hangar Way, Watsonville CA 95076 - USA
IN 502 Rev. B 06/14
Advertisement
Table of Contents

Related Manuals for Orion HDX110


Summary of Contents for Orion HDX110
- Page 1 Manual Orion HDX110 EQ-G Equatorial GoTo Mount #10011 HDX110 Mount with Tripod Pier #10044 HDX110 Mount only Figure 1. The HDX110 EQ-G mount with Tripod Pier Customer Support: www.OrionTelescopes.com/contactus Corporate Offices: 89 Hangar Way, Watsonville CA 95076 - USA Providing Exceptional Consumer Optical Products Since 1975 Copyright ©...
-
Page 2: Table Of Contents
2.3 Leveling the Mount ......6 6. Other HDX110 EQ-G Features ..11 2.4 Attaching the Counterweight Shaft and... -
Page 3: Unpacking
Figure 3. Contents of the Tripod Pier box (included with #10011) Congratulations on your purchase of the Orion HDX110 EQ-G GoTo Mount! This high-performance equatorial mount with an instrument payload capacity of 110 lbs. and typically +/- 3 arc-second tracking accuracy delivers the stability and precision needed for serious visual and imaging work with medium- size to large telescopes. -
Page 4: Setting Up The Hdx110 Eq-G Mount
2.1 setting up the Tripod Pier loosening the nuts with the other. The HDX110’s tripod pier is heavy and thus should be handled with due caution. - Page 5 To extend the leveling screw, turn it counterclockwise. Tighten the lock rings on all three leveling pads once the While the HDX110’s equatorial head has a built-in tripod is level (Figure 7). circular bubble level, if you wish to level the tripod before adding the weight of the head on top of it, you will need to purchase a circular bubble level from a hardware store.
-
Page 6: Attaching The Mount To The Tripod Pier
2.3 leveling the Mount mount is leveled. The HDX110 mount has a built-in bubble level, shown in Figure 12, making it easy to level the mount using the three leveling pads that you placed under the tripod legs. It will be easier to do this now, before attaching the counterweights and telescope. -
Page 7: Attaching The Counterweight Shaft And Counterweights
Small washer Slot Large washer Figure 11. Install the two azimuth locking bolts. Altitude lock bolt Bubble level Altitude lock knob Azimuth locking bolt Altitude jackscrew Azimuth Primary Jackscrew adjustment locking handle knobs knob Figure 12. Install the azimuth adjustment knobs and thread them in all the way. -
Page 8: Setting The Latitude
3. installing a Telescope on the Mount The HDX110 EQ-G mount is designed to hold a maximum instrument payload of up to 110 lbs. This will vary with the length of the telescope: for longer telescopes, which have a longer moment arm, the maximum weight will be less. -
Page 9: Polar Alignment
4. Polar alignment The HDX110 EQ-G mount can be polar aligned either with aid of the optional, externally mounted polar-axis scope (avail- able from Orion) or by the iterative polar alignment routine in the SynScan hand controller. The iterative method does not... -
Page 10: Drive Panel Interface
5. Drive Panel interface 5.1 Drive Panel The drive panel of the HDX110 EQ-G is shown at right (Figure On/Off 17). switch 5.2 Panel interface components SNAP POWER: This is a threaded 12V DC power input jack that pro- port vides a secure connection to the power source. -
Page 11: Power Supply Requirements
6.3 Permanent Periodic Error correction • Output Voltage: DC 11V (minimum) to DC 16V (maximum). The HDX110 EQ-G mount is equipped with an index on its Voltage not in this range could cause permanent damage R.A. worm, thus the motor controller can keep tracking the cur- to the motor controller board or the hand controller. -
Page 12: Care Of Your Hdx110 Eq-G Mount
Declination axis Backlash position, pointing straight ahead. Wide dovetail plate If you believe that the declination axis (DEC) of your HDX110 (sold separately) EQ-G mount has unwanted backlash, or on the contrary that the DEC worm and ring gear are binding due to being too tight- ly meshed, follow this procedure for adjusting the gear mesh. - Page 13 Philips Allen screws screw Figure 23: Removing the Dec motor housing is done by unthreading two Philips screws (a) and one Allen screw (b). Figure 26: Completely remove the three cosmetic cover screws on the front plate and set them aside. Figure 24: Loosen by a quarter turn the two diagonally opposed screws that fasten the motor to the seat plate.
-
Page 14: Specifications
42,000+ objects Celestial object catalogs Messier, NGC, IC, SAO, specifications Caldwell, Double Star, Variable star, Named stars, Planets Product name HDX110 EQ-G Pointing accuracy Up to 5 arc-min (RMS) Mount type German equatorial GoTo GoTo alignment 1-star, 2-star, 3-star Payload (counterwts. excl.) 110 lbs. (50kg), depending on Resolution of aux. - Page 15 Ø180 Ø140 45° 800~1100 Mount Mount Tripod 4-M 6 2-Ø 6 Mount Bottom Plate Saddle Head...
- Page 16 One-Year limited Warranty This Orion product is warranted against defects in materials or workmanship for a period of one year from the date of purchase. This warranty is for the benefit of the original retail purchaser only. During this warranty period Orion Telescopes & Binoculars will repair or replace, at Orion’s option, any warranted instrument that proves to be defective, provided it is returned postage paid.
Need help?
Do you have a question about the HDX110 and is the answer not in the manual?
Questions and answers