Table of Contents
Advertisement
Carina Guidelines
The Carina Guidelines are not a replacement or
substitute for the Instructions for Use.
Any use of the device requires full understanding
and strict observation of the Instructions for Use.
The user must be familiar with the device according
to the national and local laws and recommendations.
Advertisement
Table of Contents

Related Manuals for Siemens Drager medical Carina


Summary of Contents for Siemens Drager medical Carina
- Page 1 Carina Guidelines The Carina Guidelines are not a replacement or substitute for the Instructions for Use. Any use of the device requires full understanding and strict observation of the Instructions for Use. The user must be familiar with the device according to the national and local laws and recommendations.
-
Page 2: Table Of Contents
Table of contents Page Table of contents Intended Use Carina What is what Control panel, top Carina underside Front connection block Rear connection block Trolley 1-78 cm Screen Layout Status line for displaying current device settings Preparation Connecting electrical power Connecting the oxygen supply Setting up the ventilator breathing circuit Powering up the ventilator... -
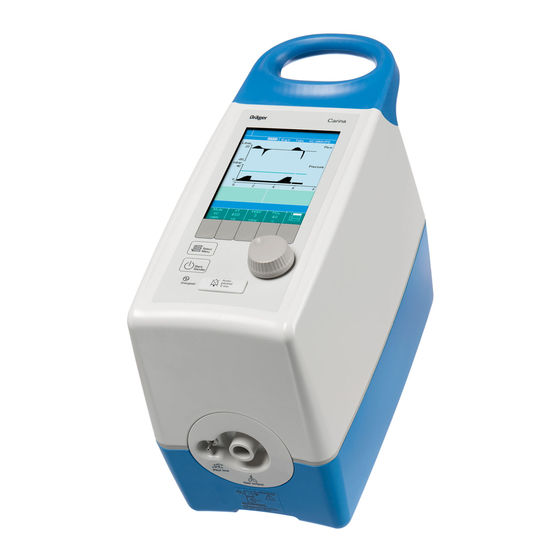
Page 3: Intended Use Carina
Intended Use Intended Use Carina – long-term ventilator for ventilator- dependent patients or ventilator-assisted patients. • For treatment of sub-acute care patients in hospital or medical rooms. • For invasive ventilation or non-invasive ventilation. • For patients with a tidal volume of at least 100 mL. •... -
Page 4: What Is What
What is what 3.1 Control panel, top Carrying handle Screen Buttons for functions and parameters Rotary knob Audio paused 2 min. button LED for indicating power supply: • LED lit = External power supply (mains/external battery), internal battery is charged •... -
Page 5: Front Connection Block
What is what 1 2 3 3.4 Rear connection block Not assigned Connection for nurse call system RS 232 serial port (MEDIBUS) Not assigned Inlet filter (HEPA filter) Connection for HPO oxygen supply Connection for LPO oxygen supply Mains switch Connection for external battery Power cable connection 3.5 Trolly... -
Page 6: Trolley 1-78 Cm
What is what 3.6 Screen layout Alarm line for alarm message Status line for current device settings Display for real-time waveforms of flow and pressure Display for 2 measured values, configurable Information line Display of ventilation parameters 3.7 Status line for displaying current device settings LPO oxygen supply Power supply Internal battery... -
Page 7: Preparation
Preparation 4.1 Connecting electrical power • Plug the ventilator power cable into device AC power • Secure with the wire clip. • Insert the mains plug into a power socket. • The LED flashes or lights up according to the charge of the internal battery. -
Page 8: Setting Up The Ventilator Breathing Circuit
Preparation 4.3 Setting up the ventilator breathing circuit Select hose system Leak valve system or expiration valve system Open the sliding cover on the underside of Carina. Using a coin, turn the switch to your hose system Close the sliding cover. Leak valve hose system: Connect the filter to socket. -
Page 9: Powering Up The Ventilator
Preparation 4.4 Powering up the ventilator Carina switching on Set the mains switch to Carina conducts a self-test. During the self-test the screen indicates the progress of the self-test. That is followed by the screen showing the ventilation mode and parameters last set. The device is in standby mode. -
Page 10: Ventilator Setting
Preparation 4.5 Ventilator settings Push „Menu“ key Vent. Alarms Values Config. Settings locked VC-SIMV AF Volume Control – Synchronized Intermittent Mandatory Ventilation AF - AutoFlow Trigger can be switched OFF VC-CMV PC-BIPAP Pressure Control – Biphasic Positive Airway Pressure Trigger can be switched OFF PC-CMV PC-AC Pressure-controlled, assisted ventilation... -
Page 11: Setting Alarm Limit
Preparation 4.6 Setting alarm limits The current measured value is displayed between the upper and lower alarm limits. Vent. Alarms Values Config. Settings locked Alarm Setting range Paw high 10 to 55 mbar MVi high 2 to 40 L/min MVi low 0.1 to 39 L/min f high 10 to 50 bpm... -
Page 12: Configuration
Preparation 4.8 Configuration The configuration menu shows the configurable functions and parameters: Vent. Alarms Values Config. Settings locked 1st page Service: for system and contact information and log book (Password:12345) Volume: adjustable from 1 to 5 Tone: default tone or Dräger tone can be selected Screen: adjustable for displaying curves or values 2nd page... -
Page 13: Alarm Handling
Alarm handling 5.1 In the event of an alarm If the alarm message, e.g. »MV high !!«, appears in the alarm line on the screen. MV high !! Carina assigns the message an appropriate level of priority. Red !!! = Alarm Message with the highest priority Yellow !! = Important Message with medium priority Yellow ! = Note Message with low priority 5.2 Suppressing the alarm tone... -
Page 14: Standby And Switch Off
Standy-by and Switch OFF 6.1 Switching Carina to Standby Press »Start/Standby« key for approx. 3 seconds – Carina is in standby mode. LED in the key flashes. The alarm line shows »Standby activated«. 6.2 Switching off the device Switch Carina to standby. Set the mains switch to Carina is switched off. -
Page 15: Cleaning And Maintenance
Cleaning and maintenance 7.1 Cleaning intervals Part Time schedule Activity Carina basic unit Per patient Wipe outside Trolley, hinged arm Per patient Wipe outside HPO hose Silicon hose Per patient/ weekly Immerse if possible Reusable water trap Sterilise hot steam 134 °C / 10 min Cleaning and disinfection machine 93 °C / 10 min VentStar Carina LV... -
Page 16: Alarm Message Cause & Remedy
Alarm message Cause & Remedy These tips are not a replacement for the Instructions for use. 8.1 Trouble shooting tips: Clinical related alarms Error message Cause Remedy Airway pressure high !!! The excess pressure alarm can be Check condition of patient, caused by continuous coughing. - Page 17 Alarm message Cause & Remedy These tips are not a replacement for the Instructions for use. 8.3 Trouble shooting tips: Battery related alarms Error message Cause Remedy External power failure !! The device has no external Check the mains supply or DC power supply.
-
Page 18: Accessories
Accessoires 9.1 Accessories for Carina VentStarLV VentStarEV NovaStar HEPA filter CareStar Pump ball ClassicStar Product Number Description Ventstar Carina LeakV MP00312 Dispo. hose with leakage valve Length: 150 cm, 5 pieces Ventstar Carina ExpV MP00313 Dispo. hose with expiration valve Length: 150 cm, 5 pieces Filter CareStar 30 MP01770... -
Page 19: Mask Cleaning
Accessoires 9.2 Mask cleaning Headband: • Separate the headband from the mask. • Hand wash the headband in warm water using pure soap. • Rinse thoroughly in cold water and allow to dry in the air, protected from direct sunlight. Mask: •... -
Page 20: Preparation Procedure
Preparation procedure Checklist After a successful check, Carina is ready for use on the patient. Aspect Measure Requirement Checked System Prepare the device, HPO Hoses configuration see chapter "Preparation", Electrical cables as of page 32 Instructions for Use. HEPA Inlet filter and components must be connected properly. - Page 21 Preparation procedure Checklist Aspect Measure Requirement Checked Alarm Set ventilation mode to »PC-BIPAP« Start ventilation: »Airway PEEP = 5 mbar Press »Start/Standby« button. pressure high« Pinsp = 15 mbar Squeeze the test lung firmly RR = 10 bpm and frequently. Each time it is Set Tinsp = 2 s compressed, expiration should Ramp = 0.2 s.
- Page 22 Europe, Middle East, Africa, Latin America, Asia, Pacific: Dräger Medical AG & Co. KG Moislinger Allee 53–55 23542 Lübeck GERMANY Tel: +49-451-882-0 Fax: +49-451-882-2080 E-mail: info@draeger.com www.draeger.com Manufacturer: Dräger Medical AG & Co. KG 23542 Lübeck, Germany The quality management system at Dräger Medical AG &...