Advertisement
Ikan Beholder Gimbal Calibration Guide v1.1
Although all gimbals are calibrated before being shipped, the accelerometer and gyroscope inside the gimbals
are temperature sensitive and may require recalibration to local operating conditions. Should you find that
your gimbal is tilting or drifting, please follow the steps below to recalibrate your gimbal.
The following items are required to properly calibrate your Gimbal:
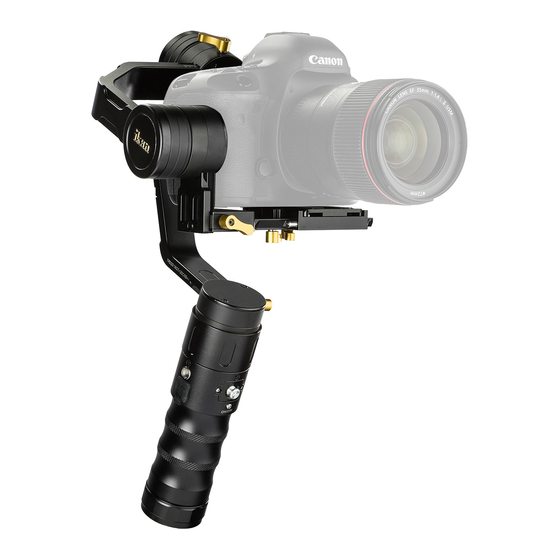
a. Ikan Gimbal - fully powered
b. Camera
c. Screwdriver - flat head
d. Computer - Windows or MacOS
e. Cable - USB to mini-USB
*Warning: gimbals can be permanently damaged if other settings not covered in this guide are changed. *
Table of Contents
1.0 Camera Installation and Gimbal Balancing ....................................................................................................... 2
2.0 Basic Gimbal Calibration ................................................................................................................................... 7
3.0 Software Installation ......................................................................................................................................... 7
4.0 Backing Up The Gimbal Settings ....................................................................................................................... 9
5.0 Upgrading Firmware ....................................................................................................................................... 10
6.0 Calibrating Gyroscope and Accelerometer ..................................................................................................... 11
7.0 Calibrating Encoders ........................................................................................................................................ 25
8.0 Frequently Asked Questions (FAQs) ............................................................................................................... 27
1
Advertisement

Related Manuals for Ikan Beholder EC1


Summary of Contents for Ikan Beholder EC1
-
Page 1: Table Of Contents
Ikan Beholder Gimbal Calibration Guide v1.1 Although all gimbals are calibrated before being shipped, the accelerometer and gyroscope inside the gimbals are temperature sensitive and may require recalibration to local operating conditions. Should you find that your gimbal is tilting or drifting, please follow the steps below to recalibrate your gimbal. -
Page 2: Camera Installation And Gimbal Balancing
1.0 Camera Installation and Gimbal Balancing Items Needed: -Camera -Ikan Beholder Gimbal -Screwdriver – flat head The gimbal cannot be properly calibrated if it is not balanced with a camera installed. To balance your gimbal, follow the steps that are outlined below. - Page 3 STEP 2: Install the camera on gimbal base • Install the camera with quick release mounted into the gimbal bottom mount base. • Slightly adjust the position of the camera into the base until you find a horizontal balance. • Shift the camera as close to the pitch motor as possible. Use the base plate positioning if needed. •...
- Page 4 STEP 3: Adjust the gimbal roll – left and right balance • Release the roll thumb M4 screw. • Slide the roll arm left or right until the camera finds a balance position and doesn’t lean left or right. • In case more space is needed on either side, then go back to step 2.
- Page 5 STEP 4: Adjust the gimbal pitch - up and down balance • Loosen the camera plate M4 thumb screw to adjust the pitch level. • Move the camera plate arm up and down, until the camera stays in place at any lens angle. •...
- Page 6 STEP 5: Adjust the gimbal pan – forward and backward balance • Loosen the pan motor left thumb screw. • Tilt the gimbal handle 45 degrees forward. • Move the pan arm to the left side or to the right side at 90 degrees and observe the direction it tends to move when released.
-
Page 7: Basic Gimbal Calibration
2.0 Basic Gimbal Calibration Basic on-board Calibration: Before attempting advanced recalibrating with the PC software, balance your gimbal using the on-board calibration features. Basic Calibration: Step 1: Power on gimbal Place on flat surface Hold the “MODE” button for 6 seconds This will activate the gimbal’s built-in basic calibration that will fix most tilting problems. - Page 8 3. Make sure that Java is installed on your computer: https://java.com/en/download/manual.jsp 4. Locate the folder where you unzipped the SimpleBGC software. For Windows, use the file SimpleBGC_GUI.exe. For Mac OS, use SimpleBGC_GUI.jar. Run the software and plug in your gimbal using the mini-USB port on the gimbal to connect to your computer.
-
Page 9: Backing Up The Gimbal Settings
4.0 Backing Up The Gimbal Settings: 1. Select the Backup Manager inside the Board drop down. 2. Press “Browse” button to set the file location and file name. Press the “Backup” button to save your backup file. 3. Should anything happen during your fine tuning process, you can now restore your gimbal to factory settings. -
Page 10: Upgrading Firmware
5.0 Upgrading Firmware: 1. Navigate to and select the Firmware tab 2. Make sure the option “Show compatible firmwares only” is checked and the “Check for beta versions” is NOT checked. 3. If your current version is a lower number than the latest version, press the “Upgrade!” button. 4. -
Page 11: Calibrating Gyroscope And Accelerometer
6.0 Calibrating Gyroscope and Accelerometer: 1. Locate and select the Hardware tab 2. Select the “IMU Calibration Helper” button in the Sensor section. 3. This will bring up the follow screen:... - Page 12 4. Press “Reset” under both Accelerometer and Gyroscope sections. Under the Gyroscope section, you’ll see a three colored bar graph. Make sure the gimbal is set on a flat steady surface. Once the gimbal is steady with nothing touching or moving it, the white bar should fall to the green section. Without touching the gimbal or moving the surface it’s on, press the “Calibrate”...
- Page 13 Straight Arm Gimbal (Pictures shown are the EC1 with a Sony A7S) (Side motor facing down)
- Page 14 (Side motors facing up)
- Page 15 (Camera lens facing up)
- Page 16 (Camera lens facing down)
- Page 17 (Screen facing back motor)
- Page 18 (Camera lens facing back motors)
- Page 19 Angled Arm Gimbal (The picture shown is the DS2-A with a Sony A7S) (Side motors flat on the surface)
- Page 20 (Side motors facing up while on a flat surface)
- Page 21 (Camera lens facing up)
- Page 22 (Camera lens facing down)
- Page 23 (Screen facing back motors)
- Page 24 (Camera lens facing back motors)
-
Page 25: Calibrating Encoders
6. After calibrating all 6 directions, close out of the Sensor Calibration Helper. Toggle the motors back on by pressing the “Motors on/off”. The motors are on when the button is highlighted in blue. 7. Turn the gimbal off and then back on. Your gimbal is now calibrated. 7.0 Calibrating Encoders The encoders and magnets inside the gimbal function together to keep everything stabilized. - Page 26 4. After the values have been changed, press the “Write” button. 5. If you turned off your motors previously, turn them back on before proceeding. Locate and press the “1. Calib. El. Field” button. You should hear a series of beeping noises, while your gimbal motors will automatically move.
-
Page 27: Frequently Asked Questions (Faqs)
8.0 Frequently Asked Questions (FAQs) How do I balance my gimbal? You can follow our guide on page 2 or alternatively you can watch our video for more in depth instructions. https://www.youtube.com/watch?v=WJkMEaLFf3A What if I mess up my settings while following the guide? Before doing any changes to your gimbal, always make sure to back up your gimbal.
Need help?
Do you have a question about the Beholder EC1 and is the answer not in the manual?
Questions and answers