
Related Manuals for Ikan Beholder MS-PRO


Summary of Contents for Ikan Beholder MS-PRO
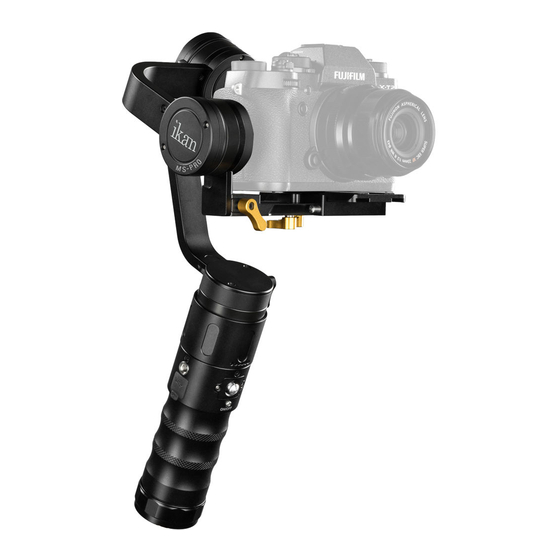
- Page 1 V1.0 2016.12 3-axis Handheld Stabilizer Gimbal Beholder MS-PRO Instruction Manual 2016 Beholder ® All Right Reserved...
-
Page 2: Table Of Contents
Table of Contents Introduction • About the MS-PRO 3 Product Description • What’s Included • Charging the Batteries • Installing the Battery Holder 7 • Camera Installation and Balance 8 Getting to Know the MS-PRO • Powering On • Modes of Operation (Profiles) •... -
Page 3: About The Ms-Pro
By attaching a monopod to the gimbal, you can simulate a drone shot, low and high follow shots, dolly shot, and many other different angles. It reduces any types of jitter from the footage. The Beholder MS-PRO includes a USB port to allow for easy firmware and software upgrades. -
Page 4: What's Included
▲ What’s Included After you’ve received the product and before you use it, please check whether the package contains all the items in the following inventory. If any item is missing, please get in touch with the dealer to resolve the situation. -
Page 5: Charging The Batteries
Note: The battery holder can only be used as a charger stand temporarily. When the battery LED indicator turns green to indicate the completion of charging, the batteries are only charged to 80% of the battery capacity. For 100% charge, please buy a professional charge adapter or use ikan’s ICH- SC4 smart charger. - Page 6 • If you need more batteries, try to purchase ikan IB-18650-26-3PK official batteries or other reliable batteries with a protection circuit to avoid overcharging and damaging the batteries. Using damaged or different capacity batteries may result in failing to start up the Beholder MS-PRO.
-
Page 7: Installing The Battery Holder
▲ Installing the Battery Holder Instructions to use the battery holder Mount the 18650 batteries with the negative electrode of the battery (-) towards the spring (Fig. 2). Push the three 18650 batteries inward. Fig. 2. Inserting batteries into the battery holder Install the battery holder into the battery compartment with the two electrical terminals toward the direction of insertion (Fig. -
Page 8: Camera Installation And Balance
▲ Camera Installation and Balance WARNING Before installing the camera and adjusting the balance, remove the camera lens cover, attach the lens hood, and insert a memory card and camera batteries, as well as any other accessories. The camera should be fully ready to shoot. - Page 9 STEP 2 Install the camera on gimbal base • Install the camera with quick release mounted into the Beholder MS-PRO bottom mount base (Fig.5). • Slightly adjust the position of the camera into the base until you find a horizontal balance.
- Page 10 STEP 4 Adjust the gimbal pitch - up and down balance • Loosen the camera plate M4 thumb screw to adjust the pitch level (M4 thumb screw – in Fig. 7) • Move the camera plate arm up and down, until the camera stays in place at any lens angle. •...
- Page 11 • Beholder MS-PRO uses the latest 32-bit systems, a multi-processor technology and inductive motor technology, with greatly improved torque. Therefore, it's able to start and level the camera if it is out of balance, but for shot stability, battery life and power saving, we strongly recommend you find the best balance first and then power the gimbal on and shoot the video.
-
Page 12: Powering On
▲ Power ON Starting the gimbal in default profile • Press the power button for two solid second to power the gimbal on. • The gimbal start in Pan follow mode.(Profile 2) • Use the five-way joystick (Fig. 9 [1]) to control the camera tilt and pan direction. Push the joystick up or down for tilt up and down. -
Page 13: Modes Of Operation (Profiles)
▲ Modes of Operation (Profiles) Switching the gimbal to different modes of operation (profiles) • Press the mode button one time, which is located under the OLED screen to enter Lock Mode (Profile 1): camera will hold the direction and not follow, pan, or tilt. •... -
Page 14: Oled Display
▲ OLED Display Boot interface with company logo profile1: Press mode button once: Lock mode profile2: Press mode button twice: Pan Follow mode profile3: Press mode button three times: Follow mode profile4: Press mode button four times: 3-Axis Follow mode profile5: Press mode button five times: Return to the Home position Note: Press and hold the mode button for 6 seconds to start gyro calibration Do not move the... -
Page 15: Gimbal Working Angles
Gyro Correction: Place the Beholder MS-PRO horizontally on the table, power on the gimbal and press and hold the menu button for 6 seconds. The system automatically enters the gyroscope calibration mode. The motors lose power for 5 seconds. After that, the automatic system calibration is complete and the stabilizer can resume normal use. - Page 16 2. Using and storing this product under high temperature and humidity, water, or highly corrosive environment can cause the device an internal fault. 3. Protect the power cord to avoid trampling or backlog, particularly at plugs, sockets and other parts. 4.
-
Page 17: Copyright/Trademark Statement
Copyright/Trademark Statement Copyright/Trademark Statement Beholder® and ikan® are certified trademarks, which cannot be used without our permission for any other purposes. The product has a number of patents so if copies of the product are found, the perpetrator will hold the relevant legal responsibility. -
Page 18: Product Specifications
▲ Product Specifications Beholder MS-PRO technical specifications Model: MS-PRO 3-axis single handheld gimbal stabilizer Load Capacity: 900g Battery: 3x 18650 3.7v Battery Operating Time: Approx. 8-10 hours Battery Charging time: Approx. 3-4 hours Working temperature: -10 to 70 degrees Celsius Working angles: Pan: 360°... -
Page 19: Frequently Asked Questions
Frequently asked questions and answers 1. How do you charge the gimbal? The Beholder MS-PRO can be charged in two ways: using the built-in battery holder micro USB or using a separate authorized dedicated charger (recommended) such as the ikan ICH-SC4.
Need help?
Do you have a question about the Beholder MS-PRO and is the answer not in the manual?
Questions and answers