
Related Manuals for Faema Enova A


Summary of Contents for Faema Enova A
- Page 1 USO E INSTALLAZIONE USE AND INSTALLATION UTILISATION ET INSTALLATION GEBRAUCH UND INSTALLATION USO E INSTALACIÓN USO E INSTALAÇÃO Enova A Code 915-202-060 (rev. 1745)
- Page 2 Istruzioni originali Italiano ............Translation of the original instructions English ............Traduction du manuel d’origine Français ............Übersetzung der Originalanleitung Deutsch ............Traducción de las instrucciones originales Español ............Tradução das traduções originais Português ............
- Page 3 Enova Macchine 1 gruppo 1 Dispenser unit machines Machines à 1 groupe Modelle mit 1 Abgabeeinheit Máquinas 1 grupo Máquinas de 1 grupo...
- Page 4 Legenda - Legend - Legende - Legende - Leyenda - Legenda LEGENDA LEGEND LEGENDE Interruttore generale Main ON/OFF switch Interrupteur g n ral. Pulsantiera Pushbutton Panel Clavier Spia luminosa macchina accesa Machine “ON” indicator light Témoin lumineux de la machine Lancia vapore orientabile Swivel steam jet pipe en marche...
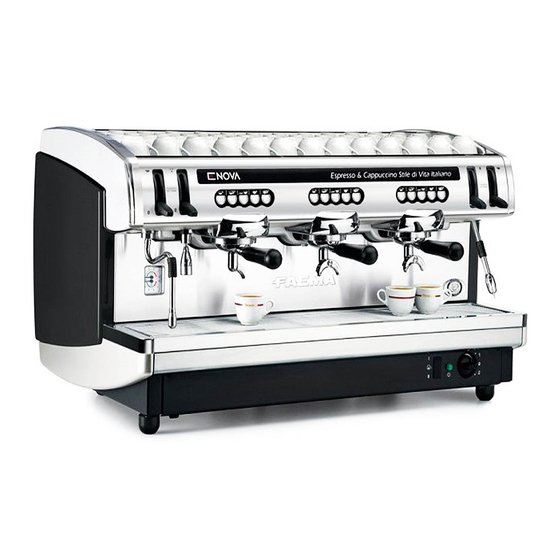
- Page 5 1 gruppo tipo di macchina 2 gruppi 3 gruppi 1 group Type of machine 2 groups 3 groups 1 groupe type de la machine 2 groupes 3 groupes 1 Einheit Maschinentypen 2 Einheiten 3 Einheiten 1 grupo modelo de la machina 2 grupos 3 grupos 1 grupo...
-
Page 6: Table Of Contents
Dear Madam, Dear Sir Congratulations on your new Faema! With this purchase, you have chosen an advanced espresso coffee machine built using the most cutting edge technology. This machine not only offers you a perfect combination of ef ciency and functionality, but also provides you with all the tools you need to do your job in the best possible way. -
Page 7: General Rules
1. General Rules Please read the warnings and rules in this User’s Manual carefully before using or handling the machine in any way because they provide important information regarding safety and hygiene when operating the machine. Keep this booklet handy for easy reference. •... -
Page 8: Installation Rules
2. Installation Rules WARNING Installation, dismantling, and ad ustments must only be performed by quali ed and authorized technicians. Carefully read the warnings and rules in this manual because they provide important information regarding safe installation, use and maintenance of the machine. Keep this booklet handy for easy reference. -
Page 9: Electrical Installation Rules
3. Electrical Installation Rules Prior to installation, make sure there is a circuit breaker installed with a distance between the contacts that allows for complete disconnection when there is a category III overload and that provides protection against current leakage equal to 30 mA. The circuit breaker must be installed on the power supply in compliance with installation rules. -
Page 10: Installation Check-Up
5. Installation Check-up WARNING: AFTER INSTALLATION, CHECK TO SEE IF THE MACHINE IS WORKING PROPERLY (see the Installation Module C). WATER CONNECTIONS • No leaks from the connections or tubes FUNCTIONING • Boiler and operating pressures are normal. • The pressure gauge is working properly. •... -
Page 11: Rules For The Worker Operating The Machine
6. Rules for the worker operating the machine BEFORE YOU START WARNING: BEFORE YOU START OPERATING THE MACHINE, WASH THE INTERNAL COMPONENTS FOLLOWING THE INSTRUCTIONS INDICATED BELOW. THESE STEPS MUST BE REPEATED AT LEAST ONCE A DAY AND WHEN THE MACHINE HAS NOT BEEN OPERATED FOR MORE THAN 8 HOURS. -
Page 12: Caution
7. Caution Danger of burns WARNING: Hot surface The areas marked with this sign become ACHTUNG: Heisse Ober äche hot. Great care should be taken when ATTENTION: Surface chaude in the vicinity of these areas. ATTENZIONE: Super cie calda GENERAL the cup-warming plate. -
Page 13: Dismantling The Machine
9. Dismantling the machine Electrical equipment cannot be disposed of as inappropriate or illegal disposal of this equipment, ordinary urban waste: it must be disposed of or improper use of the same, can be harmful to according to the special EU directive for the humans and the environment. -
Page 14: Use
10. Day-to-day operation “Before setting the machine at work, make sure that: • the main electric power switch is on; • the mains water cock has been turned on". Turn the master switch (1) to position 1. The indicator light “machine on”... -
Page 15: Delivery Of The Coffee
13. Delivery of the coffee Remove the lter holder (10), empty out any coffee grouts 19 20 and ll it up with 1 or 2 servings of ground coffee, depending on the lter holder used. Press the ground coffee in lter down uniformly, using the grinder/doser presser. -
Page 16: Hot Water Dispensing
15. Hot water dispensing Scalding hazard! appropriate insulating devices to move the water and steam wands. Dosed function After having positioned the appropriate container under the hot water nozzle (8), raise the hot water dispensing lever (9): afterwards, the lever automatically returns to the original position. -
Page 17: Programming The Coffee Measures
17. Programming the coffee measures “Before programming the coffee dispensing 19 20 push buttons ll the lter holder with the correct serving of ground coffee. Don’t use coffee grouts for programming servings.” Fit and tighten the lter holder (10) on the coffee dispenser unit, positioning the cup (or cups) under the nozzle (or nozzles) of the lter holder (10). -
Page 18: Cleaning And Maintenance
19. Cleaning and maintenance For correct application of the food safety system (HACCP), please follow the instructions in this paragraph. Washing must be carried out using original “Service Line” products, see details on the last page. Any other product could make the materials in contact with food unsuitable. CLEANING DISPENSING UNIT - Pour in a packet or dosing Using a brush, clean the... -
Page 19: Steam And Hot Water
STEAM AND HOT WATER DISPENSING PIPES - Using a clean sponge, wash with hot water removing any organic residue present. Rinse carefully. To clean the inside of the steam nozzles, follow these steps: Turn the nozzle towards the cup tray and carefully activate steam dispensing at least once. -
Page 20: Defects - Malfunctions
20. Defects - Malfunctions Direct action by the customer Before calling service personnel, to avoid useless expense, check whether the machine problem corresponds to one of the cases listed below. DEFECT CAUSE REMEDY The coffee machine is not working. No electricity supply. Check the electricity supply. - Page 21 16 EN...
- Page 22 Il Costruttore si riserva il diritto di modi care senza preavviso le caratteristiche delle apparecchiature presentate in questa pubblicazione The Manufacturer reserves the right to modify the appliances presented in this publication without notice Le fabricant se réserve le droit de modi er sans préavis les caractéristiques des appareils présentés dans cette publication Der Hersteller behält sich das Recht vor, die in dieser Veröffentlichung vorgestellten Geräte ohne Vorankündigung zu ändern...
Need help?
Do you have a question about the Enova A and is the answer not in the manual?
Questions and answers