Table of Contents
Advertisement
Quick Links
Advertisement
Table of Contents

Related Manuals for PG Drives Technology I-DRIVE Series


Summary of Contents for PG Drives Technology I-DRIVE Series
- Page 1 I-DRIVE CONTROLLER FAMILY TECHNICAL MANUAL SK76977-07...
- Page 2 All rights reserved. This manual is furnished under copyright and may only be used in accordance with the terms laid out by PG Drives Technology. The information in this manual is furnished for informational use only, is subject to change without notice, and should not be construed as a commitment by PG Drives Technology.
-
Page 3: Table Of Contents
PG D RIVES ECHNOLOGY RIVE ECHNICAL ANUAL TABLE OF CONTENTS About this manual............. 8 8.1.5 Status Indicator Flashes Rapidly And Continuously (even with throttle released)........16 Icons ..............8 TruCharge Indicator..........17 8.2.1 TruCharge Indicator Steady........17 Chapter 1 – Operation ..............9 8.2.2 TruCharge Indicator Flashing 1 Bar Slowly And Continuously ............ - Page 4 PG D RIVE ECHNICAL ANUAL RIVES ECHNOLOGY 3.2.2 Aux 1 Connector ........... 31 Drive Motors..........49 3.2.3 Tiller Interface Connector........31 Gradient Performance .......... 49 3.2.4 Programming Connector ........31 Freewheeling ............50 Crimping..............32 Programming Connection ......50 Wire Gauge and Types .......... 32 Batteries ............50 Battery Connection..........
- Page 5 PG D RIVES ECHNOLOGY RIVE ECHNICAL ANUAL PC Programmer ............. 63 Diagnostic Flash Sequence........73 Parameters ............63 Reverse Alarm............74 Pulsed Reverse Alarm ..........74 Speed Parameters ........65 Diagnostic Alarm ........... 74 Forward Acceleration ..........65 Brake Disconnected Alarm ........74 Forward Deceleration ..........
- Page 6 PG D RIVE ECHNICAL ANUAL RIVES ECHNOLOGY 12.2.1 Read Timer ............84 Surface Variant ............96 12.2.2 Clear Timer ............84 Inset Variant ............96 Mounting .............97 Chapter 4 – Diagnostics............85 Handling ..............97 Introduction..........87 Surface Variant ............97 3.2.1 Fixing..............
- Page 7 PG D RIVES ECHNOLOGY RIVE ECHNICAL ANUAL 2.11 i140 & i180 ............107 2.12 Programming Connector ........107 2.13 Crimping..............107 2.14 Wire Gauge and Types ........108 2.15 Battery Connection..........108 2.16 Belly Button Configuration........108 2.17 Fused B+ Supply..........108 2.18 Inhibit 1 & 2 Speed ..........108 2.19 Drive Motors ............108 2.20 Freewheeling ............109 2.21 Programming Connection........109...
-
Page 8: About This Manual
Caution – A point of safety which if ignored could result in damage to the control system or the vehicle. Warning – A point of safety which if ignored could cause injury to the individual. PG Drives Technology accepts no liability for any losses of any kind if these points are not followed. SK76977-07... -
Page 9: Chapter 1 - Operation
PG D – O RIVES ECHNOLOGY RIVE ECHNICAL ANUAL PERATION CHAPTER 1 – OPERATION SK76977-07... - Page 10 – O PG D RIVE ECHNICAL ANUAL PERATION RIVES ECHNOLOGY SK76977-07...
-
Page 11: Introduction
PG D – O RIVES ECHNOLOGY RIVE ECHNICAL ANUAL PERATION Introduction The relevant contents of this chapter should be included in the machine operating guide. Further copies are available from PGDT in either written or disk (Microsoft Word) format. Copies should not be made without the express permission of PG Drives Technology. -
Page 12: Status Indicator
– O PG D RIVE ECHNICAL ANUAL PERATION RIVES ECHNOLOGY Status Indicator Depending on the machine model, the status indicator may be a single bulb (or LED) or a PGDT TruCharge battery and diagnostics indicator. The status indicator shows you that the machine is switched on. It also indicates the operating status of the machine. Details are given in Section 8. -
Page 13: Slow/Fast Switch
PG D – O RIVES ECHNOLOGY RIVE ECHNICAL ANUAL PERATION Slow/Fast Switch This switch selects the driving mode – either slow or fast – of the machine. You can use this switch to limit the machine’s driving behavior in environments where that may be desirable or necessary, e.g. if you are driving in an enclosed space. 3.10 Audible Alarm This provides an audible warning when the machine is being driven in the reverse direction. -
Page 14: Precautions For Use
– O PG D RIVE ECHNICAL ANUAL PERATION RIVES ECHNOLOGY Precautions for Use In the event of the machine moving in an unexpected way, RELEASE THE THROTTLE. This action will stop the machine under any circumstances. Hazards Do not drive the machine: Beyond restrictions indicated in your machine user manual, for example inclines, curb heights etc. -
Page 15: Safety Checks
PG D – O RIVES ECHNOLOGY RIVE ECHNICAL ANUAL PERATION Safety Checks The electronic circuits in the i-Drive have been designed to be extremely safe and reliable. The on-board microprocessor carries out safety checks at up to 100 times per second. To supplement this safety monitoring you should carry out the following periodic checks. -
Page 16: Status Indication
– O PG D RIVE ECHNICAL ANUAL PERATION RIVES ECHNOLOGY Status Indication Depending on the machine model, the status indicator may be a single lamp (or LED) or a TruCharge battery gauge and diagnostics display. Both types indicate the status of the controller. A number of supposedly faulty controllers returned to PGDT are subsequently found to operate correctly. -
Page 17: Trucharge Indicator
PG D – O RIVES ECHNOLOGY RIVE ECHNICAL ANUAL PERATION • Check the condition of the battery. • Switch the machine on again and try to drive. If the safety circuits operate again, switch off and do not try to use the machine. -
Page 18: Self-Help Guide
– O PG D RIVE ECHNICAL ANUAL PERATION RIVES ECHNOLOGY • Make sure that all connectors on the machine are mated securely. • Check the condition of the battery. • If you can’t find the problem, count the number of flashing bars and use the self-help guide in Section 8.3. •... -
Page 19: Battery Gauge
PG D – O RIVES ECHNOLOGY RIVE ECHNICAL ANUAL PERATION Battery Gauge Depending on the type of machine you have, the battery gauge may be a single bulb (or LED) or a TruCharge display. How to read each type is described in the previous section. The battery gauge is included to let you know how much charge is left in your batteries. -
Page 20: Programming
– O PG D RIVE ECHNICAL ANUAL PERATION RIVES ECHNOLOGY Programming If you cannot find a position on the speed limiting control that suits you, the controller can be programmed to meet your needs. The controller can be programmed in three ways – with an SP1 programmer, a DTT Programmer or specialist PC software and interface cable. -
Page 21: Servicing
PG D – O RIVES ECHNOLOGY RIVE ECHNICAL ANUAL PERATION Servicing All repairs and servicing must be carried out by authorized service personnel. Opening or making any unauthorized adjustments or modifications to the controller or its components will invalidate any warranty and may result in hazards to yourself or other people, and is strictly forbidden. - Page 22 – O PG D RIVE ECHNICAL ANUAL PERATION RIVES ECHNOLOGY SK76977-07...
-
Page 23: Chapter 2 - Installation
PG D – I RIVES ECHNOLOGY RIVE ECHNICAL ANUAL NSTALLATION CHAPTER 2 – INSTALLATION SK76977-07... - Page 24 – I PG D RIVE ECHNICAL ANUAL NSTALLATION RIVES ECHNOLOGY SK76977-07...
-
Page 25: Documentation
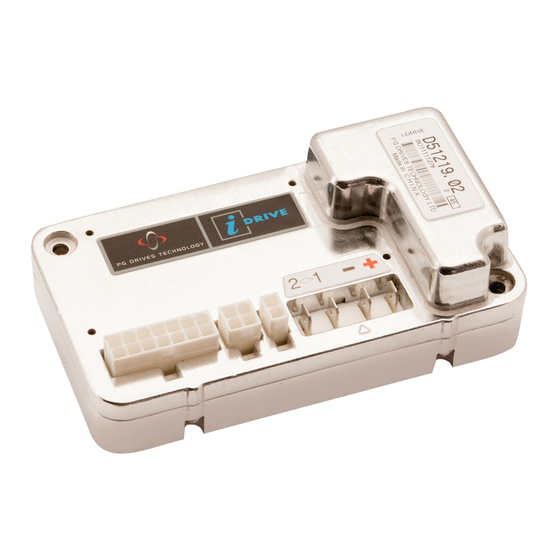
PG D – I RIVES ECHNOLOGY RIVE ECHNICAL ANUAL NSTALLATION Documentation i-Drive Versions Eight models of i-Drive are available to suit either 24V or 36V dc system voltages. The product codes for the full i-Drive family are as follows. Model Name Nominal Supply Voltage Max. -
Page 26: Dimensions
– I PG D RIVE ECHNICAL ANUAL NSTALLATION RIVES ECHNOLOGY Dimensions 1.3.1 i-Drive 45A and 70A Controllers SK76977-07... -
Page 27: I-Drive 140A And 180A Controllers
PG D – I RIVES ECHNOLOGY RIVE ECHNICAL ANUAL NSTALLATION 1.3.2 i-Drive 140A and 180A Controllers Program Settings Controllers are always supplied by PGDT with the preset settings shown on the data sheet. It is the manufacturer’s responsibility to program the control system to suit the machine model and ensure safe operation in compliance with relevant legal requirements over the whole of the operating range. -
Page 28: Soft-Stop
– I PG D RIVE ECHNICAL ANUAL NSTALLATION RIVES ECHNOLOGY It may be possible to program settings which compromise the stability of the machine. Perform suitable tests to establish which programming restrictions are needed to prevent instability. State any programming restrictions in the machine user handbook. State in the machine user handbook that it is the responsibility of the person programming the controller to make sure that the settings are safe and to note any programming changes that they make. -
Page 29: Wiring Configuration I45 & I70
PG D – I RIVES ECHNOLOGY RIVE ECHNICAL ANUAL NSTALLATION Make sure that the connectors you use are reliable under all operating conditions and correctly wired with no short circuits. Do not use unsuitable components - it may result in poor machine reliability. Refer to the following illustrations for basic connection details. -
Page 30: Wiring Configuration I140 & I180
– I PG D RIVE ECHNICAL ANUAL NSTALLATION RIVES ECHNOLOGY 3.1.2 Wiring Configuration i140 & i180 A suitable suppression diode should be fitted across an Aux 1 Output relay coil, as shown above. Connectors & Connector Kits Battery & Motor Connectors i24-45, i36-45, i24-70 &... -
Page 31: I140 & I180
PG D – I RIVES ECHNOLOGY RIVE ECHNICAL ANUAL NSTALLATION It is the responsibility of the machine manufacturer to ensure that the mating female Fastons are suitable for use on the intended application. PGDT accepts no liability for losses of any kind arising from failure to comply with this condition. -
Page 32: Crimping
For information on your closest Molex distributor refer to www.molex.com PG Drives Technology can supply all the Molex connectors and crimps required by the i-Drive as kit ‘D50319’. Wire Gauge and Types The table below gives the minimum recommended wire sizes for the i-Drive family. -
Page 33: Battery Connection
PG D – I RIVES ECHNOLOGY RIVE ECHNICAL ANUAL NSTALLATION Battery Connection The i-Drive incorporates sophisticated current limiting circuitry as protection for the components inside the controller. However, it is recommended that you provide protection against short circuits in the battery wiring and power loom or in the extremely unlikely event of a short circuit in the controller. - Page 34 – I PG D RIVE ECHNICAL ANUAL NSTALLATION RIVES ECHNOLOGY The output will be active depending on how the parameter Auxiliary 1 Output Mode is programmed. The three modes, which should be used to control an auxiliary motor, are Forward Traction, Reverse Traction or Traction. Forward Traction Means the Output is only active when the machine is driving forwards.
-
Page 35: Tiller Interface
PG D – I RIVES ECHNOLOGY RIVE ECHNICAL ANUAL NSTALLATION Tiller Interface The Tiller Interface connections are via a 14 way Molex ‘Mini-Fit-Jr.’ connector. PGDT can supply these parts or Molex can be contacted directly. Refer to Section 3.2.3 for part numbers and connector details. Pin Number Description Throttle Wiper... -
Page 36: Speed Limiting Potentiometer / Belly Button Input
– I PG D RIVE ECHNICAL ANUAL NSTALLATION RIVES ECHNOLOGY If a switch operated throttle is required, the parameter Throttle Type must be set to Wig-wag and the parameter Throttle Reference Test must be set to Off. Other factory programmed throttle inputs are available, e.g. an input configuration that accepts signals in the range of 0-5V. -
Page 37: Belly Button Configuration
PG D – I RIVES ECHNOLOGY RIVE ECHNICAL ANUAL NSTALLATION Drive Direction Potentiometer Position Machine Maximum Speed Forward Slow Position As set by Min. Fwd Speed Forward Fast Position As set by Max. Fwd Speed Reverse Slow Position As set by Min. Rev Speed Reverse Fast Position As set by Max. -
Page 38: Fused B+ Supply
– I PG D RIVE ECHNICAL ANUAL NSTALLATION RIVES ECHNOLOGY When suitably programmed, the switch is actuated AND the controller is in reverse drive, the Belly Button mode is initiated. This will: Instantly reduce drive to 0%. Accelerate in the forward direction to the programmed Belly Button Speed within 0.5s. Drive forwards at the programmed Belly Button Speed until the switch is released or if the switch is not released, for a period set by the programmed Belly Button Time. -
Page 39: Status Indicator Diagnostic Setting
PG D – I RIVES ECHNOLOGY RIVE ECHNICAL ANUAL NSTALLATION The maximum current rating of the output is 50mA; you must ensure that the indicator does not draw more current than this value. If you are using a bulb, the bulb can be connected directly between pin 10 and 0V (Highside) or pin 10 and switched B+ (Lowside). -
Page 40: Slow/Fast Switch
– I PG D RIVE ECHNICAL ANUAL NSTALLATION RIVES ECHNOLOGY This will require programming to one of the following: None No diagnostic indication. TruCharge PGDT diagnostic information. Refer to Chapter 1 Section 8. Suitable for Lamp or LED Status Indicators. The Status Indicator will flash the equivalent message of the TruCharge display. -
Page 41: Reverse Direction Switch
PG D – I RIVES ECHNOLOGY RIVE ECHNICAL ANUAL NSTALLATION 4.7.3 Reverse Direction Switch If the machine is fitted with direction switches, the reverse direction switch should be connected to this pin. For reverse drive to commence, this switch must be closed in conjunction with throttle demand. The function of the switch is programmable and can be changed using the Direction Switches parameter. -
Page 42: Brake Light
– I PG D RIVE ECHNICAL ANUAL NSTALLATION RIVES ECHNOLOGY The diagnostic alarm will sound a warning signal to alert the user that a diagnostic alarm pattern is about to be sounded. The signal will be a set of fast beeps lasting two seconds. The slower diagnostic pattern will then be sounded once. -
Page 43: Auxiliary 3 Output
PG D – I RIVES ECHNOLOGY RIVE ECHNICAL ANUAL NSTALLATION Continuous Means the Output is active the entire time the control system is powered up. Forward Traction Means the Output is only active when the machine is driving forwards. Traction Means the Output is only active when the machine is driving. -
Page 44: Volts
– I PG D RIVE ECHNICAL ANUAL NSTALLATION RIVES ECHNOLOGY 4.10 0 Volts Pin 13 provides the battery negative connection to the machine’s tiller. This pin has a current rating of 3A via an internal self- resetting fuse. 4.11 Inhibit 1 / Forward Direction Switch This input is located on pin 6 of the 14-way tiller connector. -
Page 45: Inhibit 1 Target
PG D – I RIVES ECHNOLOGY RIVE ECHNICAL ANUAL NSTALLATION The parameter can be set to Disabled, Pull Low or Open Circuit. 4.11.4 Inhibit 1 Target This parameter sets the function(s) which will be affected when the inhibit switch is in the required state. These are as follows. None No functions will be inhibited. -
Page 46: Forward Direction Switch
– I PG D RIVE ECHNICAL ANUAL NSTALLATION RIVES ECHNOLOGY Mode = Pull Low Target = Forward Drive and Reverse Drive Speed Limit Value = 40% Operation = Non-Latched If this inhibit is activated, the controller will cause the machine to decelerate to the programmed speed limit value. This could be activated by a microswitch on a brush head lever that is closed when the brush is lowered to the ground. -
Page 47: Inhibit 2 Debounce
PG D – I RIVES ECHNOLOGY RIVE ECHNICAL ANUAL NSTALLATION Inhibit 2 Debounce. Inhibit 2 Mode. Inhibit 2 Target. Inhibit 2 Speed. Inhibit 2 Operation. 4.12.2 Inhibit 2 Debounce This parameter sets the amount of time a connection to Inhibit 2 must be stable before it is interpreted as a valid condition. This parameter is particularly useful for interlock switches such as a seat switch, which can bounce momentarily as the operator passes over bumpy terrain. -
Page 48: Inhibit 2 Speed
– I PG D RIVE ECHNICAL ANUAL NSTALLATION RIVES ECHNOLOGY 4.12.5 Inhibit 2 Speed This parameter sets the maximum speed of the machine when the Inhibit 2 input is active and the Target is set as Forward Drive, Reverse Drive or both. The parameter is adjustable between 0 and 100% in steps of 1%. When Inhibit Speed = 0 this acts as an inhibit. -
Page 49: Drive Motors
PG D – I RIVES ECHNOLOGY RIVE ECHNICAL ANUAL NSTALLATION Drive Motors The controller is designed to be connected to a permanent magnet DC motor, fitted with a suitable gearbox and solenoid brake. In order to optimize the performance of the machine, the controller must be matched to the motor terminal impedance. This matching is implemented by programming the controller. -
Page 50: Freewheeling
– I PG D RIVE ECHNICAL ANUAL NSTALLATION RIVES ECHNOLOGY Motor Compensation, Slope Factor, Anti-Rollback Level, Pull-Away Delay and Anti-Rollback Velocity. Refer to Chapter 3 for details. Freewheeling There are two typical methods for providing a machine freewheel function. Disengaging the motor and brake assembly from the remainder of the drive train and allowing the wheels to freely rotate. -
Page 51: Mounting
PG D – I RIVES ECHNOLOGY RIVE ECHNICAL ANUAL NSTALLATION Mounting Mounting the i-Drive 8.1.1 i45 & i70 SK76977-07... -
Page 52: I140 & I180
– I PG D RIVE ECHNICAL ANUAL NSTALLATION RIVES ECHNOLOGY 8.1.2 i140 & i180 8.1.3 Orientation The recommended mounting orientation is such that the connectors must be lowermost. The function of the controller is not sensitive to mounting orientation. The electronics compartment of the controller has an IPX5 ingress protection rating. If the i-Drive is to be fitted with an i-Cover, the mounting orientation will be different. -
Page 53: Cables
The i45 and i70 kit comprises of a molded metal cover (1), a rubber cable seal (2), rubber gasket (3) and 4 screws. These items are available in kit format from PG Drives Technology. i45 and i70 i-Cover kit number is: D50434 The i140 and i180 Kit comprises of a molded metal cover (1), a rubber cable seal / gasket (2) and 2 screws. -
Page 54: I140 & I180 + I-Cover
– I PG D RIVE ECHNICAL ANUAL NSTALLATION RIVES ECHNOLOGY 8.2.2 i140 & i180 + i-Cover 8.2.3 Orientation The recommended mounting orientation is such that the connectors must be uppermost. The function of the controller is not sensitive to mounting orientation. The electronics compartment of the controller has an IPX5 ingress protection rating. 8.2.4 Position The controller must be mounted in a position where it is not exposed to levels of water, dust, shock or vibration above those expected on typical industrial machine applications e.g. -
Page 55: Battery Gauge
PG D – I RIVES ECHNOLOGY RIVE ECHNICAL ANUAL NSTALLATION Battery Gauge Refer to Chapter 1 Sections 8 and 9 for how to read the battery gauge. The battery gauge will start to flash one bar slowly when the Battery Lockout function has been triggered. The Battery Lockout Voltage setting controls the level at which this indication is given. -
Page 56: Immunity
– I PG D RIVE ECHNICAL ANUAL NSTALLATION RIVES ECHNOLOGY 10.2 Immunity The i-Drive controller has been stringently tested for susceptibility to electromagnetic radiation over the frequency range 26 MHz to 1 GHz. Follow the recommendations in Section 10.1.2 to ensure maximum immunity to electromagnetic radiation. Electro-Static Discharge (E.S.D.) With electronic control systems being installed in more small electric vehicle applications it is important to understand how to prevent ESD (Electrostatic Discharge) damaging or disrupting systems. -
Page 57: Control Panels
PG D – I RIVES ECHNOLOGY RIVE ECHNICAL ANUAL NSTALLATION There are two main methods. Provide electrically conductive discharge or drain paths between the electrically conductive masses around the machine. This is best achieved by providing a drain wire, which connects all the electrically conductive masses around the vehicle together. -
Page 58: Ensuring Repeatability
– I PG D RIVE ECHNICAL ANUAL NSTALLATION RIVES ECHNOLOGY 11.2.4 Ensuring Repeatability Various precautions should be taken to ensure repeatable protection from ESD. Connections to ESD drain wires etc. should not be made through painted surfaces. The routing of drain wires must be consistent. Any significant modifications to components or routings should be tested for its effect on ESD performance. -
Page 59: Production Tests
PG D – I RIVES ECHNOLOGY RIVE ECHNICAL ANUAL NSTALLATION Production Tests Perform the following tests, in order, on each machine before dispatch. These tests should be conducted in an open space and for ride-on vehicles a restraining device such as a seat belt should always be used. PGDT accepts no liability for losses of any kind arising from failure to comply with this condition. - Page 60 – I PG D RIVE ECHNICAL ANUAL NSTALLATION RIVES ECHNOLOGY SK76977-07...
-
Page 61: Chapter 3 - Programming
PG D – P RIVES ECHNOLOGY RIVE ECHNICAL ANUAL ROGRAMMING CHAPTER 3 – PROGRAMMING SK76977-07... - Page 62 – P PG D RIVE ECHNICAL ANUAL ROGRAMMING RIVES ECHNOLOGY SK76977-07...
-
Page 63: Introduction
PG D – P RIVES ECHNOLOGY RIVE ECHNICAL ANUAL ROGRAMMING Introduction This chapter gives an overview of the programmable parameters within the i-Drive Controller. The i-Drive can be programmed with a hand-held SP1, DTT or PGDT’s Industrial PC Programmer. This chapter does not give details of how to make adjustments; for these details please refer to the relevant documentation for the programmer you are using. - Page 64 – P PG D RIVE ECHNICAL ANUAL ROGRAMMING RIVES ECHNOLOGY Throttle – Section 3 Sleep Timer Throttle Invert Operation – Section 4 Throttle Type Throttle Deadband Throttle Gain Throttle Operated at Power-Up Throttle Reference Test ISO Tests Resistor Direction Switches Battery –...
-
Page 65: Speed Parameters
PG D – P RIVES ECHNOLOGY RIVE ECHNICAL ANUAL ROGRAMMING Supply Voltage Auxiliary Outputs – Section 11 Aux 1 Output Mode Aux 1 Off Delay Aux 2 Output Mode Aux 2 Off Delay Aux 3 Output Mode Aux 3 Input Type Aux 3 Output Voltage Aux 3 Off Delay Memory Functions –... -
Page 66: Reverse Deceleration
– P PG D RIVE ECHNICAL ANUAL ROGRAMMING RIVES ECHNOLOGY Reverse Deceleration This parameter adjusts the value for reverse deceleration (or braking) of the machine, in increments of 1. There are two settings: Fast This value is used when the slow/fast switch is set to fast. Slow This value is used when the slow/fast switch is set to slow. -
Page 67: Max. Reverse Speed
PG D – P RIVES ECHNOLOGY RIVE ECHNICAL ANUAL ROGRAMMING Max. Reverse Speed This parameter sets the MAXIMUM reverse speed of the machine. So long as a Slow/Fast switch is fitted to the machine then there are two available settings. Fast This value is used when the slow/fast switch is set to fast. -
Page 68: Operation Parameters
– P PG D RIVE ECHNICAL ANUAL ROGRAMMING RIVES ECHNOLOGY Operation Parameters Sleep Timer If the controller detects no throttle movement for a set period of time, it can be programmed to enter a sleep state. This will be indicated to the machine operator via the status indicator, refer to Chapter 1 Section 8.1.4. This parameter sets the period of inactivity before the i-Drive goes to sleep. -
Page 69: Throttle Operated At Power-Up
PG D – P RIVES ECHNOLOGY RIVE ECHNICAL ANUAL ROGRAMMING Example 1: If a 5kΩ throttle potentiometer is being used in a wig-wag configuration and the mechanical arrangement of the throttle means the potentiometer’s wiper reaches the high reference when the throttle is fully deflected, the Throttle Gain should be set to 100%. -
Page 70: Direction Switches
– P PG D RIVE ECHNICAL ANUAL ROGRAMMING RIVES ECHNOLOGY Direction Switches This parameter allows for industrial vehicles fitted with direction switches. Direction switches must be operated in conjunction with the throttle to effect drive. This parameter can be programmed to Yes or No and sets the function of pins 6 and 12 on the 14-way Tiller Interface. If set to No, pins 6 and 12 will operate in the normal way, i.e. -
Page 71: Battery Lockout Voltage
PG D – P RIVES ECHNOLOGY RIVE ECHNICAL ANUAL ROGRAMMING 5.3.1 Battery Lockout Voltage This parameter sets the threshold voltage at which the controller will lockout the function as set by the Battery Lockout Type parameter and is adjustable in 0.1V steps from 14V to 38V. 5.3.2 Battery Lockout Voltage 2 This parameter sets an alternate threshold voltage at which the controller will lockout the function as set by the Battery Lockout Type parameter and is adjustable in 0.1V steps from 14V to 38V. -
Page 72: Low Battery Alarm
– P PG D RIVE ECHNICAL ANUAL ROGRAMMING RIVES ECHNOLOGY The machine is in use with a type A battery; when the voltage drops below 22.3V, the timer is initiated. Once 20 seconds have elapsed, the Aux 1 Output is inhibited, so that the cleaning brushes switch off. The operator returns to the charging point, removes the type A batteries and places them on charge. -
Page 73: General Parameters
PG D – P RIVES ECHNOLOGY RIVE ECHNICAL ANUAL ROGRAMMING General Parameters Soft-Stop This parameter selects whether the soft-stop facility is enabled. Soft-stop means that if you switch the control system off whilst driving, the machine will steadily decelerate to a standstill. You can turn this function On or Off. -
Page 74: Reverse Alarm
– P PG D RIVE ECHNICAL ANUAL ROGRAMMING RIVES ECHNOLOGY Reverse Alarm This parameter sets whether an audible warning is output when the vehicle is reversing. The parameter can be set to On or Off. A warning alarm connected to Auxiliary 2 Output will not sound when the vehicle is reversing. A warning alarm connected to the Auxiliary 2 Output will sound when the vehicle is reversing. -
Page 75: Brake Light
PG D – P RIVES ECHNOLOGY RIVE ECHNICAL ANUAL ROGRAMMING 7.11 Brake Light If the parameter Auxiliary 2 Output Mode is set to Brake Light, this parameter must also be set to On when using i45 or i70 controllers. The parameter can be set to On or Off. This parameter is not required to be set when using i140 or i180 controllers. -
Page 76: Current Foldback Threshold, Current Foldback Time, Current Foldback Level And Motor Cooling Time
– P PG D RIVE ECHNICAL ANUAL ROGRAMMING RIVES ECHNOLOGY Boost Drive Current Sets the maximum current available during the boost period. Boost Drive Time This sets the period for which the Boost Drive Current will be available. Boost Drive Current can be set in 1A steps between 10A and 180A but not less than the Current Limit Max. setting. Boost Drive Time can be set in 1-second steps between 0 and 10 seconds. -
Page 77: Current Foldback Temperature
PG D – P RIVES ECHNOLOGY RIVE ECHNICAL ANUAL ROGRAMMING Current Foldback Temperature The parameter Current Foldback Temperature sets the temperature at which the i-Drive starts to reduce its maximum current capability to protect the controller. The temperature is measured at the i-Drive’s heatsink. Current Foldback Temperature Adjustable between 0°C and 80°C in steps of 1°C. -
Page 78: Slope Factor
– P PG D RIVE ECHNICAL ANUAL ROGRAMMING RIVES ECHNOLOGY The machine manufacturer is responsible for always ensuring that any replacement motors are fully compatible with the originals that the controller was designed to match. Failure to do this may result in poor control characteristics, which in extreme instances can make a machine uncontrollable and potentially unsafe. -
Page 79: Pull-Away Delay
PG D – P RIVES ECHNOLOGY RIVE ECHNICAL ANUAL ROGRAMMING Adjustments to Brake Time or Anti Rollback Level should not be necessary. Pull-Away Delay This parameter can be used to reduce roll-back or roll-forward when the machine is being started on a slope. The parameter can be adjusted in steps of 10ms between 0 and 1 second. -
Page 80: Factory
– P PG D RIVE ECHNICAL ANUAL ROGRAMMING RIVES ECHNOLOGY Factory 10.1 Safety Fences Absolute limits (or fences) can be applied to some dealer accessible programmable parameters. These limits are known as safety fences and are programmed by PGDT when the i-Drive is manufactured. The purpose of these fences is to prevent the machine being programmed to be too fast or too severe in its acceleration or deceleration. -
Page 81: Auxiliary 1 Output Off Delay
PG D – P RIVES ECHNOLOGY RIVE ECHNICAL ANUAL ROGRAMMING 11.2 Auxiliary 1 Output Off Delay This parameter sets the time in seconds that the Auxiliary 1 Output remains switched on whenever the condition defined by the parameter Auxiliary 1 Output Mode is no longer true or Battery Lockout is active or the relevant inhibit input is active for the following modes: Forward Traction. -
Page 82: Auxiliary 2 Output Off Delay
– P PG D RIVE ECHNICAL ANUAL ROGRAMMING RIVES ECHNOLOGY 11.4 Auxiliary 2 Output Off Delay This parameter sets the time in seconds that the Auxiliary 2 Output remains switched on whenever the condition defined by the parameter Auxiliary 2 Output Mode is no longer true or Battery Lockout is active or the relevant inhibit input is active for the following modes: Forward Traction. -
Page 83: Auxiliary 3 Output Off Delay
PG D – P RIVES ECHNOLOGY RIVE ECHNICAL ANUAL ROGRAMMING 11.8 Auxiliary 3 Output Off Delay This parameter sets the time in seconds that the Auxiliary 3 Output remains switched on whenever the condition defined by the parameter Auxiliary 3 Output Mode is no longer true or Battery Lockout is active or the relevant inhibit input is active for the following modes: Forward Traction. -
Page 84: Read System Log
– P PG D RIVE ECHNICAL ANUAL ROGRAMMING RIVES ECHNOLOGY 12.1.1 Read System Log This allows you to view the contents of the i-Drive’s System Log. 12.1.2 Clear System Log This function clears the i-Drive’s System Log and is only accessible using an OEM level programmer. 12.1.3 Read Control Log This allows you to view the contents of the i-Drive’s Control Log and is only accessible using an OEM level programmer. -
Page 85: Chapter 4 - Diagnostics
PG D – D RIVES ECHNOLOGY RIVE ECHNICAL ANUAL IAGNOSTICS CHAPTER 4 – DIAGNOSTICS SK76977-07... - Page 86 – D PG D RIVE ECHNICAL ANUAL IAGNOSTICS RIVES ECHNOLOGY SK76977-07...
-
Page 87: Introduction
PG D – D RIVES ECHNOLOGY RIVE ECHNICAL ANUAL IAGNOSTICS Introduction The primary objective of this chapter is to assist service personnel in finding the likely area of a detected fault within the whole electrical system. It is important to realize that even though the i-Drive is signalling a trip, it may not be the control system itself that is defective. -
Page 88: Trip Types And Possible Causes
– D PG D RIVE ECHNICAL ANUAL IAGNOSTICS RIVES ECHNOLOGY Trip Types And Possible Causes Once the trip type has been established, refer to the relevant section below for further information. Trip Code Trip Type Description & Reference 0300 Throttle Trip. Refer to Section 2.7.1 0815 Throttle Trip. -
Page 89: Trip Type 1 - Low Battery Voltage
PG D – D RIVES ECHNOLOGY RIVE ECHNICAL ANUAL IAGNOSTICS Trip Type 1 – Low Battery Voltage 2.1.1 Low Battery Voltage This occurs when the controller detects that the battery voltage has fallen below approximately 13.5V. Check the condition of the batteries, connectors and relevant wiring to the i-Drive. -
Page 90: Inhibit 2 Active
– D PG D RIVE ECHNICAL ANUAL IAGNOSTICS RIVES ECHNOLOGY 2.6.2 Inhibit 2 Active This occurs when the controller detects that the Inhibit 2 input is active, Inhibit 2 Speed has been set to ‘0’ and Inhibit 2 Operation has been set to ‘Latched’. This input is located on pin 14 of the 14-way Tiller Connector. Check the state of the input, Inhibit 2 programming, connectors and relevant wiring to the i-Drive. -
Page 91: Trip Type 8 - Possible Controller Fault
PG D – D RIVES ECHNOLOGY RIVE ECHNICAL ANUAL IAGNOSTICS Trip Type 8 – Possible Controller Fault 2.8.1 Possible Controller Fault This occurs when the controller suspects an internal problem. Check the batteries, motor, connectors and wiring to the i-Drive. If the trip is still present after these checks have been conducted, the controller may be defective. -
Page 92: Servicing Of Defective Units
– D PG D RIVE ECHNICAL ANUAL IAGNOSTICS RIVES ECHNOLOGY Servicing Of Defective Units There are no serviceable parts within the controller. Consequently, any defective units must be returned to PGDT or a PGDT approved service organization for repair. Opening or making any unauthorized adjustments or modifications to the controller or its components will invalidate any warranty and may result in hazards to the operator and is strictly forbidden. -
Page 93: Chapter 5 - Trucharge Module
PG D – T RIVES ECHNOLOGY RIVE ECHNICAL ANUAL HARGE ODULE CHAPTER 5 – TRUCHARGE MODULE SK76977-07... - Page 94 – T PG D RIVE ECHNICAL ANUAL HARGE ODULE RIVES ECHNOLOGY SK76977-07...
-
Page 95: Introduction
PG D – T RIVES ECHNOLOGY RIVE ECHNICAL ANUAL HARGE ODULE Introduction Study Chapters 1 & 2, they describe the intended functionality of the TruCharge Module and the details for connection to the i- Drive Controller. The i-Drive Status Output Type parameter will require adjustment before the TruCharge indicator will work correctly. -
Page 96: Dimensions
– T PG D RIVE ECHNICAL ANUAL HARGE ODULE RIVES ECHNOLOGY Dimensions Surface Variant The Surface Mount TruCharge Module has the dimensions shown in the following illustration. Inset Variant The Inset TruCharge Module has the dimensions shown in the following illustration. SK76977-07... -
Page 97: Mounting
PG D – T RIVES ECHNOLOGY RIVE ECHNICAL ANUAL HARGE ODULE Mounting Handling The TruCharge Module contains electronic components that may be sensitive to static electricity. Always store the modules in the original packaging until they are ready to be used. When the modules are removed from the packaging, ensure correct anti- static precautions are observed. -
Page 98: Inset Variant
– T PG D RIVE ECHNICAL ANUAL HARGE ODULE RIVES ECHNOLOGY Inset Variant 3.3.1 Fixing The machine’s control panel should be fitted with holes as suggested in the diagram below. The supplied double-sided adhesive pad should be used to secure the TruCharge Module to the machine’s control panel. See the following illustration. -
Page 99: Wiring
The machine manufacturer is responsible for establishing the suitability of the particular wiring arrangement used on the machine. PG Drives Technology can make general recommendations for wiring to TruCharge Modules, but PG Drives Technology accepts no responsibility for the wiring arrangement used. -
Page 100: Connections
– T PG D RIVE ECHNICAL ANUAL HARGE ODULE RIVES ECHNOLOGY Connections Surface Variant Inset Variant SK76977-07... -
Page 101: Controller Connections
PG D – T RIVES ECHNOLOGY RIVE ECHNICAL ANUAL HARGE ODULE Controller Connections TruCharge Module Type TruCharge Module Connector Function TruCharge Interface Inset Switched B+ Pin 5 Inset Status Indicator Pin 10 Inset Pin 13 Surface Switched B+ Pin 5 Surface Status indicator Pin 10... -
Page 102: Production Tests
– T PG D RIVE ECHNICAL ANUAL HARGE ODULE RIVES ECHNOLOGY Production Tests Mounting Make sure that the TruCharge Module is securely mounted. Do not overtighten any securing screws. Ensure that the adhesive sealing overlay is fully pressed down. Cables and Connections Check all cables and connections to the TruCharge Module for damage. -
Page 103: Chapter 6 - Warning Summary
PG D – W RIVES ECHNOLOGY RIVE ECHNICAL ANUAL ARNING UMMARY CHAPTER 6 – WARNING SUMMARY SK76977-07... - Page 104 – W PG D RIVE ECHNICAL ANUAL ARNING UMMARY RIVES ECHNOLOGY SK76977-07...
-
Page 105: Introduction
Failure to observe these warnings could result in UNSAFE CONDITIONS for the user of a machine or affect the reliability of the controller. PG Drives Technology accepts no liability for losses of any kind arising from failure to comply with any of the conditions in the warnings listed below. -
Page 106: Safety Checks
– W PG D RIVE ECHNICAL ANUAL ARNING UMMARY RIVES ECHNOLOGY Safety Checks These checks should be conducted in an open space and a restraining device such as a seat belt should always be used. PGDT accepts no liability for losses of any kind arising from failure to comply with this condition. -
Page 107: Charger Interlock
PG D – W RIVES ECHNOLOGY RIVE ECHNICAL ANUAL ARNING UMMARY Charger Interlock The machine manufacturer is responsible for providing a means of preventing the use of the machine while the batteries are being charged. PGDT accepts no liability for losses of any kind arising from failure to comply with this condition. -
Page 108: Wire Gauge And Types
– W PG D RIVE ECHNICAL ANUAL ARNING UMMARY RIVES ECHNOLOGY 2.14 Wire Gauge and Types It is the responsibility of the machine manufacturer to ensure that all wire gauges are suitable for the intended application. 2.15 Battery Connection The machine manufacturer must install a suitable circuit breaker to provide protection against short circuits in the battery wiring, power loom or the controller. -
Page 109: Freewheeling
PG D – W RIVES ECHNOLOGY RIVE ECHNICAL ANUAL ARNING UMMARY Users or service personnel must not move a controller from one machine type to install it on a different machine type. Controllers with different part numbers may have both hardware and software differences to ensure that they are compatible with the electrical and dynamic characteristics of their specific target vehicles. -
Page 110: Forward Deceleration
– W PG D RIVE ECHNICAL ANUAL ARNING UMMARY RIVES ECHNOLOGY 2.26 Forward Deceleration It is the responsibility of the machine manufacturer to ensure that the emergency stopping distance is within the distance specified for the country in which the machine will be used. 2.27 Reverse Deceleration It is the responsibility of the machine manufacturer to ensure that the emergency stopping distance is within the distance specified for the country in which the machine will be used. -
Page 111: Current Foldback Temperature
PG D – W RIVES ECHNOLOGY RIVE ECHNICAL ANUAL ARNING UMMARY 2.34 Current Foldback Temperature The value of Current Foldback Temperature should never be set higher than 80°C. PGDT accepts no liability for losses of any kind arising from failure to comply with this condition. 2.35 Motor Compensation Motor Compensation should never exceed 60%. - Page 112 – W PG D RIVE ECHNICAL ANUAL ARNING UMMARY RIVES ECHNOLOGY SK76977-07...
-
Page 113: Chapter 7 - Specifications
PG D – S RIVES ECHNOLOGY RIVE ECHNICAL ANUAL PECIFICATIONS CHAPTER 7 – SPECIFICATIONS SK76977-07... - Page 114 – S PG D RIVE ECHNICAL ANUAL PECIFICATIONS RIVES ECHNOLOGY SK76977-07...
-
Page 115: Electrical Specifications
PG D – S RIVES ECHNOLOGY RIVE ECHNICAL ANUAL PECIFICATIONS Electrical Specifications Version i24-45 i24-70 i36-45 i36-70 i24-140 i24-180 i36-140 i36-180 Supply Voltage 24Vdc 24Vdc or 36Vdc 24Vdc 24Vdc or 36Vdc Operating Voltage 16 – 30Vdc 16 – 45Vdc 16 – 30Vdc 16 –...
Need help?
Do you have a question about the I-DRIVE Series and is the answer not in the manual?
Questions and answers