Table of Contents
Advertisement
Thank you for purchasing this Panasonic product.
■ To ensure correct use of this lens, please read the operating instructions supplied
with the lens and the projector carefully.
■ Before using this product, be sure to read "Read this first!" (
■ Please save this manual for future use.
Operating Instructions
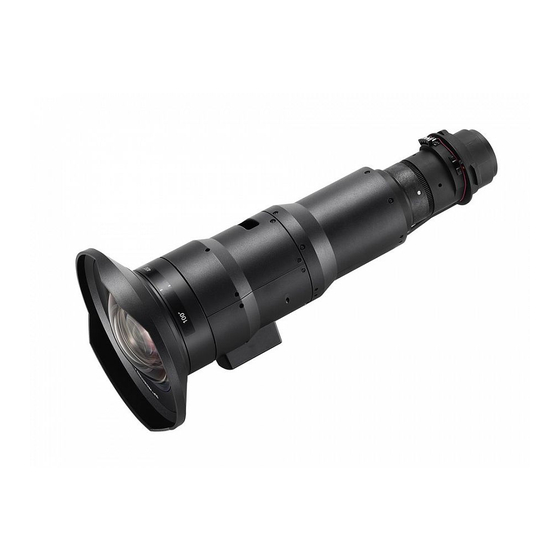
Zoom lens
Model No.
Commercial Use
ET-DLE020
Page 3).
DPQX1396ZB/X1
ENGLISH
FRANÇAIS
日本語
Advertisement
Table of Contents

Related Manuals for Panasonic ET-DLE020


Summary of Contents for Panasonic ET-DLE020
- Page 1 Model No. ENGLISH FRANÇAIS 日本語 Thank you for purchasing this Panasonic product. ■ To ensure correct use of this lens, please read the operating instructions supplied with the lens and the projector carefully. ■ Before using this product, be sure to read “Read this first!” ( ...
-
Page 2: Table Of Contents
█ Contents Read this first! ..................3 Before Use.....................4 Preparation....................6 Before replacing the projection lens ............6 Attaching the Lens................... 6 Using the Lens Fixed Attachment for Portrait Installation......9 Moving the Lens to the Home Position..........11 Lens Shift Adjustment................13 Detaching the Lens ................ -
Page 3: Read This First
Read this first! Always follow these precautions WARNING: Do not look at or place your skin into the light emitted from the lens while the projector is being used. Doing so can cause burns or loss of sight. z Strong light is emitted from the projector’s lens. Do not look at or place your hands directly into this light. -
Page 4: Before Use
- PT-RZ770 / PT-RW730 / PT-RZ660 / PT-RW620: Earlier than 1.16 For details on the update procedure, refer to the latest firmware information on the Panasonic website (https://panasonic.net/cns/projector/pass/). z The main version of the firmware can be checked in the [STATUS] screen. - Page 5 Before Use (continued) ■ Names of lens fixed attachment parts Adjustment screws (two, one Lens fixing brackets (two, one at top and one at bottom) at top and one at bottom) Lens guide bracket Phillips screws (total of four) Mounting screws (total of eight) Front Side...
-
Page 6: Preparation
Preparation Before replacing the projection lens Return the projection lens to the home position before replacing or removing it. For details on how to return the lens to the home position, refer to the operating instructions of the projector. Attention z Make sure that the projector power supply is switched off before attaching or detaching the projection lens. - Page 7 Preparation (continued) 2) Loosen the mounting screws in four places on the attachment mount bracket. z Provide a gap of about 2 mm between the attachment mount bracket and base bracket. 3) Pull together the tabs at the top and bottom of the attachment mount bracket and align the lens fixed attachment with the Mounting...
- Page 8 Preparation (continued) 5) Loosen the lens fixing bracket Adjustment screw mounting screws in four places. 6) Turn the adjustment screws to fix the lens fixing brackets in place at the top and bottom, respectively. Mounting screws Adjustment screw 7) Align the positioning guide on Guide groove the lens with the guide groove on the projector and insert...
-
Page 9: Using The Lens Fixed Attachment For Portrait Installation
Preparation (continued) Using the Lens Fixed Attachment for Portrait Installation To use this lens for portrait installation, you need to reattach the lens fixed attachment differently. 1) Remove the Phillips screws Phillips screws in four places with a Phillips screwdriver and then separate the base bracket and lens guide bracket. - Page 10 Preparation (continued) 3) Fix the lens guide bracket Phillips screws and base bracket with Phillips screws in four places. Note z The base plate attachment procedure is the same as before you reattached the lens fixed attachment differently. The lens fixing brackets are positioned at the top and bottom for portrait installation. 10-ENGLISH...
-
Page 11: Moving The Lens To The Home Position
MENU SELECT [HOME POSITION] screen and the CHANGE lens moves to the home position for the ET-DLE020. Note z If [LENS TYPE] is incorrectly set to other than [ET-DLE020], the lens will not move to the correct home position. ENGLISH-11... - Page 12 [PROGRESS] is displayed on the [HOME POSITION] screen and the lens moves to the home position for the ET-DLE020. Note z If [HOME POSITION] is incorrectly set to other than [ET-DLE020], the lens will not move to the correct home position. 12-ENGLISH...
-
Page 13: Lens Shift Adjustment
Preparation (continued) Lens Shift Adjustment 1) Display the internal test pattern screen. Projected z Press the <TEST PATTERN> button image Screen on the remote control and use the ◄► buttons to select the corresponding test pattern in the following table. Test pattern list Model Name Test Pattern... - Page 14 Preparation (continued) 4) Turn the adjustment screw at the bottom of the lens fixed attachment to move the lower edge of the projected image to lower edge of the screen. Attention z Do not perform the shift operation while the lens fixed attachment is fixed in place. Adjustment screw Note z If the target amount is significantly exceeded, the projected image may no longer be in...
-
Page 15: Detaching The Lens
(ii) remove it. Attention z Before using a projection lens other than the ET-DLE020, be sure to remove the lens fixed attachment. z Store the lens fixed attachment in a safe place so that it will not be lost. -
Page 16: Focus Adjustment
Preparation (continued) Focus Adjustment The focus balance of the center of the projected image and that of the peripheral areas differs depending on the size of the image. This lens is equipped with a function for adjusting the peripheral focus balance. ■... - Page 17 Preparation (continued) 1) Display the internal test pattern screen. z For the test pattern to display, refer to “Test pattern list” ( page 13 ). 2) Press and hold down the ▼ or ◄ button for zoom adjustment on the projector until the projected image size become the smallest.
- Page 18 Preparation (continued) 6) Press the <SHUTTER> button to disable the shutter function (shutter: open) 7) Insert the hexagonal wrench into the hole that can be seen from the projection lens side surface and turn the internal lens barrel slowly in the direction of the arrow to align the focus.
-
Page 19: Projection Relationships
Projection relationships The dimensional relationship between the screen and the projector is shown below. ■ Dimensional relationship diagram Projected image L (LW/LT) Screen L (LW/LT) Note z This diagram assumes that the size and position of the projected image will be adjusted so that the image fills the entire screen. - Page 20 Projection relationships (continued) Attention z To prevent obstruction of the intake and exhaust vents, install the projector with a clearance at least 500 mm (1 ft. 7 in.) from walls and objects. If you are installing the projector in a sealed space, be sure to provide additional air conditioning equipment and ventilation equipment.
-
Page 21: Lens Shift Ranges
Lens shift ranges If you perform lens calibration after attaching the projection lens, the projection lens moves to the home position after calibration is complete. Using the position of the projected image at the home position (i.e., the standard projection position) as a basis, you can use the lens shift adjustment function on the projector to adjust the position of the projected image within the respective lens shift ranges. - Page 22 Lens shift ranges (continued) Note z The home position of the projector a point of origin position for the lens shift (i.e., vertical and horizontal positions of the lens) based on the results of lens calibration. It is not the optical center position of the screen.
-
Page 23: Specifications
Specifications F value 2.00 Focal Length (f) 4.1 mm (5/32") - 4.4 mm (3/16") Width 170 mm (6-22/32") Dimensions Height 170 mm (6-22/32") Depth 391 mm (15-13/32") Net Weight Approx. 3.2 k g (7.1 lb) Dimensions (Unit: mm) 391 (15-13/32") ENGLISH-23... - Page 24 Atıkların atılmasıyla ilgili yanlış uygulamalar yasayla belirlenmiş olan cezalara sebebiyet verebilir. Panasonic Corporation Web Site : https://panasonic.net/cns/projector/ © Panasonic Corporation 2019 Panasonic System Solutions Company of North America Two Riverfront Plaza, Newark, NJ 07102 TEL: (877) 803 - 8492 Panasonic Canada Inc. 5770 Ambler Drive, Mississauga, Ontario L4W 2T3...
-
Page 25: Projected Image Size And Projection Distance
Appendix / Annexe / 付録 ■ Projected image size and Projection distance ■ Taille de l'image projetée et Distance de projection ■ 投写画面サイズと投写距離 z When the screen aspect ratio is 16:10 z Lorsque le rapport dʼaspect de l'écran est 16:10 z アスペクト比... - Page 26 Appendix / Annexe / 付録 (continued / suite / つづき) z When the screen aspect ratio is 16:9 z Lorsque le rrapport dʼaspect de l'écran est 16:9 z アスペクト比 16:9 (Unit / Unités / 単位 : m) PT-RCQ10 / PT-RCQ80 / PT-RZ120 / PT-RZ970 / PT-RZ870 / PT-RZ770 / PT-RZ660 Throw ratio / Rapport de projection / スローレシオ...
- Page 27 Appendix / Annexe / 付録 (continued / suite / つづき) z When the screen aspect ratio is 4:3 z Lorsque le rapport dʼaspect de l'écran est 4:3 z アスペクト比 4:3 (Unit / Unités / 単位 : m) PT-RCQ10 / PT-RCQ80 / PT-RZ120 / PT-RZ970 / PT-RZ870 / PT-RZ770 / PT-RZ660 Throw ratio / Rapport de projection / スローレシオ...
- Page 28 Appendix / Annexe / 付録 (continued / suite / つづき) Note z A ±5 % error in listed projection distances may occur. In addition, when [KEYSTONE] is used, distance is corrected to become smaller than the specified screen size. z The throw ratio is based on the value during projection with the projected image size of 3.81 m (150"). z The periods used in the numbers in the tables are decimal points.
- Page 29 Appendix / Annexe / 付録 (continued / suite / つづき) z Projection distance formulas z Formules de distance de projection z 投写距離計算式 The dimensions of the following table contain a slight error. Periods are used to represent decimal points in the calculation formulas in the following table. Les dimensions du tableau suivant peuvent présenter un léger écart.
- Page 30 Panasonic Corporation Web Site : https://panasonic.net/cns/projector/ Panasonic System Solutions Company of North America Two Riverfront Plaza, Newark, NJ 07102 TEL: (877) 803 - 8492 Panasonic Canada Inc. 5770 Ambler Drive, Mississauga, Ontario L4W 2T3 TEL: (905) 624 - 5010 パナソニック株式会社 コネクティッドソリューションズ社...