Table of Contents
Advertisement
Available languages
Available languages
WARN INDUSTRIES, INC.
Installation and Specification
Guide for the
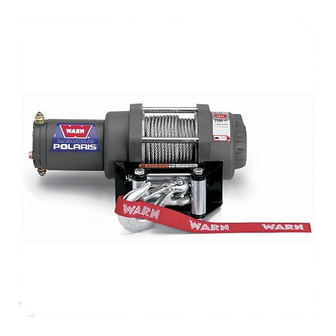
2.5ci
ATV Winch
English .................................................................... ..1
Français .................................................................. 10
WARN INDUSTRIES, INC.* 12900 CAPPS ROAD * CLACKAMAS, OREGON 97015
(503)722-1200 * CUSTOMER SERVICE LINE 1-800-543-WARN * FAX (503)722-3000
Español ................................................................... 19
PN 64258 A1
Advertisement
Table of Contents

Related Manuals for Warn 2.5ci


Summary of Contents for Warn 2.5ci
- Page 1 Installation and Specification Guide for the 2.5ci ATV Winch English ..............1 Français ..............10 WARN INDUSTRIES, INC.* 12900 CAPPS ROAD * CLACKAMAS, OREGON 97015 (503)722-1200 * CUSTOMER SERVICE LINE 1-800-543-WARN * FAX (503)722-3000 Español ..............19 PN 64258 A1...
- Page 2 • Do not disengage clutch if lead to damage to the frame. winch is under load or wire • Before winching, inspect re- rope is in tension. mote control lead for damage. WARN 2.5ci Winch Installation and Specification Guide |...
-
Page 3: Specifications
Figure 3: To install the complete kit, you will need to mount the winch, contactor handlebar mounted Mini-rocker switch and remote socket (optional on the 2.5ci winch). Mounting locations may vary depending on make and model of the ATV. Read and understand the following instructions to choose the appropriate mounting locations. - Page 4 ATV key switch. The wire should only have power when the key is in the "ON" position. Figure 8: Use a test light to locate a suitable wire. WARN 2.5ci Winch Installation and Specification Guide | | Warn Industries, Inc.
- Page 5 (green to green, black to black). Next, attach the terminals on the handle bar switch wires into the "Y" connectors on the remote socket wire harness after removing the dust caps. WARN 2.5ci Winch Installation and Specification Guide | | Warn Industries, Inc.
-
Page 6: Warranty
A full listing of replacement and service parts are available. Should you encounter a problem during Check with your WARN authorized dealer or on the installation or operation of your winch, please web: www.warn.com follow these steps toward resolving the problem: 1. - Page 7 • Ne débrayez pas si le treuil est • Avant le treuillage, examinez la sous charge ou si le câble d’acier télécommande pour vous assurer est tendu. qu’elle n’est pas endommagée. Guide d’installation et de spécification du treuil WARN 2.5ci |...
-
Page 8: Caractéristiques
à bascule installé sur le guidon du contacteur et la prise de la télécommande (en option sur 2200 (998) 2ème le treuil 2.5ci). Les emplacements de montage peuvent varier selon la marque et le modèle de 1930 (875) 3ème VTT. Prenez soin de bien lire et comprendre les instructions suivantes afin de choisir les 1700 (771) 4ème... - Page 9 Figure 8 : utilisez une lampe tension que lorsque la clé est en position « ON » pour le moment. témoin pour trouver le bon fil. (marche). | Warn Industries, Inc. Guide d’installation et de spécification du treuil WARN 2.5ci |...
- Page 10 « Y » du faisceau de fils de la prise de télécommande après avoir retiré au préalable les capuchons antipoussière. | Warn Industries, Inc. Guide d’installation et de spécification du treuil WARN 2.5ci |...
-
Page 11: Garantie
Consultez votre concessionnaire agréé schémas d’assemblage. Si vous ne parvenez WARN ou bien notre site Web : www.warn.com. pas à résoudre le problème, passez à l’étape 2. | Warn Industries, Inc. Guide d’installation et de spécification du treuil WARN 2.5ci |... - Page 12 • Antes de accionar el cabrestante, • No quite el embrague si el compruebe que el cable del cabrestante lleva carga o si el control remoto no presente daños. cable de tracción está tensado. Guía de instalación y especificaciones del Cabrestante WARN 2.5ci |...
-
Page 13: Especificaciones
2,5ci). Las ubicaciones de montaje pueden variar dependiendo de la marca y el 1930 (875) 3ª modelo del vehículo todoterreno. Lea y comprenda las instrucciones siguientes para elegir 1700 (771) 4ª las ubicaciones apropiadas. | Warn Industries, Inc. Guía de instalación y especificaciones del Cabrestante WARN 2.5ci |... - Page 14 únicamente cuando la todoterreno. NO MONTE el contactor todavía. Figura 8: Utilice una luz de prueba llave esté en la posición de encendido. para localizar un cable apropiado. | Warn Industries, Inc. Guía de instalación y especificaciones del Cabrestante WARN 2.5ci |...
- Page 15 “Y” del arnés de cables del tomacorriente remoto después de haber quitado las tapas antipolvo. | Warn Industries, Inc. Guía de instalación y especificaciones del Cabrestante WARN 2.5ci |...
- Page 16 WARN o vaya a la página Web: www.warn.com. ensamblaje. Si todavía no ha podido resolver el problema, vaya al paso 2. | Warn Industries, Inc. Guía de instalación y especificaciones del Cabrestante WARN 2.5ci | © 2005 Copyright Warn Industries, Inc. All rights reserved.
Need help?
Do you have a question about the 2.5ci and is the answer not in the manual?
Questions and answers