Table of Contents
Advertisement
SERVICE GUIDE
ATV and Utility Winches
A2000, A2500, T2500, U2500,
P2500, Z3500, Pull Pack
REPAIR / REPLACEMENT INSTRUCTIONS
TROUBLE SHOOTING GUIDE
This guide has been provided for use by Warn Authorized Service Centers. Any other
use is prohibited.
This guide identifies potential hazards and has important safety messages that help
you and others avoid personal injury or death. WARNING and CAUTION are signal
words that identify the level of hazard. These signal words mean:
WARNING signals a hazard that could cause serious injury or death, if you do not
follow recommendations.
CAUTION signals a hazard that may cause minor to moderate injury, if you do not
follow recommendations.
This guide uses NOTICE to call attention to important mechanical information, and
Note: to emphasize general information worthy of special attention
1
FOR THE
WARN
12V DC
Electric Winch
Warn Industries, Inc
12900 SE Capps Road
Clackamas, OR 97015 USA
Advertisement
Table of Contents

Related Manuals for Warn A2000


Summary of Contents for Warn A2000
- Page 1 Electric Winch REPAIR / REPLACEMENT INSTRUCTIONS TROUBLE SHOOTING GUIDE This guide has been provided for use by Warn Authorized Service Centers. Any other use is prohibited. This guide identifies potential hazards and has important safety messages that help you and others avoid personal injury or death. WARNING and CAUTION are signal words that identify the level of hazard.
- Page 2 TABLE OF CONTENTS SECTION 1 - GETTING STARTED -------------------------------- 3 1.1 WINCH MODEL IDENTIFICATION -------------------------------------------------------- 3 1.2 DEFINITIONS AND WINCH OPERATION------------------------------------------------ 4 SECTION 2 – DISASSEMBLY & REASSEMBLY -------------- 7 2.1 SERVICE TECHNICIAN REPAIRS --------------------------------------------------------- 7 2.2 SUGGESTED TOOLS -------------------------------------------------------------------------- 7 2.3 DISASSEMBLY/REASSEMBLY------------------------------------------------------------- 7 SECTION 3 –BRAKE REMOVAL AND REPLACEMENT--18 3.1 SUGGESTED TOOLS ------------------------------------------------------------------------ 18...
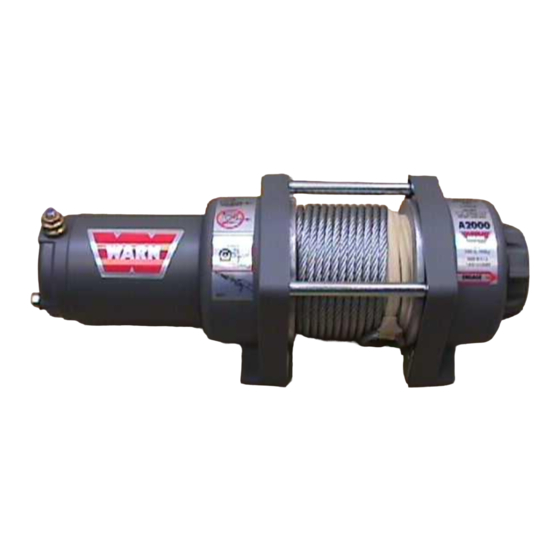
- Page 3 SECTION 1 - Getting Started 1.1 Winch Model Identification To ensure proper winch repair it is necessary to correctly identify the model and part number of your winch. This makes ordering replacement parts easier, and helps you obtain the necessary For a part description, item information from your Authorized Service Center.
- Page 4 Definitions And Winch Operation 1.2.1 Definitions Operation and service of a Warn planetary winch can be explained easier by defining a few major structural components. Refer to Figure 1.2 for the following definitions: MOTOR : The winch motor is a permanent magnet motor. A 12-volt DC battery powers the electric motor.
- Page 5 MOTOR CONTROLS: The electric winch motor is controlled by a control pack (contactor), ATV switch, or a rocker switch. The 12-volt battery power source feeds the electric cables that are connected to these controllers. The main function is to allow the winch to function in both directions.
- Page 6 The winch motor turns the electrical energy into mechanical energy. The motor shaft powers the gears, which in turn pulls the load. For the winches with a brake, it will hold the load if user must stop. On power-in operation, the drive shaft rotates and drives the planetary gears, starting with the gear carrier stage farthest from the winch drum (the first stage carrier.) The first stage carrier, in turn, drives the second stage carrier, which then drives the third stage carrier.
- Page 7 Failure to observe these instructions could lead to severe injury or death. READ THIS BEFORE BEGINNING REPAIRS This manual is intended for use by a WARN authorized service technician. It is important that you make repairs with the proper tools and equipment. It is also important to correctly follow the instructions.
- Page 8 MOTOR REMOVAL Note the motor placement for correct replacement before any removal, also checking and marking any wires that will be removed. Repairs are easier and safer when winch is removed from vehicle and located on a workbench. Secure wire rope with rope or electrical ...
- Page 9 At this time the cap assembly may be removed, and checked for wear, corrosion, and electrical terminals that may have been damaged or over-tightened. ARMATURE REMOVAL: Placing shaft end on the bench and pushing case down, pulling the armature out at the top will remove the armature.
- Page 10 ARMATURE REPLACEMENT: To replace the armature, it is slid in from the bottom of the casing, which is identified by the magnets closer to one end of the case. If there is resistance to the armature placement, it is the wrong direction.
- Page 11 Index Mark MOTOR CAP ASSEMBLY REPLACEMENT On the top of the motor case there is an index, which must mate to the index on the cap assembly. The rotation of the motor should be the same position as when removed.
- Page 12 MOTOR HOUSING REASSEMBLY: Replace sun gear . Replace first stage carrier assembly. If winch had a thrust washer it may be re- installed. If winch had a brake, place the thrust washer in first with brake resting on it. Replace mounting nuts flat side out.
- Page 13 CLUTCH HOUSING DISASSEMBLY: Note the motor placement for correct replacement before any removal, also checking and marking any wires that will be removed Repairs are easier and safer when winch is removed from vehicle and located on a workbench. Secure wire rope with rope or ...
- Page 14 Remove clutch end and cable protector screws . Remove drum support plate. Check the drum bushings on each end for wear or damage. Remove gears. Check that Drive shaft must fit easily through the single sun gear on clutch end. This sun gear must have chamfered edges to match drive shaft.
- Page 15 CLUTCH HOUSING REASSEMBLY: Turn the clutch dial to the free spool position, insert cam follower button side up. Dial clutch to engage position. Grease housing and replace single sun gear, second stage planetary greasing the tall sun gear, replace 3 stage planetary, greasing the drum sun gear.
- Page 16 Insert drum bushing, rounded side up, to plate with openings on either side of the tab with a light amount of grease. Check the drum for any tooth or flange damage, if none install on matting drum gear. ...
- Page 17 NOTES:...
- Page 18 A mechanical brake is an option for most ATV winches. If so equipped it is a spring brake that expands and contracts holding the load for which it was designed. Warn Industries does not offer individual replacement brake parts. The complete brake assembly (PN 22142) must be replaced.
- Page 19 Remove retaining ring and washer. Lift out the input gear and check for any fractures or breaks. Remove spring by lifting out with flat blade screwdriver. Check both tang ends of the spring for fractures or breaks. ...
- Page 20 If any parts are broken or damaged, the full brake assembly must be replaced. 3.3 Reassembly/ New Brake Installation To service brake, clean residue and use HI-TEMP Brake Slider Grease during reassembly. Fill cavity of brake housing with ...
- Page 21 Grease & replace input gear with spring tab fitting under, being sure to match small square index marks located on both gear tabs. (Index marks together) Replace washer and retaining ring (flat side up) Check brake function by inserting ...
- Page 22 SECTION 4.0 - Control Pack Overview Wiring Reference Electrical operation of the winch control may consist of a dial control switch, a power in/ power out contactor or a set of two solenoids. WARNING Fire Hazard Failure to observe these instructions could lead to severe injury or death.
- Page 23 Figure 4.1a Figure 4.1b 4.1.2 Contactor Control Pack- Electrical operation of this winch control assembly consists of a contactor. Power to the remote control socket is supplied by the red wire connected to a key controlled electrical wire from the ATV ignition. In the power out mode , the black wire is triggered by the remote control switch to energize the control component.
- Page 24 Motor Cable (#1) Motor Cable (#2) Control Pack Ground Cable Positive Battery Cable Diode Figure 4.3 Solenoid Control Pack and Wiring Connections 4.1.4 Solenoid Control Pack(Pull Pack)- This solenoid pack contains 2 canister solenoids, a diode, and one electrical cable which will run under the winch motor and connect to terminal #2.
- Page 25 Figure 4.5 is the basic wiring diagram of the 3-wire remote control. Figure4.5 Remote Control Plug And Wiring Schematic Inside wiring for the housing harness plug with notch of plug facing down: Place wires in the back side of the plug. Going clockwise green wire is opposite notch, skip a hole and black wire position, skip a hole and white or red wire position.
- Page 26 SECTION 5 Winch Trouble Shooting Guide – PROBLEM POSSIBLE CAUSE CORRECTIVE ACTION 5.1.1 Winch does not hold a. Wire Rope is spooled Remove all wire rope from load onto the drum in the wrong drum and respool in the proper direction.
- Page 27 PROBLEM POSSIBLE CAUSE CORRECTIVE ACTION c. Broken cam or cam Replace damaged follower when clutch knob components. turned under load d. Wire rope is bound up By connecting the hook to on the drum. a load and alternately powering- in and powering-out, the wire rope will usually work itself free.
- Page 28 PROBLEM POSSIBLE CAUSE CORRECTIVE ACTION k. Remote control switch Test winch operation with or cord is damaged. replacement remote control. Replace remote control if defective. l. Battery ground wire Connect ground wire connected to vehicles frame. directly to negative battery terminal.
- Page 29 PROBLEM POSSIBLE CAUSE CORRECTIVE ACTION c. Motor battery Repair insulator or replace connections have been motor improperly tightened, and turned to pinch insulation from motor body d. Electrical ground is not Install a ground wire to the sufficient. Ground wire was not motor housing, and attach to the installed, or the battery ground negative terminal of the battery.
- Page 30 The following Parts breakdown and parts lists are for current winch models. Please refer to your WARN Winch Replacements Parts List for correct information specific to the winch being serviced.
Need help?
Do you have a question about the A2000 and is the answer not in the manual?
Questions and answers