Table of Contents
Troubleshooting

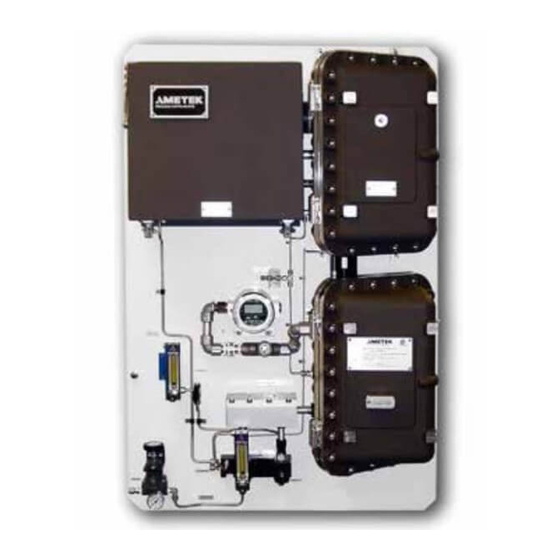
Related Manuals for Ametek 931S


Summary of Contents for Ametek 931S
- Page 1 Model 931S Single-Gas UV Analyzer Model 932S Multi-Gas UV Analyzer Operator’s Guide With Essential Health and Safety Requirements Canada A DIVISION OF AMETEK PROCESS & ANALYTICAL INSTRUMENTS Western Research PN 903-8750, Rev. F...
-
Page 2: Offices
Printed in Canada This manual is a guide for the use of the Model 931S UV Single-Gas and Model 932S UV Multi-Gas Analyzers. Data herein has been verified and validated and is believed adequate for the intended use of this instrument. If the instrument or procedures are used for purposes over and above the capabilities specified herein, confirmation of their validity and suitability should be obtained;... -
Page 3: Table Of Contents
Contents Offices ..........................ii Safety Notes ........................viii Electrical Safety ........................viii Grounding ........................viii Personnel and Equipment Safety Information ............. ix Warnings ........................ix Cautions ........................x Warning Labels ........................xi Environmental Information (WEEE) ................xi UV Source Lamps Disposal ..................... xi Electromagnetic Compatibility (EMC) ................ - Page 4 Installing the Optional Heated Acid Gas Sample Probe ........3-9 Installing the Sample and Vent Lines ..............3-11 Preparing the Optional Heated Measuring Cell for Operation ......3-11 Installing the Zero/Aspirator Drive Gas Line ............3-12 iv | Model 931S / Model 932S UV Analyzers...
- Page 5 Electrical Connections ....................3-13 Input/Output Signal Connections ............... 3-14 Optional Interface Capabilities ................3-15 Gas Sensor Interface Options ..............3-15 Digital Input Options ..................3-15 Digital Communication ..................3-16 Hardware Configuration (Modbus Serial Communication) ......3-16 Hardware Configuration (Modbus TCP Communication) ........3-20 Multiple-Analyzer (Multi-Drop) System Configuration........3-20 AC Power Connection and Fusing ...............
- Page 6 Changing Out Replaceable Parts ................6-7 Measuring Cell Maintenance ................6-7 Source Lamp Replacement ..................6-14 When Do Source Lamps Need to be Replaced? ..........6-14 About the Source Lamps ................6-15 Replacing the Source Lamps ................6-15 vi | Model 931S / Model 932S UV Analyzers...
- Page 7 Technical Support ......................7-1 Returning Equipment ..................... 7-2 ?? ANSWERS TO YOUR QUESTIONS ?? ..............7-3 AMETEK SERVICE & AFTERMARKET SALES SUPPORT........ 7-3 Recommended Preventive Maintenance Spare Parts ..........7-4 Optical Bench Spare Parts ..................7-4 Spare Analyzer Fuses ....................7-5 Replacement Boards....................
-
Page 8: Safety Notes
Instrument grounding is mandatory. Performance specifications and safety protection are void if instrument is operated from an improperly grounded power source. Verify ground continuity of all equipment before applying power. CAUTION viii | Model 931S / Model 932S UV Analyzers... -
Page 9: Personnel And Equipment Safety Information
Personnel and Equipment Safety Information This section describes important safety information to avoid personal injury and damage to the equipment while installing, operating, maintaining, or servicing the equipment. All safety regu- lations, standards, and procedures at the analyzer location must be followed. All personnel involved with the installation, start-up, operation, maintenance, service, or trou- bleshooting of the analyzer must review and follow these Warnings and Cautions. -
Page 10: Cautions
If the analyzer is equipped with the Environmental Purge option, clean air or nitrogen can be supplied to the inlet flame arrester at a pressure of 7–70 KPAG (1–10 PSIG). CAUTION x | Model 931S / Model 932S UV Analyzers... -
Page 11: Warning Labels
UV Source Lamps Disposal AMETEK recommends that all UV lamps – whether they are new, used, or damaged in any way – need to be disposed of in an environmentally safe manner. Most UV lamps do not contain restricted substances listed under the European RoHS 2 direc- tive. -
Page 12: Electromagnetic Compatibility (Emc)
CAUTION The various configurations of the Model 931S and Model 932S Analyzers should not produce, or fall victim to, electromagnetic disturbances as specified in the European Union’s EMC Directive. -
Page 13: Special Warnings And Information
Special Warnings and Information Equipment Used in Class I, Division 2 Hazardous Locations Refer to Chapter 2 – Specifications for details about the suitability of this equipment in hazard- ous locations. EXPLOSION HAZARD – DO NOT DISCONNECT EQUIPMENT UNLESS POWER HAS BEEN SWITCHED OFF OR THE AREA IS KNOWN TO BE NON-HAZARDOUS. -
Page 14: Eu Declaration Of Conformity
– Part 1: General requirements. Pressure Equipment Directive 2014/68/EU Article 4, Paragraph 3 Canada A DIVISION OF AMETEK PROCESS & ANALYTICAL INSTRUMENTS Western Research Page 1 of 2 PN 903-8595 Rev N xiv | Model 931S / Model 932S UV Analyzers... - Page 15 KEMA 02ATEX2247 X Notified Body: DEKRA Certification B.V. 0344 Meander 1051, 6825 MJ Arnhem The Netherlands ____________________________ Randy Meads Quality Assurance Manager Calgary, Alberta, Canada June 28, 2017 Canada A DIVISION OF AMETEK PROCESS & ANALYTICAL INSTRUMENTS Western Research Page 2 of 2 Contents | xv...
-
Page 16: Warranty And Claims
Process photometric analyzers, process moisture analyzers, and sample systems are warranted to perform the in- tended measurement, only in the event that the customer has supplied, and AMETEK has accepted, valid sample stream composition data, process conditions, and electrical area classification prior to order acknowledgment. The photometric light sources are warranted for ninety (90) days from date of shipment. -
Page 17: Chapter 1 Overview
OVERVIEW The AMETEK Model 931S and Model 932S UV Analyzers use photometric analysis to continuously monitor H S levels in acid gas (and other) ap- plications or other high dewpoint applications. The microprocessor-based Model 931S and Model 932S Analyzers minimize the complexity of these tasks and simplify operation of the analyzer system. -
Page 18: About The Analyzer
About the Analyzer The Model 931S and Model 932S Analyzers are comprised of (see Figure 1-1): • Two ultraviolet light sources (source lamps) • Source lamp filters: Model 931S Single-Species Analyzers A Filter Block containing two wavelength-selective filters Model 932S Multi-Species Analyzers... - Page 19 SOL B SOL A SOL Z BY CUSTOMER LEGEND Figure 1-2. Sample flow diagram (Plumbing Schematic). Figure 1-2 illustrates a Sample Flow Diagram (plumbing schematic) for a typical European style analyzer. For your system, refer to Final NOTE “As-Built” drawings in the analyzer Documentation Package. Overview | 1-3...
-
Page 20: About The Analyzer Sample System
Probe Assembly above the sample dewpoint temperature. Includes an aspirator which provides suction to move the sample gas through the sample path. Refer to the Heated Acid Gas Sample Probe Installation and Maintenance Guide for complete details. 1-4 | Model 931S / Model 932S UV Analyzers... - Page 21 SERIAL COMMUNICATIONS PORT DO NOT OPEN IF A HAZARDOUS GAS ATMOSPHERE IS PRESENT LOWER ENCLOSURE PORT DESIGNATIONS SOLENOID BLOCK DETAIL CABLE ENTRIES IN BOTTOM OF ENCLOSURE POWER & HAG PROBE POWER CABLE ENTRY, ANALOG LAYOUT MAY NOT BE EXACTLY AS SHOWN SIGNAL, DISCRETE &...
-
Page 22: Working In This Manual
While working with the software, use these navigational aids to quickly access Example: software screens. See example at left, and see “Navigating in the Software” in Setup (tab)Gas Calibration Chapter 4. 1-6 | Model 931S / Model 932S UV Analyzers... -
Page 23: Supplemental Information - Where Can I Find It
• EEPROM Data Sheets, which list the factory-default configuration set- tings of all programmable analyzer parameters. • Signed Final QC (Quality Control) Document, which includes AMETEK Testing Quality Control information for the analyzer. • Final As-Built drawings which are customer-specific drawings for the analyzer system. - Page 24 This page intentionally left blank. 1-8 | Model 931S / Model 932S UV Analyzers...
-
Page 25: Chapter 2 Specifications
SPECIFICATIONS The Specifications listed in this chapter apply to both Model 931S and Model 932S Analyzers, except where noted. Methodology Model 931S Analyzers: Dual wavelength, high resolution, non-dispersive UV. Model 932S Analyzers: Multi-wavelength, high resolution, non-dispersive UV. Standard Range Measuring Cell Maximum ranges are based on sample (expressed in cm). -
Page 26: Calibration
S @ 228 nm = (40 PPM / Cell length) / °C S @ 214 nm = (20 PPM / Cell length) / °C = (40 PPM / Cell length) / °C 2-2 | Model 931S / Model 932S UV Analyzers... -
Page 27: 24-Hour Zero Drift
24-Hour Zero Drift Model 931S Analyzers: S (Heated or Unheated Cell): 2.0 % of customer full-scale for the Measuring Cell size (application- specific), with Auto-Zero disabled. 1.0 % of customer full-scale for the Measuring Cell size (application- specific), with Auto-Zero disabled. -
Page 28: Electrical Requirements
104~132 VAC, 50/60 Hz, 3 A Maximum 208~264 VAC, 50/60 Hz, 2 A Maximum Maximum Sample Gas Temperature 165 °C (329 °F) Sample Gas Flow Rate Maximum 20 NLM (42.4 SCFH) for the High Pressure/Low Range Kit. 2-4 | Model 931S / Model 932S UV Analyzers... -
Page 29: Ambient Limits
Ambient Limits Temperature From 0–50 °C (32–122 °F). For applications using an unheated Measuring Cell, the surrounding ambient temperature must be at least 5 °C above the sample dew point temperature. In high dewpoint applications, a heated Measuring Cell and heat-traced Sample/Vent Lines must be used to prevent condensation of liquids in the sample system. -
Page 30: Instrument Air Requirements
Physical Dimensions (on Backpan) Height: 1185 mm (46.65") Width: 780 mm (30.7") Depth: 254 mm (9.97") Weight: Approximately 145 kg (320 lb), entire system and backpan only (may vary, depending on system). 2-6 | Model 931S / Model 932S UV Analyzers... -
Page 31: Hydrogen Sensor (Optional)
Hydrogen Sensor (Optional) Accuracy ± 2.0 % full-scale of standard ranges. Based on a full-scale of 0–10 % H in a Scot Contactor Overhead application, where the sensor is in a temperature- controlled Oven. Cross-Talk ± 1.3 % of H full-scale. -
Page 32: Approvals And Certifications
Approvals and Certifications The Model 931S and Model 932S Analyzers are certified for indoor use only, Installation Category II (local level transients, less than those found at power distribution level), and Pollution Degree 2 (normally noncon- ductive environmental pollution occurs with occasional condensation). -
Page 33: Atex And Iecex Certificates And Analyzer Markings
ATEX and IECEx Certificates and Analyzer Markings For installation sites with potentially explosive atmospheres that require ATEX and IECEx certification, AMETEK’s ATEX and IECEx certificates for the Model 931S/932S Analyzers (and their markings) are included in the following pages. Specifications | 2-9... - Page 34 2-10 | Model 931S / Model 932S UV Analyzers...
- Page 35 Specifications | 2-11...
- Page 36 2-12 | Model 931S / Model 932S UV Analyzers...
- Page 37 Specifications | 2-13...
- Page 38 2-14 | Model 931S / Model 932S UV Analyzers...
- Page 39 Specifications | 2-15...
- Page 40 ATEX- and IECEx- certified Model 931S and 932S Analyzers are marked with the label shown below. 0344 II 2 G Western Research Model 93X Analyzer Certificate Nos.: KEMA 02ATEX2247 X, IECEx DEK12.0035X Ex db IIB+H2 T3 Gb (T amb. 0°C...50°C) Year: _______ Serial No.: __________________...
-
Page 41: Csa Certificate And Analyzer Marking
CSA Certificate and Analyzer Marking For installation sites that require CSA certification, AMETEK’s CSA cer- tificate for the Model 931S and Model 932S Analyzers is included in the following pages. Certificate of Compliance Certificate: 1031027 Master Contract: 164369 (048179_0_000) Project:... - Page 42 Jurisdiction. It is the responsibility of the manufacturer to provide and apply these additional markings, where applicable, in accordance with the requirements of those authorities. DQD 507 Rev. 2016-02-18 Page 2 2-18 | Model 931S / Model 932S UV Analyzers...
- Page 43 Certificate: 1031027 Master Contract: 164369 Project: 70097231 Date Issued: 2017-02-24 The products listed are eligible to bear the CSA Mark shown with adjacent indicators 'C' and 'US' for Canada and US (indicating that products have been manufactured to the requirements of both Canadian and U.S. Standards) or with adjacent indicator 'US' for US only or without either indicator for Canada only.
- Page 44 Upgrade of Optical Bench PCB to eliminate potential voltage spikes. Original Certification for Process Analyzer, Model 93X for use in Hazardous 1031027 2000-03-17 Locations.Originally issued as 2500004397 DQD 507 Rev. 2016-02-18 Page 1 2-20 | Model 931S / Model 932S UV Analyzers...
- Page 45 CSA-certified Model 931S and Model 932S Analyzers are marked with the label shown below. PROCESS INSTRUMENTS Western Research Analyzer Model: ___104-132Vac, 3A ___208-264 Vac, 2A, 50/60 Hz, <500W CLASS I, DIVISION 1 GROUPS B, C & D CLASS I ZONE 1 Ex d IIB+H2 T3, AEx d IIB+H2 T3 Tamb.
- Page 46 2-22 | Model 931S / Model 932S UV Analyzers...
-
Page 47: Chapter 3 Installation And Start-Up
INSTALLATION and START-UP This chapter shows you how to install and start up the Model 931S and Model 932S Analyzers, including: • Safety requirements to consider before working on the analyzer. • Uncrating, inspecting, and storing the analyzer prior to installation. -
Page 48: Safety Considerations
Recommended storage conditions include: Temperature: 0 °C to 50 °C (32 °F to 122 °F) Relative Humidity: < 70 % Failure to comply with these storage conditions will void your warranty. 3-2 | Model 931S / Model 932S UV Analyzers... -
Page 49: Uncrating And Inspecting The Analyzer
Optical Bench appears to be damaged open the ESD packaging (follow ESD precautions to prevent ESD damage to the electronics), observe the Optical Bench, and contact AMETEK with details of the damage. Reseal the ESD-safe packaging while awaiting instructions from AMETEK. -
Page 50: General Installation Information
(breaker) must be connected to and mounted near the analyzer, in an easily accessible area. The switch (breaker) must be clearly la- beled (e.g., “AMETEK Model 932 Analyzer Main AC Power Disconnect Switch”). For safety reasons during maintenance, this switch allows the main AC power to be disconnected from the analyzer prior to performing service on the analyzer. -
Page 51: Installing The Mechanical Components
Final “As-Built” drawings in the analyzer Documentation Package. Location and Environment The Model 931S and Model 932S Analyzers are designed for indoor operation (Pollution Degree 2). In all cases, the analyzer system must be installed indoors to ensure it is shielded from harsh environmental ele- ments. - Page 52 SERIAL COMMUNICATIONS PORT DO NOT OPEN IF A HAZARDOUS GAS ATMOSPHERE IS PRESENT LAYOUT MAY NOT BE EXACTLY AS SHOWN Figure 3-1. Analyzer backpan dimensions (European). 3-6 | Model 931S / Model 932S UV Analyzers...
-
Page 53: Installing The Optical Bench Assembly
Installing the Optical Bench Assembly The Optical Bench Assembly – shipped in a separate box – must be in- stalled in the analyzer’s Upper Enclosure after the analyzer has been installed. All electrical connections to the Optical Bench are made via pre-wired connector plugs. - Page 54 Upper Enclosure layout (Model 932S) and Cam Pin locations. Figure 3-2 illustrates a Model 932S Optical Bench Assembly. However, the installation procedure is the same for Model 931S analyzers. NOTE 3-8 | Model 931S / Model 932S UV Analyzers...
-
Page 55: Installing The Sample System
Refer to the Fuse Legend on the inside of the analyzer’s Lower WARNING Enclosure for locations of these fuses. If parts of the sample system are not supplied by AMETEK, refer to the appropriate instructions and drawings shipped with those NOTE components. - Page 56 Figure 3-3. Backpan component layout (European). Figure 3-3 illustrates a European analyzer with a heated Cell. For your system, refer to Final “As-Built” drawings in the analyzer NOTE Documentation Package. 3-10 | Model 931S / Model 932S UV Analyzers...
-
Page 57: Installing The Sample And Vent Lines
Installing the Sample and Vent Lines The Sample and Vent Lines can be supplied by AMETEK or the customer. The tubing must be 1/4" 316 stainless steel tubing with appropriate 1/4" NPT connectors. Applications that use AMETEK’s Heated Sample Probe will return the used sample gas to the sample stream through the probe. -
Page 58: Installing The Zero/Aspirator Drive Gas Line
3. Connect the line to the Zero/Aspirator Drive Gas Inlet on the analyzer. 4. Connect the Zero gas air line to the Zero gas cylinder or the Instrument Air line to the Instrument Air supply. 3-12 | Model 931S / Model 932S UV Analyzers... -
Page 59: Electrical Connections
EMC Directive regarding NOTE techniques and wiring practices to be followed. To maintain EMC compliance in European installations, AMETEK recommends using metallic glands and shielded cable (at least 85 % coverage) for both power and signal cable connections. -
Page 60: Input/Output Signal Connections
Signal wires, contained within cable that is approved locally for the haz- ardous area, enter the Ex d Lower Enclosure through one of the Signal Cable Entries on the bottom of the enclosure. 3-14 | Model 931S / Model 932S UV Analyzers... -
Page 61: Optional Interface Capabilities
Gas sensor interface options include: • 4–20 mA inputs. • Half-bridge type sensors. • For other types, contact AMETEK. For gas sensor wiring details, refer to the “Analyzer Customer Connections” drawing, part of the Final “As-Built” drawings included in the “Supplemental Information” section of this manual. -
Page 62: Digital Communication
D-sub connector), configured as RS-232, is located on the front of the Lower Enclosure (Figure 3-3). The port is principally intended as a tem- porary connection for configuring and servicing the analyzer while communicating with the analyzer via the AMETEK S93XS System 200 Configurator Software. Hazardous Locations... - Page 63 I/O BOARD CUSTOMER CONNECTIONS 240VAC POWER TERMINATIONS Figure 3-4. Customer Connections, I/O board (European). Installation and Start-Up | 3-17...
- Page 64 Communications Port unless you stop polling from the Customer Data Acquisition Port. Customer Data Acquisition Port RS-485, Full/Half Duplex (Customer RS-485 JP303) To configure Set jumper JP303 to the analyzer for: this position: Full-Duplex (4-Wire) Half-Duplex (2-Wire) 3-18 | Model 931S / Model 932S UV Analyzers...
- Page 65 If it is possible to do so during installation, cable the terminal connections into a nonhazardous area. Ensure that all unused cable/conduit entries to the enclosures are closed with appropriately certified plugs for the haz- ardous area. Use a soft, nonabrasive cloth to gently clean the joining areas (flame- path) of the Upper and Lower Enclosures before closing them.
-
Page 66: Hardware Configuration (Modbus Tcp Communication)
Hardware Configuration (Modbus TCP Communication) If using Modbus TCP to communicate with the analyzer (via the AMETEK S93XS System 200 Configurator Software), a TCP module must be in- stalled and set up before communication between the computer and ana- lyzer can be established. This type of communication connection can be used for configuring and servicing the analyzer, without the use of a serial cable. - Page 67 JP303 JP304 JP302 JP301 JP300 Green Status LED100 Figure 3-6. Host Controller board (P/N 100-1757). Installation and Start-Up | 3-21...
- Page 68 Figure 3-7. Various RS-485 port terminations and bias options (Host Controller board, P/N 100-1757). 3-22 | Model 931S / Model 932S UV Analyzers...
-
Page 69: Ac Power Connection And Fusing
AC Power Connection and Fusing Both the North American and European versions of the Model 931S and Model 932S Analyzers require a power-disconnect switch (break- CAUTION er), rated for at least 250 V , 4 A and certified for the hazardous location (to satisfy local electrical codes, the switch must be certified by the local author ity for the appropriate hazardous location). -
Page 70: European Installation
The AC power connections are made at the terminals designated “H”, “N”, and “G” (at TB1) on the AC Terminal Strip (Figure 3-8, Detail A). For your system, refer to Final “As-Built” drawings in the analyzer Documentation Package. 3-24 | Model 931S / Model 932S UV Analyzers... - Page 71 Figure 3-8. Conduit entries and AC power connection locations, Lower Enclosure. Installation and Start-Up | 3-25...
-
Page 72: S93Xs System 200 Configurator Software Installation
• Windows 7 Professional Edition and later. The System 200 Configurator Software is not certified to operate with Windows Home Editions. • 800 x 600 resolution or higher recommended. • 256-color display, 32767 colors (HiColor, 16-bit) recommended. 3-26 | Model 931S / Model 932S UV Analyzers... -
Page 73: Installing The Configurator Software
2. Click Next to continue with the setup. The Select Installation Folder screen will appear. Follow the instructions to install the software. By default the software will install in C:\Program Files (x86)\Ametek\ AMETEK S93XS Configurator Version #.#. To install the software in... - Page 74 3. Click Next to continue. The Ready to Install screen will appear. Or, to review or change your installation settings, click Back. To begin the installation, click Install. The Installing AMETEK S93XS Configurator Version #.# screen appears, displaying the installation Status.
-
Page 75: Removing The Configurator Software
2. Double-click Programs and Features (or Add or Remove Programs). 3. Select AMETEK S93XS Configurator and click Uninstall (or Remove) to remove the software. 4. In the C:\Program Files (x86)\Ametek folder, delete all remaining fold- ers and files. Installation and Start-Up | 3-29... -
Page 76: Start-Up And Verification
See “Examining and Caring for the Flamepaths” in Chapter 6. Replace parts immediately if damage or wear is apparent. Contact AMETEK if there is any doubt about the integrity of any flamepath. 3-30 | Model 931S / Model 932S UV Analyzers... - Page 77 IMPORTANT Performing analyzer start-up and verification procedures requires us- NOTE ing the System 200 Configurator Software. Familiarize yourself with the software before working on the analyzer. See Chapter 4 for details on how to navigate through the software. To power up the analyzer and verify it is operating properly: 1.
- Page 78 LED D406 (Alarm Valid) LED D407 (Concentration Alarm1) LED D408 (Concentration Alarm2) LED D409 (Span1 Solenoid) LED D410 (Span2 Solenoid) LED D411 (Zero Solenoid) Figure 3-11. Customer I/O board (P/N 100-1758). D401 (Probe Heater) 3-32 | Model 931S / Model 932S UV Analyzers...
- Page 79 d. The green status LED (LED100) on the Host Controller board (Figure 3-6) will stay ON steady for a few seconds before pulsing at a rate of once per second. Verify this operation. The pulsing indicates that communication has been established between the Microcontroller and Host Controller boards.
- Page 80 LED201 (Optical Bench heater) and LED200 (Measuring Cell heater) on the Micro-Interface board are ON steady or pulsing. LED200 (Measuring Cell Heater) LED201 (Optical Bench Heater) Figure 3-13. Micro-Interface board (100-2231). 3-34 | Model 931S / Model 932S UV Analyzers...
- Page 81 g. Check the analyzer temperature zones: While working from the Configurator Software (Analyzer Data tab), view and record the current (start-up) temperature readings for each zone. These values can be used as a reference later while comparing the temperature values after the analyzer has warmed up.
- Page 82 Compare the current temperatures to their respective Setpoint values and their start-up values. Normal operating tem- peratures are values that are within 5 % of their Setpoint values. Figure 3-16. Status tab (Model 932S). 3-36 | Model 931S / Model 932S UV Analyzers...
- Page 83 Status (tab) Output Setup Outputs will vary, depending on the application and analyzer. Model 931S Analyzers are typically equipped with only one V/I output, while Model 932S Analyzers may have up to four. Figure 3-17. Output Setup dialog box.
- Page 84 Chapter 4 before making changes. For more information about NOTE Modbus implementation on the analyzer, contact AMETEK. After configuring the Modbus Port parameters, click OK then Apply. Save the changes to EEPROM. Figure 3-19. Modbus dialog box. 3-38 | Model 931S / Model 932S UV Analyzers...
- Page 85 Upper and Lower Enclosures before closing them. CAUTION Replace the parts immediately if damage or wear is apparent. Contact AMETEK immediately if there is any doubt about the integrity of any WARNING flamepath. 6. Perform an Auto-Setup to optimize the PMT gains of the source lamps.
-
Page 86: Start-Up Diagnostic Checklist
Check the Over-Temp Switch on the Optical Bench Assembly (see Figure 3-2). If the plunger has popped out, press it to reset it. • Check for proper wiring terminations for the appropriate temperature zone. 3-40 | Model 931S / Model 932S UV Analyzers... - Page 87 Corrective Action Take appropriate safety precautions and check the related RTD for a short or an open circuit. If necessary, replace the RTD with an AMETEK-approved replacement part. Contact AMETEK for assistance. Problem Encountered Alarms remain active after the analyzer has warmed up to normal oper- ...
-
Page 88: Sample System Leak Check
(refer to Final “As-Built” drawings in the analyzer Documentation Package), to backpurge the sample system. Allow the purge to continue for 5 minutes. 3-42 | Model 931S / Model 932S UV Analyzers... - Page 89 4. Disconnect the Vent tubing from the analyzer and plug it with a cap fitting. Open the Metering Valve and the Sample Flow Pressure Regulator (regulator closest to the Sample Shut-Off Ball Valve on the Sample Inlet line). 5. Using the Configurator Software, change the Flow Control to ‘2’ ...
- Page 90 See “Setting the Sample Gas Flow Rate and Sample Response Time” for details about setting the flow rate. The procedure is complete and the analyzer is ready to analyze sample gas. 3-44 | Model 931S / Model 932S UV Analyzers...
-
Page 91: Adjusting Analyzer Controls For Normal Operation
Adjusting Analyzer Controls for Normal Operation Setting the Sample Gas Flow Rate and Sample Response Time Sample response time is determined by switching the analyzer’s Flow Control mode from ‘2’ (zero) to ‘0’ (auto) and recording the time it takes the analyzer to display the first reading after the switch. -
Page 92: Setting The Zero Gas Flow Rate
This is less critical if plant nitrogen or instrument air is being used as the Zero gas. Set the response time first to ensure a good zero. NOTE Some applications may require a higher flow rate. 3-46 | Model 931S / Model 932S UV Analyzers... -
Page 93: Normal Operation
Recording Initial Readings AMETEK recommends that you observe and record this information monthly to obtain a history. From these recordings, you will be able to determine if there are problems with the analyzer, such as diminishing PMT signals, or increasing sample response time. -
Page 94: Recording Initial Sample Response Time
Flow Control mode from ‘2’ to ‘0’ is approximately 15 seconds), no further adjustment is necessary. The sample response time may vary, depending on Sample Line length. NOTE 4. Record these signals in a log book every month. 3-48 | Model 931S / Model 932S UV Analyzers... -
Page 95: Analyzer Configuration
Analyzer Configuration EEPROM Data Sheets and Analyzer Programming Parameters, which list the factory-default configuration settings of all programmable parameters, are located in the analyzer Documentation Package. If any changes are made to the original configuration, be sure to record the changes for later reference. If the EEPROM is replaced, this data must be re-entered to override the factory defaults. - Page 96 This page intentionally left blank. 3-50 | Model 931S / Model 932S UV Analyzers...
-
Page 97: Chapter 4 Controller / User Interface
CONTROLLER / USER INTERFACE This chapter contains information about the following topics: • An overview of the Model 93XS Analyzer System 200 Configurator Software. • How to work and navigate through the software. • How to view analyzer data, configure analyzer settings, and perform analyzer functions. -
Page 98: System 200 Configurator Software Overview - Getting Started
Press this butto n to navigate to the computer’s hard drive to locate files, such as the Configurator file (“93XS.dyc”). Press this button to print scanned data (such as Measure/Reference PMT signals) from the analyzer. 4-2 | Model 931S / Model 932S UV Analyzers... - Page 99 Log window)Setup (tab) In the example at left (and illustrated below), after the Gas Calibration (dialog box) Configurator Software is first started, the AMETEK Configurator <<Man Zero (button)>> main window will appear (Devices & Log window is active in this window). To initiate a Manual Zero, double-click Dev1 (<<Device Name>>) on the Devices &...
-
Page 100: Starting The Configurator Software And Establishing Communication Between The Analyzer And Computer
2. Power up the computer and start the 93XS System 200 Configurator Software using one of two methods: • Click S93xs from the Start\All Programs\AMETEK 93XS Configurator Version #.# menu. • Click the S93xs icon on the computer’s desktop. 4-4 | Model 931S / Model 932S UV Analyzers... - Page 101 If at any time you close the 93XS Properties dialog box (by click- ing OK or Cancel), the software will revert to the AMETEK NOTE Configurator window. To return to the 93XS Properties dialog box, double-click Dev1 on the Devices &...
-
Page 102: Closing The Configurator Software
2. From the AMETEK Configurator window, select File\Exit. 3. Power down the computer and disconnect the serial cable from the analyzer’s Communications Port. 4. Close the Communications Port cover and hand-tighten the screw to secure it in place. 4-6 | Model 931S / Model 932S UV Analyzers... -
Page 103: Configurator Software Troubleshooting
Problem Encountered “Wrong Device” is displayed on the Devices & Log window. Corrective Action Check the analyzer markings to ensure it is a Model 931S or Model 932S Analyzer (the 93XS Configurator Software cannot communicate with other analyzer models). The Communication Protocol/Settings information may be incorrect. Review the settings in the Communication Settings dialog box (Modbus Serial or Modbus TCP) and verify or change them to the proper settings. - Page 104 Corrective Action Enable Device Enabled, if necessary, to establish communication. Check the analyzer markings to ensure it is a Model 931S or Model 932S Analyzer (the Configurator Software cannot communicate with other ana- lyzer models). 4-8 | Model 931S / Model 932S UV Analyzers...
-
Page 105: General Tab
General Tab When the analyzer is connected to the PC, the current Host Controller and Microcontroller Firmware Version Number and analyzer Serial Number are displayed to the right of PC Communications (Figure 4-1). Check box selected Configurator Software Version Figure 4-1. General tab (with Modbus Serial communication settings). - Page 106 The PC is not connected to the analyzer (or Device Enabled is selected and Live Data is not selected). Configurator Software version Displays the version of the Configurator Software (below Status). 4-10 | Model 931S / Model 932S UV Analyzers...
-
Page 107: Modbus Serial / Modbus Tcp Communication Setup
Modbus Serial / Modbus TCP Communication Setup The PC can communicate with the analyzer through the Local Service Port or the Remote Service Port, but not both at the same time. The Local Service Port (RS-232) is located on the front of the Lower Enclosure; the Remote Service Port (RS-485) is accessed via connector J303 on the Host Controller board. - Page 108 If using the RS-485 port, enter a unique Modbus address (Slave ID) for the analyzer. For Modbus Serial communication interface: 0 = Disabled 1–255 = Enabled For Modbus TCP communication interface: 0,1 = Disabled 2–255 = Enabled 4-12 | Model 931S / Model 932S UV Analyzers...
- Page 109 Time out (ms) Time out value (duration) that the software will use to attempt to establish communications with the analyzer. AMETEK rec- ommends a value of 1000 ms. If unsure of the Modbus address assigned to the analyzer, use the alternate or “service”...
-
Page 110: User Interface
Contains icons used to save data files (not discussed in this manual). • Status Bar Displays system messages. • Devices & Log window This window is a system event log that lists all devices and their status (see “Viewing Device Activities”). 4-14 | Model 931S / Model 932S UV Analyzers... -
Page 111: Viewing Device Activities
The Devices & Log window displays the status of all active devices (ana- lyzers), plus a system event log of all analyzer operations. This window, which is displayed within the AMETEK Configurator main window (Figures 4-4 and 4-5), can help you diagnose problems with the analyzer. -
Page 112: Saving Analyzer Configuration Parameters
YES to the prompt “Would you like to save the settings to EEPROM?”. During the parameters restoration, the analyzer will temporar- ily go “OFFLINE”. After the restoration is complete, the Name and Description will change to reflect those of the saved parameters. 4-16 | Model 931S / Model 932S UV Analyzers... - Page 113 3. View the Devices & Log window. If the file restoration is successful, the message “This new CFG has been restored successfully!” will be displayed. If the file that is being restored contains identical information as that already saved to the analyzer’s EEPROM, the message “The restored CFG is not new!”...
-
Page 114: Modifying Analyzer Device Settings
The analyzer settings have been configured at the factory to meet customer requirements. Changing the factory-set configuration could CAUTION cause the analyzer to operate incorrectly. Message box Figure 4-7. Setup tab (Model 932S), navigation (Modify) buttons. Save CFG to EEPROM button 4-18 | Model 931S / Model 932S UV Analyzers... - Page 115 Modify ent aspects Contains buttons that allow you to view and set up differ of the analyzer (discussed in the following pages). Dialog boxes for each of the Setup Configuration/Calibration screens discussed in this chapter are sample screens only. Refer to the actual NOTE software screens for enabled/valid parameters for your analyzer.
- Page 116 • You can make changes to multiple Modify Configuration dialog boxes before clicking Save CFG to EEPROM. 4-20 | Model 931S / Model 932S UV Analyzers...
-
Page 117: Saving Analyzer Configuration Parameters To An Ascii File
AMETEK recommends saving and storing these files in path, name the file, and click Save. The file will be saved with a “.dmp” in C:\Program Data\AMETEK extension and stored in C:\Program Data\AMETEK Configurator\S93xs\ Configurator\S93xs\data. data. Figure 4-8. Save As dialog box (Print to File button). -
Page 118: Refreshing Configuration Or Calibration Parameters
Then, click Apply (under the Setup tab). The software will prompt “Would you like to save the settings to EEPROM?”. Click YES to send the new value(s) to the analyzer and save them to EEPROM. 4-22 | Model 931S / Model 932S UV Analyzers... -
Page 119: Optical Bench
Optical Bench The Optical Bench dialog box allows Optical Bench control and data ac- quisition parameters to be viewed and modified. Setup (tab)Optical Bench Figure 4-10. Optical Bench dialog box (Model 932S). ‘**’ following the parameter names below indicates the parameter ... - Page 120 ALC SetPt** The Automatic Lamp Control Setpoint signal is obtained from the Reference PMT for each filter (two for Model 931S; up to six for Model 932S) after an Auto-Setup is complete. These values are updated au- tomatically by an Auto-Setup. The Automatic Lamp Control function adjusts the lamp pulses to maintain the Reference PMT signals to these values.
- Page 121 The expected noise level for the lamps (default is 0.00025). Do not change this. Samples per Peak** Model 931S Analyzers: The number of times the PMT signal is mea- sured for each filter. Model 932S Analyzers: The number of times the PMT signal is mea- sured while a filter is completely within the light path.
- Page 122 (Reference or Measure PMT) with the highest gain. The PMT signal with the highest gain is set to SigMax when each filter is in the light path while the Auto-Setup is in progress. SigMax should be 8000–9000 mV. 4-26 | Model 931S / Model 932S UV Analyzers...
- Page 123 Display During normal operation, these message lines display the real-time status of the species being measured (top line) and its concentration value (bottom line). When an Auto-Setup is in progress, messages indicating the current stage of the Auto-Setup are displayed on the top line. Auto-Setup mes- sages include: •...
-
Page 124: Cell/Miscellaneous (Compensations) Parameters
One value of Z is used for all species. The default value for this parameter is ‘1’, but can be any value between ‘0.5’ and ‘1.5’. The correction is applied to the concentrations in the following manner: <Conc> = <Conc> corr. uncorr. 4-28 | Model 931S / Model 932S UV Analyzers... - Page 125 Default Cell Pres Displays the default absolute pressure for the Measuring Cell (mmHg). This value is used in place of the Measuring Cell pressure when active pressure compensation is disabled. Enter a value to place the pressure compensation into fixed mode (the approximate Measuring Cell pressure).
- Page 126 IMPORTANT Before changing these settings, record the values and selected options. NOTE These settings must be returned to their original state when changing the output display to its original format. 4-30 | Model 931S / Model 932S UV Analyzers...
-
Page 127: Temperature Control
Cell The measure Range (°C) for the Measuring Cell. Probe The parameters for the optional Heated Acid Gas Probe temperature zone. The Probe temperature zone is optional (AMETEK Heated Acid Gas Sample Probe required). Controller / User Interface | 4-31... - Page 128 The alarm indicator box displays active temperature-related alarms. If any alarms are active, see “Diagnostics and Troubleshooting” in Chapter 6 for details about the alarm and corrective action to take to reset the alarm. 4-32 | Model 931S / Model 932S UV Analyzers...
-
Page 129: Optical Bench Temperature Control
Optical Bench Temperature Control The Optical Bench temperature is controlled (by an RTD and heater) to maintain a stable condition for the analysis of the target species and to en- sure that no condensation forms to obscure the light path. The Optical Bench temperature control is protected by an independent over-temperature circuit with a trip temperature of 65 °C. -
Page 130: Measuring Cell (Oven) Temperature Control (Optional)
Measuring Cell temperature Setpoint is factory-set, and is dependent upon the stream temperature. Confirm the Cell/Oven Setpoint for your system on the “Analyzer Programming Parameters” sheet (part of the ana- lyzer Documentation Package). 4-34 | Model 931S / Model 932S UV Analyzers... - Page 131 (JP300, Micro-Interface board) Temperature Range Jumper Position Measuring Range A (default) 5 °C to 65 °C Other ranges are available but AMETEK does not recommend chang- ing the range or the jumpers. NOTE Controller / User Interface | 4-35...
-
Page 132: Heated Acid Gas Sample Probe Temperature Control (Optional)
Too Cold NOTE Setpoint or exceeds its Too Hot Setpoint the “w: Probe tempera- Status (tab)<<HC ture too low” alarm will be triggered and displayed in the software. Scode>> 4-36 | Model 931S / Model 932S UV Analyzers... -
Page 133: Output Setup
Output Setup The Output Setup dialog box contains current and voltage output assign- ments plus concentration alarms and setting parameters. Setup (tab)Output Figure 4-13. Output Setup dialog box, with two streams. There are four independent isolated 4–20 mA outputs (see Figure 3-4, Customer Connections, I/O Board) that can be either loop-powered (loop supply by customer) or self-powered. - Page 134 . Enter ‘0’ if an output is not used. High Scale (Full Scale) The voltage Full Scale setpoint corresponding to 5000 mV . Enter ‘0’ if an output is not used. 4-38 | Model 931S / Model 932S UV Analyzers...
- Page 135 Zero (mV) The measured voltage output when the analog output is set to zero scale during the Zero calibration procedure for a voltage output. Span (mV) The measured voltage output when the analog output is set to full-scale during the Span calibration procedure for a voltage output.
-
Page 136: Sensors Setup
NOTE a certain sensor type is indicated in the following descriptions, where applicable. Figure 4-14.1. Sensors dialog box (Model 932S), Sensor 1 with Differential Signal Type selected. 4-40 | Model 931S / Model 932S UV Analyzers... - Page 137 Sensor Enabled Check this to enable the sensor assigned to this circuit (example, for CO measurement). All parameters and action buttons for a sensor are ignored if the sensor is not enabled. Species Name Enter the species being measured by the sensor. This will be dis- played in other software screens.
- Page 138 Figure 4-14.2. Sensors dialog box (Model 932S), Sensor 1 with Voltage Signal Type selected. Figure 4-14.3. Sensors dialog box (Model 932S), Sensor 2. Figure 4-14.4. Sensors dialog box (Model 932S), Sensor 3. 4-42 | Model 931S / Model 932S UV Analyzers...
- Page 139 Span-Cal Span Concentration The concentration of the component (%) in the calibration gas mixture, for each sensor (entered in decimal notation). Enter ‘0’ if a calibration gas is not used. Span Factor The Span (calibration) Factor for the calculated result (component concentration), for each sensor (adjusted automatically at the completion of a Span).
- Page 140 The concentration in % of the interfering gas, Gas #1 or Gas #2, in the sample stream. Compensation Factor The factor, corresponding interfering gas, Gas #1 or Gas #2, used in the interference compensation calculation. 4-44 | Model 931S / Model 932S UV Analyzers...
- Page 141 UV Result Compensation Species** Select the UV species the analyzer is measuring to compensate the concentration measured by the sensor. Options include all UV spe- cies measured by the analyzer and the calculated Custom result. Select Disabled if no UV species compensation is required. Factor** The factor used in the UV species compensation calculation.
-
Page 142: Modbus Settings
This file can then be imported and opened us- ing MS Excel. The field at the bottom of this dialog box (that is, RTU 9600 N 8 1 in Figure 4-15) represents the current settings. 4-46 | Model 931S / Model 932S UV Analyzers... -
Page 143: Matrix
Setup (tab)Matrix by interfering gas species. The Matrix dialog box is used only for the Model 932S Multi-Gas Analyzer. For the Model 931S Single-Gas Analyzer, the Matrix but- NOTE ton is greyed out (function is not available). Figure 4-16. -
Page 144: Analytical Parameters
Analytical Parameters The Analytical Parameters dialog box is used only for the Model Setup (tab)Analytical 932S Multi-Gas Analyzer. For the Model 931S Single-Gas Analyzer, Parameters NOTE the Analytical Parameters button is greyed out (this function is not available). -
Page 145: Analog Inputs
Analog Inputs The Analog Inputs dialog box allows you to configure various parameters for the analog inputs associated with the analyzer. Setup (tab)Analog Inputs Figure 4-18. Analog Inputs dialog box. ‘**’ following the parameter names below indicates the parameter should only be modified by a trained technician. - Page 146 Auto-Zero. After entering a value, click Apply to save the changes. Refresh button Reverts the changes made on this screen back to their original settings, but only before you click OK to exit this screen. 4-50 | Model 931S / Model 932S UV Analyzers...
-
Page 147: Setting Gas Calibration Parameters
Setting Gas Calibration Parameters The Gas Calibration dialog box contains gas species information and sample system control parameters that are used to Span and Zero the Setup (tab)Gas Calibration analyzer. Figure 4-19. Gas Calibration dialog box (Model 932S). Result Code Each of these factory-set Result Codes corresponds to a specific spe- cies. - Page 148 Initializes the analyzer to automatically cycle sequentially through the Auto-Zero and Auto-Span functions. Only the func- tions with timers set to non-zero durations are included. The zero offset and calibration will be auto- matically adjusted. 4-52 | Model 931S / Model 932S UV Analyzers...
- Page 149 AutoZero button Initializes the analyzer to automatically introduce Zero gas into the sample system. The Span1 CAL, Span2 CAL, and Zero CAL solenoids are configured (at the fac- tory) on the Alarm Setting and Stream Switch Parameters dialog box (under Flow Setup (tab)Alarm/ Operation).
- Page 150 Auto-Zero sequence. The Auto-Zero will be included in the Auto- Calibration sequence if Auto-Zero is enabled and Timer0 duration is not ‘0’. 4-54 | Model 931S / Model 932S UV Analyzers...
- Page 151 ACAL Interval (hr) Enter a value (hours) that controls the interval between Auto-Calibration se- quences. The interval can be set from 0–999 (default = 0 hours). Enter ‘0’ to turn off the timer, disabling a timed start of the Auto- Calibration Zero sequence.
- Page 152 Manually forces the analyzer to switch to sampling from Stream B. 7 = sample Manually forces the analyzer to continuously sample. Apply button Applies the changes made to the Flow Control mode. 4-56 | Model 931S / Model 932S UV Analyzers...
-
Page 153: Alarm Setting And Stream Switch Parameters
Alarm Setting and Stream Switch Parameters The Alarm Setting and Stream Switch Parameters dialog box contains gas species information and sample system control parameters. Setup (tab)Alarm/ Stream Switch Figure 4-20.1. Alarm Setting and Stream Switch Parameters dialog box (Model 932S), Single Stream. - Page 154 The value at which the Concentration Alarm will be reset, unless Enable latching is checked (enabled). Time delay(sec) The duration (seconds), that the Concentration Alarm will be delayed before it is triggered. 4-58 | Model 931S / Model 932S UV Analyzers...
- Page 155 Enable latching check box Checked The activated warning relay will latch (will not clear) until you disable the concentra- tion alarms by clicking the Conc. Alarm Soft Enable On/Off button on the Status tab. Not Checked The relay will automatically return to its non-alarm state once the concentration falls below the concentration Off-threshold value.
- Page 156 A is selected from the Stream Selection list. Sample Stream B Combination of solenoids activated when stream B is selected from the Stream Selection list. Assignment This is a code representing the solenoid combination. 4-60 | Model 931S / Model 932S UV Analyzers...
- Page 157 Flow Switch Alarm Allows you to set up the conditions for the Low flow detected alarm. Alarm Type Allows you to set the type of alarm that will be displayed when a flow switching alarm is detected. Options include: 0 = warning (data is suspect; analyzer re- quires service) 1 = fault (data is invalid;...
-
Page 158: Analyzer Information
Microcontroller board software version. Serial # Analyzer serial number. EEPROM Writes The number of times that new configuration data has been saved to the analyzer’s EEPROM. The maximum allowable number of saves is 20,000. 4-62 | Model 931S / Model 932S UV Analyzers... - Page 159 Parameters” in this chapter). Model ID Displays a code (see Analyzer Legend, below) that the software uses to define the AMETEK analyzer model the software is currently com- municating with (not user adjustable). Analyzer models include: 151 = M931S (Model 931S Analyzer)
-
Page 160: Viewing Analyzer Data
Displays the communication status between the analyzer and the Configurator Software. Messages that can appear here include: Online, OFFLINE, DISABLED, Wrong Device (if the analyzer can- not be recognized), or DEMO. 4-64 | Model 931S / Model 932S UV Analyzers... - Page 161 Host Runtime The length of time the Host Controller board has been operational since the last analyzer reset. Micro Runtime The length of time the Microcontroller board has been operational since the last analyzer reset. Host Controller Board software version Displayed next to Host Runtime (HC/93x Vx.xx), only if the Configurator Software is communicating with the analyzer.
- Page 162 Analyzer Data tab (Time to end of cal). Stabilizing concentration readings The analyzer is stabilizing (prior to opera- tion), following power-up or a reset. 4-66 | Model 931S / Model 932S UV Analyzers...
- Page 163 Calibration Status The status of the calibration functions is dis- played on this display. Depending on which calibration function is in progress, one of the following messages is displayed: Auto-CAL, Auto-Zero, Auto-span1, Auto- span2 (Model 932S Analyzer only), Manual- zero, Manual-span1, Manual-span2 (Model 932S Analyzer only).
- Page 164 Whenever a Fault alarm condition exists, the text on the Display message lines on the Optical Bench, Sensors, Gas Calibration, and Information dialog boxes will turn Red to indicate a fault status. 4-68 | Model 931S / Model 932S UV Analyzers...
- Page 165 Conc. Alarm Valid (Relay) Indicates whether the Concentration Alarm is Valid or not (Invalid). When the status is Invalid, this field has a Red background. When the Conc. Alarm relays are configured as Stream Indicators rather than as Concentration Alarm Indicators: Concentration Alarm 1 relay indicates StreamA selected for analysis.
-
Page 166: Analyzer Data Tab
Analyzer Data tab (Model 932S). Results Displays each gas species being measured (one for Model 931S Analyzers; up to six for Model 932S Analyzers) and their live values (updated at one-second intervals). This information is also displayed in the Display field on the Optical Bench, Gas Calibration, and Info dialog boxes, and Status tab. - Page 167 Countdown timers Time to next auto-zero(min) The amount of time until the next Auto-Zero starts. Minus 1 (-1) indicates timed Auto-Zero is disabled. Time to next auto-cal(min) The amount of time until the next Auto-Calibration starts. Minus 1 (-1) indicates timed Auto-Calibration is disabled. Time to end of cal(sec) The amount of time left in the Calibration Integration Timer (see ...
- Page 168 Displays the real-time status of the analyzer’s relays: Conc. alarm invalid relay (Invalid/Valid) Warning relay (Warning/Normal) Fault relay (Fault/Normal) Solenoid Control Bits Displays the real time status of the solenoids (Solenoid A, Solenoid B, Solenoid Z). 4-72 | Model 931S / Model 932S UV Analyzers...
-
Page 169: Optical Bench Data Tab
The Optical Bench Data tab displays live data results from various signals that originate from each filter in the Optical Bench. For Model 931S Analyzers, only Filter 1 and Filter 2 data will be displayed; for Model 932S Analyzers, data for all six filters will be NOTE displayed. - Page 170 This page intentionally left blank. 4-74 | Model 931S / Model 932S UV Analyzers...
-
Page 171: Chapter 5 Calibration
This procedure describes calibrating the analyzer and the various optional infrared (IR) and thermal conductivity (TC) sensors that can be used with the Model 931S or 932S Analyzer. The procedure is generally the same for each of the sensors, except where noted. To verify range and output gas type requirements for the sensor(s) used in your application, refer to the Final “As-Built”... -
Page 172: Calibrating The Analyzer And Gas Sensors
Type selected on the Sensor 1 screen. Depending on how the sensor is NOTE configured for your application, data for the sensor will be dis-played on either the Sensor 1, Sensor 2, or Sensor 3 screen. 5-2 | Model 931S / Model 932S UV Analyzers... -
Page 173: Manual Zero Gas Calibration
Manual Zero Gas Calibration A Manual Zero forces the analyzer to purge the sample system with Zero gas which removes any residual contaminants in the sample system. See also “Setting Gas Calibration Parameters” in Chapter 4. To manually Zero the analyzer: 1. -
Page 174: Manual Span Gas Calibration
“Manual-span2” for Model 932S Analyzers only). At the completion of the Span, confirm that the Span Factor (SFactor, Gas Calibration dialog box) for the species has been updated. The default value for Span Factor is 1.0. 5-4 | Model 931S / Model 932S UV Analyzers... - Page 175 Figure 5-2. Analyzer Data tab (Model 932S). 8. Bleed down the Span gas and disconnect it from the Span gas connec- tion point. 9. Replace and tighten the Swagelok cap on the Span gas connection point. 10. Turn on the Zero gas and adjust the pressure to the level it was at be- fore Spanning the analyzer.
- Page 176 POWER & HAG PROBE POWER CABLE ENTRY, ANALOG LAYOUT MAY NOT BE EXACTLY AS SHOWN SIGNAL, DISCRETE & HAG PROBE RTD SIGNAL Figure 5-3. Span gas and Zero gas inlet locations. 5-6 | Model 931S / Model 932S UV Analyzers...
-
Page 177: Sensors Calibration
Sensors Calibration The calibration procedure takes approximately 15–30 minutes to complete. If configured, a concentration alarm may occur if the sensor fails or goes significantly out of calibration. Figure 5-4 shows the Sensors dialog box with Differential Signal Type selected on the Sensor 1 screen. Depending on how the sensor is NOTE configured for your application, data for the sensor will be displayed on either the Sensor 1, Sensor 2, or Sensor 3 screen. - Page 178 Span the analyzer, as described in Step 2-a, then bleed down the Span gas and disconnect it from the analyzer. If there is another sensor to span, continue with Step 2-c. If not, continue with Step 3. 5-8 | Model 931S / Model 932S UV Analyzers...
- Page 179 c. Span the third sensor (if used): Connect the Span gas cylinder (for the species being measured by Sensor3, for example) to the analyzer. Span the analyzer, as described in Step 2-a, then bleed down the Span gas and disconnect it from the analyzer. Continue with Step 3.
-
Page 180: Analog Output Calibration
I/O board) and measure the current of Output 1. Under Current Outputs, enter the value next to Zero (mA), under the first column (Output 1). Place a 250 Ohm resistor in series of the multi-meter for accurate calibration. 5-10 | Model 931S / Model 932S UV Analyzers... - Page 181 c. Repeat this step for Output 2 (Pins 3 and 4), Output 3 (Pins 5 and 6), and Output 4 (Pins 7 and 8), recording the value for each output in the corresponding field. d. Click Apply to save the changes. e.
-
Page 182: Voltage Calibration
Repeat this step for Output 2 (Pins 3 and 4), Output 3 (Pins 5 and 6), and Output 4 (Pins 7 and 8), recording the value for each output in the corresponding field. 5-12 | Model 931S / Model 932S UV Analyzers... - Page 183 c. Click Apply to save the changes. d. To test the accuracy of the output channels, click Mid-Scale to turn On this function. Verify the voltage outputs are 3000 mV, ± 5 mV. e. Click the Span Cal button to change its status to Off. 3.
- Page 184 This page intentionally left blank. 5-14 | Model 931S / Model 932S UV Analyzers...
-
Page 185: Chapter 6 Maintenance And Troubleshooting
MAINTENANCE and TROUBLESHOOTING This chapter discusses preventive maintenance to keep the analyzer sample system operating at peak efficiency, how to check for plugging in the analyzer sample system, and how to replace internal parts. This chap- ter also discusses how to view alarms (errors) that can be used to diagnose and troubleshoot problems with the analyzer. -
Page 186: Preventive Maintenance
Most leaks are preventable with regular cleaning and replacement of the Measuring Cell o-rings. Leak check the analyzer’s sample system whenever it has been dis- mantled for maintenance. 6-2 | Model 931S / Model 932S UV Analyzers... -
Page 187: Analyzer Preventive Maintenance Schedule
For complex maintenance procedures not discussed in this manual, such as replacing heaters, RTDs, or electronic boards, contact AMETEK. Or, review Chapter 7 and then contact AMETEK for assistance with returning the assembly/analyzer to the factory for repair. Analyzer Preventive Maintenance Schedule... - Page 188 The gap must not exceed the listed gap for each location; if the gap exceeds this value, contact AMETEK for advice. See “Examining and Caring For the Flamepaths” in this chapter. • Upper/Lower Enclosure flanges (enclosure door and housing joining surfaces).
-
Page 189: Preventing, Detecting, And Locating A Plug In The Sample System
Preventing, Detecting, and Locating a Plug in the Sample System Preventing a plug in the sample system: While various factors can contribute to plugs in the sample system, plugs can be avoided in many cases by: • Maintaining the ambient temperature around the analyzer, and the operating temperatures for each analyzer temperature zone. - Page 190 PSIA) or 0–700 KPAA (0–100 PSIA). After confirming that the plug is somewhere in the sample inlet, take all appropriate safety precautions and dismantle the sample system, NOTE starting at the Sample Probe. 6-6 | Model 931S / Model 932S UV Analyzers...
-
Page 191: Changing Out Replaceable Parts
Changing Out Replaceable Parts The following sections discuss parts that should be replaced, as per the “Analyzer Preventive Maintenance Schedule.” Preventing leaks in the sample system is critical to proper analyzer operation. If sample gas migrates into the Reflector Block or Optical CAUTION Bench (uncommon) due to a leak in the Measuring Cell, the optics will become damaged and most likely require replacement. - Page 192 Figure 6-1. Upper Enclosure layout, Cell Window Housing. Figure 6-1 illustrates a Model 932S Optical Bench Assembly. However, this maintenance procedure is the same for Model 931S NOTE Analyzers. 6-8 | Model 931S / Model 932S UV Analyzers...
- Page 193 “P/N” refers to Part Number. NOTE To clean and replace parts in the Measuring Cell (see Figures 6-1 and 6-2): Hazardous Locations Before proceeding, test the area around the analyzer for explosive WARNING gases and proceed only when the area is found to be safe. Do not remove the cover of the Explosion-Proof Digital Communications Port on the front of the Lower Enclosure, do not connect a serial cable to the Communications Port, do not open the...
- Page 194 Inspect the interior of the Measuring Cell for particulate and clean it with a nonabrasive detergent and water solution, Isopropanol, or reagent-grade acetone followed by a rinse with pharmaceutical- grade distilled water. Allow all components to dry thoroughly before reassembling. 6-10 | Model 931S / Model 932S UV Analyzers...
- Page 195 Figure 6-2. 40 cm Measuring Cell. Figure 6-2 illustrates a 40 cm Measuring Cell. Assembly drawings and maintenance procedures for other types of Measuring Cells can NOTE be found in Manual Supplements in the “Supplemental Information” section of this manual. The supplements also list part numbers for the replaceable parts (o-rings and Cell Window).
- Page 196 Cell Window Housing with the (3) screws removed earlier. Tighten the screws evenly. 10. Reconnect the sample tubing to the Measuring Cell. 11. Power up the analyzer and computer. 6-12 | Model 931S / Model 932S UV Analyzers...
- Page 197 12. Allow the analyzer to warm up then perform a leak check on the sample system fittings that were disconnected. See “Sample System Leak Check” in Chapter 3. Analyzers without Heated Cells: If the leak check passes, continue with Step 13. Analyzers with Heated Cells: If the leak check passes, replace the Insulating Jacket or close the Oven door to allow the Cell to warm up to normal operating temperature...
-
Page 198: Source Lamp Replacement
• The “w: ALC out of range” alarm is displayed on the Status tab. Figure 6-3. Optical Bench Data tab (Model 932S). Figure 6-4. HC Scode and MC Scode alarm lists, Status tab (Model 932S). 6-14 | Model 931S / Model 932S UV Analyzers... -
Page 199: About The Source Lamps
About the Source Lamps • Source Lamp 1 is closest to the Measuring Cell. • The cathode of the source lamp must be centered on the optical axis of the Beam Splitter for optimal operation of the analyzer. The cathode and the outer envelope of the lamp are not necessarily concentric or consistent from lamp to lamp. - Page 200 Model 932S Optical Bench Assembly. Figure 6-5 illustrates an Optical Bench Assembly from a Model 932S Analyzer. However, the lamp replacement procedure is the same for a NOTE Model 931S Analyzer. 6-16 | Model 931S / Model 932S UV Analyzers...
- Page 201 2. If the analyzer uses measured Pressure Compensation (optional), change the pressure compensation to fixed mode so that a “f: Sample gas pressure too low” alarm does not occur. To do this, view the Cell/ Misc Parameters dialog box and enter a value in the Default Cell Setup (tab)Cell/Misc Pres (pressure compensation) field that is the same as, or approxi- mately, the Measuring Cell pressure.
- Page 202 OK. Do not save the changes to EEPROM. Allow the Zero gas to flow for 2–3 minutes. c. Perform an Auto-Setup. See “The Auto-Setup Sequence” in this chapter. Setup (tab)Optical Bench<<Auto-Setup>> 6-18 | Model 931S / Model 932S UV Analyzers...
- Page 203 Figure 6-6. Gas Calibration dialog box (Model 932S). 9. From the Optical Bench dialog box, disable (turn off) Alc On (off = unchecked). Alc On must be disabled so the analyzer does not make automatic adjustments while you are setting the Measure and Reference signals to operate at optimum ratios to each other, as described below.
- Page 204 Scan from the context menu to view the Msr PMT Signals Trend Properties dialog box (Figure 6-9). b. To assign an input to a channel click the first (top) button under Channels to select it. 6-20 | Model 931S / Model 932S UV Analyzers...
- Page 205 Next, click Device under Data Source to enable the Input Channel drop-down list box. From this list, select “PMT Msr1” to assign this signal to the first channel. Model 931S Analyzers: Repeat Step b and Step c to assign “PMT Msr2” to the next channel.
- Page 206 If the Flow Control mode is left in any mode other than ‘0’ (auto), the message “Flow Control not in Auto” will be displayed in the Operational Message window on the Status tab. 6-22 | Model 931S / Model 932S UV Analyzers...
- Page 207 16. If the analyzer uses measured Pressure Compensations (optional), return the setting to measured. 17. Open the valves isolating the analyzer from the sample stream and/or remove the cap from the Vent Line outlet. 18. Close the Configurator Software, power down the computer, and disconnect the serial cable from the analyzer’s Communications Port.
-
Page 208: When Is An Auto-Setup Required / Not Required
The PMT Level signal adjusts the gain of both PMTs simultaneously in the same direction. PMT Balance adjusts the gain of the two PMTs in opposite directions by controlling a virtual ground circuit on the Optical Bench board. 6-24 | Model 931S / Model 932S UV Analyzers... - Page 209 • Have there been any leaks from the Measuring Cell? If so, check the condition of the Optical Filters, Beam Splitter, Mirrors, Windows, Lenses, and o-rings in the Optical Bench and in the Measuring Cell (including Reflector Block). Contact AMETEK for procedures not dis- cussed in this manual. ...
-
Page 210: Auto-Setup Fault Message And Corrective Action
If the conditions have been met and you wish to proceed with the Auto-Setup, click Yes. If not, click No. The Auto-Setup takes about 3 minutes to complete. 6-26 | Model 931S / Model 932S UV Analyzers... -
Page 211: Cancel Auto-Setup
Observe the top line of the Display readout. The following messages are displayed during the Auto-Setup sequence: • Adjusting PMT Level • Adjusting Lamp Pulses • Adjusting PMT Balance • Adjusting PMT Level • Adjusting Lamp Pulses • Setting Up ALC •... -
Page 212: Manipulating The Pmt Level And Pmt Balance
3. After the Zero is complete, change the Flow Control setting back to ‘0’ (auto). Click OK then Apply. Save the changes to EEPROM. 4. From the Status tab, click Conc. Alarm Soft Enable On/Off to enable the Concentration Alarms then click OK. 6-28 | Model 931S / Model 932S UV Analyzers... - Page 213 Jumper Positions P300 P301 Higher PMT Balance Figure 6-10. Optical Bench board Lower PMT P300/P301 jumper Balance position vs PMT balance. When changing jumpers, one must be present in one of the six posi- tions at all times. NOTE Maintenance and Troubleshooting | 6-29...
-
Page 214: Source Lamp Alignment
8. Tighten the Locking Screw located between the two source lamps. 9. Tighten the Lamp Clamping Screw to secure the lamps. Do not over- tighten; the spring should not be collapsed. 6-30 | Model 931S / Model 932S UV Analyzers... - Page 215 10. Tighten the Lamp Retaining Screw to secure the lamp socket. Do not overtighten; the spring should not be collapsed. 11. Swing the Microcontroller/Micro-Interface board assembly back to its original position and tighten the (2) M3 X 8 screws on its mounting bracket.
-
Page 216: Chopper Assembly Maintenance - Model 932S Analyzers Only
Flow Control mode. Click the ManZero button to initiate a Manual Zero then click OK. Do not save the chang- es to EEPROM. Allow the Zero gas to flow for 2–3 minutes. 6-32 | Model 931S / Model 932S UV Analyzers... - Page 217 2. Analyzer with Heated Cells: Remove the Insulating Jacket or open the Oven door to allow the Cell to cool down enough to work on it. 3. If the analyzer uses measured Pressure Compensation (optional), change the pressure compensation to fixed mode so that a “f: Sample gas pressure too low”...
- Page 218 • Optional: If your analyzer has a Cell Heater, disconnect the Heater Cartridge wire (marked ‘N’) at J200 (Terminal 2) and the Overtemp Switch wire (marked ‘L’) at J200 (Terminal 1). J104 J300 J200 J103 Figure 6-11. Micro-Interface board (100-2231). 6-34 | Model 931S / Model 932S UV Analyzers...
- Page 219 c. Disconnect the terminals of the green/yellow ground wire that runs from the interior bottom of the Upper Enclosure to the Optical Bench. d. Optional: If your analyzer uses the Optical Bench Purge, discon- nect the purge line (black tube) from the Optical Bench Purge Fitting (Figure 6-12).
- Page 220 The Cam Pins must stay aligned while the Optical Bench is being installed in the enclosure. The lined groove on the head of each Cam NOTE Pin must be parallel to the Measuring Cell until the Optical Bench is in place. 6-36 | Model 931S / Model 932S UV Analyzers...
- Page 221 Figure 6-12. Optical Bench Chopper Assembly Maintenance diagram (100-2313-1A). Maintenance and Troubleshooting | 6-37...
- Page 222 ‘0’ (auto). Click Apply (next to Flow Control). Click OK then save this parameter change to EEPROM by clicking the Save CFG to EEPROM button on the Setup tab. 14. If the analyzer uses measured Pressure Compensations (optional), return the setting to measured. 6-38 | Model 931S / Model 932S UV Analyzers...
- Page 223 15. Open the valves isolating the analyzer from the sample stream and/or remove the cap from the Vent Line outlet. 16. Close the Configurator Software, power down the computer, and disconnect the serial cable from the analyzer’s Communications Port. Close the Communications Port cover and hand-tighten the screw to secure it in place.
-
Page 224: Examining And Caring For The Flamepaths
0.1 mm (Group IIB) or 0.04 mm (Group IIB+H2). If any gap exceeds its maximum flamepath gap value, contact AMETEK for advice. See Warning below. In all locations, use stain- less steel fasteners with yield strength ≥450 MPa (65,300 psi). - Page 225 Replace the parts immediately if damage or wear is apparent. Contact AMETEK immediately if there is any doubt about the integrity of any flamepath. Maintenance and Troubleshooting | 6-41...
-
Page 226: Upper/Lower Electronics Enclosure Flamepaths (Joining Surfaces)
WARNING not attack aluminum (a suitable agent is Isopropanol). Following any maintenance and/or cleaning – and after the cleaning fluid has evaporated completely – immediately close the Ex d Upper/Lower Enclosure. 6-42 | Model 931S / Model 932S UV Analyzers... -
Page 227: Troubleshooting And Diagnostics
Upper/Lower Enclosures, and do not power up/down the analyzer or computer if there is an explosive gas atmosphere present. The Model 931S and Model 932S Analyzers have a built-in alarm detec- tion system that continuously monitors the operation of key param- eters. - Page 228 If the Alarm Enable digital input is wired to a customer’s Distributed Control System, have the system toggle that line from Enabled to Disabled and then back to Enabled at least one second later. 6-44 | Model 931S / Model 932S UV Analyzers...
-
Page 229: Host Controller Board Alarm Conditions And Corrective Action
(95 % used). Corrective Action: • Replace the EEPROM as soon as possible. Contact AMETEK to verify operation before removing the EEPROM and for information about installing the new EEPROM to ensure your analyzer will operate the same as it did prior to replacing the EEPROM. - Page 230 Hot temperature. Control Take appropriate safety precautions, and: • Check the Probe RTD – inside the Probe Heater Assembly – for a short or open circuit. Contact AMETEK to verify operation before removing this component. w: Excessive zero drift Warning This condition indicates excessive Zero Drift, such as when Zero gas transmission values attained after a Zero have exceeded user specified values.
- Page 231 • Confirm that the pressure transducer jumpers on the Customer I/O board are configured correctly. See “Cell/Miscellaneous (Compensation) Parameters” in Chapter 4. • Replace the Customer I/O board. Contact AMETEK to verify operation before removing this board. w: Sample gas pressure range Warning The sample gas pressure is above 99 % of the full-scale range.
- Page 232 • Check the flow switch for plugs and/or for an open circuit. Take appropriate safety precautions, open the Upper Enclosure, and: • Check the Micro-Interface board by simulating the low flow switch output. 6-48 | Model 931S / Model 932S UV Analyzers...
- Page 233 • Check the connections of the cable between the Host Controller (J300) and Micro-Interface (J104) boards. Inspect it for damage (cuts, nicks, burn marks, etc.). • Replace the Microcontroller, Host Controller, and/or Micro-Interface boards. Contact AMETEK to verify operation before removing any of these boards. f: Analytical data not received Fault This serious system Fault condition indicates the Host Controller board is not receiving analytical data from the Microcontroller board.
- Page 234 If this doesn’t correct the alarm, take appropriate safety precautions, open the Lower Enclosure, and: • Check the pressure transducer. • Replace the Customer I/O board. Contact AMETEK to verify operation before removing this board. Fault f: On-Chip A/D not responding The Host Controller board’s internal analog-to-digital converter (A/D) is not...
- Page 235 • Check the Probe RTD – inside the Probe Heater Assembly – for a short or an open circuit. Contact AMETEK to verify operation before removing this component. Refer to the Heated Acid Gas Sample Probe Installation and Maintenance Guide for a maintenance procedure to replace this part.
- Page 236 • Check the flow switch for plugs and/or for an open circuit. Take appropriate safety precautions, open the Upper Enclosure, and: • Check the Micro-Interface board by simulating the low flow switch output. 6-52 | Model 931S / Model 932S UV Analyzers...
- Page 237 Figure 6-14. AC Distribution board (P/N 100-1771). Maintenance and Troubleshooting | 6-53...
- Page 238 SW100 Figure 6-15. Host Controller board (P/N 100-1757). 6-54 | Model 931S / Model 932S UV Analyzers...
- Page 239 SW400 Figure 6-16. Microcontroller board (P/N 100-1781). Maintenance and Troubleshooting | 6-55...
-
Page 240: Microcontroller Board Alarm Conditions And Corrective Action
• Replace the Optical Bench and/or PMT Buffer boards. Contact AMETEK to verify operation before removing these boards. 6-56 | Model 931S / Model 932S UV Analyzers... - Page 241 Decimal Alarm Value Type Alarm Condition / Description and Suggested Corrective Action Warning w: ALC out of range One or both lamp pulse current-control signals has exceeded 9500 mV. The Lamp Maximum range is typically 4500–7800 mV. When this alarm occurs, the Setup (tab)Optical analyzer will initiate an Auto-Zero and then an Auto-Setup, to a maximum of three Bench...
- Page 242 (jumpers 1-2). See “Temperature Control” in Chapter 4. • Check the Measuring Cell RTD (Upper Enclosure, see Figure 6-1) for a short or an open circuit. Replace the RTD, if necessary. Contact AMETEK to verify operation before removing this component.
- Page 243 (jumpers 2-3). See “Temperature Control” in Chapter 4. • Check the Optical Bench RTD (Upper Enclosure, Figure 6-1) for a short or an open circuit. Replace the RTD, if necessary. Contact AMETEK to verify operation before removing this part. • Check the heater control circuit: - Check fuse F4 on the AC Distribution board in the Lower Enclosure (Figure 6-14).
- Page 244 • Ensure the Measuring Cell and its Windows are clean and not damaged. • Check and clean, if necessary, the Mirror in the PMT Block. Contact AMETEK to verify operation before checking. 6-60 | Model 931S / Model 932S UV Analyzers...
- Page 245 Final “As-Built” Analyzer Customer Connections drawing in the Analyzer Documentation Package. If the sensor is faulty, replace the sensor. Contact AMETEK to verify sensor operation, to order a new sensor, and/or to remove and replace the sensor.
- Page 246 (A/D) is not responding. Corrective Action: Take appropriate safety precautions, open the Upper Enclosure, and: • Replace one or both of the A/D converters. Contact AMETEK to verify operation before removing these components. • Replace the Microcontroller board. Contact AMETEK to verify operation before removing this board.
- Page 247 • Check the connections of the cable between the Host Controller (J300) and Micro-Interface (J104) boards. Also, inspect it for damage (cuts, nicks, burn marks, etc.). • Replace the Microcontroller, Host Controller, and/or Micro-Interface boards. Contact AMETEK to verify operation before removing any of these boards. Maintenance and Troubleshooting | 6-63...
- Page 248 (jumpers 1-2). See “Temperature Control” in Chapter 4. • Check the Measuring Cell RTD (Figure 6-1) for a short or open circuit. Replace the RTD, if necessary. Contact AMETEK to verify operation before removing this component. • Replace the Micro-Interface board. Contact AMETEK to verify operation before removing this board.
-
Page 249: Analyzer Reset
Analyzer Reset If the Host Controller board or Microcontroller board must be reset, take appropriate safety precautions and cycle the AC power to the analyzer off for a minimum of 15 seconds before cycling it on again. If this doesn’t correct the alarm, view the Info dialog box and click the HC ... - Page 250 This page intentionally left blank. 6-66 | Model 931S / Model 932S UV Analyzers...
-
Page 251: Chapter 7 Service And Parts
SERVICE and PARTS This chapter discusses what to do if you need technical support from AMETEK, or if you are returning parts for service. This chapter also lists the recommended spare parts to have on hand to ensure preventive maintenance is performed according to the schedule in Chapter 6. -
Page 252: Returning Equipment
Return Material Authorization (RMA) number. This will ensure your equipment is serviced and returned to you in a prompt and efficient manner. To obtain a RMA number, contact your local or nearest AMETEK Service Centre and have the following information available: •... -
Page 253: Answers To Your Questions
• START UPS all of the AMETEK process analyzers at your facility. Your decision to buy an AMETEK analyzer is greatly • AFTERMARKET SALES appreciated. After the time and money spent on your analyzer, wouldn’t you expect a fast and successful... -
Page 254: Recommended Preventive Maintenance Spare Parts
Because the Model 931S and Model 932S Analyzers are designed to ac- commodate a wide variety of applications (and therefore can accommo- date a variety of sample system components), there is no typical spare parts list available for the analyzer’s Optical Bench and sample system. -
Page 255: Spare Analyzer Fuses
Spare Analyzer Fuses AMETEK recommends having on-site spare fuses used in the analyzer. These fuses do not need to be changed out at regular intervals, but are necessary in the event that a fuse has blown and a replacement is required. -
Page 256: Replacement Boards
Ordering a Hard Copy of the Analyzer Operator’s Guide To order a hard copy of the Operator’s Guide and the entire Documentation Package, use the Part Number below: Part No. Description 903-8750 Model 931S/932S UV Analyzer Operator’s Guide 7-6 | Model 931S / Model 932S UV Analyzers... -
Page 257: Appendix A - Drawings
APPENDIX A – DRAWINGS This appendix contains drawings that are not included in the main body of this manual. The Analyzer Documentation Package includes Final “As-Built” (job- specific) drawings for your system. Use those drawings for instal- NOTE lation and maintenance/diagnostic purposes in place of the generic installation drawings in this manual. -
Page 258: Lower Enclosure Layout (Wx-14838) - North American (Csa)/European (Zone 1/Atex
European (Zone 1/ATEX) See “Customer Connection, I/O Board” and “Conduit Entries and AC Power Connection Locations” drawings in Chapter 3 for details about NOTE customer termination points and cable/conduit entries. A-2 | Model 931S / Model 932S UV Analyzers... -
Page 259: Analyzer Wiring Diagram (Wx-102860-1
Analyzer Wiring Diagram (WX-102860-1) Appendix A – Drawings | A-3... -
Page 260: Tc Sensor Wiring Diagram (Wx-102860-2
TC Sensor Wiring Diagram (WX-102860-2) A-4 | Model 931S / Model 932S UV Analyzers... -
Page 261: Ir Sensor Wiring Diagram (Wx-102860-3
IR Sensor Wiring Diagram (WX-102860-3) Appendix A – Drawings | A-5... -
Page 262: Optional Hmi And Ethernet Gateway Wiring Diagram (Wx-102860-4
HOST CONTROL Chassis GND J302 +24VDC TxD- DC GND TxD+ Relay RxD+ HOST 18AWG Relay RxD- WIRES CONTROLLER 301-4183 J302 COM1 CABLE 22AWG 100-1757 100-2712 DCPWR 4-COND (300-0473) (JP303 at 2-3) A-6 | Model 931S / Model 932S UV Analyzers... -
Page 263: Cable Communications Connections (300-9480
RS-232 Cable Communications Connections (300-9480) Appendix A – Drawings | A-7... -
Page 264: Optical Bench Board (100-1662
Optical Bench Board (100-1662) A-8 | Model 931S / Model 932S UV Analyzers... -
Page 265: Pmt Buffer Board (100-0140
PMT Buffer Board (100-0140) Appendix A – Drawings | A-9... -
Page 266: Inlet And Vent Flame Arrestor Locations For Environmental Purge Option (100-1783-1A
Inlet and Vent Flame Arrestor Locations for Environmental Purge Option (100-1783-1A) A-10 | Model 931S / Model 932S UV Analyzers... -
Page 267: Supplemental Information
SUPPLEMENTAL INFORMATION This section consists of information and documents that are not part of the main manual, but which describe and illustrate installation, operation, layout, and maintenance procedures for non-standard or optional equip- ment – and derivative analyzer models – that make up your analyzer and its sample system. - Page 268 This page intentionally left blank. S-2 | Model 931S/Model 932S UV Analyzers...
Need help?
Do you have a question about the 931S and is the answer not in the manual?
Questions and answers