Table of Contents
Advertisement
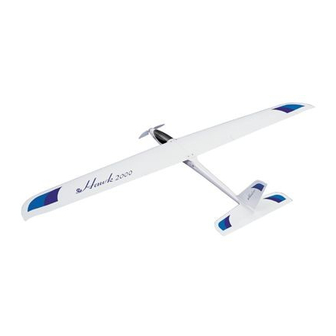
2M Electric Powered R/C Sailplane
No.4308 E-HAWK
Wing Span: 80.7"(2050mm) Length: 38.6" (980mm) Wing Area: 524 sq.in.(33.8dm
Wing Loading: 14.6oz./sq.ft.(44g/dm
Warranty
:This kit is guaranteed to be free from defects in material and workmanship at the date of
purchase.
It does not cover any damage caused by use or modification. The warranty does not extend
beyond the product itself and is limited only to the original cost of the kit. By the act of building this user-
assembled kit, the user accepts all resulting liability for damage caused by the final product. If the buyer
is not prepared to accept this liability, it can be returned new and unused to the place of purchase for a
refund.
Notice: Adult Supervision Required
product requires adult supervision. Read through this book completely and become familiar with the
assembly and flight of this airplane. Inspect all parts for completeness and damage. Customers in North
America please call 1-949-833-7498 for help if you encounter any problems.
Almost Ready To Fly
) Motor: 540 Motor included Prop: 8 x 4.5 Folding Prop included
2
2
) Weight: 51~55oz.(1450~1550g)
:This is not a toy. Assembly and flying of this
JE6467
Advertisement
Table of Contents

Related Manuals for THUNDER TIGER E-HAWK 2000


Summary of Contents for THUNDER TIGER E-HAWK 2000
- Page 1 Almost Ready To Fly 2M Electric Powered R/C Sailplane No.4308 E-HAWK Wing Span: 80.7"(2050mm) Length: 38.6” (980mm) Wing Area: 524 sq.in.(33.8dm ) Weight: 51~55oz.(1450~1550g) Wing Loading: 14.6oz./sq.ft.(44g/dm ) Motor: 540 Motor included Prop: 8 x 4.5 Folding Prop included Warranty :This kit is guaranteed to be free from defects in material and workmanship at the date of purchase.
-
Page 2: Table Of Contents
INTRODUCTION All of us at Thunder Tiger want to thank you for choosing the E-Hawk.This Kit has been engineered to go together quickly and easily while still providing you with great looks and exceptional flying performance. The world of electric powered sailplanes can be an extremely challenging and rewarding experience. -
Page 3: Pre-Assembly Notes
ASSEMBLY INSTRUCTION PRE-ASSEMBLY NOTES 1. If you are not an experienced R/C pilot plan to have a fully competent pilot help you to learn to fly your E-Hawk. This will help you to be successful much faster and also avoid controlling the power of your E-Hawk as well as eliminating potential damage to your model. - Page 4 Open the box and check that you have all the parts as shown below. If anything is missing please contact your dealer AS6187 Main Wing Set Two-Sided Tape (2) Wing Joiner (L/1, S/1) Wing Protector (1) Aileron Servo Tray (2) Hatch Cover (L/1, R/1) Wing Bolt (L/2, S/2) Wood Screw (8)
- Page 5 ASSEMBLY / WING Wing Assembly 3. Use heat iron to tack down the covering at the 1. Before you install the aileron servo you have to opening. decide if your e-Hawk will have Flaperons(FLPN) or not. If Flaperon function is applied, then it will require 2 Servo Extensions which are 15"...
- Page 6 ASSEMBLY / WING 9. Cut the servo horn as shown. Before you install the control horn and secure the aileron servo in place, you will have to connect the servo to your receiver and set up in your radio to make sure the direction 6.
-
Page 7: Wing
ASSEMBLY / FUSELAGE 14.Locate the Hatch Cover. Cut a hole as an exit for pushrod and drill holes at each corner with 1/16" (1.6mm) drill bit, before securing the Hatch Cover, thread the pushrod rod through the exit hole. 1/16" 1.6mm 12.Locate the clevis and the pushrod. - Page 8 ASSEMBLY / FUSELAGE 17.Trial fit the wing mount in the fuselage, sand to fit if necessary. 20.Place the main wing on the fuselage with the wing halves jointed CLOSELY. Use masking tape to tape to hold together. Use the holes on the wing as the guide to make drill marks. Drill 5mm(3/16") holes where you marked.
-
Page 9: Tail
ASSEMBLY / TAIL 22.Locate the wing protector, place the wing protector 24.Cut away the covering both at the center leading where is even with the trailing edge. With it and trailing edge as shown. centered then make drill marks on the wing protector. - Page 10 ASSEMBLY / TAIL 31.Enlarge the exit hole at the rear of fuselage, make sure that clevis and control horn will pass through 28.Remove the tail. Cut the covering away about 1/8" freely. inside the line. Clean the line with rubbing alcohol after you cut away the covering.
-
Page 11: Servo
ASSEMBLY / SERVO & MOTOR 36.Insert the pushrod through the EZ connector then secure the horn on the servo when elevator in neutral position. Secure the pushrod with the 3mm set screw. If you have Rudder Control Surface then install the rudder servo as the same procedure on the elevator servo. - Page 12 ASSEMBLY / RECEIVER 39.Locate the prop, spinner and screws as shown. Assemble the folding prop first. Make sure the two blades move freely. Insert the drive nut to the backplate then the drive shaft. The hole of drive nut is tapered to accommodate the drive shaft. Secure the whole set onto motor shaft with the nut.
-
Page 13: Motor
ASSEMBLY / CANOPY 4.Tape the other side of Velcro in the fuselage so it ACE R/C TR-402A BATT 4CH AM RECEIVER will keep the battery in place. CH.1 CH.2 CH.3 NARROW BAND CH.4 Note: We use 6-cell Sanyo Battery Pack and the START Auto Cutoff initial setting is 4 1/4"(108mm)away from the... -
Page 14: Control Throws
FINAL ASSEMBLY / CONTROL THROWS & BALANCING 2.Check the direction of travel of your control Control Throws surfaces and the operation of the motor controller per the manufacturers instructions. These control throws are merely a starting point for 3.Range check your radio system per the your radio setup and can be tailored to fit your flying manufacturers instructions. - Page 15 asphalt parking lots, etc.) absorb the sun’s energy THE FIRST FLIGHTS faster than lighter colored and are generally good You should always use the first few flights to get thermal generators. This warmer air is lighter (less accustomed to your new airplane and its flying dense) than the cooler air and thus rises.
-
Page 16: Safety Precautions
Thank you for purchasing this Safety Precautions E-Hawk from Thunder Tiger and we look forward to providing you with other great R/C products in the You as the pilot of this radio controlled model are future.
Need help?
Do you have a question about the E-HAWK 2000 and is the answer not in the manual?
Questions and answers