
Related Manuals for Hunter Douglas Silhouette A Deux


Summary of Contents for Hunter Douglas Silhouette A Deux
- Page 1 Installation Operation Care • • LiteRise ® EasyRise ™ PowerView ® Motorization Silhouette and Nantucket ® ™ A Deux Window Shadings ™ EasyRise, LiteRise, and PowerView Motorization Operating Systems...
-
Page 2: Table Of Contents
Cord Loop Shadings ................26 Declarations ..................27 Warranty ..................Back Cover Questions? Call Hunter Douglas Consumer Support at 1-888-501-8364. © 2018 Hunter Douglas. All rights reserved. All trademarks used herein are the property of Hunter Douglas or their respective owners. -
Page 3: Getting Started
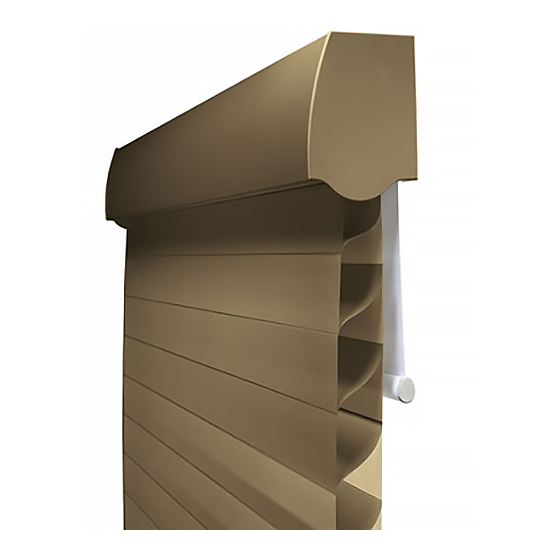
GETTING STARTED Product Views Optional Dust Cover Installation Brackets Headrail Cord Loop Cord Loop Cord Tensioner Cord Tensioner Front Shading Rear Roller Shade Shading Bottom Rail Roller Shade Bottom Rail EasyRise ™ Battery Wand Handle LiteRise PowerView ® Pebble Remote ®... -
Page 4: Tools And Fasteners Needed
GETTING STARTED Thank you for purchasing Hunter Douglas Silhouette or Nantucket window shadings. ® ™ With proper installation, operation, and care, your new shadings will provide years of beauty and performance. Please thoroughly review this instruction booklet before beginning the installation. If your shading has a protective plastic cover on the fabric-covered headrail, keep the plastic in place until the shading is installed. -
Page 5: Installation
INSTALLATION Installation Overview To install your shading, you will need to perform the following four steps: STEP 1: Mount the Installation Brackets STEP 2: PowerView Only: Connect the Power Cables ® STEP 3: Install the Shading STEP 4: PowerView Only: Connect the Power Source, If Applicable STEP 1 —... -
Page 6: Inside Mount
INSTALLATION Mount the Installation Brackets — Inside Mount Prepare the Installation Brackets The purpose of the back cover bracket is to Back Cover Bracket provide clearance for the battery wand for Top Tab PowerView shadings. ® If you have a battery wand, remove the ➤... - Page 7 INSTALLATION Center the installation brackets on your marks and mark the location of the screw holes. ■ Allow sufficient rear clearance when positioning the ➤ brackets. The bottom tab provides the necessary clearance ") for all systems except PowerView with battery wand, which requires "...
-
Page 8: Outside Mount
INSTALLATION Mount the Installation Brackets — Outside Mount Center the headrail over the window opening at the desired height. Use a pencil to lightly ■ mark each end of the headrail. Alternatively, measure the width of the headrail and use that width to mark the headrail ➤... - Page 9 INSTALLATION Additional Clearance with Spacer Blocks NOTE: A minimum of " additional clearance is required for PowerView shadings with ® battery wand. If using " or " spacer blocks, attach the spacer ■ Spacer block(s) and installation bracket to a flat vertical Blocks mounting surface with #6 screws long enough for a Longer...
-
Page 10: Step 2 - Powerview Only: Connect The Power Cables
INSTALLATION STEP 2 — PowerView Only: Connect the Power Cables ® Refer to the appropriate page based on your order. ■ For a battery wand, see below. ➤ For an optional satellite battery pack or 18V DC power supply, see page 11. ➤... -
Page 11: Step 3: Install The Shading
INSTALLATION STEP 3 — Install the Shading Mount the Headrail Lever Peel back the protective covering Installation Bracket ■ Headrail from the top of the Palette fabric- ® covered headrail. Leave the rest Slide the Headrail Between the Lever of the protective covering on the and the Bracket front of the headrail. -
Page 12: Easyrise ™ Only: Attach The Cord Tensioners
INSTALLATION EasyRise Only: Attach the Cord Tensioners ™ IMPORTANT: Before you proceed, you must first slide the cord tensioners to the bottom of the cord loops. Insert a small screwdriver, punch, or awl through the screw hole at ■ the bottom of each cord tensioner. Move the screw hole down to the indicator line to release the safety ■... -
Page 13: Step 4: Powerview Only: Connect The Power Source, If Applicable
INSTALLATION STEP 4 — PowerView Only: Connect the Power Source, If Applicable ® Refer to the appropriate page based on your order. ■ For an optional satellite battery pack, see below. ➤ For an optional 18V DC power supply, see page 12. ➤... - Page 14 INSTALLATION 18V DC Power Supply Connect the Power Supply Power Cables Plug the power cables from the shading ■ from Shading and the extension cable into the “Y” connector. Plug the other end of the extension cable ■ into the 18V DC power supply. Wire Retainers “Y”...
-
Page 15: Operation
OPERATION Operate the Shading Whatever the lifting system, the front shading and rear roller shade are operated independently of each other. Shown below are a few examples of possible shading and shade positions. Shading lowered with vanes open, Shading lowered with vanes open, Shading lowered with vanes open, roller shade lowered roller shade partly raised... -
Page 16: Literise Shadings
OPERATION LiteRise Shadings ® IMPORTANT: With LiteRise lifting systems, the front shading must be raised before the rear ® roller shade can be operated. Slowly and steadily pull down on the bottom ■ rail handle to lower the shading or roller shade. -
Page 17: Powerview Shadings
OPERATION PowerView Shadings ® Test the Shade and Shading Using the Programming Buttons Testing the shade and shading with the programming buttons will allow you to ensure that the motor and power source are working correctly. CAUTION: When raising the shade or shading for the first time, observe how the fabric rolls up into the headrail. - Page 18 OPERATION Using the PowerView Remote ® First, activate the remote by pulling both plastic tabs from the back battery compartment. OPEN Group 4 Group 3 Group 5 Group 2 Group 1 Group 6 RIGHT ARROW LEFT ARROW Opens vanes on front shading; Opens vanes on front no function for rear shade shading;...
- Page 19 OPERATION Basic Operation To wake up the remote, simply pick it up or press ■ STOP. The last group(s) selected will be ■ highlighted and active. Press “all” or groups 1 – 6 to select the shade and/or shading to move. Selected group ■...
- Page 20 OPERATION Resetting the Shade or Shading (If Necessary) Basic Reset The basic reset is used to reset the travel limits of the shade or shading. 1. Press and hold the programming button for approximately 6 seconds. The shade or shading will move slightly.
-
Page 21: Troubleshooting
Press the cap on until it latches. Squeeze Latch NOTE: Hunter Douglas recommends AA alkaline batteries for use with our battery- powered shadings. These will provide more than one year of operation, depending on usage. Lithium and rechargeable batteries are not recommended. - Page 22 OPERATION Problem PowerView : The shade or shading does not operate using the programming ® button. Solution Unplug the power cable from the motor, then plug it back in. A green LED inside the programming button housing should flash to indicate the motor has power. Check that the batteries in the battery wand or satellite battery pack are correctly inserted and fresh.
- Page 23 OPERATION Problem The shading raises or lowers unevenly, the fabric rubs against one end of the headrail, or the bottom rail is uneven when fully raised. Solution Check that the window is square by measuring the diagonals. Check that the installation brackets are level. Shim (not provided) to level, if necessary.
- Page 24 OPERATION Problem The vanes do not open when the shading is first operated. Solution Open and close the shading several times to help open the vanes. If necessary, gently pull down on the bottom rail when the shading is fully lowered. LiteRise : With your thumb on the front of the handle and fingers on the back, ®...
- Page 25 OPERATION Problem PowerView : Adjacent shadings do not roll up evenly. ® Solution It is considered normal if the roll-up on both shadings is within " of each other. If one shading rolls up tighter than another, lower and raise both shadings several times.
-
Page 26: Care
CARE Removing the Shading Top View Fully raise the rear shade and front shading. ■ Move each lever of the installation brackets to the left to ■ release the shading. A flat blade screwdriver can be used to move the lever. ➤... - Page 27 CARE Forced Air Blow away dirt and debris between the vanes using clean compressed air. Spot-Cleaning Do not spot-clean anything other than the Palette fabric-covered headrail. ® Ultrasonic Cleaning Silhouette and Nantucket window shadings can be ultrasonically cleaned by a professional, ®...
-
Page 28: Child Safety
™ page 8. This can prevent children from pulling cord loops around their necks. Hunter Douglas provides cord tensioner installation kits with ■ instructions for attaching the cord tensioners. For the shading to operate properly, the cord tensioners must be correctly mounted and secured. -
Page 29: Declarations
RSS-102 of the IC radio frequency (RF) Exposure rules. This equipment should be installed and operated keeping the radiator at least 20 cm or more away from person’s body. European Conformity We, the undersigned, Hunter Douglas Window Fashions One Duette Way, Broomfield, CO 80020, USA Hunter Douglas Europe B.V. Piekstraat 2, 3071 EL Rotterdam, The Netherlands certify and declare under our sole responsibility that assembly PV9 conforms with the essential requirements of the EMC directive 2004/108/EC and R&TTE directive 1999/5/EC. - Page 30 Notes...
-
Page 32: Warranty
2. Visit hunterdouglas.com for additional warranty information, frequently asked questions and access to service locations. 3. Contact Hunter Douglas at (888) 501-8364 for technical support, certain parts free of charge, for assistance in obtaining warranty service or for further explanation of our warranty.
Need help?
Do you have a question about the Silhouette A Deux and is the answer not in the manual?
Questions and answers