Extech Instruments BR200 User Manual
Video borescope. wireless inspection camera. kits
Hide thumbs
Also See for BR200:
- User manual (15 pages) ,
- User manual (12 pages) ,
- User manual (11 pages)

Related Manuals for Extech Instruments BR200


Summary of Contents for Extech Instruments BR200
- Page 1 USER MANUAL Video Borescope Wireless Inspection Camera Models BR200, BR250, and KITS Additional User Manual Translations available at www.extech.com...
- Page 2 Includes four (4) AA batteries for camera controller, rechargeable battery for monitor, micro SD memory card with SD adaptor, USB cable, video connect cable, AC adaptor (100-240Vac, 50/60Hz, adapters for US, UK, EU, AUS), magnetic mount for monitor, and hard case. BR200 and BR250 also include hook, mirror, and magnet attachment accessories...
-
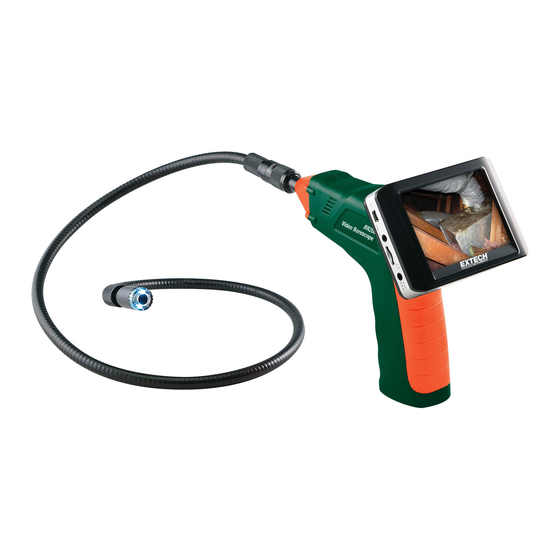
Page 3: Supplied Equipment
Camera controller Color TFT monitor AC adaptor for monitor’s rechargeable battery Video cable for connecting additional monitor Accessories (magnet, hook, mirror) BR200/BR250 only Magnetic mount for monitor Flexible cable and camera head Four (4) ‘AA’ batteries for Camera Controller Note: Micro SD card and adaptor (not shown) - Page 4 10 Monitor power ON/OFF button 11 Monitor power indicator 12 USB jack for PC connection 13 Video output jack for alternate monitor 14 SD card slot 15 AC power adaptor jack 16 Reset button 17 Monitor mount (input signal) BR200-BR250-KITS_en-GB_v9.1 3/20...
-
Page 5: Preparation For Use
Align the flexible cable with the camera controller, noting the keyed pairing; and then tighten the knurled collar to hold the connection firmly in place. Warning: Damage to the flexible cable can occur if it is forcibly bent into too narrow a radius. BR200-BR250-KITS_en-GB_v9.1 3/20... -
Page 6: Operation
6. Turn the dimmer dial on the camera controller to adjust the LED light intensity. 7. Bend the flexible cable into the desired position. The cable can be bent into the shape of most examination areas, but please do not bend the cable excessively as this can cause damage to the system. BR200-BR250-KITS_en-GB_v9.1 3/20... -
Page 7: Capturing Still Images
8. Use the supplied accessories to help locate and retrieve small items (BR200 and BR250 only). Refer to the separate section in this manual for connecting the attachment accessories. Capturing still images Use the up arrow button on the Monitor to select the Image mode, and then press OK to capture a still image. - Page 8 VIDEO OUT jack on the Extech monitor and then connect the other end of the cable to the VIDEO IN jack of the additional monitor. The Extech monitor will output a high quality video image to the additional monitor. BR200-BR250-KITS_en-GB_v9.1 3/20...
- Page 9 Hook, mirror, and magnet accessories for the BR200 The supplied BR200 accessories (mirror, hook and magnet) all attach to the camera in the same manner. Refer to the diagrams below. Note that these accessories are not compatible with the BR250-4.
-
Page 10: Settings Menu
5. Use the arrows to highlight YES (format/erase) or NO (leave unchanged) 6. Press OK to accept the selection and exit 7. Press the button to return to the main Settings Menu or use the arrows to move to another icon in the System settings menu BR200-BR250-KITS_en-GB_v9.1 3/20... -
Page 11: Restoring Factory Default Settings
Press OK to open the parameter Use the arrows to select ON or OFF Press OK to confirm Press the button to return to the main Settings Menu or use the arrows to move to another icon in the Recorder settings menu BR200-BR250-KITS_en-GB_v9.1 3/20... -
Page 12: Date/Time Setting
Familiarize yourself with the process of viewing/deleting images and video and then you can conveniently access the playback functions using one of two options. BR200-BR250-KITS_en-GB_v9.1 3/20... -
Page 13: Specifications
Dimensions (controller) 186 x 145 x 41mm (7.3 x 5.7 x 1.6”) excluding flex cable Weight (controller) BR200: 530g (1.2 lbs.); BR250: 450g (1.0 lbs.); BR250-4: 450g (1.0 lbs.); BR250-5 381g (13.4oz) Camera-head diameter BR200: 17mm (0.67”); BR250: 9mm (0.36”); BR250-4: 4.5mm (0.17”): BR250-5 5.2mm (0.20”) - Page 14 Copyright © 2014-2020 FLIR Systems, Inc. All rights reserved including the right of reproduction in whole or in part in any form www.extech.com BR200-BR250-KITS_en-GB_v9.1 3/20...
Need help?
Do you have a question about the BR200 and is the answer not in the manual?
Questions and answers