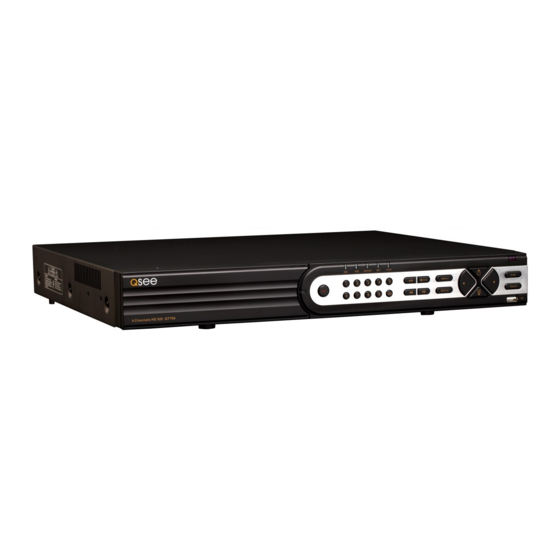
Q-See QT Series Remote Monitoring Setup Manual
Dvr & nvr
Hide thumbs
Also See for QT Series:
- User manual (89 pages) ,
- Manual (48 pages) ,
- Quick start manual (12 pages)

Related Manuals for Q-See QT Series


Summary of Contents for Q-See QT Series
- Page 1 Setup Guide for Remote Internet and Smartphone Monitoring, MyQ-See DDNS, and Email Notification PC with Windows Operating System Apple Macintosh Computer Android QT SERIES DVR & NVR MODELS REMOTE MONITORING SETUP GUIDE...
- Page 2 Our self-help Knowledge Base, located at www.Q-See.com/Support has the answers to the most common questions. If you can’t find the solution to your problem, please feel free to contact our live support during the hours shown below.
- Page 3 We encourage you to visit our website at www.Q-see. com to check for the latest firmware and sofware updates as well as product announcements.
-
Page 4: Table Of Contents
TABLE OF CONTENTS ABOUT THIS MANUAL 1. REMOTE ACCESS 1.1 Connecting your DVR to a Network Before you get started Obtaining an IP Address 1.2 Opening Ports Option 1: UPnP Option 2: Opening Ports Using DMZ Confirming That Ports are Opened 1.3 Static Internal IP (Network) Address 1.4 PPPOE 1.5 Domain Name System (DNS) -
Page 6: Remote Access
Internet access. And, by using Q-See’s free DDNS service, MyQ-See.com (more on this later), you’ll be able to do so using a conventional web address. -
Page 7: Obtaining An Ip Address
OBTAINING AN IP ADDRESS Each device on a network - both a LAN or the Internet - has a specific IP address. This address is what allows different devices on the network to communicate with each other. Your QT-series DVR displays its IP address in the Network Setup window. STEP 1. -
Page 8: Opening Ports
Section 1.7 Resolving Connection Issues. OPTION 1: UPNP The QT series of DVRs come configured to take advantage of the latest networking technology, UPnP or Universal Plug ‘n Play right out of the box. If you have an UPnP-enabled router, you will only need to plug the DVR into your network and you will then be able to proceed to the end of this section. -
Page 9: Option 2: Opening Ports Using Dmz
OPTION 2: OPENING PORTS USING DMZ Accessing your router’s DMZ controls: The exact location of DMZ within the router’s settings vary by manufacturer so please consult your router’s manual for the location of this feature. The method for accessing your router’s settings, however, is pretty standard. -
Page 10: Confirming That Ports Are Opened
CONFIRMING THAT PORTS ARE OPENED To confirm that your ports have been forwarded successfully, go to www.canyouseeme.org using a computer connected to the same router as the DVR. STEP 1. Enter “85” into the box labeled “What Port?” Browser - Windows Internet Explorer http://canyouseeme.org/ Open Port Check Tool STEP 2. -
Page 11: Static Internal Ip (Network) Address
1.3 STATIC INTERNAL IP (NETWORK) ADDRESS Most routers assign connected devices a random IP address that is not currently in use by another device on your internal network. With the exception of 2Wire brand routers, when a router or networked device reboots due to a power loss or other issue, the addresses will change and the port forwarding configuration will no longer work. -
Page 12: Pppoe
1.4 PPPOE If you are going to attach the DVR directly to a DSL or cable modem instead of to a router then select the PPPOE option in the Network options. Before you proceed, you will need to contact your ISP to obtain your User Name and Password. STEP 1. -
Page 13: Domain Name System (Dns)
1.5 DOMAIN NAME SYSTEM (DNS) Once you have completed the above sections, you are able to operate your DVR remotely. The sections below allow you to take advantage of additional features including the ability to access your DVR using a conventional domain name and having your system send out e-mail alerts. -
Page 14: Dynamic Domain Name Service (Ddns)
DVR from outside of your network. It also allows you to avoid having to repeat Sections 1.3 and 1.5 when/if your ISP reassigns IP addresses. Q-See offers DDNS service for free at www.MyQ-See.com and your DVR is configured accept account information from that site. -
Page 15: Resolving Connection Issues
1.7 RESOLVING CONNECTION ISSUES There are several hardware-related situations which can prevent the DVR’s port from being properly forwarded. The presence of multiple routers or the routers not featuring UPnP or DMZ are the two most common issues. DETERMINE THE NUMBER OF ROUTERS ON THE NETWORK If there is more than one router between the DVR and the Internet it will block communication to and from your system. - Page 16 STEP 5. Click on CHECK NOW to detect how many Routers are in the network. PICTURE 1-22 STEP 6. If there is only one router detected, and you are using UPnP, then you will need to turn off that setting and attempt to connect using DMZ as described in Section 1.2 Opening Ports.
-
Page 17: Setting Up Dmz In Router 2
SETTING UP DMZ IN ROUTER 2 STEP 1. Login into Router 1 by putting the IP of Router 1 into the Internet Explorer browser, as in the example shown in where the IP Picture 1-22 address of Router 1 is 192.168.0.1 STEP 2. -
Page 18: Remote Monitoring
ActiveX control This website wants to install the following add-on: “WebClient.exe” from Q-See International Ltd.” If you trust the website and the add-on and want to install it, click here... was blocked. You will need to click on the Internet Explorer - Security Warning warning message bar to unblock it. -
Page 19: User Account Control For Windows Vista And Windows 7
USER ACCOUNT CONTROL FOR WINDOWS VISTA AND WINDOWS 7 Some users of computers using Windows Vista or Windows 7 operating systems may receive an error message informing of a codec that is missing or not installed. This conflict can be resolved by turning off User Account Control (UAC). - Page 20 5. Select Turn User Account Control on or off PICTURE 2-7 6. Uncheck the box next to “Use User Account Control (UAC) to help protect your computer.” 7. You will then be asked to restart your computer for the change to take effect.
- Page 21 SETTING UP ACTIVEX CONTROL STEP 1. Open Internet Explorer STEP 2. Click on Tools STEP 3. Select Internet Options in the pull-down menu PICTURE 2-11 STEP 4. Click on the Security Tab STEP 5. Select Trusted Sites STEP 6. Click on the Sites button PICTURE 2-12 STEP 7.
- Page 22 STEP 11. Click the Custom level… button. PICTURE 2-14 STEP 12. Pull down the “Reset to:” menu button and select Low PICTURE 2-15...
- Page 23 STEP 13. Click the Reset button STEP 14. Click “Yes” when asked, “Are you sure you want to change the setting for this zone?” STEP 15. Click OK STEP 16. Click Apply STEP 17. Click OK STEP 18. Close Internet Explorer PICTURE 2-16 You are now ready to monitor your DVR from your computer, please proceed to Section 2.3 Using the Remote Access Software.
-
Page 24: Accessing The Dvr From A Macintosh
2.2 ACCESSING THE DVR FROM A MACINTOSH Once you have configured the network settings on the DVR to match those on your router and forwarded the ports needed by the DVR to enable remote access over the Internet, you will be ready to remotely view your cameras and control your system through a web browser. - Page 25 Begin the installation process by double-clicking on the icon for the WebClientPlugin.pkg file - either in the Downloads pop-up window, or the Downloads window in your Dock. PICTURE 2-18 Once the installer has launched, quit out of Safari so that the plug in can be properly installed.
- Page 26 You will be asked to input the user name and password for this computer to give the program permission to install. PICTURE 2-21 You’ll see a progress bar as the program installs... PICTURE 2-22 Which will be followed by a message indicating that the program was installed correctly.
-
Page 27: Using The Remote Access Software
2.3 USING THE REMOTE ACCESS SOFTWARE Once you have installed the WebClient plugin into your browser, you may access your DVR by entering the appropriate web address or local network IP address for your DVR into the browser’s address bar. A login screen will be displayed indicating that your DVR is ready for access. - Page 28 Screen Display Mode Clicking on the arrow beside the screen display mode will open the Channel Select dialog which will allow you to specify which channels are shown. Channels can be selected individually or in blocks of four. PICTURE 2-27 Record and Playback Controls Buttons 5 through 9 shown in Picture 2-26...
- Page 29 Color Adjustment Drag the slide bars to adjust Brightness, Contrast, Hue and Saturation. Clicking Default will return them to the original settings. Button Description Button Description Brightness Saturation Contrast Default Save settings PTZ Control Selecting the PTZ button will bring up a control panel similar to that seen on the DVR. Users have the same level of control as they would at the DVR including activating pre-set commands and cruises as well as full manual control.
- Page 30 Master and Sub-Streams Right-clicking on any live image will open up a pull-down menu. Changes made in this menu will be reflected in the Master/Sub-Stream status display on the right of the Remote Live Preview interface. Master Stream Sub-stream All to Master Stream All to Sub-stream Enable Audio Full Screen...
-
Page 31: Remote Playback And Backup
2.4 REMOTE PLAYBACK AND BACKUP REMOTE PLAYBACK Clicking the Playback button (Item 8 in Picture 2-26) will bring up the Player window. Users can select the record date and channels. Double-click the file name in the record file list box and you can play back that file. Play Stop Next Frame... - Page 32 SEARCH Clicking on the Search tab in the Remote Live Viewer will allow you to search by Time, Event or File Management. Time Search STEP 1. The user can select the display mode as well as the time and date to begin searching from in the area at the top of the Search window (Red box listed as Item 1 in Picture...
- Page 33 STEP 6. This will open a window with control buttons at the bottom. Control buttons at the bottom allow the user to move through the playback. Channel Mode Play Mode Play Button Progress Play Rewind Single Frame Full Screen Snap Pause Fast Forward Next Frame...
- Page 34 Event Search STEP 1. Click on the highlighted date, select recorded channels along with the type of event – motion or sensor. Then click Search. PICTURE 2-33 STEP 2. The list of recorded events will be displayed in the Event List. Double-click on an item to open the Playback window.
- Page 35 File Management This allows you to locate an event and lock, unlock or delete it from the record. PICTURE 2-34 Lock – Select a recording from the File List box. Clicking the “Lock” button will protect the file from being overwritten or deleted except when the hard drive is reformatted. Unlock –...
- Page 36 Remote Backup Clicking on the Backup tab will open the Backup interface. This allows you to backup files from the DVR to your computer’s hard drive. PICTURE 2-35 STEP 1. Select channels, the start and end time, and then click the Search button. The search results will be shown in the File List box.
-
Page 37: Remote System Configuration
2.5 REMOTE SYSTEM CONFIGURATION Clicking on the Config tab in the Main Menu of the Remote Live Viewer will change the display to where the user can set-up or alter the operating parameters of the DVR. Available functions include the ability to configure; Basic, Live, Record, Schedule, Alarm, Network, PTZ and User settings. -
Page 38: E-Mail Notification Setup
E-MAIL NOTIFICATION SETUP The Email tab, located in the Network menu, allows you to set how your DVR will send out e-mail alerts. You will be able to send e-mail alerts to three addresses. NOTE! Depending upon your settings, the system can generate a lot of e-mail alerts. -
Page 39: Mobile Surveillance
Windows Mobile Phone, BlackBerry and Symbian simply download the needed software by logging into their DVR. Those using Android, Apple or Windows Phone 7 should search for “Q-See” in their respective online markets (iTunes, Android Market, etc.) to download the QT View app. -
Page 40: Qt View For Apple Ipad And Iphone
In order to monitor your system using your iPhone or iPad, you will need to install either the Q-See QT View app for smartphones or Q-See QT View HD app if you’re using a tablet. These are available for free through iTunes by searching for “Q-See.” Install either one as you would any other application on your device. - Page 41 CONNECTING TO YOUR DVR Upon start-up, the QT View program will require you to log in. The first time you will need to enter the address of your DVR. You will need to create at least two connections to access your DVR. These are selected through the Login screen and can be created through this screen.
- Page 42 If you will be connecting to your DVR on the same network, say from within the same building, enter the local IP address and this will be referred to as a Local Connection. The second connection will be for times when you are away from that network and will be connecting to a different network or using the 3G/4G function of your device.
- Page 43 Remote Connection To monitor your DVR at times when you are away from its location, you will use the system’s public or Internet address instead of the local IP address described above. This address could either be the series of digits that you use to log into your DVR over the Internet, or the Dynamic Domain Name Service (MyQ-See) address you created when configuring your DVR for remote access.
- Page 44 Adding a Server A server is added in the same manner as in the Login screen. Simply tap on the white icon to open up the window to enter the information for the new connection including your name for this connection, the IP address (local or Internet) and your user name and password. PICTURE 4-7 Editing or Deleting a Server Each server connection features two icons in...
- Page 45 OPERATION Live View When you log in, QT View will open the Live View window which will show a single-channel feed from your DVR. Examples are shown below from QT View HD (left) and QT View (right). You can configure the default display mode using the Settings menu described later. PICTURE 4-10 PICTURE 4-9 A series of indicators and icons will appear...
- Page 46 When switching to multi-channel view, a pop-up window will allow you to select which cameras will be displayed. PICTURE 4-11 PICTURE 4-12 The iPhone version offers the option to view video from a single camera or four channels simultaneously. On QT View HD for the iPad, you also have the ability to view the feeds from six, eight or nine cameras at the same time as well.
- Page 47 Tapping on the PTZ icon will open the PTZ Control window allowing you to control a Pan- Tilt-Zoom camera connected to your DVR by touching the directional arrows. Adjust your camera’s focus, zoom and iris (light level) using the “+” and “-” buttons. There are three sliders which also provide camera control.
- Page 48 Snapshot Tapping the Snapshot icon will cause the program to take a still image of the currently displayed video feed and save it onto your device. You can take full-size images from any or all of the currently displayed video feeds. These images are not saved to the Photos folder on your device, but are available for viewing by selecting them from the Image menu located at the upper left of the application’s screen (circled, below).
- Page 49 Record Likewise, tapping the Record icon will cause the program to begin recording video from the selected channel onto your device’s internal memory. Tapping the icon again will end the recording. These files can be accessed, along with videos recorded onto your DVR’s own hard drive in the Playback menu which is also located at the top of the screen next to the Image menu.
- Page 50 Time Search This search mode differs in that it’ll show a 24-hour timeline for each channel with blocks indicating when a video record took place. To begin playback, simply select a channel and then tap on Play. A progress bar will appear below the video along with the start and end times of the video clip.
- Page 51 Remote File Search This last search mode is best used when you have a channel set to constantly record but it also works if you know when an event occurred. The results list and playback will resemble that seen in the Event Search, above, but will not show the event type, rather it’ll display the start and...
- Page 52 Schedule Settings This area is generally set up when you first configure your DVR, but you may find it necessary to change a recording schedule while you’re away from your DVR. PICTURE 4-26 You’ll be able to change the schedule for general recording, motion detection recording and alarm-based recording for each camera.
- Page 53 INFORMATION The three windows available under the Information menu allow you to access information about your DVR, your network and which users are currently logged into your system The information displayed in these three windows cannot be altered. System shows your DVR’s name as well as the software and hardware configuration.
-
Page 54: Qt View For Android Smartphones
“Q-See.” Install it just as you would any other Android application. If you are using a tablet, you will need to download the Q-See QT View HD app. These are two separate programs and the HD version will not work on a smartphone. Please see Section 4.3, immediately following, for instructions on installing and using Q-See QT View... - Page 55 CONNECTING TO YOUR DVR Upon start-up, the QT View program will require you to log in. The first time you will need to enter the address of your DVR. If you will be connecting to your DVR on the same network, say from within the same building, enter the local IP address.
- Page 56 OPERATION Live View When you select Live from the Main Menu, you will be taken to the Live View window which will show a single-channel feed from your DVR. When the phone is held in portrait mode, a series of indicators and icons will appear below the video.
- Page 57 When switching to four-channel view, the Channel Configure window will allow you to select which cameras will be displayed. When viewing multiple channels, the screen outlined in red will be the one affected by such actions as snapshot or record. Double tap on a screen in four-channel mode to bring it to full screen.
- Page 58 Snapshot and Record Tapping the Snapshot icon will cause the program to take a still image of the currently displayed video feed. In the case of multi- PICTURE 4-35 screen mode, the channel outlined in red will be the one that will be captured. Likewise, tapping the Record icon will cause the program to begin recording video from the selected channel onto your phone’s...
- Page 59 Playback When you tap on the Playback icon you will be given a list of channels which have recordings. Select the desired channel and then select the video by date and time. Once you have selected your video, it will begin playing back.
- Page 60 Information This window contains information about your DVR and the phone you are using to run the QT View app. Device name and Device ID: these are both set on the DVR and are useful when you are using QT View to monitor more than one DVR.
-
Page 61: Qt View For Android Tablets
That will need to be done either in the DVR itself or when remote monitoring using a computer. In order to monitor your system using your Android tablet, you will need to install the Q-See QT View HD app. The program is available for free through the Android market by searching for “Q-See.”... - Page 62 CONNECTING TO YOUR DVR Upon start-up, the QT View program will require you to log in. The first time you will need to enter the address of your DVR. If you will be connecting to your DVR on the same network, say from within the same building, enter the local IP address.
- Page 63 OPERATION Live View Once you have logged into your DVR you will see a live display from the system’s first camera. QT View HD only operates in landscape mode at present. PICTURE 4-45 You can select which channel you want to view by tapping on the single channel view icon and then selecting the desired channel followed by tapping on OK.
- Page 64 In the viewing modes with a single large screen surrounded by smaller ones, the first camera selected will be the larger view. Double-tapping on any screen will bring it to full screen view. Double-tapping upon it again will return to multi-screen viewing mode. PICTURE 4-47 A series of indicators and icons appear below Color...
- Page 65 Record and Snapshot You can record video or still images from any of the video streams onto your tablet for later review. This video is separate from that recorded on your DVR’s hard drive and recording on your tablet will not affect the recording schedule on your DVR. Only one channel can be recorded or have a still image captured at a time.
- Page 66 PICTURE 4-49 The controls below the video playback allow you to start, stop or pause the video. The double arrows will take you to the previous or next video clip. Tapping on Close will take you back to the search window. Image View Selecting Image from the options along the top of the screen will allow you to review your saved images.
- Page 67 Settings This window is where you configure how QT View will record and display video along with how it will notify you of events. PICTURE 4-51 You are able to reserve a set amount of memory space for QT View to record files as well as the maximum file size for any recordings.
-
Page 68: Windows Mobile Pro
4.4 WINDOWS MOBILE PRO Windows Mobile Pro 6.1 and 6.5 STEP 1. Activate mobile network access on the mobile phone. STEP 2. Run Internet Explorer STEP 3. Input the DVR’s IP address or DDNS domain STEP 4. You will be asked to download the software PCam. - Page 69 STEP 6. PCam will open automatically once the install process is complete. STEP 7. Input the DVR’s address, ID and password respectively in the fields “Server”, “User” and “Password”. The User Name and Password are PICTURE 4-55 the same as used on the DVR. The default is admin and 123456.
-
Page 70: Windows Phone 7
4.5 WINDOWS PHONE 7 & 8 To view your cameras from your Windows Phone device, you will need to download the free SuperCam app from the Windows Phone Marketplace. This program requires Windows Phone 7.5 or higher. STEP 1. Access the Windows Phone Marketplace from your mobile device and search for SuperCam. - Page 71 The Main window gives you access to all the features of the program. Not all are shown in this screenshot but they are listed below. STEP 3. Select Live to begin viewing your cameras. PICTURE 4-60 Button Function Button Function Live Live view Settings...
- Page 72 Pressing the PTZ icon at the bottom of the screen switches to the PTZ controls. You must have a PTZ camera connected to the DVR. The operation of the PTZ camera is the same as on the DVR itself or when using the WebClient plugin on the computer.
-
Page 73: Blackberry
4.6 BLACKBERRY Please note that BlackBerry 10 is not supported and instructions for the third party SuperCam software used to monitor your system from your phone is provided as a courtesy for users of the legacy BlackBerry OS 5 -7. SOFTWARE INSTALLATION STEP 1. - Page 74 If the software fails to download, please check the following: • Verify that you have a good connection to your cellular network • Verify that you can access the DVR from a remote computer • Modify your BlackBerry’s browser configuration: STEP 1.
- Page 75 OPERATING SUPERCAM Login STEP 1. Launch SuperCam. This will bring up the Login interface. STEP 2. Input the DVR’s IP address or DDNS domain name, User Name and Password. Check the “Remember Server” box to save this setting. The User Name and Password are the same as used on the DVR.
- Page 76 Live View In this display you can access the different viewing functions of the DVR in a similar manner to the controls on the DVR itself. PICTURE 4-73 PICTURE 4-74 PICTURE 4-75 PICTURE 4-76 Button Function Button Function Switch channels Switches to PTZ interface Snap picture Full Screen...
- Page 77 Server List This allows you to add, delete or modify the DVR connection or connections if you are remotely monitoring multiple systems. Add – Add a DVR’s IP address or DDNS domain name Modify – Modify a DVR’s IP address or DDNS domain name Delete –...
- Page 78 Digital Peripheral Solutions, Inc. 8015 E. Crystal Drive Anaheim, CA 92807...