
Related Manuals for Medela Freestyle Flex


Summary of Contents for Medela Freestyle Flex
- Page 1 Freestyle Flex ™ Electric breast pump Instructions for use Master file (classified as medical device)
- Page 3 ENGLISH 4–51...
- Page 4 If damage is found, immediately discontinue use of power adaptor and call Medela Customer Service. • Do not use an electrical product that has been exposed to water or other liquids including: –...
- Page 5 To avoid health risks and reduce the risk of severe injury: • Do not use the Freestyle Flex breast pump while operating a moving vehicle. • Pumping can induce labour. Do not pump until after giving birth. If you become pregnant while breastfeeding or breast pumping, consult with a licensed healthcare professional before continuing.
- Page 6 • Clean and sanitize all parts that come into contact with your breast and breast milk prior to first use. • Only use Medela recommended parts with your Freestyle Flex breast pump. • If pumping is uncomfortable or causing pain, turn the unit off, break the seal between the breast and the breast shield with your finger and remove the breast shield from your breast.
-
Page 7: Table Of Contents
Contents 1. Important safety information 2. Intended purpose Indications for use 3. Product description Description of the Freestyle Flex breast pump Your breast pump system includes 4. Getting started First steps Powering your breast pump 5. Cleaning Cleaning overview Disassembling... - Page 8 11. Storing and thawing breast milk 11.1 General storage guidelines 11.2 Storing breast milk in a Medela cooler bag 11.3 Freezing 11.4 Thawing 11.5 Feeding breast milk 12. Maintenance and care 12.1 Power adaptor care 12.2 Battery maintenance 12.3 Long-term storage 13.
-
Page 9: Intended Purpose
2. Intended purpose 2.1 Indications for use The Freestyle Flex breast pump is a powered breast pump to be used by lactating women to express and collect milk from their breasts. The Freestyle Flex breast pump is intended for a single user. -
Page 10: Your Breast Pump System Includes
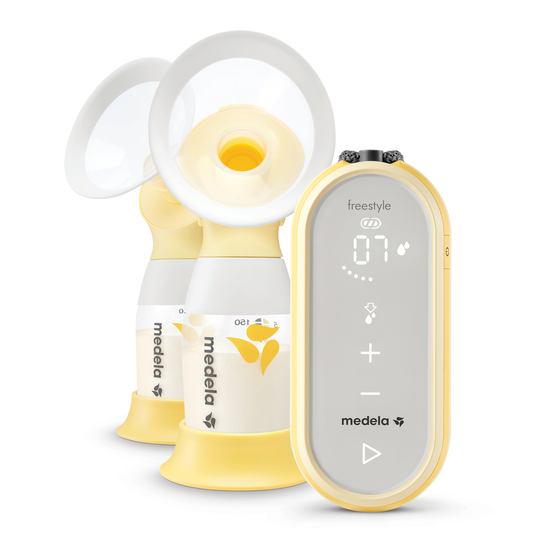
Product description (cont.) 3.2 Your breast pump system includes 2x PersonalFit Flex connector 2x PersonalFit Flex breast shield (21 mm) (Applied Part) 2x PersonalFit Flex 2x Membrane breast shield (24 mm) (Applied Part) For other breast shield sizes, see chapter 6 2x Connector body 4x Bottle 1x Tubing... - Page 11 For ordering information about accessories see chapter 14. All pictures shown in these instructions are for illustration purpose only. The actual product may vary due to local differences or product enhancement. Medela reserves the right to substitute any component or accessory with a replacement of equivalent performance.
-
Page 12: Getting Started
To be ready for expressing milk do the following before using your breast pump for the first time: 1. Charge the battery of your Freestyle Flex breast pump for two hours – see section 8.3. 2. Separate all parts that are exposed to the breast or breast milk prior to cleaning – see section 5.2. -
Page 13: Cleaning
5. Cleaning Supplies needed: Parts to wash or sanitize: • Mild dish soap • Breast shields • Clean soft brush • Breast milk bottles • Clean wash basin • Lids • Drinking-quality water • Connectors • Clean pot for boiling water •... -
Page 14: Cleaning Overview
Cleaning (cont.) 5.1 Cleaning overview Washing and sanitizing are two different activities. They must be done separately to protect you and your baby, and to maintain the performance of your breast pump. Wash – To clean the surfaces of the parts by physically removing contamination. Sanitize –... -
Page 15: Disassembling
5.2 Disassembling Before first use Remove and dispose of the protective cover* from the breast shield. After each use Disassemble the pump set into its individual parts (breast shield, connector and milk bottle) as follows: 1. Remove the breast shield from the connector. 2. -
Page 16: Washing
Cleaning (cont.) 5.3 Washing Washing is important for hygiene and serves to clean the surfaces of the parts by physically removing contamination. Wash the parts either by hand or in a dishwasher. Before first use and after each use Wash in dishwasher Rinse and wash by hand Do not place the parts directly in the kitchen 1. -
Page 17: Sanitizing
5.4 Sanitizing Sanitizing is important for hygiene and serves to kill living organisms, such as bacteria or virus- es. Boil the parts either on the stovetop or use Quick Clean microwave bags. Before first use and once per day Sanitize on stovetop Sanitize in microwave 5min 1. -
Page 18: Cleaning The Motor Unit
Cleaning (cont.) 5.5 Cleaning the motor unit Supplies needed: Parts needed: • Drinking-quality water • Motor unit • Mild dish soap • Clean dish or paper towel CAUTION • Unplug the breast pump before cleaning the motor unit. • Do not immerse the motor unit in water; do not run water over the motor unit. -
Page 19: Cleaning The Tubing
5.6 Cleaning the tubing Normally, cleaning of the tubing is not necessary. Only if it is dirty or if milk is present it is necessary to wash the tubing as described in these instructions. Supplies needed: Parts needed: • Drinking-quality water •... -
Page 20: Breast Shield Sizing
Do not include the areola. Step 2 Based on the measurement, determine the Medela breast shield size. Example: If the nipple size measures 16 mm in diameter, the recommended Medela breast shield size is 21 mm. Information The PersonalFit Flex breast shields are available in sizes up to 30 mm. If you need a larger size breast shield (36 mm) refer to your local Medela retailer or www.medela.com. -
Page 21: Optimizing The Breast Shield Size
6.2 Optimizing the breast shield size • Start with the breast shield that came with your pump, or the size determined by measuring. • Center the nipple and gently hold the breast shield against the breast. • Adjust for maximum comfort vacuum (refer to chapter 9) to achieve optimum suction level. •... -
Page 22: Assembling Your Breast Pump
• Check pump set components for wear or damage before use. Replace if necessary. • Always inspect all parts prior to use for cleanliness. If dirty, clean according to chapter 5. • Only use genuine Medela parts. See chapter 14 for details. NOTICE To prevent damage to the breast pump all components must be completely dry before use. - Page 23 3. Screw the connector onto the bottle. 4. Carefully push the breast shield into the connector body. Choose a breast shield size that suits your needs. For proper sizing see chapter 6. 5. The oval breast shields can be rotated (360°) and placed in the desired position to have the most comfortable fit for you.
-
Page 24: Preparing For Single Pumping
Assembling your breast pump (cont.) 7.2 Preparing for single pumping 1. Insert the unused tubing end into the tubing holder. Correctly assembled system (for single pumping). 2. Place the breast shield on the breast so that the nipple is prop erly centerd in the tunnel. 3. -
Page 25: Preparing For Double Pumping
For the delayed start function see section 10.2. • For hands-free expression you can also put on the Easy Expression Bustier* available from Medela. 1. Assemble the second pump set as described in section 7.1. -
Page 26: Hands-Free Expression With The Easy Expression Bustier
7.4 Hands-free expression with the Easy Expression Bustier Information The Easy Expression Bustier must be purchased separately. More information on www.medela.com. 1. Put the Easy Expression Bustier on and close it using the hook on top. 2. Leave the zip slightly open. -
Page 27: Operating Your Breast Pump
8. Operating your breast pump 8.1 Terms and designations Through research, Medela found that babies nurse in 2 2-Phase phases – Stimulation and Expression. This research is the basis Expression for the technology in most Medela breast pumps. Fast sucking/pumping mode to stimulate milk flow. - Page 28 If all three bars and the outline of the battery display are flashing at the same time, this indicates that the battery is overheated or defective. (flashing) See Troubleshooting (chapter 13) or call Medela Customer Service.
-
Page 29: Charging The Battery
8.3 Charging the battery WARNING Only use the power adaptor and cable that comes with the breast pump. An inadequate power source or cable may result in a fire hazard, electric shock or malfunction of the equipment. Information • You can use your breast pump while charging the battery. The battery will charge as soon as the breast pump is connected to a power source. -
Page 30: Expressing Your Breast Milk
Operating your breast pump (cont.) 8.4 Expressing your breast milk CAUTION • Do not hold the pump set by the bottle. This can lead to compression and blockage of the milk ducts and engorgement. • Do not try to express with vacuum that is too high and uncomfortable (painful). The pain, along with potential breast and nipple trauma, may decrease milk output. - Page 31 5. Adjust the vacuum with the Increase vacuum ( ) and Decrease vacuum ( ) buttons to find a comfortable level (for maximum comfort vacuum see chapter 9). 6. As soon as your milk begins to flow, press the Let-down button to go to the expression phase.
- Page 32 Operating your breast pump (cont.) Pausing In both stimulation and expression phase the breast pump can be paused. This allows you to readjust yourself or your breast pump set, or attend to your surroundings. 1. For pausing, press the Start/Pause button while the breast pump is running.
-
Page 33: Finding Your Maximum Comfort Vacuum
9. Finding your maximum comfort vacuum Once you are pumping in the Expression phase , increase the vacuum with the Increase vacuum ( ) button until pumping feels slightly uncomfortable (not painful), then decrease the vacuum slightly with the Decrease vacuum ( ) button. Information •... -
Page 34: Special Features
Bluetooth is a wireless technology for exchanging data over short distances. This can be used to connect your Freestyle Flex breast pump via a personal device, such as a smart phone, to the MyMedela platform. By connecting your breast pump to the MyMedela platform you can automatically transfer your pumping data (session length, phases &... - Page 35 • Only one mobile device at a time can interact with the Freestyle Flex breast pump. • The Freestyle Flex breast pump has the ability to store your last 30 pump sessions in its memory. If the pump is not connected prior to session 31 your history will be overwritten with new session data.
-
Page 36: Delayed Start
Special features (cont.) 10.2 Delayed start The Freestyle Flex breast pump features a delayed start function. With this, the pump only starts after a delay of ten seconds. This is useful in case you want to have your hands free when pumping starts (e.g. for holding the breast shields while double pumping). -
Page 37: Storing And Thawing Breast Milk
11.2 Storing breast milk in a Medela cooler bag Your Medela cooler bag requires one Medela contoured ice pack. Up to four 150 ml bottles of breast milk will stay cool for up to ten hours in a room temperature environment inside your pump bag. -
Page 38: Freezing
• Do not attempt to enlarge the nipple hole. • Infants must not be bottle fed without adult supervision. • Do not use the nipple as a pacifier. For additional breast milk collection & storage information, please visit www.medela.com. -
Page 39: Maintenance And Care
12. Maintenance and care 12.1 Power adaptor care NOTICE To keep your power adaptor and cable in good working condition, pay attention to the following: Do not unplug the cable or the power adaptor by pulling on the cord, but hold it by the connector housing and adaptor body. -
Page 40: Long-Term Storage
Maintenance and care (cont.) Information To preserve the battery life cycle: • Keep your breast pump in a cool place. • Recharge the battery before it completely drains. This is better for the life cycle of the battery. • Fully charge the battery before storing your breast pump. Refer to section 8.2 for information on the battery charging state. -
Page 41: Troubleshooting
• If there is no change, make sure that the breast pump is On/Off button connected to a properly working power supply. • If there is still no change, contact the Medela Customer Service. • Contact the Medela Customer Service. - Page 42 The breast pump is not button (on the side) for seven seconds. responding as expected • If there is no change, contact the Medela Customer Service. • Unplug the breast pump from the power source and The breast pump exterior switch it off.
-
Page 43: Ordering Information
A different size of breast shield may help make expres- sion more comfortable and successful. In case of difficulties in finding your desired accessory, please contact Medela Customer Service. For contact data visit www.medela.com. Under “Contact” choose your country. -
Page 44: Warranty
LEGAL RIGHTS AND YOU MAY ALSO HAVE OTHER RIGHTS WHICH VARY FROM STATE TO STATE OR IN YOUR COUNTRY. Before you make a claim under this warranty, it may save time and expense to call Medela Customer Service (see contacts below). You may also call this number for additional informa- tion concerning this warranty. -
Page 45: Disposal
16. Disposal Disposal of your breast pump At the end of its operating life, separate the parts of your breast pump and dispose of according to the following instructions. Breast shields, connector, tubing and accessories The parts are made of plastics that are not harmful to the environment when disposed of as household waste. -
Page 46: Meaning Of Symbols
17. Meaning of symbols The following tables explain the meaning of the symbols found on the product parts and its packaging. Symbols used in these instructions General safety alert symbol, points to information related to safety. Defines a temperature range (e.g. for operation, transport or storage). Defines a relative humidity range (e.g. - Page 47 Symbols on the motor unit (cont.) Indicates that this device contains Bluetooth wireless technology. The Regulatory Compliance Mark indicates the compliance with Australian EMC and radio transmission requirements. The CE mark indicates conformity with the European low voltage and electromagnetic compat- ibility directive.
- Page 48 Meaning of symbols (cont.) Symbols on the packaging Identifies the manufacturer. Indicates the part number of the product. Contains fragile goods. Handle with care. Keep away from sunlight. Keep away from rain. Keep in dry conditions. Defines the temperature range for transport or storage. Defines the relative humidity range for transport or storage.
-
Page 49: International Regulations
18. International regulations 18.1 Electromagnetic compatibility (EMC) Breast pumps are intended to be used in a hospital or home environment. The Freestyle Flex breast pump is EMC-tested in conformity with the requirements of IEC 60601-1-2:2007 3rd Edition and IEC 60601-1-2:2014 4th Edition according to clause 7 and 8.9. -
Page 50: Technical Specifications
19. Technical specifications Summary of important technical specifications Vacuum performance (at 500 m above sea Operating temperature range level [954.62 hPa ambient pressure]) 41 to 95 °F -45 to -245 mmHg (-60 to -327 hPa) 45 to 111 cpm Operating humidity range Power adaptor (Model: S010WU0500200) 100 to 240 V~ 50/60 Hz 5 V... - Page 51 Enter “End of document” in a paragraph with the format Pagination End of document...
- Page 52 Medela LLC 1101 Corporate Drive McHenry, IL 60050 USA Phone: (800) 435-8316 / (815) 363-1166 Email: customer.service@medela.com Canada Medela Canada Inc. 4160 Sladeview Crescent, # 8 Mississauga, ON, L5L 0A1 Canada Phone: (905) 608-7272 Email: info@medela.ca www.medela.ca © Medela AG/101037930/2019-07/A...
Need help?
Do you have a question about the Freestyle Flex and is the answer not in the manual?
Questions and answers