Table of Contents
Advertisement
Advertisement
Table of Contents

Related Manuals for Zanussi Z712W43BI


Summary of Contents for Zanussi Z712W43BI
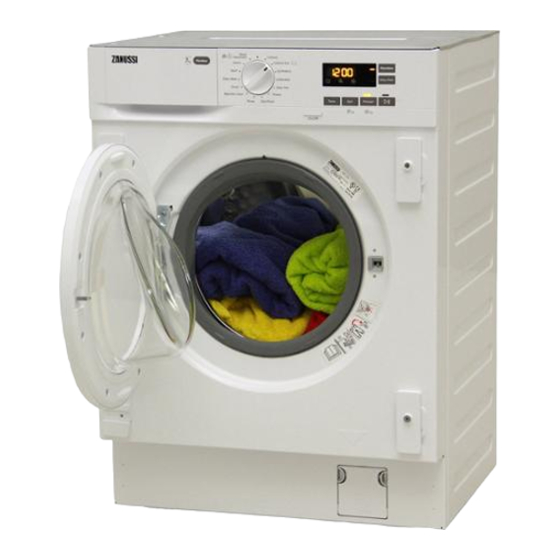
- Page 1 User Manual GETTING STARTED? EASY. Z712W43BI EN User Manual Washing Machine...
-
Page 2: Children And Vulnerable People Safety
VISIT OUR WEBSITE FOR: Get usage advice, brochures, trouble shoot- er, service and repair information: www.zanussi.com/support SAFETY INFORMATION Before the installation and use of the appliance, carefully read the supplied instructions. The manufacturer is not responsible for any injuries or damage that are the result of incorrect installation or usage. -
Page 3: Safety Instructions
staff kitchen areas in shops, offices and other working – environments; by clients in hotels, motels, bed & breakfast and other – residential type environments; areas for communal use in blocks of flats or in launderettes. – Do not exceed the maximum load of 7 kg (refer to the •... -
Page 4: Electrical Connection
• The floor area on which the appliance is to be • Do not use an extension hose if the inlet hose is installed must be flat, stable, heat resistant and too short. Contact the Authorised Service clean. Centre for the replacement of the inlet hose. •... -
Page 5: Product Description
DISPOSAL • Remove the door catch to prevent children or pets from becoming trapped in the drum. WARNING! Risk of injury or • Dispose of the appliance in accordance with suffocation. local requirements for the disposal of Waste Electrical and Electronic Equipment (WEEE). •... -
Page 6: Technical Data
TECHNICAL DATA Dimension Width/ Height/ Total depth 59.6 cm /81.9 cm /55.3 cm Electrical connection Voltage 230-240 V Overall power 2200 W Fuse 13 A Frequency 50 Hz Level of protection against ingress of solid particles and moisture IPX4 ensured by the protective cover, except where the low voltage equipment has no protection against moisture Water supply pressure Minimum... - Page 7 UNPACKING WARNING! Use the gloves. WARNING! Remove all the packaging and the transit bolts before installing the appliance. 1. Put two polystyrene packaging elements on the floor under the appliance. WARNING! It is strongly recom- mended that this action is carries out by two persons.
-
Page 8: Installation On Suspended Flooring
5. Remove the power supply cable and the drain hose from the hose holders. It is possible to see water flowing from the drain hose. This is due to the testing with water of the appli- ance in factory. 6. Remove the three bolts, the hose holders and plastic spacers by using the spanner supplied with the appliance. -
Page 9: Positioning And Levelling
POSITIONING AND LEVELLING 1. Install the appliance on a flat hard floor. WARNING! Make sure that carpets do not stop the air circulation below the ap- pliance. Bring the appliance near the furniture recess before levelling it. For more de- tails, refer to paragraph "Building in". - Page 10 The inlet hose 1. Remove the inlet hose from inside the drum. 2. To connect the water inlet hose towards the prop- er direction and with the proper inclination, check the position of the water tap before connecting it to the back of the appliance.
- Page 11 To a stand pipe with vent-hole Directly into a drain pipe at a height of not less than Ø 40 mm 60 cm (23.6”) and not more than 100 cm (39.3”). The end of the drain hose must always be ventilated , i.e.
-
Page 12: Installing Anti-Tilting Device
If hoses run behind the appliance, make 596 mm 553 mm sure that nothing closes the small re- cess indicated with the measures 50 x 50 mm. 819 mm 50 mm 50 mm 140 mm 76 mm The appliance is also equipped with an adhesive sponge pad H that you can find inside the drum. - Page 13 1. Remove the screws of the top cover on the rear of the appliance and install the anti-tilting device as shown in the drawing. 2. Adjust the anti-tilting device so that the distance from the counter is 10mm. Loosen the nut counter- ~10mm clockwise with a 3mm wrench.
- Page 14 Reversibility of the cupboard door Carry out the cupboard door reversibility before the appliance is built in completely. If the cupboard door has to be opened from left to right, invert the position of the hinge supports M with the magnetic plate N and lower plate O. Make sure that the plate with magnet is on the upper position.
- Page 15 Set the position of the lower hole respecting dimen- sions and distances shown in the drawing (449 16-22 mm mm). Countersink the holes. Ø 35 mm 12,5 - 14 mm 22±1,5 mm 595-598 mm Hinges To mount the hinges it is necessary to drill two holes (dia.
- Page 16 Counter-magnet The appliance is pre set for a magnetic closure. For a correct closure: 1. Position the screw C and the counter-magnet D on the magnetic plate N. Lean the cupboard door against the screw until it leaves a mark. 2.
-
Page 17: Control Panel Description
CONTROL PANEL CONTROL PANEL DESCRIPTION Wool/ Handwash Eco 40-60 Denim Cottons Sport Synthetics Delay Start 20min 3kg Delicates Duvet Easy Iron Machine Clean Mixed Temp. Spin Prewash Rinse Spin/Drain On/Off Spin reduction options touch button and The permanent options are set by permanent Child Lock option holding pressed the relative button for Temp. -
Page 18: Dial And Buttons
DISPLAY Door locked indicator. Child safety lock indicator. The digital indicator can show: • Programme duration: e. g. • Delay time: e. g. • Cycle end: • Warning code: e.g. • Temperature: • Spin speed: and no spin in- dicator DIAL AND BUTTONS INTRODUCTION Touch the button repeatedly to set the required... -
Page 19: Child Lock
To activate/deactivate this option , hold down are available. In some programmes the rinses are performed with more water. the Prewash button until relevant indicator comes on/goes off. If you touch the Start/Pause button, the appliance performs only the draining phase. SPIN The appliance empties the water out When you set a programme, the appliance... -
Page 20: Programme Chart
PROGRAMMES PROGRAMME CHART Programme Reference Default tempera- spin speed Maximum Programme description ture Spin speed load (Type of load and level of soiling) Temperature range range (rpm) Eco 40-60 1200 rpm 7 kg White cotton and fast-coloured cotton. Normally (1200 - soiled items. - Page 21 Programme Reference Default tempera- spin speed Maximum Programme description ture Spin speed load (Type of load and level of soiling) Temperature range range (rpm) 1200 rpm Maintenance cycle with hot water to clean and freshen the drum and to remove residue that may cause odour. Machine Clean For the best result use this cycle once a month.
- Page 22 Programme Reference Default tempera- spin speed Maximum Programme description ture Spin speed load (Type of load and level of soiling) Temperature range range (rpm) 1200 rpm 1.5 kg Machine washable wool, hand washable wool (1200 - and other fabrics with «hand washing» care sym- Wool/Hand- 400) wash...
- Page 23 Programme ■ ■ ■ ■ ■ ■ ■ ■ Mixed ■ ■ ■ Spin/Drain ■ ■ ■ ■ ■ Rinse ■ ■ ■ Machine Clean ■ ■ ■ Duvet ■ ■ ■ 20min 3kg ■ ■ ■ ■ ■ ■ Sport ■...
-
Page 24: Before First Use
Universal pow- Liquid Univer- Liquid for col- Delicates wool- Programme Special oureds lens ▲ ▲ 20min 3kg ▲ ▲ ▲ Sport ▲ ▲ ▲ Denim Wool/Hand- ▲ ▲ wash 1) At temperature higher than 60 °C the use of powder detergent is recommended. ▲... -
Page 25: Check The Position Of The Detergent Flap
3. Put the laundry in the drum, one item at a time. Always follow the instructions that you Do not put too much laundry in the drum. find on the packaging of the detergent 4. Close the door firmly. products, but we recommend that you do not exceed the maximum indicated level ( ). - Page 26 Cancelling the delay start after the countdown has started To cancel the delay start: 1. Touch the Start/Pause button to pause the appliance. The related indicator flashes. 2. Touch the Delay Start button repeatedly until the display shows . 3. Touch the Start/Pause button again to start the programme immediately.
-
Page 27: Opening The Door - Adding Garments
DRAINING WATER OUT AFTER END OF If the AutoAdjust System has CYCLE completed and the water filling has If you have chosen a programme or an option that already started, the new programme does not empty out the water of the last rinse, the starts without repeating the programme is completed, but: AutoAdjust System. -
Page 28: Hints And Tips
HINTS AND TIPS Special stain removers are available. Use the WARNING! Refer to Safety chapters. special stain remover that is applicable to the type of stain and fabric. DETERGENT TYPE AND QUANTITY THE LAUNDRY LOAD The choice of detergent and use of correct •... -
Page 29: Water Hardness
• Normally soiled laundry may be washed WATER HARDNESS without prewash in order to save detergent, If the water hardness in your area is high or water and time (the environment is protected moderate, we recommend that you use a water too!). -
Page 30: Maintenance Wash
Always follow the instructions that you Always follow the instructions that you find on the packaging of the product. find on the packaging of the product. Do not clean the drum with acidic descaling products, scouring products MAINTENANCE WASH containing chlorine or iron or steel The repeated and prolonged use of low wool. -
Page 31: Cleaning The Drain Pump
CLEANING THE DRAIN PUMP Use a small brush to clean the recess. WARNING! Disconnect the mains plug from the mains socket. Regularly check the drain pump filter and make sure that it is clean. Clean the drain pump if: • The appliance does not drain the water. - Page 32 2. Place a suitable bowl below the drain pump access to collect the water that flows out. Always keep a rag nearby to dry up any water spill- ages when removing the filter. 180˚ 3. Turn the filter 180 degrees in anti-clockwise direc- tion to open it, without removing.
- Page 33 8. Clean the filter under the water tap. 9. Put the filter back into the special guides by turning it clockwise. Make sure that you tighten the filter cor- rectly to prevent leakages. 10. Close the pump cover. When you drain the water with the emergency drain procedure, you must activate the drain system again: 1.
-
Page 34: Troubleshooting
CLEANING THE INLET HOSE AND THE VALVE FILTER 45° 20° EMERGENCY DRAIN 1. Disconnect the mains plug from the mains socket. If the appliance cannot drain the water, carry out 2. Close the water tap. the same procedure, described in 'Cleaning the 3. - Page 35 ALARM CODES AND POSSIBLE FAILURES The appliance does not start or it stops during operation. First try to find a solution to the problem (refer to the tables). WARNING! Deactivate the appliance before carrying out any check. With some problems, the display shows an alarm code and the Start/Pause button may flash continuously: If the appliance is overloaded, remove some items from the drum and/or keep pressed the...
- Page 36 • The programme was not finished properly or the appliance stopped too early. Switch the appliance off and on again. No communication be- • If the alarm code appears again, contact the Authorised Service Cen- tween electronic ele- tre. ments of the appliance. •...
-
Page 37: Emergency Door Opening
Problem Possible solution The programme dura- • The AutoAdjust System is able to adjust the programme duration ac- tion increases or de- cording to the type and the laundry load size. Refer to "The AutoAdjust creases during pro- System load detection" in "Daily Use" chapter. gramme execution. -
Page 38: Consumption Values
CONSUMPTION VALUES INTRODUCTION This user manual reports two different tables in order to favour a gradual passage from a reg- ulation to the other: • Regulation EU 1061/2010, valid up to 28th of February 2021, is related to the Energy Effi- ciency classes from A+++ to D, •... - Page 39 Eco 40-60 pro- Litres h:mm °C gramme Quarter load 0.500 2:30 1151 1) Maximum spin speed. Power consumption in different modes Off (W) Stand-by (W) Delay start (W) 0.48 0.48 4.00 Time to Off/Standby mode is 15 minutes maximum. ACCORDING TO REGULATION 1061/2010 Approximate Remaining Energy con-...
-
Page 40: Environmental Concerns
Programme Litres h:mm °C Cottons 1.90 3:25 1200 90°C Cottons 1.10 2:55 1200 60°C Cottons 0.35 2:35 1200 20°C Synthetics 0.75 2:10 1200 40°C Delicates 0.30 0:50 1200 30°C Wool 0.25 1:05 1200 30°C 1) Reference indicator of the spin speed. 2) Suitable for washing heavily soiled textiles. - Page 44 WWW.ZANUSSI.COM/SHOP...
Need help?
Do you have a question about the Z712W43BI and is the answer not in the manual?
Questions and answers