Advertisement
Quick Links
sauder.com
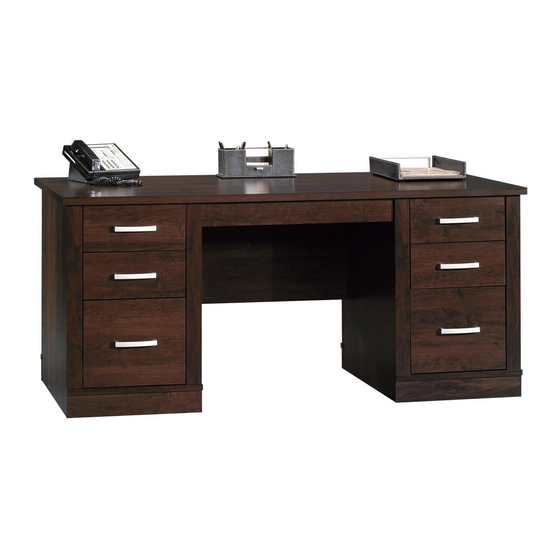
Executive Desk
Offi ce Port Collection | Model 408289
Need help? Visit Sauder.com to view video assembly tips or chat with a live rep.
Prefer the phone? Call 1-800-523-3987.
Share your journey!
Business or pleasure.
Works both ways.
NOTE: THIS INSTRUCTION
BOOKLET CONTAINS IMPORTANT
SAFETY INFORMATION.
PLEASE READ AND KEEP FOR
FUTURE REFERENCE.
English pg 1-27
Français pg 28-31
Español pg 32-36
Lot # 398492
12/06/16
Purchased: __________________
Be sure to give us a ring before
making any returns. 1-800-523-3987
Advertisement

Related Manuals for Sauder Executive Desk 408289


Summary of Contents for Sauder Executive Desk 408289
- Page 1 Offi ce Port Collection | Model 408289 NOTE: THIS INSTRUCTION BOOKLET CONTAINS IMPORTANT SAFETY INFORMATION. Need help? Visit Sauder.com to view video assembly tips or chat with a live rep. PLEASE READ AND KEEP FOR FUTURE REFERENCE. Prefer the phone? Call 1-800-523-3987.
- Page 2 BACK (2) DRAWER FRONT (4) LARGE LEFT DRAWER SIDE (2) BRACE (4) LARGE DRAWER FRONT (2) D107 RIGHT DRAWER SIDE (4) EXTENSION BLOCK (4) BOTTOM MOLDING (4) D108 LEFT DRAWER SIDE (4) BASE (4) END MOLDING (4) Page 2 408289 www.sauder.com/services...
- Page 3 Part Identifi cation D109 D107 D707 D108 D708 www.sauder.com/services 408289 Page 3...
- Page 4 CAM DOWEL - 26 CAM SCREW - 8 METAL BRACKET - 16 RAIL BRACKET - 16 KEYBOARD PULL - 1 HINGE - 2 PULL - 6 GROMMET - 2 METAL PIN - 8 GROMMET CAP - 2 Page 4 408289 www.sauder.com/services...
- Page 5 30S BLACK 1-9/16" FLAT HEAD SCREW - 24 SILVER 5/8" FLAT HEAD SCREW - 4 BLACK 9/16" PAN HEAD SCREW - 2 SILVER 9/16" LARGE HEAD SCREW - 2 SILVER 2" FLAT HEAD SCREW - 8 BLACK 1" PAN HEAD SCREW - 12 www.sauder.com/services 408289 Page 5...
- Page 6 Look for this icon. It means a Step 1 video assembly tip is available at www.sauder.com/services/tips Assemble your unit on a carpeted fl oor or on the empty å carton to avoid scratching your unit or the fl oor. Scan this QR code or go to this address: http://qr.sauder.com/?ID=1684...
- Page 7 Step 2 Turn eight CAM SCREWS (8F) into the å BOTTOM MOLDINGS (Y). Remember: Righty tighty. Lefty loosey. (8 used) www.sauder.com/services 408289 Page 7...
- Page 8 BLACK 9/16" LARGE HEAD SCREW (32 used for the RAIL BRACKETS) (16 used) Surface with HIDDEN CAMS Notched edge Notched edge Notched edge Surface with HIDDEN CAMS Notched edge SILVER 2" FLAT HEAD SCREW (8 used for the EXTENSION BLOCKS) Page 8 408289 www.sauder.com/services...
- Page 9 NOTE: The CABINET RAILS are marked "CABINET RIGHT" å and "CABINET LEFT" for easy identifi cation. GOLD 5/16" FLAT HEAD SCREW (16 used in this step) Roller end Notched edge Roller end Notched edge Roller end Notched edge Roller end Notched edge www.sauder.com/services 408289 Page 9...
- Page 10 RAIL out to fi nd the other hole that lines up with the hole in the END. Turn a (8 used in this step) SCREW into this hole. Open end Push the black lever in and pull the SLIDE from the RAIL. Open end Open end Hole Open end Page 10 408289 www.sauder.com/services...
- Page 11 DD) to the other surfaces of the UPRIGHTS (C2 and D2). Use four GOLD 5/16" FLAT HEAD SCREWS (3S) through holes #1 and #4. Roller end GOLD 5/16" FLAT HEAD SCREW (4 used in this step) Notched edge Roller end Notched edge www.sauder.com/services 408289 Page 11...
- Page 12 Tighten Risk of damage or Arrow injury. HIDDEN CAMS must be completely Arrow Maximum tightened. HIDDEN 210 degrees CAMS that are not completely tightened may loosen, and parts may separate. To Minimum completely tighten: 190 degrees Page 12 408289 www.sauder.com/services...
- Page 13 Fasten the ENDS (A2 and B2) and UPRIGHTS (C2 å and D2) to the TOP (E2). Tighten eight HIDDEN CAMS. Maximum Arrow 210 degrees Minimum 190 degrees Notched edge Notched edge These holes must be here. www.sauder.com/services 408289 Page 13...
- Page 14 D2). Use four BLACK 1-7/8" FLAT HEAD SCREWS (2S). Minimum 190 degrees S u r f a c H I D D E N i t h o BLACK 1-7/8" FLAT HEAD SCREW (4 used in this step) Page 14 408289 www.sauder.com/services...
- Page 15 Step 10 Fasten the BACKS (G2) to the ENDS (A2 and B2) å and UPRIGHTS (C2 and D2). Tighten eight Maximum Arrow HIDDEN CAMS. 210 degrees Minimum 190 degrees www.sauder.com/services 408289 Page 15...
- Page 16 ENDS (A2 and B2) and UPRIGHTS (C2 and D2). The groove should be * U.S. Patent No. 5,499,886 å closer to this edge. Slide the END MOLDINGS (Z) onto the notched edges. The groove should be closer to this edge. Page 16 408289 www.sauder.com/services...
- Page 17 Fasten the BOTTOM MOLDINGS (Y) to the BRACES (H2). å Tighten eight HIDDEN CAMS. Don't worry. It isn't Rome. This can be built NOTE: There should not be a gap between the BOTTOM å in a day. MOLDINGS and the BACKS. www.sauder.com/services 408289 Page 17...
- Page 18 Next, fasten the BASES (J) to the ENDS (A2 and B2), UPRIGHTS (C2 and D2), and å BRACES (H2). Use sixteen BLACK 9/16" LARGE HEAD SCREWS (1S). (16 used) BLACK 9/16" LARGE HEAD SCREW (32 used in this step) Page 18 408289 www.sauder.com/services...
- Page 19 BLACK 9/16" PAN HEAD SCREW (2 used for the KEYBOARD PULL) Long fi nished edge These surfaces should be the same color. BROWN 1-1/2" FLAT HEAD SCREW Long fi nished edge (6 used in this step) www.sauder.com/services 408289 Page 19...
- Page 20 Fasten the HINGES (12H) to the KEYBOARD SHELF (N2). å Use two SILVER 9/16" LARGE HEAD SCREWS (54S). SILVER 5/8" FLAT HEAD SCREW (4 used in this step) SILVER 9/16" LARGE HEAD SCREW (2 used in this step) Page 20 408289 www.sauder.com/services...
- Page 21 FLAT HEAD SCREWS (3S) through holes #1 and #3. NOTE: The DRAWER SLIDES are marked "DRAWER å RIGHT" and "DRAWER LEFT" for easy identifi cation. Roller end Roller end GOLD 5/16" FLAT HEAD SCREW (4 used in this step) www.sauder.com/services 408289 Page 21...
- Page 22 Fasten the LARGE DRAWER BACK (D78) to the LARGE DRAWER SIDES (D87 and D88). Use four BLACK 1-9/16" FLAT å HEAD SCREWS (30S). NOTE: Be sure the LARGE DRAWER BOTTOM (D708) inserts into the groove of the LARGE DRAWER BACK (D78). å Repeat this step for the remaining drawers. å Page 22 408289 www.sauder.com/services...
- Page 23 å Open end Screw head - turn CAM to line up holes in the SLIDES with holes in DRAWER SIDES Open end (4 screws per drawer) GOLD 5/16" FLAT HEAD SCREW (8 used in this step) www.sauder.com/services 408289 Page 23...
- Page 24 BLACK 1" PAN HEAD SCREWS (60S). (4 used for the PULLS) Repeat this step for the other large drawer. å Insert the FILE RODS into the holes of your choice in the FILE GLIDES, depending on your fi le sizes. Page 24 408289 www.sauder.com/services...
- Page 25 Screw head - turn CAM to line up holes in the SLIDES with holes in DRAWER SIDES D108 Roller end D107 (4 screws per drawer) GOLD 5/16" FLAT HEAD SCREW (16 used for the DRAWER SLIDES) www.sauder.com/services 408289 Page 25...
- Page 26 Lift the front of the drawer up and slide it into the unit. Repeat this step to insert the KEYBOARD SHELF (N2). 15 lbs. 100 lbs. 15 lbs. 35 lbs. 15 lbs. 25 lbs. 15 lbs. 35 lbs. Page 26 408289 www.sauder.com/services...
- Page 27 #4. The higher the screw in the oblong hole, the higher your drawer front will be. The lower the screw, the lower the drawer front. www.sauder.com/services 408289 Page 27...
- Page 28 EXTRÉMITÉ DROITE ............. 1 GLISSIÈRE DROITE D'ÉLÉMENT NUMÉROTÉE ..5 pour future référence. EXTRÉMITÉ GAUCHE ............1 GLISSIÈRE GAUCHE D'ÉLÉMENT NUMÉROTÉE ..5 Pour contacter Sauder MONTANT GAUCHE ............1 COULISSE DROITE DE TIROIR NUMÉROTÉE ...5 en ce qui concerne cet MONTANT DROIT ..............1 COULISSE GAUCHE DE TIROIR NUMÉROTÉE ..5...
- Page 29 "CABINET RIGHT" (droite) et "CABINET LEFT" (gauche) pour Escamotables que ne sont pas serrées à bloc peuvent desserrer faciliter leur identifi cation. et les pièces peuvent séparer. Pour serrer à bloc, faire tourner l'excentrique escamotable de 210 degrés. www.sauder.com/services 408289 Page 29...
- Page 30 ÉQUERRE sont à fl eur des chants des EXTRÉMITÉS, des MONTANTS et des ENTRETOISES. Ensuite, fi xer les SOCLES (J) aux EXTRÉMITÉS (A2 et B2), aux MONTANTS (C2 et D2) et aux ENTRETOISES (H2). Utiliser seize VIS TÊTE LARGE 14 mm NOIRES (1S). Page 30 408289 www.sauder.com/services...
- Page 31 REMARQUE : Prière de lire les informations importantes sur la sécurité fi gurant sur les pages arrière du manuel d’instructions. Ceci complète l'assemblage. Pour nettoyer l’unité, humidifi er un chiff on avec de l’eau du robinet et essuyer. www.sauder.com/services 408289 Page 31...
- Page 32 EXTREMO IZQUIERDO ............1 CORRIMIENTO DE ARCHIVERO........ 4 pour future référence. PARAL IZQUIERDO ..............1 VARILLA DE ARCHIVERO ..........4 Pour contacter Sauder PARAL DERECHO ..............1 EXCÉNTRICO ESCONDIDO ........34 en ce qui concerne cet D78 DORSO DE CAJÓN GRANDE ........2 PASADOR DE EXCÉNTRICO ........26...
- Page 33 PARALES (C2 y D2). Utilice ocho TORNILLOS PLATEADOS hacia el exterior para encontrar el otro agujero que se alinea con DE CABEZA PERDIDA de 51 mm (57S). el agujero del EXTREMO. Atornille un TORNILLO dentro de este agujero. www.sauder.com/services 408289 Page 33...
- Page 34 NOTA: No debe quedar ningún espacio entre las MOLDURAS DE FONDO y los DORSOS. PASO 8 Fije los EXTREMOS (A2 y B2) y los PARALES (C2 y D2) al PANEL SUPERIOR (E2). Apriete ocho EXCÉNTRICOS ESCONDIDOS. Page 34 408289 www.sauder.com/services...
- Page 35 DORADOS de cabeza PERDIDA de 8 mm (3S) a través de los agujeros No. 1 y No. 4. NOTA: La cabeza de tornillo del EXCÉNTRICO debe ser visible a través del agujero alargado de la CORREDERA. Repita este paso para el otro cajón grande. www.sauder.com/services 408289 Page 35...
- Page 36 TORNILLOS NEGROS DE CABEZA REDONDA de 25 mm (60S). Esto completa el ensamblaje. Para limpiar la unidad, humedezca Repita este paso para los otros cajones pequeños. un paño con agua de llave y limpie. Page 36 408289 www.sauder.com/services...
- Page 37 à Les téléviseurs peuvent être particulièrement un téléviseur. cet eff et. lourds. De plus, le poids et l’emplacement du tube image ont tendance à rendre les téléviseurs instables et enclins à tomber vers l’ a vant. www.sauder.com/services 408289 Page 37...
- Page 38 Además, el peso y la ubicación del tubo de imagen tienden a causar la inestabilidad de televisores y propensa a volcarse hacia adelante. Page 38 408289 www.sauder.com/services...
- Page 39 à compter de la date d'achat la première fois et qui sont signalés à Sauder dans les limites de couverture de la contre tout défaut de matériaux ou de fabrication des composantes de mobilier Sauder.
- Page 40 Dear Valued Customer: So, how did it go? Thanks so much for choosing Sauder® furniture. I hope the Set a world record for speed? purchase and assembly process was a positive experience Feeling good about yourself? and you feel good about the furniture you just built. If you Nice.
Need help?
Do you have a question about the Executive Desk 408289 and is the answer not in the manual?
Questions and answers