Advertisement
Quick Links
sauder.com
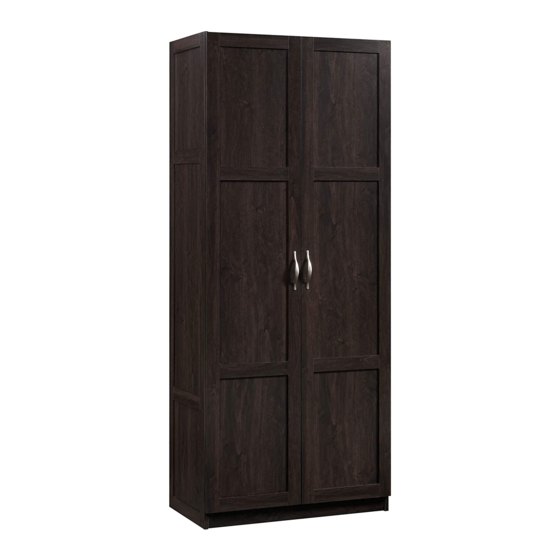
Storage Cabinet
419496
Need help? Visit Sauder.com to view video assembly tips or chat with a live rep.
Prefer the phone? Call 1-800-445-1527.
Share your journey!
You'll love what we
have in storage.
NOTE: THIS INSTRUCTION
BOOKLET CONTAINS IMPORTANT
SAFETY INFORMATION.
PLEASE READ AND KEEP FOR
FUTURE REFERENCE.
English pg 1-18
Français pg 19-21
Español pg 22-24
Lot #: 374611
Date Purchased: __________________
06/15/15
Be sure to give us a ring before
making any returns. 1-800-445-1527
Advertisement

Related Manuals for Sauder Storage Cabinet 419496


Summary of Contents for Sauder Storage Cabinet 419496
- Page 1 NOTE: THIS INSTRUCTION BOOKLET CONTAINS IMPORTANT SAFETY INFORMATION. PLEASE READ AND KEEP FOR Need help? Visit Sauder.com to view video assembly tips or chat with a live rep. FUTURE REFERENCE. Prefer the phone? Call 1-800-445-1527. English pg 1-18 Français pg 19-21 Español pg 22-24...
- Page 2 Use this part identifi cation to help identify similar parts. RIGHT END (1) BACK (1) LEFT END (1) RIGHT DOOR (1) UPRIGHT (1) LEFT DOOR (1) TOP (1) ADJUSTABLE SHELF (4) BOTTOM (1) FRONT SKIRT (1) SHELF (1) BACK SKIRT (1) Page 2 www.sauder.com/services 419496...
- Page 3 Part Identifi cation 419496 www.sauder.com/services Page 3...
- Page 4 APPLIQUE - 22 1-3/8" FLAT HEAD SCREW - 24 1" PAN HEAD SCREW - 1 5/8" PAN HEAD SCREW - 1 5/8" MACHINE SCREW - 4 1/2" PAN HEAD SCREW - 12 1/2" FLAT HEAD SCREW - 12 Page 4 www.sauder.com/services 419496...
- Page 5 Look for this icon. It means a Step 1 video assembly tip is available at www.sauder.com/services/tips Assemble your unit on a carpeted fl oor or on the empty å carton to avoid scratching your unit or the fl oor. Fasten six ANGLE BRACKETS (1) to the SKIRTS (K and L).
- Page 6 Fasten the SKIRTS (K and L) to the BOTTOM (E). Use å six 1/2" PAN HEAD SCREWS (16) through the ANGLE BRACKETS on the SKIRTS and into the BOTTOM. 1/2" PAN HEAD SCREW (6 used in this step) The molding on the BOTTOM should be here. Page 6 www.sauder.com/services 419496...
- Page 7 Fasten the BOTTOM (E) to the UPRIGHT (C). Use two å Caution 1-3/8" FLAT HEAD SCREWS (11). Do not stand the unit upright without the BACK fastened. The unit may collapse. 1-3/8" FLAT HEAD SCREW (2 used in this step) 419496 www.sauder.com/services Page 7...
- Page 8 Then, peel two APPLIQUES (7) from the applique card å and stick them over the head of the SCREWS. Peel the APPLIQUES from the applique card. The molding on the SHELF should be here. 1-3/8" FLAT HEAD SCREW (2 used in this step) Page 8 www.sauder.com/services 419496...
- Page 9 Step 5 Fasten the HINGE BRACKETS (3) to the ENDS (A and B). å Use the SCREWS in the HINGE BRACKETS. 419496 www.sauder.com/services Page 9...
- Page 10 SCREWS. Edge with HINGE BRACKETS 1-3/8" FLAT HEAD SCREW (10 used in this step) u r f a i s h e F i n (10 used) To cover screws Page 10 www.sauder.com/services 419496...
- Page 11 Then, peel ten APPLIQUES (7) from the applique card å and stick them over the head of the SCREWS. Edge with HINGE BRACKETS 1-3/8" FLAT HEAD SCREW (10 used in this step) (10 used) To cover screws 419496 www.sauder.com/services Page 11...
- Page 12 NOTE: Be sure to tap NAILS into the holes that line up å over the UPRIGHT (C) and SHELF (F). NAIL (38 used in this step) These holes must line up over the UPRIGHT (C) and SHELF (F). Page 12 www.sauder.com/services 419496...
- Page 13 Step 9 Fasten the HINGES (2) to the DOORS (H and I). Use å twelve 1/2" FLAT HEAD SCREWS (15). 1/2" FLAT HEAD SCREW (12 used in this step) 419496 www.sauder.com/services Page 13...
- Page 14 Fasten the DOORS (H and I) to the ENDS (A and B). Slide å the HINGES on the DOORS onto the HINGE BRACKETS on the ENDS. Secure the DOORS with the mounting screw on the HINGE BRACKET. HINGE BRACKET Page 14 www.sauder.com/services 419496...
- Page 15 Push the RUBBER SLEEVES (9) over the METAL å PINS (8). Insert the METAL PINS into the hole locations of your choice in the ENDS (A and B) and UPRIGHT (C). Set the ADJUSTABLE SHELVES (J) onto the METAL PINS. (16 used) 419496 www.sauder.com/services Page 15...
- Page 16 Step 12 Fasten the PULLS (4) to the DOORS (H and I). Use four å 5/8" MACHINE SCREWS (14). 5/8" MACHINE SCREW (4 used for the PULLS) Page 16 www.sauder.com/services 419496...
- Page 17 We recommend using the SAFETY STRAP (6) for added stability. å Fasten the SAFETY STRAP (6) to the TOP (D). Use a 5/8" PAN HEAD å SCREW (13). 5/8" PAN HEAD SCREW (1 used in this step) 419496 www.sauder.com/services Page 17...
- Page 18 This completes assembly. Clean with your favorite furniture polish or å a damp cloth. Wipe dry. Weight Limits: Shelf - 50 lbs. Adjustable Shelf - 25 lbs. each Bottom - 50 lbs. No load Page 18 www.sauder.com/services 419496...
- Page 19 QUANTITÉ d’ a chat de cet élément et conserver le livret pour future référence. EXTRÉMITÉ DROITE ..........1 CONSOLE À ÉQUERRE .........6 Pour contacter Sauder EXTRÉMITÉ GAUCHE ..........1 CHARNIÈRE ..............6 en ce qui concerne cet MONTANT................1 CONSOLE DE CHARNIÈRE.........6 élément, faire référence au numéro de lot et...
- Page 20 À l’ a ide d’un marteau, fi xer l'ARRIÈRE (G) à l'élément à l'aide des CLOUS (10). REMARQUE : S'assurer de bien enfoncer les CLOUS dans les trous qui sont alignés au-dessus le MONTANT (C) et la TABLETTE (F). Page 20 www.sauder.com/services 419496...
- Page 21 ÉTAPE 12 Ceci complète l'assemblage. Nettoyer à l’ a ide d’une encaustique Fixer les POIGNÉES (4) aux PORTES (H et I). Utiliser quatre VIS À pour meubles ou d’un chiff on humide. Essuyer. MÉTAUX 16 mm (14). 419496 www.sauder.com/services Page 21...
- Page 22 EXTREMO DERECHO ............1 SOPORTE ANGULAR ..........6 et conserver le livret pour future référence. EXTREMO IZQUIERDO ............1 BISAGRA ................6 Pour contacter Sauder PARAL ....................1 SOPORTE DE BISAGRA ........6 en ce qui concerne cet PANEL SUPERIOR ..............1 TIRADOR ................2 élément, faire référence...
- Page 23 Utilizando un martillo, fi je el DORSO (G) a la unidad utilizando los CLAVOS (10). NOTA: Asegúrese de clavar ligeramente los CLAVOS dentro de los agujeros que se alinean sobre el PARAL (C) y el ESTANTE (F). 419496 www.sauder.com/services Page 23...
- Page 24 Fije los TIRADORES (4) a las PUERTAS (H e I). Utilice cuatro Esto completa el ensamblaje. Limpie con su pulimento para TORNILLOS PARA METAL de 16 mm (14). muebles preferido o un paño húmedo. Seque con un paño. Page 24 www.sauder.com/services 419496...
- Page 25 • Ne pas pousser le mobilier, surtout sur la être très lourd. moquette. Se faire aider par une autre personne pour soulever l’élément et le mettre en place. • Cette unité doit être placée contre un mur. 419496 www.sauder.com/services Page 25...
- Page 26 • No empuje la unidad, especialmente sobre ser muy pesado. un piso alfombrado. Pide la ayuda de otra persona para levantar la unidad y colocarla en lugar. • Esta unidad debe ser colocada contra una pared. Page 26 www.sauder.com/services 419496...
- Page 27 GARANTIE LIMITÉE DE 1 AN 1. Sauder Woodworking Co. (Sauder®) off re une couverture de garantie limitée à l’ a cheteur 4. La présente garantie ne s’ a pplique qu’ a ux défauts garantis qui se produisent pour initial du présent produit pendant une période un an à...
- Page 28 Dear Valued Customer: So, how did it go? Thanks so much for choosing Sauder® furniture. I hope the Set a world record for speed? purchase and assembly process was a positive experience Feeling good about yourself? and you feel good about the furniture you just built. If you Nice.
Need help?
Do you have a question about the Storage Cabinet 419496 and is the answer not in the manual?
Questions and answers
We purchased this beautiful cabinet from an individual but the 4 adjustable shelves (j) did not come with it. Are the shelves available separately and what is the price?