Table of Contents
Advertisement
Quick Links
Advertisement
Table of Contents

Related Manuals for Quest Engineering Screen House


Summary of Contents for Quest Engineering Screen House
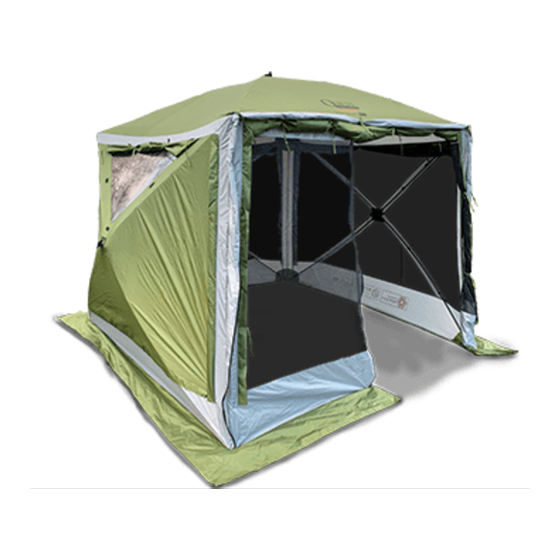
- Page 1 Welcome to your instructions Screen House : and accessories...
- Page 2 If the screen house is left unattended it could impact the performance of the screen house. • If the screen house is going to be left unattended for an extended period of time (longer than a couple of days), we recommend to take the screen house down.
- Page 3 These allow the addition of optional extra. • The Screen House 6 Pro also has two doors, one at the front and one at the rear. The front door can be identified by the logo printed above it and the rear door can be idenfied as it does not have a logo above it.
- Page 4 Screen House and accessories full instructions Screen House 4 Roof Frame Diagram Code: 120053 • Diagram Version 1 Roof poles 11mm diameter Solid Fibreglass Pole end caps (hub end) Pole end caps (sleeve end) Roof hub 2 Pieces (top and bottom)
- Page 5 Screen House and accessories full instructions Screen House 4 Roof Frame Diagram Code: A3000 • Diagram Version 1 Roof poles 11mm diameter Solid Fibreglass Pole end caps (hub end) Pole end caps (sleeve end) Roof hub 2 Pieces (top and bottom)
- Page 6 Screen House and accessories full instructions Screen House 6 Roof Frame Diagram Code: 120051 • Diagram Version 1 Roof poles 11mm diameter Solid Fibreglass Pole end caps (hub end) Pole end caps (sleeve end) Roof hub 2 Pieces (top and bottom)
- Page 7 Screen House and accessories full instructions Screen House 6 Roof Frame Diagram Code: A3001 • Diagram Version 1 Roof poles 11mm diameter Solid Fibreglass Pole end caps (hub end) Pole end caps (sleeve end) Roof hub 2 Pieces (top and bottom)
- Page 8 • Remove the two door poles by unfastening the velcro tabs and removing the poles from the pockets. • Walk to the centre of the screen house and using the pull loop attached to the roof pull the roof down until it relaxes fully. Take care not to pull the roof down on top of yourself.
- Page 9 • Condensation : Condensation is a natural process where moisture from the ground is drawn up and collects on the roof or sides or your screen house. Whilst this is keep to a very minimum thanks to the mesh side on your screen house, you may still get some on roof during certain conditions.
- Page 10 • Take the canopy out of the bag and locate the zip(s) on the canopy. There are two zips on the canopy, one for use with a screen house 4 pro and one for use with a screen house 6 pro. The screen house 4 zip is the longer of the two.
- Page 11 Screen House Pro and a vehicle. The vehicle connector goes on the rear accessory zip on your Screen House 6 Pro and the front accessory zip on your Screen House 4 Pro. • First zip the vehicle connector onto your Screen House. There are two zips on the vehicle connector.
- Page 12 Drive away kits come in two different sizes : 4 and 6mm. You choose the size closest to the size of the channel on your vehicle or roll out canopy. Please consult the instructions that came with your canopy/channel to find our which one you need.
- Page 13 Screen House and accessories full instructions Registration You can register your Screen House online at https://www.questleisure.com/register or fill out the form below and send it into Quest : Model Your Purchase Name Date Your Retailers Email Name Your Retailers Address...
- Page 14 Screen House and accessories full instructions Warranty : 12 Months (1 Year) warranty. Warranty Claim • In the unlikely event of a warranty claim, you must contact your retailer. • If you have not registered your product, first fill out the registration form overleaf and take this with you when you go to your retailer.
- Page 15 Screen House and accessories full instructions This Screen House is part of the Quest range of screen houses, shelters and accessories. This range includes the following items that are matched with your product. 1 Person 1 Minute to erect Premium...
- Page 16 Screen House and accessories full instructions This Screen House is part of the Quest range of screen houses, shelters and accessories. This range includes the following items that are matched with your product. 1 Person 1 Minute to erect Premium...
- Page 17 Screen House and accessories full instructions This Screen House is part of the Quest range of screen houses, shelters and accessories. This range includes the following items that are matched with your product. 1 Person 1 Minute to erect Premium...
- Page 18 Screen House and accessories full instructions This Screen House is part of the Quest range of screen houses, shelters and accessories. This range includes the following items that are matched with your product. 1 Person 1 Minute to erect Premium...
- Page 19 Screen House and accessories full instructions This Screen House is part of the Quest range of screen houses, shelters and accessories. This range includes the following items that are matched with your product. 1 Person 1 Minute to erect Small...
- Page 20 Screen House Side Walls • Added privacy and protection from the elements • Clips in place in seconds • Sold in pairs • Available for Screen House 4 and 6 (not pro models) 120054 : Screen House 4 side walls (beige)
- Page 21 Along with the other items in the range there are other optional accessories available for your product. Cat No A5505 Screen House Pro vehicle connector • Connects your Screen House Pro to a vehicle • U.V. protection • Simply zips into place • Dual side doors •...
- Page 22 ...outdoor leisure, home & garden www.twitter.com/questleisure www.facebook.com/questleisure www.youtube.com/questleisure Email: info@questleisure.com • Web: www.questleisure.com...
Need help?
Do you have a question about the Screen House and is the answer not in the manual?
Questions and answers