Table of Contents
Advertisement
Quick Links
Advertisement
Table of Contents

Related Manuals for Fermax VDS SMILE


Summary of Contents for Fermax VDS SMILE
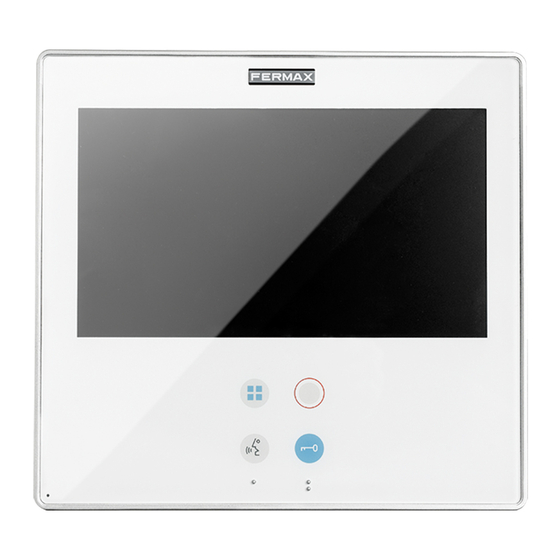
- Page 1 SMILE Touch Monitor INSTALLATION AND PROGRAMMING MANUAL AVANCED MANUAL...
- Page 2 Code 97890Ib V09_18 This technical document of an informative nature is published by FERMAX ELECTRONICA, who reserves the right to modify the technical characteristics of the products referred to herein at any time and without prior notice. These changes will be refl ected in subsequent editions of this document.
-
Page 3: Table Of Contents
SMILE Monitor INDEX CONTROL BUTTONS (capacitive buttons) ................4 1.1 TOUCH SCREEN 7’’, BROWSE BUTTONS AND LED ..............4 1.2 STRUCTURE AND LAYOUT OF FUNCTIONS ................5 1.3.SHORTCUT BUTTONS .........................6 1.4 ENABLE FUNCTIONS ........................6 1.5 SAVING AFTER CHANGING SCREENS OR RESET ..............6 1.6 MENU BUTTON FUNCTIONS TABLE BY TIME PRESSED ............6 FUNCTIONS AVAILABLE ON THE MONITOR ................7 2.1 DO NOT DISTURB (Cancel ring tone) ....................7 2.2 CALL GUARD UNIT ........................7... -
Page 4: Control Buttons (Capacitive Buttons)
SMILE Monitor 1. CONTROL BUTTONS (capacitive buttons) Lock Releases / Call Guard Unit Button. 1. In conversation, press to open the door. 2. In standby, call to guard unit (if applicable). Button Menu: Adjustments and confi guration 1. Press for 3 seconds to access the installer and ring tone menu. 2. -
Page 5: Structure And Layout Of Functions
SMILE Monitor 1.2 STRUCTURE AND LAYOUT OF FUNCTIONS Do not disturb mode (2.1) Calling the guard unit (2.2) Auto-start (2.3) Doormatic Mode (2.4) F1 Function (2.5) F2 Function (2.6) Confi guration Menu (2.7) Ring tones (2.7.1) Installer menu (2.7.2) Accessing Programming: Do not disturb mode - Monitor - Call capture... -
Page 6: Shortcut Buttons
SMILE Monitor 1.3. SHORTCUT BUTTONS The short-cut buttons menu is accessible via a short-press of the MENU button from the following status: - Standby - Only Video and Re-press a short press on the MENU - Conversation button to access the shortcut button screen. -
Page 7: Functions Available On The Monitor
SMILE Monitor 2. FUNCTIONS AVAILABLE ON THE MONITOR Below we will discuss all of the functions on the monitor. 2.1 DO NOT DISTURB (Cancel ring tone) Function for deactivating the ring tone. With this mode active, the do not disturb mode led is on and we if we receive a call, the audio LED will fl... -
Page 8: Auto-Start
SMILE Monitor 2.3. AUTO-START Function for activating the panel camera. Auto-start can be performed: Wildcard button. With the monitor on standby, press and hold the wildcard for 1 second to switch the monitor on manually. With video, press and hold this button for 2 seconds to sequentially select between the main camera and the secondary camera (where one exists). -
Page 9: F1 Function
SMILE Monitor 2.5 F1 FUNCTION The F1 function and F1 terminal have the option of confi guring its operating mode in two ways when the monitor is integrated in an MDS Digital system (along with the corresponding MDS/ VDS decoder): - Sending a negative (exit) or - Panic call to MDS guard unit (entrance). -
Page 10: Ring Tones
SMILE Monitor 2.7.1 Ring tones A function that allows you to select the ring tone for each type of call. The selected ring tones sound Main panel Decrease/increase volume Secondary panel Volume settings Doorbell Continuous mode (the ring tone sounds 3 times). -
Page 11: A1) Programming From: Monitor / Panel
SMILE Monitor a1) Programming from: - Monitor Enter the monitor’s address. Call range for VDS from 1...199. - Panel Upon pressing, a screen confi rms the option and you hear a beep on the monitor, and automatically the monitor connects with the street panel, activating the camera (an icon appears on the upper corner of the street panel). -
Page 12: A3) Programming Installer Code
SMILE Monitor master panel < 2 and half minutes a3) Programming installer code Function for changing the installer code. b) Conversation Mode Menu to select the conversation mode (hands free mode, by default). Simplex mode: press to talk and release to listen to the audio activation button. This function automatically simplex opens audio after receiving a call... -
Page 13: C) Confi G. Func. Assigned By The Menu, Shortcut Or Wildcard Buttons
SMILE Monitor c) Confi guration of functions assigned by the menu, shortcut or wildcard button. The installer may enable determined functions that are not enabled by default. Within the FUNCTIONS options, these are enabled by default as a screen sample. - X: Enabled as shortcut buttons. -
Page 14: C7) Activation Of The Aerial Camera (Cctv)
SMILE Monitor c7) Activation of the aerial camera (CCTV) There is the option to connect an external analogue camera to the monitor and use it as a CCTV image. This camera´s image appears on the monitor when we select the CCTV function. When the auxiliary video input is activated, the CCTV icon is displayed on the monitor´s screen indicating that it is the CCTV. -
Page 15: D) Parameter Confi Guration
SMILE Monitor d) Parameter confi guration. The installer may enable determined parameters that are not enabled by default. e1) Activation F2 with door opening e2) Call identifi cation (panel number). e3) Inductive loop. e4) Activation of the aerial camera with doorbell e5) Activation of auxiliary devices with do not disturb mode Selected... -
Page 16: D5) Activation Of Auxiliary Devices With Do Not Disturb Mode
SMILE Monitor d5) Activation of auxiliary devices with do not disturb mode. A function that allows you to listen to the call extension output tone, light and ring tone activator... etc, even if in do not disturb mode when the monitor receives a call. Indicator LED Do not disturb mode activated... -
Page 17: Audio Settings
7” touch screen 5. MONITOR SIZE Measurement in mm. SURFACE FLUSH-MOUNTED Note: Dimensions of fl ush-mounted Fermax box ref. 6551: - Does not require decorative frame, (see 186 x 198 x 46 mm (Height x Width x Depth.) installation). Page 17... -
Page 18: Installing The Monitor
SMILE Monitor 6. INSTALLING THE MONITOR 6.1 EMBEDDED 7" 6.2 SURFACE 7" Page 18... -
Page 19: Connections
SMILE Monitor 6.3 CONNECTIONS MONITOR CONNECTOR Video terminals: V: live M: mesh CT: camera activation (12 Vdc) VAUX: auxiliary video input (CCTV camera connection). This function is not available at Dominium model. Connection Terminals: +, -: 18 Vdc power supply. L: data bus. - Page 20 SMILE Monitor ominiu m home management DISTRIBUIDOR VIDEO 2 SALIDAS REF.2448 2 OUTPUTS VIDEO DISTRIBUTOR COAX COAX DISTRIBUIDOR VIDEO 2 SALIDAS REF.2448 2 OUTPUTS VIDEO DISTRIBUTOR 75 Ohm COAX Page 20...
- Page 21 SMILE Monitor ominium home management DISTRIBUIDOR VIDEO 2 SALIDAS REF.2448 2 OUTPUTS VIDEO DISTRIBUTOR COAX DISTRIBUIDOR VIDEO 2 SALIDAS REF.2448 2 OUTPUTS VIDEO DISTRIBUTOR b) With BUS 5 wires / UTP CAT5. DISTRIBUIDOR VIDEO 2 SALIDAS REF.2448 2 OUTPUTS VIDEO DISTRIBUTOR 75 Ohm 75 Ohm Page 21...
- Page 22 SMILE Monitor ominium home management DISTRIBUIDOR VIDEO 2 SALIDAS REF.2448 2 OUTPUTS VIDEO DISTRIBUTOR DISTRIBUIDOR VIDEO 2 SALIDAS REF.2448 2 OUTPUTS VIDEO DISTRIBUTOR 75 Ohm Page 22...
- Page 23 SMILE Monitor ominium home management DISTRIBUIDOR VIDEO 2 SALIDAS REF.2448 2 OUTPUTS VIDEO DISTRIBUTOR DISTRIBUIDOR VIDEO 2 SALIDAS REF.2448 2 OUTPUTS VIDEO DISTRIBUTOR c) Auxiliary video input 75 Ohm COAX omini um home management Not functional. Page 23...
- Page 24 Avd. Tres Cruces, 133 46017 Valencia España...
Need help?
Do you have a question about the VDS SMILE and is the answer not in the manual?
Questions and answers