
Related Manuals for Thermo Scientific HM525 NX Series


Summary of Contents for Thermo Scientific HM525 NX Series
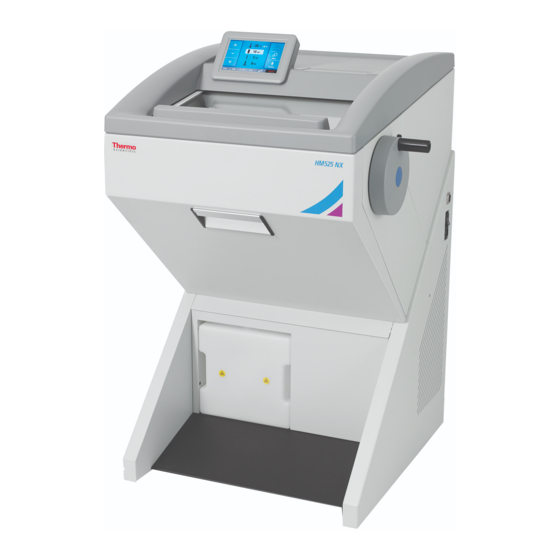
- Page 1 Thermo Scientific HM525 NX Product Code 956640, 956641, 956650, 956651 Operator Guide 388159 Issue 10...
- Page 2 Thermo Scientific HM525 NX Operator Guide...
-
Page 3: Company Information
The development of Thermo Scientific products and services is an ongoing process. Please ensure that any published information you use as a reference is up to date and relates to the condition of the product. If necessary, check with your local Thermo Fisher Scientific representative. - Page 4 Thermo Scientific HM525 NX Operator Guide HM525 NX 110V EC Regulation No 517/2014 – Fluorinated Greenhouse Gas Regulations Contains fluorinated greenhouse gases Refrigerant: R404A R404A GWP value = 3992 System charge weight = 0.182 Kg System CO2 equivalent charge weight = 0.713 tonnes HM525 NX 230V EC Regulation No 517/2014 –...
-
Page 5: Emc Statement
Thermo Scientific HM525 NX Operator Guide EMC Statement This IVD equipment complies with the emissions and immunity requirements of IEC 61326-2-6:2012 and IEC 61326-1:2012. This equipment has been designed and tested to CISPR 11:2009+A1:2010 Class A. It is intended for use in a laboratory environment by a trained and qualified professional. In a domestic environment it may cause radio interference, in which case it may be necessary to take measures to mitigate the interference. -
Page 6: Important Note Regarding Instrument Variants
Thermo Scientific HM525 NX Operator Guide Important Note Regarding Instrument Variants This document is designed for use with all the Thermo Scientific HM525 NX. Only two variants UVC and none UVC are available on this instrument and the instructions contained in this manual are not specific to any one variant. -
Page 7: Symbols
Thermo Scientific HM525 NX Operator Guide Symbols The following symbols and conventions may be used throughout this document and on the instrument: This symbol is used on the instrument, or in a document, to indicate that instructions must be followed for safe and correct operation. If this symbol appears on the instrument, always refer to the operator guide. - Page 8 Thermo Scientific HM525 NX Operator Guide ial number It is stated on the product label sticker. It is built up as follows: SYYMMXXXX S=Production site, Y=year of production, M=Month of production, X= Counter So the serial number states the production date of the device...
-
Page 9: Table Of Contents
Thermo Scientific HM525 NX Operator Guide Table of Contents COMPANY INFORMATION ..........................3 EMC S ..............................5 TATEMENT IMPORTANT NOTE REGARDING INSTRUMENT VARIANTS ................6 ................................7 YMBOLS TABLE OF CONTENTS ............................9 SAFETY INFORMATION ..........................12 ..............................12 ENERAL AFETY .............................. - Page 10 Thermo Scientific HM525 NX Operator Guide Fine Adjustment of the Anti-Roll Device ....................... 29 Selecting the Clearance Angle ........................29 Specimen Head HM525 NX .......................... 29 ................................. 30 ETUP ..............................31 PECIMEN ETUP CHAPTER 3 – OPERATION..........................32 ..............................32 WITCHING .............................
- Page 11 Thermo Scientific HM525 NX Operator Guide ........................50 ROGRAMMING THE EFROST YCLE Program the Daily Defrost Cycle ........................50 ................................51 Enter the Log File ............................51 ..............................52 ACTORY ETTINGS Reset to Factory Settings ..........................52 Display Icons with Text ..........................52 ................................
-
Page 12: Safety Information
Thermo Scientific HM525 NX Operator Guide Safety Information Thermo Scientific instruments are designed for convenient and reliable service; however, improper use or handling by a user may damage the instrument, or cause a hazard to health. The instrument must not be used in a manner not specified by Thermo Shandon Limited. -
Page 13: Chemical Safety
Thermo Scientific HM525 NX Operator Guide Chemical Safety The introduction of chemicals creates potential hazards. Thermo Fisher Scientific has adopted the following position with regard to the subject of volatile chemicals used in laboratories: • Customers using non-specified chemicals in the instrument, do so at their own risk. -
Page 14: Chapter 1 - Introduction
Chapter 1 – Introduction Intended Use The Thermo Scientific cryostat HM525 NX is an in vitro diagnostic device, designed to take precision sections of tissue specimens including the sectioning of paraffin embedded samples in medical, pharmaceutical laboratories as necessary preparation for their examination. -
Page 15: Technical Specifications
Thermo Scientific HM525 NX Operator Guide Technical Specifications Mechanical Specifications Depth 760 mm (29.9 in) Width 640 mm (25.19 in) w/o handwheel Height Range 1150 mm ( 45.3 in) Maximum Weight 143 kg (315.2 lb) Electrical Specifications Dedicated line recommended. -
Page 16: Cooling Specifications
Thermo Scientific HM525 NX Operator Guide Cooling Specifications Cryobar Cooling (Peltier Element) Max. - 55°C (-67°F) Chamber Temperature Max. -35°C -2K/+1K (-31°F -2K/+1K) at +20°C room Temp. (decrease 0,7°C/1°C room temp. increase) Defrosting Options Programmed / Immediate Microtome and Sectioning Specifications Section Thickness Range 1 –... -
Page 17: Factory Settings
Thermo Scientific HM525 NX Operator Guide Factory Settings Counter Mode Retraction Language English Chamber Temperature -20°C Fine 1 µm Trim 5 µm Chamber Light 100% Screen Brightness 100% Stepper Motor Initialization Cryobar Defrost Cycle (Automatic) ON (00:00 Night) Section Counter... -
Page 18: Chapter 2 - Instrument Setup
Thermo Scientific HM525 NX Operator Guide Chapter 2 – Instrument Setup Unpacking and Repacking Safety Precautions Use safe lifting practices when moving the HM525 NX. At least two people are required to safely move the instrument. The HM525 NX has a high centre of gravity and care should be taken when moving. -
Page 19: Unpacking The Instrument
Thermo Scientific HM525 NX Operator Guide Unpacking the Instrument • Cut through the three packing straps and remove the packing. • Remove the upper wooden cover (fig. 1) (item • The hinges of the upper wooden cover are secured with tape. - Page 20 Thermo Scientific HM525 NX Operator Guide The instrument is very heavy. While the instrument rolls down the ramp, it must be carefully controlled. • Now the HM525 NX can be rolled to its site of installation. • For possible return shipments, please keep all packing materials.
-
Page 21: Repacking The Instrument
Thermo Scientific HM525 NX Operator Guide Instead of the hand wheel handle, a transportation screw (Fig 2b) (item 1) is inserted into the hand wheel. This way the hand wheel is tight and securely connected with the housing of the HM525 NX. -
Page 22: Location And Setup
Thermo Scientific HM525 NX Operator Guide Location and Setup When deciding where to locate the HM525 NX, the following items must be taken into consideration: • Approximately 10 cm (4 in) must be allowed around the cooling system to allow free air flow. -
Page 23: Identification Of Parts
Thermo Scientific HM525 NX Operator Guide Identification of Parts Overview Cryo chamber Cryo chamber Window Touch Screen Connections Panel Handwheel Mechanical Lock Handwheel Water Drain Reservoir Connections Panel USB port Power Switch 10 Power Socket Cryochamber Cryobar and Cooled Storage Area... -
Page 24: Solid Knife Holder
Thermo Scientific HM525 NX Operator Guide Solid Knife Holder Inserting the Knife • The knife is inserted into the slot behind the clamping plate. Clamping Plates Clamping Screws Anti-roll Plate Anti-roll Plate Turning Lever Knurled Screw Anti-roll Plate Knurling Screw... -
Page 25: Fine Adjustment Of The Anti-Roll Device
Thermo Scientific HM525 NX Operator Guide Fine adjustment of the anti-roll device: • The fine adjustment of the anti-roll device is carried out via the knurled screw. Selecting the clearance angle: • Loosen the clamping lever on the left side of the knife carrier. -
Page 26: Disposable Blade Holder Ec
Thermo Scientific HM525 NX Operator Guide Disposable Blade Holder EC • The disposable blade carrier takes all commercially available low and high profile blades. The anti-roll plate length is 39.5 mm. Blade Clamping Lever Blade carrier Clamping Lever Clearance Angle Clamping Lever... -
Page 27: Fine Adjustment Of The Anti-Roll Device
Thermo Scientific HM525 NX Operator Guide If the cutting area of the blade is no longer usable, the blade carrier can be moved: • The blade itself is clamped solidly into the blade carrier. The complete carrier is moved. •... -
Page 28: Disposable Blade Holder Ec 70
Thermo Scientific HM525 NX Operator Guide Disposable Blade Holder EC 70 Blade Clamping Lever Blade Carrier Clamping Lever Clearance Angle Clamping Lever Clearance Angle Scale Anti-roll Plate Turning Lever Anti-roll Plate Knurling Screw Knurling Screw Spacer strip for high profile blade... -
Page 29: Fine Adjustment Of The Anti-Roll Device
Thermo Scientific HM525 NX Operator Guide Fine Adjustment of the Anti-Roll Device • The fine adjustment of the anti-roll device is carried out via the knurling screw. Selecting the Clearance Angle • Loosen the clamping lever. • Swivel the upper part of the blade carrier on the base until the desired clearance angle is reached. -
Page 30: Setup
Thermo Scientific HM525 NX Operator Guide Setup Before sectioning, the blade holder and the cryo chamber should be at a stable temperature close to the desired cutting temperature. These temperatures should be selected to suit the consistency of the specimen. -
Page 31: Specimen Setup
Thermo Scientific HM525 NX Operator Guide Specimen Setup Before sectioning can begin, the specimen must be correctly clamped and oriented in the specimen head. To clamp and orient the specimen: • Loosen the specimen chuck release lever and insert the specimen chuck into the jaws of the specimen head. -
Page 32: Chapter 3 - Operation
Thermo Scientific HM525 NX Operator Guide Chapter 3 – Operation Switching On Before switching on the instrument for the first time, ensure that the power requirements indicated on the rating label correspond to the power supply voltage being tested. Note No other instruments should be connected to the circuit used for the HM525 NX, as the compressor needs high surge currents when started. -
Page 33: System Interfacing
Thermo Scientific HM525 NX Operator Guide System Interfacing Using the Touch screen The HM525 NX has an embedded touch screen user interface which is used to set all preferences. Note Avoid using sharp or pointed objects to press buttons on the touch screen. It is recommended that a clean finger is used to operate the touchscreen. - Page 34 Thermo Scientific HM525 NX Operator Guide Arrow Button The “Arrow” buttons are used in several menus to increase or decrease values. • Use the arrow button to adjust the value to the required setting. Decreases the selected value by multiple steps.
-
Page 35: Setting Preferences
Thermo Scientific HM525 NX Operator Guide Setting Preferences Quick Freezing of the Specimen The cryobar provides on-demand, quick freezing of specimens. Note When the cryobar is activated, it will take approximately 2 - 3 minutes for the cryobar to reach a temperature of maximum -55°C. -
Page 36: Set The Specimen Head Position
Thermo Scientific HM525 NX Operator Guide Set the Specimen Head Position • Move the Specimen Head to the desired position and press the “Position” button on the Main screen for about 3 seconds. • The colour will change to yellow, showing that the position has been saved and the required position is stored. -
Page 37: Microtome / Chamber Temperature
Thermo Scientific HM525 NX Operator Guide Microtome / Chamber Temperature The microtome/chamber is actively cooled and the user can adjust the temperature independently. Setting the Temperature Press the "Microtome/Chamber Temperature" button on the Main screen. • Either select one of the preset temperatures (-35°C, -30°C, -20°C or -10°C) or adjust the temperature using the arrow keys. -
Page 38: Trim And Fine Section Thickness
Thermo Scientific HM525 NX Operator Guide Trim and Fine Section Thickness To set the trim/trimming section thickness: • Press the "Trim Thickness" button on the Main screen. • The Trim Section screen will be displayed. • Either select one of the preset values (400µm, 200µm, 100µm or 10µm) or adjust the value... -
Page 39: Multi-Function Bar
Thermo Scientific HM525 NX Operator Guide Multi-Function Bar The Multi-Function bar provides the user access to useful information and functions. The Multi-Function Bar is located at bottom of the Main screen. TRIM button Time/Date Counter (section thickness / section counter) -
Page 40: Outstanding Service Message
Thermo Scientific HM525 NX Operator Guide Outstanding Service Message When there is an outstanding service message, a wrench symbol is shown. Press the Wrench symbol to see the service message. Counter To Toggle between the Section Counter and the Section Thickness Sum: Section Counter The section counter adds up the number of the produced sections. -
Page 41: Retraction
Thermo Scientific HM525 NX Operator Guide Retraction If required, the Retraction function can be turned off. To toggle the Retraction On or Off • Press the Retraction button on the Main Screen. • The Retraction screen will be displayed. •... -
Page 42: Handwheel Lock
Thermo Scientific HM525 NX Operator Guide Handwheel Lock • The Handwheel must be in the 12’ oclock position to engage the lock. • Push the "Brake" lever on the Handwheel forward. To release the brake, pull it backward again. Menu The "Menu"... -
Page 43: Time And Date
Thermo Scientific HM525 NX Operator Guide Time and Date • Press the "Menu" button on the Main screen. • The Menu screen will be displayed. Set the Date • Press the "Date" button. • The Menu: Date screen will be displayed. -
Page 44: Change To Iso Format
Thermo Scientific HM525 NX Operator Guide Change to ISO Format • Press the "ISO" button to toggle between the full date format and the ISO format. • Press "OK" to confirm the setting and to return to the Main screen. -
Page 45: Uv Option
Thermo Scientific HM525 NX Operator Guide UV Option • Press the "Menu" button on the Main screen. • The Menu screen will be displayed. • Press the "UV" button. • The UV screen will be displayed. • Select Duration, Now, or Time. - Page 46 Thermo Scientific HM525 NX Operator Guide • Set the Time for the UV cycle to start: • Press “Time” to set a programmed time for the UV cycle to start: • Press “Day” and select the day for the UV cycle to run.
-
Page 47: Chamber Light
Thermo Scientific HM525 NX Operator Guide Chamber Light The Chamber light is located in the sliding window. To adjust the brightness of the chamber light: • Press the "Menu" button on the Main screen. • The Menu screen will be displayed. -
Page 48: Display Lock
Thermo Scientific HM525 NX Operator Guide Display Lock Note The display lock is used to avoid unwanted changes to the settings of the HM525 NX. To activate the Display Lock: • Press the "Menu" button on the Main screen. •... -
Page 49: Immediate Defrost
Thermo Scientific HM525 NX Operator Guide Immediate Defrost Start the Defrost Immediately • Press the "Menu" button on the Main screen. • The Menu screen will be displayed. • Press the "Defrost" button. • The Defrost screen will be displayed. -
Page 50: Programming The Defrost Cycle
Thermo Scientific HM525 NX Operator Guide Programming the Defrost Cycle Note The time for the daily defrost cycle should be programmed outside of the normal working hours to avoid delays in the workflow. Program the Daily Defrost Cycle • Press the "Menu" button on the Main screen. -
Page 51: Log File
Thermo Scientific HM525 NX Operator Guide Log File The Data Log records all events and error messages on the HM525 NX. The Log file can be exported to the original USB-Stick for Service purposes in case of a malfunction. Enter the Log File •... -
Page 52: Factory Settings
Thermo Scientific HM525 NX Operator Guide Factory Settings If required, the instrument can be reset to the factory settings. Reset to Factory Settings • Press the "Menu" button on the Main screen. • The Menu screen will be displayed. •... -
Page 53: Screen
Thermo Scientific HM525 NX Operator Guide Screen The brightness of the Screen can be adjusted. Screen Brightness • Press the "Menu" button on the Main screen. • The Menu screen will be displayed. • Press the "Screen" button. • The Menu: Screen will be displayed. -
Page 54: Heat Extractor
Thermo Scientific HM525 NX Operator Guide Heat Extractor Cryobar Cryo-Mold Specimen Chuck Heat Extractor Cryo-Mold handle • Using a Heat Extractor in combination with a cryo mold or specimen stage promotes a faster freezing method which freezes from the top and the bottom simultaneously. -
Page 55: Sectioning Procedures
Thermo Scientific HM525 NX Operator Guide Sectioning Procedures Cutting Movement and Retraction Front Rear Lateral view into instrument Note The retraction prevents the surface of the specimen being damaged during the return stroke of the specimen head. The retraction can be switched off - see "Switching the Retraction On - Off". -
Page 56: Sectioning And Taking Off Sections
Thermo Scientific HM525 NX Operator Guide Sectioning and Taking Off Sections • Set the desired section thickness - see Cutting Thickness. • Place the anti-roll plate against the blade. • Turn the hand wheel in a clockwise direction to carry out sectioning. -
Page 57: Hand Wheel Lock
Thermo Scientific HM525 NX Operator Guide Hand Wheel Lock Before placing or removing a specimen on the specimen head, or adjusting the orientation, always ensure that the mechanical hand wheel lock brake is engaged. The handwheel lock brake will prevent unintended movement of the specimen head. -
Page 58: How To Avoid Malfunctions
Thermo Scientific HM525 NX Operator Guide How to Avoid Malfunctions To cut usable sections, the following points are of utmost importance: • Fit the knife edge, probably move it horizontally to the left or right. • Check adjustment of anti-roll plate guide and correct it, if necessary. -
Page 59: Chapter 4 - Troubleshooting
Thermo Scientific HM525 NX Operator Guide Chapter 4 – Troubleshooting Troubleshooting Tables Problem Cause Removal Lower ambient temperature by fresh air, climate. Ambient temperature too high Please note the specified temperature of +20°C! HM525NX is influenced by near, Change site of installation... - Page 60 Thermo Scientific HM525 NX Operator Guide Problem Cause Removal Specimen not cold enough Select a lower temperature Knife and/or anti-roll plate are not Allow knife and/or anti-roll plate to cool. yet cold enough – section melts Blade clamping force can be increased by Sticky sections Specimen incorrectly clamped.
- Page 61 Thermo Scientific HM525 NX Operator Guide Problem Cause Removal Sections roll over the Anti-roll plate does not project Readjust the anti-roll plate anti-roll plate over the knife edge properly Scratching noise while Anti-roll plate projects over the cutting and during the...
-
Page 62: Tips For Successful Sectioning
Thermo Scientific HM525 NX Operator Guide Tips for Successful Sectioning For optimal sectioning, the following points should be followed: • Check the condition of the blade edge; move carrier horizontally to the left or right side to obtain a sharp cutting edge. -
Page 63: Temperature List For Cryo-Sectioning
Thermo Scientific HM525 NX Operator Guide Temperature List for Cryo-Sectioning The optimal cutting temperature of a specimen depends on the respective characteristics of the tissue especially the fat content. The following table based on experience recommends cutting temperatures for some typical specimens: Range A -10 to -20°C... -
Page 64: Chapter 5 - Maintenance And Care Of The Hm525 Nx
Thermo Scientific HM525 NX Operator Guide Chapter 5 – Maintenance and Care of the HM525 NX Cleaning the Touch Screen Display • Use commercially available cleaning tissues or use a soft and slightly wet towel to clean the Touch screen. -
Page 65: Cleaning And Care
Thermo Scientific HM525 NX Operator Guide Cleaning and Care Cleaning and Care during Routine Work A regular and/or immediate disinfection of the blade carrier, the cryo chamber as well as all the other potentially contaminated parts of the instrument is highly recommended. -
Page 66: Conditions For The Transportation Of The Instrument
Thermo Scientific HM525 NX Operator Guide Conditions for the Transportation of the Instrument Returning the instrument for repair or routine Maintenance Repair or maintenance work is normally carried out at the site of installation. If this is not possible for some special reason, the instrument can be returned to manufacturer. -
Page 67: Disposal Of The Instrument After Final Shutdown
Thermo Scientific HM525 NX Operator Guide Note Clean and disinfect these accessories according to the lab regulations and transport them in a dry condition. • Clean and disinfect the cryo chamber according to the lab regulations. • Unscrew the handwheel handle for transportation. -
Page 68: Accessories Standard Equipment
Thermo Scientific HM525 NX Operator Guide Accessories Standard Equipment The microtome HM525NX HM 525 NX is equipped with the following accessories: Description Cat.No. 6 chucks, 30 mm round 715110 Distance Bolts (x2) 570110 1 Allen key 5 mm 362260 1 Allen key 6 mm... - Page 69 Thermo Scientific HM525 NX Operator Guide Description Cat.No. Knife and Blade carriers: 705460 Standard knife carrier 705630 Disposable blade carrier EC 70 705470 Disposable Blade Holder EC 449980 Anti-Roll Plate (ARP for use with EC70) 449990 Anti-Roll Plate (ARP for use with EC)
-
Page 70: Index
Thermo Scientific HM525 NX Operator Guide Index Abort the Defrost ............49 Factory Settings ............17, 52 Accessories Standard Equipment........68 Fine adjustment of the anti-roll device ......25 Additional equipment (optional) ........68 General Information ............. 18 Blade ............. 26, 28, 29, 60, 69 Hand Wheel Lock ............ - Page 71 Thermo Scientific HM525 NX Operator Guide Set the Month ............... 43 Set the Specimen Head Position ........36 Set the Year ..............43 Operation ..............32 Setting Preferences ............35 Outstanding Service Message ........40 Setting the Hour ............44 Setting the Minutes ............
Need help?
Do you have a question about the HM525 NX Series and is the answer not in the manual?
Questions and answers