Table of Contents
Advertisement
Advertisement
Table of Contents

Related Manuals for Thermo Scientific Cryostat Microm Cryo-Star HM 560


Summary of Contents for Thermo Scientific Cryostat Microm Cryo-Star HM 560
- Page 1 Thermo Scientific Cryostat Microm Cryo Star HM 560 Thermo Scientific Microtome Cryostat Microm Cryo-Star HM 560 INSTRUCTION MANUAL Microm International GmbH part of Thermo Fisher Scientific Robert-Bosch-Str. 49 69190 Walldorf / Germany 387 500 - English...
- Page 2 Thermo Scientific Cryostat Microm Cryo Star HM 560 Microm International GmbH part of Thermo Fisher Scientific Robert-Bosch-Str. 49 69190 Walldorf / Germany 387 500 - English...
-
Page 3: Warranty
Thermo Scientific Cryostat Microm Cryo Star HM 560 CERTIFICATION Thermo Fisher Scientific Microm International GmbH certifies that this instrument has been tested and checked carefully. Its technical data was verified before shipment to be in accordance with the published specifications. The instrument complies with applicable international safety regulations. -
Page 4: Intended Use
Thermo Scientific Cryostat Microm Cryo Star HM 560 INTENDED USE Dear valued Customer, Thank you for buying this Thermo Fisher Scientific instrument. Before putting the instrument into operation, please read these operating instructions carefully to familiarize you with its proper operation and functions. - Page 5 Thermo Scientific Cryostat Microm Cryo Star HM 560 Intended Use Table of Contents Safety Precautions PART 1 INTRODUCTION Description of the Cryo-Star HM 560 Technical data Cryo-Star HM 560 PART 2 OPERATING INSTRUCTIONS Setting up the cryostat Initial turn-on Basic operational rules Setting section thickness and trimming thickness Specimen and knife cooling 2-5-1...
- Page 6 Thermo Scientific Cryostat Microm Cryo Star HM 560 2-13 Defrosting 2-13-1 Setting the defrost time 2-13-2 Defrosting cycle 2-13-3 Interrupting a defrosting cycle 2-14 Turning off the function retraction 2-15 Customer-specific settings 2-15-1 Setting the contrast 2-15-2 Selecting the language 2-16 Turning off the cooling function 2-17...
- Page 7 Thermo Scientific Cryostat Microm Cryo Star HM 560 PART 5 Maintenance of the cryostat Shutting-off for cleaning Cleaning and care of the microtome Changing the fluorescent lamp Disposal of the instrument after final shutdown Microm International GmbH part of Thermo Fisher Scientific Robert-Bosch-Str.
-
Page 8: Safety Precautions
Thermo Scientific Cryostat Microm Cryo Star HM 560 SAFETY PRECAUTIONS WARNING SIGNALS AND SYMBOLS The installation and routine use of the Cryo-Star HM 560 is easy and safe if the instructions in this manual are being observed. However, the situations which might be risky for the personnel or equipment are specially marked in this manual with the following symbols and messages. - Page 9 Thermo Scientific Cryostat Microm Cryo Star HM 560 SAFETY PRECAUTIONS A T T E N T I O N ! The operator's safety is affected, when the instrument is not operated in accordance with this instruction manual. Please observe the following general precautions during operation of this instrument.
- Page 10 Thermo Scientific Cryostat Microm Cryo Star HM 560 HAZARD OF INFECTION Use the appropriate safety and disinfection measures when working with infectious specimens. According to the rules and regulations concerning the handling of infectious/radioactive contaminated material of the respective laboratory, safety clothing (e.g. particle mask, gloves, protective shoe covers) must be worn.
- Page 11 Thermo Scientific Cryostat Microm Cryo Star HM 560 Fig. 1 Microm International GmbH part of Thermo Fisher Scientific Robert-Bosch-Str. 49 69190 Walldorf / Germany 387 500 - English...
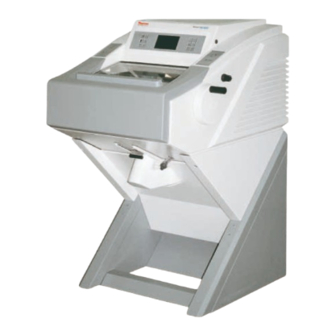
- Page 12 Thermo Scientific Cryostat Microm Cryo Star HM 560 INTRODUCTION 1-1 DESCRIPTION OF THE CRYO-STAR HM 560 Section counter and indication of sum of Open top cryostat. Modular design. Stainless section thicknesses with reset-button. steel cooling chamber. Temperature regulation Indication of remaining travel. Hand wheel variable down to -50°...
- Page 13 Thermo Scientific Cryostat Microm Cryo Star HM 560 TECHNICAL DATA CRYO-STAR HM 560 Specimen temperature control: ................+10° C to -50° C Knife carrier control: ................-10° C to -35° C Fast freezing station: ................. down to -60° C Defrosting: automatic defrosting, adjustable with temperature control manual immediate defrosting Microtome:...
- Page 14 Thermo Scientific Cryostat Microm Cryo Star HM 560 page -2- TECHNICAL DATA CRYO-STAR HM 560 Storage temperature range: ................. -20° C up to +50° C Operating conditions: ....... +5° C up to +35° C (at a max. rel. humidity of 60%) ............
- Page 15 Thermo Scientific Cryostat Microm Cryo Star HM 560 Fig. 2 1 = On indication (sleep status) 9 = Button options 2 = Button specimen temperature 10 = Button detaching 3 = Button knife temperature 11 = Scroll button 4 = Button TRIM/FEED 12 = Button RESET 5 = Button UP 13 = Button PROG...
- Page 16 Thermo Scientific Cryostat Microm Cryo Star HM 560 Fig. 3 1 = Button cutting window 2 = Button ACA 3 = Button coarse feed, forwards 4 = Button coarse feed, backwards 5 = Button TRIM MICROM International GmbH Robert-Bosch-Str. 49 D- 69190 Walldorf 387 500 - English...
- Page 17 Thermo Scientific Cryostat Microm Cryo Star HM 560 Fig. 4 1 = Symbol Hand wheel 2 = Button to activate the Hand wheel brake 3 = Button to loosen the Hand wheel brake 4 = Brake LED MICROM International GmbH Robert-Bosch-Str.
- Page 18 Thermo Scientific Cryostat Microm Cryo Star HM 560 OPERATING INSTRUCTIONS SETTING UP THE CRYOSTAT Note: If the microtome cryostat is supplied with an extra height-adjustable stage, first unpack and set up this stage according to the separate instruction manual. Unpacking the instrument: •...
- Page 19 Thermo Scientific Cryostat Microm Cryo Star HM 560 • Adjust the handles of the cryostat (fig. 5a.1 and 5a.2) on the rear side of the cryostat stage. • Carefully keep the shipping container possible return shipments. Choose installation site that •...
-
Page 20: Initial Turn-On
Thermo Scientific Cryostat Microm Cryo Star HM 560 INITIAL TURN-ON As already mentioned in part 2-1, the height- adjustable stage, if equipped, must be set up according to the separate instruction manual before the initial turn-on of the microtome cryostat. Caution: Before turning on the instrument for the first time, please check if the power... - Page 21 Thermo Scientific Cryostat Microm Cryo Star HM 560 BASIC OPERATIONAL RULES When turning on the instrument, the display shows: • the configuration of the instrument • the section thickness selection • the specimen and knife temperatures with the corresponding set and actual values •...
- Page 22 Thermo Scientific Cryostat Microm Cryo Star HM 560 • To return to the active operating state, press any key on the control panels, move the Hand wheel or wait until the WAKE time (see 2-12-2) has been reached. The WAKE time is used to trigger the instrument back into the active state.
- Page 23 Thermo Scientific Cryostat Microm Cryo Star HM 560 SETTING SECTION THICKNESS AND TRIMMING THICKNESS Basic status of the operating control: To choose between section thickness and trimming thickness • press button (fig. 14.4). • The selected setting is shown inverted on the display.
- Page 24 Thermo Scientific Cryostat Microm Cryo Star HM 560 SPECIMEN AND KNIFE COOLING The HM 560 makes it possible to set both the specimen and the knife temperature. 2-5-1 ACTUAL AND SET VALUE OF THE SPECIMEN TEMPERATURE The specimen cooling of the cryostat can be controlled via the corresponding part of the operating controls (fig.
- Page 25 Thermo Scientific Cryostat Microm Cryo Star HM 560 2-5-2 ACTUAL AND SET VALUE OF THE KNIFE TEMPERATURE The knife cooling of the cryostat can be controlled via the corresponding part of the operating controls (fig. 16.3). The actual and set values of the knife cooling are shown in °...
- Page 26 Thermo Scientific Cryostat Microm Cryo Star HM 560 2-5-4 PROGRAMMING TEMPERATURE PARAMETERS With the cryostat HM 560 it is possible to store four different combinations of set value temperatures for the specimen and knife temperatures. The stored temperatures are of no direct importance for the respective valid set value temperatures of knife and specimen.
-
Page 27: Cutting Movement And Retraction
Thermo Scientific Cryostat Microm Cryo Star HM 560 CUTTING MOVEMENT AND RETRACTION X=selected section thickness, • Turn the Hand wheel in a clockwise direction 1=specimen, so the cutting movement is carried out. 2=cutting movement • As the specimen moves down, sections are 3=knife produced. - Page 28 Thermo Scientific Cryostat Microm Cryo Star HM 560 FEED 2-7-1 KNIFE CARRIER COARSE FEED For the fast forward and backward travel between knife and specimen, the cryostat microtome has a motorized coarse feed system. The approach between knife and specimen can also be carried out by means of an automatic function (see part 2-7-3).
- Page 29 Thermo Scientific Cryostat Microm Cryo Star HM 560 • Take note that the knife edge and specimen do not come in contact with each other. • Carefully observe the narrowing gap between knife edge and specimen to stop the function coarse feed forwards in time before the knife touches the specimen.
- Page 30 Thermo Scientific Cryostat Microm Cryo Star HM 560 2-7-3 AUTOMATIC APPROACH SYSTEM The automatic approach system performs the fast and exact approach of the specimen towards the knife edge and can be applied between -5° C and -35° C. Beyond these temperature limits, the automatic approach system is blocked (see error code 'OUT OF TEMPERATURE').
- Page 31 Thermo Scientific Cryostat Microm Cryo Star HM 560 • Immediately afterwards, this forward travel of the knife carrier is stopped and moved backwards by a safety distance of 200 µm. AUT.APPROACH is still shown on the display as the process of the automatic approach has not yet been finished.
- Page 32 Thermo Scientific Cryostat Microm Cryo Star HM 560 • Error code 'OUT OF TEMPERATURE' appears in the status line (fig. 2.15) on the display, if the actual temperature for the knife or the specimen is outside the temperature range of -5° and -35° C, which is valid for the automatic approach function only.
-
Page 33: Trimming And First Cuts
Thermo Scientific Cryostat Microm Cryo Star HM 560 2-7-4 TRIMMING AND FIRST CUTS After the specimen and the knife are adjusted, further gradual feed for trimming can be carried out using the function trimming. For different sectioning series, deeper layers of the specimen can be reached with the function trimming. - Page 34 Thermo Scientific Cryostat Microm Cryo Star HM 560 SETTING THE CUTTING WINDOW To activate an automatic approach process, it is necessary to set a cutting window first (see part 2-7-3). The instrument automatically detects the cutting window. It is shown on the display (fig. 29) in the status line with the letters "AW"...
- Page 35 Thermo Scientific Cryostat Microm Cryo Star HM 560 • Continue turning the Hand wheel clockwise to place the upper edge of the specimen just below the knife edge. • Press button (fig. 31.1) to set the lower limit of the cutting window. •...
- Page 36 Thermo Scientific Cryostat Microm Cryo Star HM 560 HAND WHEEL BRAKE Unintended movements of the specimen holder can be avoided via the Hand wheel brake. This reduces the danger of being injured while adjusting specimen clamp and knife carrier! Caution: When the instrument is turned off, the Hand wheel brake is not operative.
- Page 37 Thermo Scientific Cryostat Microm Cryo Star HM 560 2-10 DETACHING THE SPECIMEN To detach a frozen specimen from the specimen chuck, choose the detach function. • For this, press button (fig. 40.6). • The plate of the fast freezing station warms •...
-
Page 38: Section Counter
Thermo Scientific Cryostat Microm Cryo Star HM 560 2-11 INDICATION OF CUTTING PROCESSES Further information on the cutting processes can be seen on the display. Press the scroll button (fig. 41.5), to show the various functions one after the other. The following information on the carried-out cutting processes of the instrument can be read on the info line of the display:... - Page 39 Thermo Scientific Cryostat Microm Cryo Star HM 560 2-11-3 REMAINING TRAVEL TO FRONT END POSITION • This value shows the distance in microns, which is left for sectioning. • When the knife carrier is in the rear end position, the display shows 48 000 µm. This number decreases the closer the knife carrier moves towards the front.
-
Page 40: Setting The Real Time
Thermo Scientific Cryostat Microm Cryo Star HM 560 2-12 SETTING THE REAL TIME, WAKE TIME AND ACTIVE TIME 2-12-1 SETTING THE REAL TIME • Press button (fig. 47b.2) once. • To change the instrument's real time at intervals of one minute, press the UP or DOWN button (fig. -
Page 41: Defrosting Cycle
Thermo Scientific Cryostat Microm Cryo Star HM 560 2-13 DEFROSTING 2-13-1 SETTING THE DEFROSTING TIME • Press button (fig. 47b.2) twice. • To change the instrument's defrosting time at intervals of 15 minutes, press the UP or DOWN button (fig. 47d.5 or 47d.6). Note: Defrosting can only be carried out at the set defrosting time, if the real... - Page 42 Thermo Scientific Cryostat Microm Cryo Star HM 560 2-13-3 INTERRUPTING A DEFROSTING CYCLE needed, the daily defrosting can be interrupted or cancelled. • For this, press button (fig. 47d.3) (knife temperature) together with the RESET button (fig. 47b.4). • The interrupted defrost cycle is indicated with INTR.
- Page 43 Thermo Scientific Cryostat Microm Cryo Star HM 560 2-14 TURNING OFF THE FUNCTION RETRACTION If needed, the function retraction can be turned off. Turning off To turn the function retraction off, the following preparation is necessary: • Via the scroll button (fig. 48.5) select the blank status line (fig.
-
Page 44: Customer-Specific Settings
Thermo Scientific Cryostat Microm Cryo Star HM 560 2-15 CUSTOMER-SPECIFIC SETTINGS The information on the display can be shown in various contrasts four different languages. 2-15-1 SETTING THE CONTRAST • To set the contrast higher or lower, press the RESET-button (fig. 50.4). While the RESET-button is still being pressed, also activate button (fig. -
Page 45: Selecting The Language
Thermo Scientific Cryostat Microm Cryo Star HM 560 2-15-2 SELECTING THE LANGUAGE The information on the display can be shown in four different languages. The following languages are available: - German - English - French - Spanish • To select or change one of these languages, first turn off the power switch (fig. - Page 46 Thermo Scientific Cryostat Microm Cryo Star HM 560 2-16 TURNING OFF THE COOLING FUNCTION With this OFF-function (fig. 56a), it is possible to turn off the major electric assemblies of the instrument (e.g. the compressors, the fast freezing element, the temperature control) without having to turn off the instrument on the main switch.
- Page 47 Thermo Scientific Cryostat Microm Cryo Star HM 560 2-17 ILLUMINATION OF THE COOLING CHAMBER illuminate cooling chamber, fluorescent lamp is located in the handle of the sliding window. • The fluorescent lamp is automatically turned on when the instrument is turned on. •...
- Page 48 Thermo Scientific Cryostat Microm Cryo Star HM 560 2-19 SPECIMEN HOLDER, FREEZING-ON AND SPECIMEN ORIENTATION 2-19-1 SPECIMEN HOLDER, FREEZING-ON There are several possibilities to freeze on specimens. Various specimen chucks are available. Round specimen chucks can be supplied with a diameter of 30 mm and 40 mm and rectangular specimen chucks with a size of 50, 55, 60 and 70 mm.
-
Page 49: Specimen Orientation
Thermo Scientific Cryostat Microm Cryo Star HM 560 • After having oriented the specimen (see part 2-19-2), specimen sectioned. Note: The upper side of the freezing station must not be covered by frost or ice. To avoid this, use acetone, ethanol or the like. - Page 50 Thermo Scientific Cryostat Microm Cryo Star HM 560 • After having oriented and aligned the specimen, press the orienting lever (fig. 60.1) upwards. For the further specimen orientation, the specimen chuck can be rotated by 360° . • Slightly loosen the clamping lever (fig. 60.2) upwards.
- Page 51 Thermo Scientific Cryostat Microm Cryo Star HM 560 2-20 KNIFE CARRIERS 2-20-1 STANDARD KNIFE CARRIER SM The standard knife carrier SM takes up commercially available conventional knives with c- and d- profiles as well as the disposable blade holder SE. Fig.
- Page 52 Thermo Scientific Cryostat Microm Cryo Star HM 560 Inserting the knife: • The knife is inserted into the knife carrier from above. • For this, swivel both knife guards (fig. 61.1a and 61.1b) over the knife carrier towards the microtome. •...
- Page 53 Thermo Scientific Cryostat Microm Cryo Star HM 560 Height adjustment of the knife: • Open the knife guards (fig. 61.1) to loosen the fixation of the knife. • Via the knurled screws (fig. 61.8) adjust the height of the knife so that the blade corresponds with the red marking line.
- Page 54 Thermo Scientific Cryostat Microm Cryo Star HM 560 2-20-2 DISPOSABLE BLADE HOLDER SE The disposable blade holder SE takes up all commercially available low profile blades with a dimension of 80 x 8 mm and a facette angle of approx. 35° and as another version it takes also up high profile blades.
- Page 55 Thermo Scientific Cryostat Microm Cryo Star HM 560 Inserting the blade: • Open the left and right knife guard (fig. 62.1a and 62.1b). • Open clamping lever (fig. 62.8) upwards. • Insert the blade from the left side into the slot behind the clamping plate (fig.
- Page 56 Thermo Scientific Cryostat Microm Cryo Star HM 560 Selecting the clearance angle: • Loosen the levers (fig. 62.6). • Swivel the upper part of the knife carrier on the base (fig. 62.7) until the desired clearance angle is reached. • The clearance angle can be read on the scale on the left side on the base.
- Page 57 Thermo Scientific Cryostat Microm Cryo Star HM 560 2-20-3 MODIFICATION FROM STANDARD KNIFE CARRIER SM TO DISPOSABLE BLADE HOLDER SE For the cryostat HM 560 series a knife carrier system is used which is modified depending on the application of either a standard knife or disposable blades.
-
Page 58: Error Code Indication
Thermo Scientific Cryostat Microm Cryo Star HM 560 2-21 ERROR CODE INDICATION The instrument has an error code indication to define faster and better possible malfunctions. The error codes describe so-called system errors. Additionally, error messages are shown on the display as text messages, e.g. when the temperature sensors are faulty, when the end position of the knife carrier has not been reached, when there is a high pressure in the... - Page 59 Thermo Scientific Cryostat Microm Cryo Star HM 560 ERROR CODE 'NO END POSITION' Before turning on the instrument on the main switch, it carries out an automatic travel calibration of the knife carrier. The knife carrier is brought into that position which has the longest distance to the specimen head.
-
Page 60: System Error
Thermo Scientific Cryostat Microm Cryo Star HM 560 SYSTEM-ERROR The instrument is designed to check for internal system errors. In case such an error is recognized, it is shown as 'ER-10' to 'ER-16' for approx. 5 sec. in the middle of the display. The recognition of such an error leads to an automatic RESET-process. -
Page 61: Standard Equipment
Thermo Scientific Cryostat Microm Cryo Star HM 560 2-22 ACCESSORIES 2-22-1 STANDARD EQUIPMENT The microtome cryostat HM 560 Cryo-Star is equipped with the following accessories: Cat. No. 2 specimen chucks, 30 mm round 715600 1 specimen chuck, 40 mm round 715610 1 Allan key 2,5 mm 362220... -
Page 62: Additional Equipment (Optional)
Thermo Scientific Cryostat Microm Cryo Star HM 560 2-22-2 ADDITIONAL EQUIPMENT (OPTIONAL) Cat. No. Specimen chucks: ∅ 30 mm 715600 ∅ 40 mm 715610 Cryo-Molds: 10 mm 570400 15 mm 570380 22 mm 570390 Knife carriers with anti-roll guide: Standard knife carrier SM 705700 Disposable blade holder SE 705710... -
Page 63: Theory Of Operation
Thermo Scientific Cryostat Microm Cryo Star HM 560 THEORY OF OPERATION SPECIMEN AND KNIFE CARRIER COOLING, DEFROSTING The chamber, the knife carrier and the specimen head are cooled by two refrigeration machines. In the rear area of the microtome chamber is an evaporator which the cold coolant flows through as well as through the knife carrier and the specimen head. - Page 64 Thermo Scientific Cryostat Microm Cryo Star HM 560 Inevitably, when working on the microtome the dry cold air of the microtome chamber mixes with the warm humid air outside the chamber. Frost forms on the finned evaporator. The increasing thickness of the frost reduces the efficiency of the evaporator.
- Page 65 Thermo Scientific Cryostat Microm Cryo Star HM 560 CUTTING MOVEMENT The microtome of this cryostat is a rustproof rotary microtome. The cutting movement is carried out by turning the Hand wheel. The rotary movement results in the vertical movement of the specimen clamp and in the horizontal movement of the knife carrier.
- Page 66 Thermo Scientific Cryostat Microm Cryo Star HM 560 KNIFE CARRIER COARSE FEED AND TRIMMING FUNCTION After changing the specimen or moving the knife or knife carrier, it is necessary to adjust the knife edge to the specimen again.This can easily be done by means of the coarse feed and the trimming function.
- Page 67 Thermo Scientific Cryostat Microm Cryo Star HM 560 AUTOMATIC APPROACH SYSTEM The automatic approach system is used for the fast and exact approach of the specimen towards the knife edge. The function of the automatic approach system is limited to the temperature range between - 5°...
- Page 68 Thermo Scientific Cryostat Microm Cryo Star HM 560 WORKING WITH THE CRYOSTAT PREPARATIONS ON THE MICROTOME AND INSIDE THE COOLING CHAMBER Before sectioning, the knife carrier and the cooling chamber should be at a stable temperature around desired cutting temperature. Select knife carrier...
- Page 69 Thermo Scientific Cryostat Microm Cryo Star HM 560 FREEZING-ON THE SPECIMEN The specimen is frozen-on to the specimen chuck with clinging groves by means of a freezing compound. To freeze-on specimens, use the fast freezing device on the left side of the chamber. Press the button Freeze Down in due time before the freezing-on so that the active cooling surface can adjust itself to the...
- Page 70 Thermo Scientific Cryostat Microm Cryo Star HM 560 ORIENTATION AND TRIMMING Clamp the specimen chuck together with the frozen specimen into the specimen holder. For this, tighten the clamping lever (fig. 60.2) and insert the specimen chuck into the specimen holder. Tighten the clamping lever again.
- Page 71 Thermo Scientific Cryostat Microm Cryo Star HM 560 HOW TO AVOID MALFUNCTIONS To cut usable sections, the following points are of utmost importance: • Condition of the knife edge, probably move it horizontally to the left or right side. • Check adjustment of anti-roll guide and correct it, if necessary.
- Page 72 Thermo Scientific Cryostat Microm Cryo Star HM 560 • Moreover, for the functionality of the automatic approach system automatic window, a certain conductivity must be given via the specimen chuck as well as from the knife edge to the microtome base. For this reason, the original equipment such as knife carrier and specimen chucks should be used only.
- Page 73 Thermo Scientific Cryostat Microm Cryo Star HM 560 MAINTENANCE OF THE CRYOSTAT SHUTTING-OFF FOR CLEANING Caution: Cleaning of the cryostat depends on how Any shipping of the instrument requires original frequently the instrument is used. However, it is packaging materials! Damages caused by recommended to shut the instrument off every shipping with non-conform packaging are not 6 - 8 weeks.
- Page 74 Thermo Scientific Cryostat Microm Cryo Star HM 560 CLEANING AND CARE OF THE MICROTOME • Carefully clean and dry the dismounted knife carrier. • As there is condensated humidity inside the microtome, dry the components inside the cooling chamber very carefully. For this, use a hair dryer.
-
Page 75: Changing The Fluorescent Lamp
Thermo Scientific Cryostat Microm Cryo Star HM 560 CHANGING THE FLUORESCENT LAMP The fluorescent lamp L8/12 of the cryostat is integrated in the grip (fig. 66.1) of the heated sliding window. • Before exchanging the lamp, turn off the main switch and unplug the instrument. •... -
Page 76: Disposal Of The Instrument After Final Shutdown
Thermo Scientific Cryostat Microm Cryo Star HM 560 DISPOSAL OF THE INSTRUMENT AFTER FINAL SHUTDOWN After the final shutdown of the instrument, we recommend to contact a local recycling company for the disposal according to the national applicable regulations. To be applied in the countries of the European Union and other European countries with a separate collecting system...
Need help?
Do you have a question about the Cryostat Microm Cryo-Star HM 560 and is the answer not in the manual?
Questions and answers