Table of Contents
Advertisement
Advertisement
Table of Contents

Related Manuals for Toshiba B-443


Summary of Contents for Toshiba B-443
- Page 1 TEC Bar Code Printer B-443 Owner’ s Manual...
- Page 2 LIST OF STANDARDS OF CONFORMITY Manufacturer : TOSHIBA TEC Corporation Address : 570 Ohito, Ohito-cho, Tagata-Gun, Shizuoka-ken, 410-2392 Japan declares that following product Product Name : Bar Code Printer Model : B-443-QP Options : All conforms to the following product specifications...
- Page 3 CAUTION: 1. This manual may not be copied in whole or in part without prior written permission of TOSHIBA TEC. 2. The contents of this manual may be changed without notification. 3. Please refer to your local Authorized Service representative with regard to any queries you may have in this manual.
-
Page 4: Table Of Contents
3.5 Install External Label Roll Mount ... 17 3.6 Install Memory Module... 18 3.7 Self Test ... 19 3.8 Dump Mode ... 20 4. USING B-443 ... 21 4.1 Power-on Utilities... 21 4.1.1 Self Test Utility ... 21 4.1.2 Gap Sensor Calibration Utility ... 21 4.1.3 Printer Initialization... - Page 5 5.2 Options ... 26 5.3 Supplies... 27 5.3.1 Label Stock... 27 5.3.2 Ribbon ... 27 EO1-33013...
-
Page 6: Safety Summary
Do not attempt to effect repairs or modifications to this equipment. If a fault occurs that cannot be rectified using the procedures described in this manual, turn off the power, unplug the machine, then contact your authorized TOSHIBA TEC representative for assistance. Meanings of Each Symbol This symbol indicates warning items (including cautions). - Page 7 • Utilize our maintenance services. After purchasing the machine, contact your authorized TOSHIBA TEC representative for assistance once a year to have the inside of the machine cleaned. Otherwise, dust will build up inside the machines and may cause a fire or a malfunction. Cleaning is particularly effective before humid rainy seasons.
-
Page 8: Product Introduction
1. PRODUCT INTRODUCTION Thank you very much for purchasing TEC B-443 bar code printer. The attractive desktop printer delivers superior performance at an economical price. Both powerful and easy-to-use, B-443 printer is your best choice among desktop direct thermal and thermal transfer label printers. -
Page 9: Getting Started
Please retain the packaging materials in case you need to reship the printer. 2.3 Equipment Checklist l One B-443 bar code printer unit l Ribbon paper core l Ribbon supply/rewind spindle (2 pcs.) l Label supply roll spindle... - Page 10 EO1-33013 l Portable LCD keyboard If any parts are missing, please contact the Customer Service Department of your purchased reseller or distributor.
-
Page 11: Printer Parts
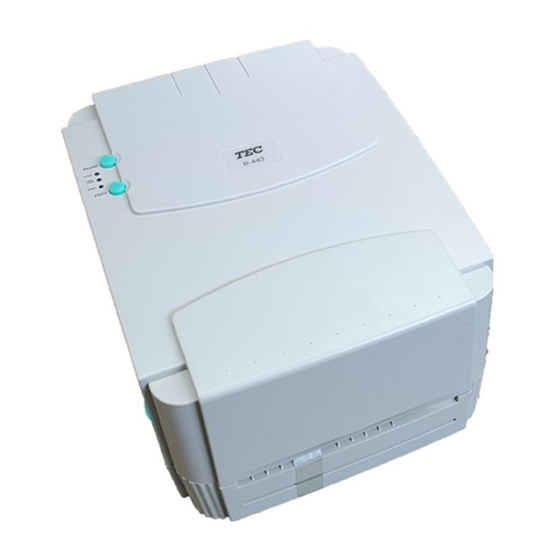
2.4 Printer Parts 1. Cover Release Button 2. PWR., ON-LINE and ERR. Indicators 3. PAUSE Button 4. FEED Button 5. Label Dispense Opening 6. Backing Paper Opening (for use with self-peeling function) Figure 1. Top front view EO1-33013... - Page 12 EO1-33013 Figure 2. Interior view 1. Printer Cover (in open position) 2. PAUSE Button 3. PWR., ON-LINE, ERR. Indicators 4. FEED Button 5. Ribbon Mechanism 6. Printer Carriage Release Lever 7. Peel-Off Sensor 8. Backing Paper Opening 9. Detachable Front Panel 10.
- Page 13 EO1-33013 Figure 3. Rear view 1. Power On/Off Switch 2. Power Supply Connector 3. RS-232 DB-9 Interface Connector 4. Centronics Interface Connector 5. Label Insert Opening (for use with external labels) 6. Cover Hinge...
-
Page 14: External Label Roll Mount
EO1-33013 2.5 External Label Roll Mount Figure 4. External label roll mount... -
Page 15: Buttons And Indicators
2.6 Buttons and Indicators PWR. (POWER) Indicator The green PWR. indicator illuminates when the POWER switch is turned on. ON-LINE Indicator The green ON-LINE indicator illuminates when the printer is ready to print. When PAUSE button is pressed, the ON-LINE indicator flashes. ERR. -
Page 16: Set Up
3. SET UP 3.1 Setting Up the Printer 1. Place the printer on a flat, secure surface. 2. Make sure the POWER switch is off. 3. Connect the printer to the computer mainframe with the provided RS-232C or Centronics cable. 4. - Page 17 EO1-33013 Figure 5. Inserting label supply roll into label roll mount 1. Label Supply Roll Spindle 2. Label Roll Mount 3. Fixing Tabs 4. Label Roll...
- Page 18 EO1-33013 Figure 6. Feed labels through adjustable label guide 1. Printer Carriage Release Lever 2. Platen 3. Label Media 4. Adjustable Label Guide...
-
Page 19: Self-Peeling Function
3.3 Self-Peeling Function To employ the self-peeling function, load the label stock according to the following steps. 1. Remove the front panel. 2. Tear off the foremost one or two labels of the label stock, as befits the case. Feed the backing paper between the platen and the white “ self-peeling” roller, as shown in Figure 7. - Page 20 EO1-33013 Figure 8. Printer ready for self-peeling function 1. Printer Carriage Release Lever 2. Printer Front Panel 3. Backing Paper 4. Backing Paper Opening 5. Label...
-
Page 21: Ribbon Loading Instructions
3.4 Ribbon Loading Instructions 1. Place an empty paper core on the ribbon rewind spindle. 2. Install the ribbon on the ribbon supply spindle. 3. Disengage the printer carriage. 4. Pull the ribbon leader to the front from beneath the printer carriage. Attach the ribbon leader to the ribbon rewind paper core. - Page 22 EO1-33013 Figure 9. Placement of ribbon supply roll 1. Ribbon Supply Spindle 2. Ribbon Rewind Spindle 3. Printer Carriage Release Lever 4. Thermal Transfer Ribbon...
- Page 23 EO1-33013 Figure 10. Installation of label stock and thermal transfer ribbon...
-
Page 24: Install External Label Roll Mount
EO1-33013 3.5 Install External Label Roll Mount Figure 11. Installation of external label roll mount 1. Label Supply Roll Spindle 2. External Label Roll Mount 3. External Label Feed Opening... -
Page 25: Install Memory Module
EO1-33013 3.6 Install Memory Module 1. Power off the printer. 2. Remove the cover. 3. Insert the memory module. 4. Put the cover back. 5. Turn on the power Figure 12. Installation of memory module (Option) 1. Memory Module. 2. Cover. -
Page 26: Self Test
EO1-33013 3.7 Self Test To initiate the self test mode, depress the FEED button while turning on the printer power. The printer will calibrate the label length. If the label gap is not detected within 7", the printer stops feeding labels and the media is treated as continuous paper. -
Page 27: Dump Mode
EO1-33013 3.8 Dump Mode After the self test, the printer enters the dump mode. In this mode, any characters sent from the host computer will be printed in two columns, as shown. The characters received will be shown in the first column, and their corresponding hexadecimal values, in the second. -
Page 28: Using B-443
4. USING B-443 4.1 Power-on Utilities There are three power-on utilities to set up and test B-443 hardware. These utilities are activated by pressing the FEED or PAUSE button and turning on the printer power simultaneously. The utilities are listed as below: 1. -
Page 29: Printer Initialization
4.1.3 Printer Initialization Printer initialization clears all downloaded files resident in flash memory, and sets printer parameters to default values. Parameter MILEAGE FLASH TIMES CHECK SUM SERIAL PORT CODE PAGE 437 (8 bit), USA (7 bit) COUNTRY CODE SPEED DENSITY SIZE GAP(BLINE) TRANSPARANCY... -
Page 30: Error Messages
4.2 Error Messages Syntax Error The command format is incorrect. The serial port setting is incorrect. Out of Range Numeric input is too large to be processed. The input string is too long to be stored. The size of the text or bar code exceeds that of the label. Download Error The download file format is incorrect. -
Page 31: Troubleshooting Guide
4.3 Troubleshooting Guide The following guide lists some of the most common problems that may be encountered when operating the B-443 bar code printer. If the printer still does not function after all suggested solutions have been invoked, please contact the... -
Page 32: Specifications, Options, & Supplies
5. SPECIFICATIONS, OPTIONS, & SUPPLIES 5.1 Specifications 5.1.1 Printer l Type: Direct thermal or thermal transfer l Print speed: Selectable speeds of 1.5, 2.0 or 3.0 inches per second l Resolution: 203 DPI (8 dots per mm) l Font styles: Five alphanumeric fonts from 0.059"H (1.5 mm) to 0.23" (6.0 mm), expandable vertically and horizontally up to 8x. -
Page 33: Environment
B-443: 6.0 lbs. (2.7 kg), or 6.5 lbs. (2.9 kg) with external roll mount 5.2 Options A number of different options may be added to the B-443 bar code printer for even greater convenience and versatility. The available options include:... -
Page 34: Supplies
EO1-33013 5.3 Supplies 5.3.1 Label Stock B-443 is capable of both direct thermal and thermal transfer printing. Many different direct thermal or thermal transfer stocks can be used. Refer to the following list for specifications of compatible label media. Media... - Page 35 PRINTED IN TAIWAN EO1-33013 9910 100 TSC...