
Related Manuals for Kenmore PG-40506SRLD


Summary of Contents for Kenmore PG-40506SRLD
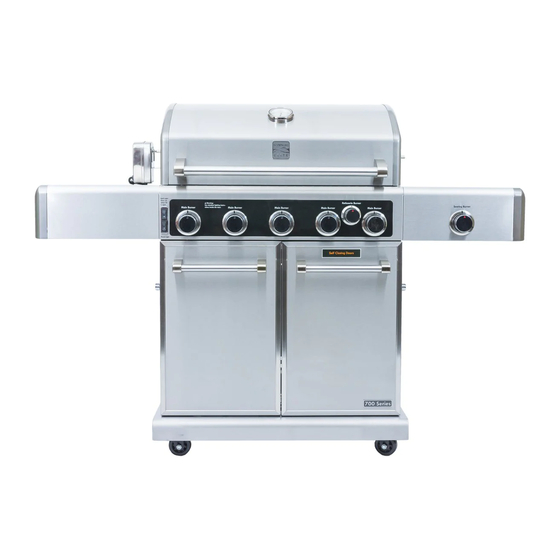
- Page 1 Use & Care Guide Manual de Uso y Cuidado English / Español Kenmore Elite ® Liquid Propane Gas Grill Parrilla a gas de propane liquido Models/Modelos: PG-40506SRLD P/N 50600322D ®...
-
Page 2: For Your Safety
Kenmore brand has evolved through technology, style and the specific needs of every generation. Yet, one constant remains – all Kenmore products offer keys to more living such as greater convenience, better performance and time saved. Your new Kenmore Elite gas grill is another example of this great Kenmore legacy. -
Page 3: Grill Service Center
Installation Safety Precautions Call Grill Service Center For Help And Parts • Please read this User’s Manual in its entirety before using If you have questions or need assistance during assembly, the grill. please call 1-888-287-0735. You will be speaking to a •... -
Page 4: Table Of Contents
. . 3 Safety Symbols . . . California to cause cancer, birth defects, and other reproductive harm. Kenmore Grill Warranty ..5 2. This Product contains chemicals, including lead and Use and Care . . . -
Page 5: Kenmore Grill Warranty
WARRANTY KENMORE ELITE LIMITED WARRANTY WITH PROOF OF SALE, the following warranty coverage applies when this appliance is correctly installed, operated and mainta according to all supplied instructions. FOR TWO YEAR from the date of sale this appliance is warranted against defects in material or workmanship, proof of purchase be provided;... -
Page 6: Use And Care
LP Cylinder USE AND CARE • The LP cylinder used with your grill must meet the following requirements: DANGER • Use LP cylinders only with these required measurements: 12" (30.5cm) (diameter) x 18" (45.7 cm) (tall) with 20 lb. (9 kg.) Capacity maximum. - Page 7 LP Tank Exchange Connecting Regulator To The LP Tank • Many retailers that sell grills offer you the option of replacing 1. LP tank must be properly secured onto grill. (Refer to your empty LP tank through an exchange service. Use only those assembly section.) reputable exchange companies that inspect, precision fill, test 2.
- Page 8 Leak Testing Valves, Hose and Regulator 1.Turn all grill control knobs to OFF. 2.Be sure regulator is tightly connected to LP tank. 3.Completely open LP tank valve by turning OPD hand wheel counterclockwise. If you hear a rushing sound, turn gas off immediately.
- Page 9 Safety Tips WARNING ▲ Before opening LP cylinder valve, check the coupling nut for tightness. ▲ When grill is not in use, turn off all control knobs and LP cylinder For Safe Use of Your Grill and to Avoid Serious valve.
- Page 10 Burner Flame Check WARNING • Remove cooking grates and heat diffusers. Light burners, turn knobs from HI to LO. You should see a smaller flame in LO position than seen on HI. Perform burner flame check Turn controls and gas source or tank OFF when not on sideburner, also.
- Page 11 • Painted surfaces: Wash with mild detergent or nonabrasive Storing Your Grill cleaner and warm soapy water. Wipe dry with a soft nonabrasive cloth. •Clean cooking grates. • Stainless steel surfaces: To maintain your grill’s high quality •Store in dry location. appearance, wash with mild detergent and warm soapy water and wipe dry with a soft cloth after each use.
- Page 12 Food Safety Food safety is a very important part of enjoying the outdoor cooking experience. To keep food safe from harmful bacteria, follow these four basic steps: Clean: Wash hands, utensils, and surfaces with hot soapy water before and after handling raw meat and poultry. Separate: Separate raw meats and poultry from ready-to-eat foods to avoid cross contamination.
- Page 13 To purchase Natural Gas Conversion Parts call Permasteel at 1-888-287-0735. M - C F 8:00 - C 5:00 Pacific Natural gas conversion kit Kenmore Model # 34562 (Manufacturer Part NO.: 30800339) Your grill can be converted to natural gas with this conversion kit by a qualified gas technician only.
- Page 14 Notes Gas Requirements LP Gas For Natural Gas Connection If your grill is for LP Gas, the regulator supplied is set for Preparing: an 11-in. Water column (WC) and is for use with LP gas 1. Turn off gas supply, and then remove cap on gas only.
-
Page 15: Light Bulb Replacement
Light Bulb Replacement If the light bulbs on the inside rear of the firebox do not work, follow the steps below to replace them. It is recommended to remove the grill lid before attempting to replace the firebox light bulbs. Open the lid and remove the cotter keys from each hinge bolt. - Page 16 10. Tighten the bulb case back into place with 7. Using a glove or cloth, insert new bulb into bulb previously removed screw and nut. socket. CAUTION: Be careful with fingers around possible sharp edges when replacing bulb case screw and nut. 8.
-
Page 17: Parts List
PARTS LIST Description Part Number Description Part Number Description Lid, Side Burner 41500041 Regulator 50600233C HEAT DIFFUSERS Rotate Rod, Side Burner 41500205 Control Knob Bezel 40900036 COOKING GRATE End Cap, Right Side Shelf 30800206C Control Knob Bezel, Rotisserie Burner 50403001 SWING AWAY GRATE Right Side Shelf 50600033C... - Page 18 PARTS LIST Description Part Number Description Part Number Description Left Side Panel (SS) 50600045C Lid Rubber Bumper, Back HEAT DIFFUSERS 40800107 COOKING GRATE Tank Baffle 50600074C Temperature Gauge 30800207 SWING AWAY GRATE CLIP, F/ GREASE CUP Transformer 41500216 Temp Gauge Bezel 30800208 GREASE CUP TANK THUMBSCREW...
-
Page 19: Parts Diagram
DIAGRAM... -
Page 20: Before Assembly
BEFORE ASSEMBLY NOTICE: Once you have unpacked the grill according to the STOP SHEET instructions, check all grill parts against the pictures on this and the following two pages. If any parts are missing or damaged, call 1-888-287-0735. M – F 8:00 –... - Page 21 BEFORE ASSEMBLY...
- Page 22 BEFORE ASSEMBLY...
-
Page 23: Assembly
ASSEMBLY CAREFULLY READ AND PERFORM ALL ASSEMBLY INSTRUCTIONS ON THE FOLLOWING PAGES. Tools Required: Adjustable wrench (not provided) #2 and #3 Philips Screwdriver and Slotted Screwdriver (not provided) The following hardware is provided in blister pack for convenient use. M4X10 Screws M4X12 Screws Qty: 2 pcs Qty: 2 pcs... - Page 24 Left Side Shelf Assembly □ Hang shelf onto brackets on left side of firebox. (A) □ Attach shelf to firebox from inside with (2) M6x13 screws. (B) □ Attach shelf to firebox from outside with (3) M6x13 screws and (1) M4x12 screw. (C) M6X13 screws Qty: 5 pcs M4X12 screws Qty: 1 pc...
- Page 25 Right Side Shelf Assembly □ Hang shelf onto brackets on right side of firebox. (A) □ Attach shelf to firebox from inside with (2) M6x13 screws. (B) □ Attach shelf to firebox from outside with (3) M6x13 screws and (1) M4x12 screw. (C) M6X13 screws Qty: 5 pcs M4X12 screws Qty: 1 pc...