Table of Contents
Advertisement
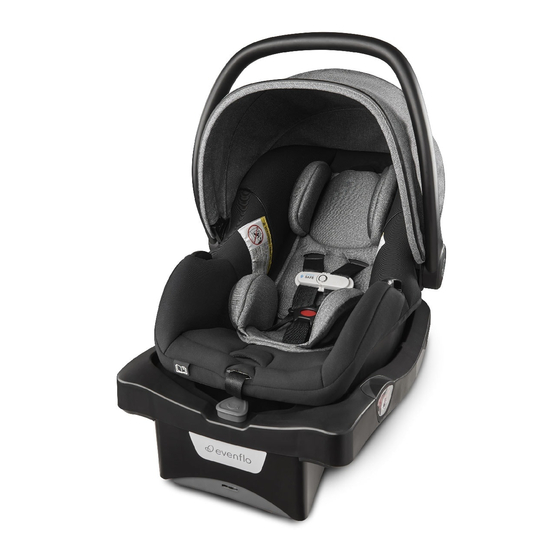
LITEMAX
SMART REAR-FACING
INFANT CAR SEAT
OWNER'S MANUAL
KEEP FOR FUTURE USE.
Rear-facing*
1.8 to 15.8 kg
(4 to 35 lbs)
43 to 81 cm
(17 to 32 in.)
*See page 6 for complete
requirements.
WARNING
To reduce the risk of serious injury or death, read
this owner's manual prior to installing and using
this child restraint.
©2019 Evenflo Company, Inc.
TM
25701516 3/19
Advertisement
Table of Contents

Related Manuals for Evenflo LITEMAX GOLD


Summary of Contents for Evenflo LITEMAX GOLD
- Page 1 43 to 81 cm (17 to 32 in.) *See page 6 for complete requirements. WARNING To reduce the risk of serious injury or death, read this owner’s manual prior to installing and using this child restraint. ©2019 Evenflo Company, Inc. 25701516 3/19...
- Page 2 More children are killed every year as U.S. Regulatory Notice passengers in car crashes than by any other This child restraint meets all the requirements of type of injury. Federal Motor Vehicle Safety Standard 213. For Canadian Models To reduce the risk of SERIOUS INJURY or DEATH, read this owner’s manual and your vehicle owner’s CANADIAN REGULATORY NOTICE manual before installing and using this child...
-
Page 3: Table Of Contents
Table of Contents (TOC) Installation Checklist ..........67 Child Requirements ..........6 Installing the Carrier WITHOUT the Convenience Premature Infant Use ..........8 Base..............69 Warnings .............. 10 Securing the Child in the Carrier ......75 LATCH/UAS Warnings ........... 22 Removing the Child from the Carrier .... -
Page 4: Child Requirements
To use this child restraint properly, children MUST meet the size and age At least 2.5 cm requirements below. In addition, Evenflo recommends (1 inch) consulting with your child’s physician before allowing your child to transition from a rear-facing to forward-facing child restraint. -
Page 5: Premature Infant Use
All children should ride rear-facing in the vehicle as long as other resources for parents and medical professionals, at as possible. Preterm and low birth weight infants are at https://www.healthychildren.org/english/safety- additional risk of breathing difficulties and heart problems prevention/on-the-go/Pages/default.aspx when placed in a child restraint. Evenflo requires that the... -
Page 6: Warnings
You should limit the time DO NOT • attach additional padding, toys spent each day in a child restraint as much or other devices not made by Evenflo or as possible. You must NEVER use your child restraint as a sleeping environment in the described in these instructions, to the child home. - Page 7 DEATH or SERIOUS DEATH or SERIOUS WARNING! WARNING! INJURY can occur. INJURY can occur. Air Bag Warnings DO NOT place rear-facing child • DO NOT use this restraint in the front seat of a vehicle seat on front seat with air bag. equipped with an air bag.
- Page 8 38 mm vehicle owner’s manual, try a different seating (1.5 inches) of space between any part of the child location or call Evenflo at restraint and the vehicle seat that is closest to the child’s 1-800-233-2229 in the (U.S), and (Canada).
- Page 9 DEATH or SERIOUS DEATH or SERIOUS WARNING! WARNING! INJURY can occur. INJURY can occur. Vehicle Seat Belt Warnings • DO NOT use this child restraint Retractor in a vehicle with seat belts that • ALWAYS read your vehicle automatically move along the owner's manual to determine vehicle frame when the door is what vehicle belts and retractors...
- Page 10 DEATH or SERIOUS DEATH or SERIOUS WARNING! WARNING! INJURY can occur. INJURY can occur. Vehicle Seat Belt Warnings (cont.) • This child restraint must be securely belted to the vehicle, even when it is unoccupied, since in • DO NOT use with lap/shoulder belts a crash an unsecured child restraint system may with two retractors.
- Page 11 DEATH or SERIOUS DEATH or SERIOUS WARNING! WARNING! INJURY can occur. INJURY can occur. Vehicle Seat Belt Warnings (cont.) Lap/Shoulder Belt with Locking Latch Plate If you have any of these types of vehicle belt systems The lap portion of this belt does not listed, these are SAFE to use to install your child loosen once the belt is buckled.
-
Page 12: Latch/Uas Warnings
DEATH or SERIOUS DEATH or SERIOUS WARNING! WARNING! INJURY can occur. INJURY can occur. Center installation in a non-standard LATCH LATCH /UAS Warnings position: Vehicle Top Tether Anchor What is LATCH? Center installation of this child restraint is permitted Points (Forward-Facing Only) LATCH is an acronym using inner Lower Anchor Bars from the outside... - Page 13 DEATH or SERIOUS DEATH or SERIOUS WARNING! WARNING! INJURY can occur. INJURY can occur. LATCH /UAS Warnings LATCH /UAS Warnings - continued • The LATCH system is intended to be used ONLY as • When not in use, the lower anchor connector described in these instructions.
-
Page 14: Usage Warnings
DEATH or SERIOUS DEATH or SERIOUS WARNING! WARNING! INJURY can occur. INJURY can occur. Usage Warnings Usage Warnings - continued WARNING • ALWAYS place the handle in Position 1 or 3 (U.S. models) or Position 1 (Canadian models) when using Children have STRANGLED this child restraint in a vehicle (p. -
Page 15: Safe Practices
Safe Practices Recall Information for U.S. Customers • Everyone rides buckled up or the vehicle does • Child restraints could be recalled for safety not go. Make no exceptions for adults or children. reasons. You must register this restraint to be If someone unbuckles, stop the vehicle. -
Page 16: Public Notice For Canadian Customers
The information you provide must be complete. registercarseatcanada Or register online at www.evenflo.com/registercarseatcanada. ATTENTION : Cette carte pourait être importante à la sécurité de votre enfant. Veuillez remplir cette carte à l’encre bleue ou noire installing your child restraint in aircraft. -
Page 17: Base Features
Base Features Base Features 1. Level Adjustment Knob 5. Vehicle Seat Belt/Lower 9. Load Leg storage (Not available on all models) Anchor Connector 10. LATCH storage 2. Angle Indicator Assembly Belt Path 3. Leveling Foot 6. One Step Lock-Off 7. SafeZone Load Leg 4. -
Page 18: Child Seat Features
Child Seat Features Child Seat Features 1. Handle 9. Headrest adjustment button 16. Handle adjustment button 2. Canopy* 10. SensorSafe Chest Clip 17. Harness Straps 3. Seat Pad 11. Harness Straps 18. Splitter Plate 4. Harness Covers* 12. Carrier 19. Carrier Release Handle * Not all features are 5. -
Page 19: Using The Handle
Using the Handle Using the Handle (cont.) To change handle positions, squeeze both Handle IMPORTANT: Always secure the child in the carrier. Releases and rotate the handle to the desired Refer to “Securing your Child in the Carrier” on position until it locks into place. p. -
Page 20: Safezone Tm Load Leg
SafeZone Load Leg Using the Handle (cont.) WARNING MISE EN GARDE The load leg helps minimize crash Position 3 (Travel – U.S.) forces on a baby in a frontal crash. For U.S. models, you It allows the child restraint’s safety may place the handle system to absorb crash energy in this position while... - Page 21 SafeZone Load Leg (cont.) SafeZone Load Leg- (cont.) WARNING Turn the base over as shown. MISE EN GARDE The load leg MUST be locked in a locked position and the foot MUST be in contact with the Pull the load leg out as shown. vehicle floor.
- Page 22 SafeZone Load Leg- (cont.) SafeZone Load Leg- Storage Although we recommend Turn base over and place base using the base with the load leg, in some cases it on the seat as shown. may not be possible, if it is not possible you should CLICK! store load leg.
-
Page 23: Proper Installation With The Convenience Base
Proper Installation WITH the Convenience Base Installation Checklist Child Requirements 1. Secure convenience base to the vehicle • Weight: 1.8 – 15.8 kg (4 – 35 lbs) seat. • Height: 43 – 81 cm (17 – 32 in.) and top of child’s Convenience base is securely installed with lower head is at least 2.5 cm (1 in.) below the top of the anchor connector assembly (shown) (p. -
Page 24: Installing The Convenience Base With The Lower Anchor Connector Assembly
Installing the Convenience Base with the Installation Checklist (cont.) Lower Anchor Connector Assembly DEATH or SERIOUS 2. Secure child in the carrier. WARNING! Refer to p. 75. INJURY can occur. Harness straps are at, or below shoulder level (p. 44). Both buckle tongues are fastened (p. - Page 25 Installing the Convenience Base with the Installing the Convenience Base with the Lower Anchor Connector Assembly (cont.) Lower Anchor Connector Assembly (cont.) DEATH or SERIOUS WARNING! Before you begin, be sure the vehicle is on level ground. INJURY can occur. Remove lower anchor connectors, see p.
- Page 26 Installing the Convenience Base with the Installing the Convenience Base with the Lower Anchor Connector Assembly (cont.) Lower Anchor Connector Assembly (cont.) Base shown with leveling foot in stored position. Knob Recline base until white indicator line is in the correct color zone for Turn the convenience base upside down.
- Page 27 Installing the Convenience Base with the Installing the Convenience Base with the Lower Anchor Connector Assembly (cont.) Lower Anchor Connector Assembly (cont.) Know Your Lower Anchor Open One Step Lock-Off Connector Assembly The lower anchor connector assembly that comes Turn the convenience base right side up. Push down with your child restraint will be below.
- Page 28 Installing the Convenience Base with the Installing the Convenience Base with the Lower Anchor Connector Assembly (cont.) Lower Anchor Connector Assembly (cont.) WARNING! DEATH or SERIOUS Using your full weight, INJURY can occur. push the base into the vehicle seat while pulling Make sure the lower up on the strap to anchor connector assembly...
-
Page 29: Installing The Convenience Base With The Vehicle Lap/Shoulder Belt
Installing the Convenience Base with Installing the Convenience Base with the Vehicle Lap/Shoulder Belt (cont.) the Vehicle Lap/Shoulder Belt Before you begin, be sure the vehicle is on level ground. Store the lower anchor connectors, see p. 94-95. Before installing the base, if you Using your full weight, Knob are using the load leg, you will... - Page 30 Installing the Convenience Base with Installing the Convenience Base with the Vehicle Lap/Shoulder Belt (cont.) the Vehicle Lap/Shoulder Belt (cont.) Secure the base to your vehicle seat Base shown with by routing the lap/shoulder belt leveling foot in stored through the belt path openings on position.
- Page 31 Installing the Convenience Base with Installing the Convenience Base with the Vehicle Lap/Shoulder Belt (cont.) the Vehicle Lap/Shoulder Belt (cont.) Secure the base to your vehicle seat Close the Lock-Off until by routing the lap belt through the it clicks into place. belt path openings on the sides of the base and through the vehicle Click!
-
Page 32: Placing The Carrier In The Base
Placing the Carrier in the Base Placing the Carrier in the Base (cont.) WARNING! DEATH or SERIOUS INJURY can occur. Recline Indicator 1.8-9 kg Indicateur d’inclinaison (4-20 lbs) 9-15.8 kg • NEVER use this child (20-35 lbs) restraint in the forward-facing position. -
Page 33: Releasing The Carrier From The Base
Releasing the Carrier from the Base Placing the Carrier in the Base (cont.) Move the handle to Position 1 (Carry) by squeezing U.S. Models ONLY Canadian Models ONLY in on both handle releases and rotating the handle Position 1 Position 1 or 3 until it locks into place above the carrier. -
Page 34: Proper Installation Without The Convenience Base
Proper Installation WITHOUT the Convenience Base Installation Checklist Child Requirements 1. Place the child in the carrier. • Weight: 1.8 – 15.8 kg (4 – 35 lbs) The child’s back and bottom are flat against the • Height: 43 – 81 cm (17 – 32 in.) and top of child’s back and bottom surfaces of the carrier. -
Page 35: Installation Checklist
Installing the Carrier Installation Checklist WITHOUT the Convenience Base 3. Secure child restraint to the vehicle seat. Carrier is securely installed with vehicle seat belt (p. 69-74). The vehicle shoulder strap portion of the seat belt is above the polished area on rear of child restraint (p. -
Page 36: Installing The Carrier Without The Convenience Base
Installing the Carrier without the Convenience Installing the Carrier Installing the Carrier WITHOUT the Convenience Base (cont.) Base (cont.) WITHOUT the Convenience Base (cont.) WARNING! DEATH or SERIOUS LAP/ SHOULDER BELT LAP BELT INJURY can occur. In vehicles with a lap/ •... - Page 37 Installing the Carrier Installing the Carrier WITHOUT the Convenience Base (cont.) WITHOUT the Convenience Base (cont.) Canadian Models ONLY U.S. Models ONLY Position 1 or 3 If the level line is not level with the ground, use a tightly rolled towel or small blanket beneath the front edge of the child restraint to provide enough recline for an infant’s head to lie back comfortably.
-
Page 38: Securing The Child In The Carrier
Installing the Carrier Securing the Child in the Carrier WITHOUT the Convenience Base (cont.) Install Locking Clip (not Locking Clip included), if necessary. installed If your vehicle was built prior to properly model year 1996, and has a lap/ 13 mm shoulder belt that is equipped with (0.5 in.) an emergency locking retractor... - Page 39 Securing the Child in the Carrier (cont.) Securing the Child in the Carrier (cont.) Slide each harness strap over the child’s shoulders. The harness straps must be snug against the child. Insert the buckle tongues A snug strap should not into the buckle.
-
Page 40: Removing The Child From The Carrier
Securing the Child in the Carrier (cont.) Removing the Child from the Carrier Press the red buckle release, and remove the buckle tongues. Push the release button and pull the chest clip To tighten the harness straps, pull the harness apart. -
Page 41: Using As An Infant Carrier
WARNING! DEATH or SERIOUS Using as an Infant Carrier INJURY can occur. • NEVER place this carrier near the edges of counter tops, tables, Secure the child in the carrier by following “Securing or other high surfaces. The child’s movements can cause the the Child in the Carrier”... -
Page 42: Changing The Crotch Strap Position
Changing the Crotch Strap Position Changing the Crotch Strap Position (cont.) Crotch Strap in the Middle Slot As your child grows, you will need to change the crotch strap position so that it is in the slot closest to your child. - Page 43 Changing the Crotch Strap Position (cont.) Changing the Crotch Strap Position (cont.) To reposition crotch strap, loosen the harness straps (p. 82) and move the strap out of the way. Remove the crotch strap anchor from its position on the bottom of the carrier, and push the anchor up through Anchor the slot to the top of the seat.
-
Page 44: Changing The Waist Strap Position
Changing the Waist Strap Position Changing the Waist Strap Position (cont.) As your child grows, you will need to change the waist strap position so that it is in the slot closest to your child. The waist strap should ALWAYS be as close as To reposition waist straps, possible to, but... - Page 45 Changing the Waist Strap Position (cont.) Changing the Waist Strap Position (cont.) Unhook the front of the child restraint’s seat pad and move it out of the way to expose the waist strap slots and anchors. Remove the waist strap anchor from its position on top of the seat, and push the anchor down through the slot to the...
- Page 46 Changing the Waist Strap Position (cont.) Changing the Waist Strap Position (cont.) Medium size baby Small size baby Small size baby Medium size baby...
-
Page 47: Removing The Lower Anchor Connector Assembly
Removing the Lower Anchor Connector Changing the Waist Strap Position (cont.) Assembly (cont.) Large size baby The lower anchor connector that comes with your child restraint will be below: Large size baby To remove the clip, pull the red release strap and remove clip from anchor. - Page 48 Removing the Lower Anchor Connector Removing the Lower Anchor Connector Assembly (cont.) Assembly (cont.) Attach the connector to the posts located on each side When the lower anchor connector assembly is of the base or on the bottom of the base. not in use, you MUST securely store it in the...
-
Page 49: Sensorsafe Tm Application
GENERAL INFORMATION ABOUT SENSORSAFE SENSORSAFE APPLICATION Secure your child into the child restraint as you would normally. The NEVER INSTALL or use this Child SensorSafe Receiver Plug monitors both the Chest Clip Transmitter Restraint until you have read and and the vehicle. When you arrive at your destination and turn your understand the instructions in this manual vehicle off, the SensorSafe system sounds a series of gentle tones... - Page 50 CR2032. If you should have issues 1-800-233-2229 in the (U.S) and (Canada), to order a with SensorSafe hardware, please contact compatible Receiver Plug. Evenflo’s ParentLink at: 1-800-233-2229 in the (U.S) and (Canada), or online at: www.evenflogold.com or www.evenflogold.ca to order a replacement battery/parts.
- Page 51 GENERAL INFORMATION ABOUT SENSORSAFE GENERAL INFORMATION ABOUT SENSORSAFE USING SENSORSAFE 2.1 (CONT.) (CONT.) SensorSafe Technology ™ This equipment generates, uses, and can radiate radio frequency energy and, if not installed and used in accordance Questions? Comments?: with the instructions, may cause harmful interference to radio Visit us at: www.evenflogold.com or www.evenflogold.ca communications.
- Page 52 SensorSafe by following steps 1-5 again. Receiver, in other vehicles the Contact Evenflo’s ParentLink at: 1-800-233-2229 in the (U.S) tone will not be heard until the and (Canada), or online at: www.evenflogold.com or www. vehicle has been started.
-
Page 53: Using Sensorsafe Tm
Buckle and pulling out both Buckle Tongues. This completes the battery replacement process. 3. Open Chest Clip by pressing the Release Button and If you have questions, please contact Evenflo’s ParentLink pulling the Chest Clip apart. at: 1-800-233-2229 in the (U.S) and (Canada), or online at: www.evenflogold.com or www.evenflogold.ca... -
Page 54: Securing Your Child Restraint In Aircraft
Installing Carrier WITHOUT Convenience Securing Your Child Restraint in Aircraft Base in Aircraft The Federal Aviation Administration (FAA) recommends that you secure your child for air travel in an appropriate child restraint based on your child’s weight and size. Turbulence Place the child can happen with little or no warning. - Page 55 Installing Carrier WITHOUT Convenience Installing Carrier WITHOUT Convenience Base in Aircraft (cont.) Base in Aircraft (cont.) Fasten the aircraft seat belt. Route the aircraft seat belt through the belt slots on the carrier, as shown above.
- Page 56 Installing Carrier WITHOUT Convenience Installing Carrier without Convenience Base Base in Aircraft (cont.) in Aircraft (cont.) Position 1 Squeeze both handle releases and move the handle to Position 1 The aircraft seat belt must be as tight as possible. Unfasten SensorSafe Route the excess seat belt strap back through the Chest Clip belt slots, as shown above.
-
Page 57: Installing The Canopy
Installing the Canopy Installing the Accessories To remove the harness covers. Loosen the harness straps by pressing the harness release button while pulling on the straps. Slide the harness Click! strap off of the splitter plate. Pull both harness straps through the front of the child restraint. -
Page 58: Removing The Seat Pad
Removing the Seat Pad Installing the Accessories (cont.) • Move handle to Position 4 (p. 36). • Unfasten chest clip and crotch buckle (p. 79). To remove the buckle • Remove crotch buckle cover (p. 114). cover, press the red •... - Page 59 Removing the Seat Pad Removing the Seat Pad (cont.) Unfasten Velcro® on Push both harness straps back of canopy and through seat pad. pull canopy forward. Push crotch buckle through seat pad. Slide J-clips down and out of slots on both sides of child restraint.
-
Page 60: Replacement Parts
Evenflo. When you contact us, please have the product model number and date of manufacture (found on the back of the child restraint). To replace seat pad, reverse these steps. -
Page 61: Care And Cleaning
Replacement Parts (cont.) Care and Cleaning • DO NOT lubricate or immerse in water the LATCH connectors, the buckle, or any other part of this child restraint, unless rinsing is permitted, as stated on the back of the buckle for your restraint. -
Page 62: Proper Disposal Of This Child Restraint
Registration in the Evenflo Gold Lifetime Warranty means found on the date of manufacture label, Evenflo that for the life of this Gold product, Evenflo warrants to encourages you to dispose of it properly. Most the original purchaser who registers online (“Registrant”) components of this child restraint are recyclable. - Page 63 Warranty (cont.) Warranty (cont.) *STROLLER WARRANTY INFORMATION: By simply registering your Evenflo Gold Stroller or Gold Car Seat Your Evenflo Gold Stroller frame is warranted to be free from online within 3 months of purchase, you, the Registrant, will any frame damage for the life of the stroller, which is through...
-
Page 64: Storing Your Instructions
Warranty (cont.) Storing Your Instructions *GOLD CAR SEAT WARRANTY INFORMATION: Your Evenflo Gold Car Seat is warranted to be free from any manufacturing irregularities for the life of the car seat under normal use conditions and according to the instruction manual. - Page 65 www.evenflogold.com or www.evenflogold.ca USA: ,Canada: 1-800-233-2229, 8 AM – 5 PM E.T.
Need help?
Do you have a question about the LITEMAX GOLD and is the answer not in the manual?
Questions and answers