Table of Contents
Advertisement
INSTRUCTIONS
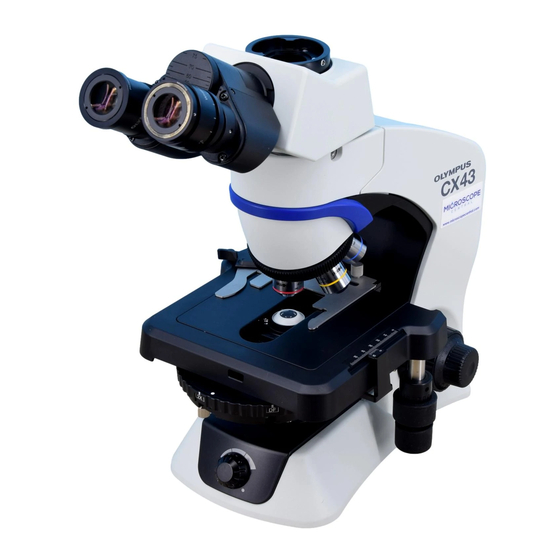
CX43
Biological Microscope
This instruction manual is for the Olympus biological microscope.
To ensure the safety, obtain optimum performance and to familiarize yourself fully with the use
Optical Microscope and Accessory
of this microscope, we recommend that you study this manual thoroughly before operating this
microscope, and always keep this manual at hand when operating this product.
Retain this instruction manual in an easily accessible place near the work desk for future
reference.
A X 8878
Advertisement
Table of Contents

Related Manuals for Olympus CX43


Summary of Contents for Olympus CX43
- Page 1 INSTRUCTIONS CX43 Biological Microscope This instruction manual is for the Olympus biological microscope. To ensure the safety, obtain optimum performance and to familiarize yourself fully with the use Optical Microscope and Accessory of this microscope, we recommend that you study this manual thoroughly before operating this microscope, and always keep this manual at hand when operating this product.
- Page 2 Refer to your local Olympus distributor in EU for return and/or collection systems available in your country. NOTE: This product has been tested and found to comply with the limits for a Class A digital device, pursuant to Part 15 of the FCC Rules.
-
Page 3: Table Of Contents
Contents Safety precautions ............................1 Nomenclature of configuration units ..................2 Nomenclature of operating portions ..................3 Transmitted brightfield/darkfield observation methods ........4 Operating procedures of each portion ................4-1 Base portion ................................Turning ON the LED illumination ............................9 Using the filter ....................................9 4-2 Stage portion ................................ - Page 4 5 Various observation methods ..................... 5-1 Transmitted phase contrast observation method .............. Centering the ring slit for phase contrast ......................25 5-2 Transmitted simple polarization observation method ............ Adjusting the crossed Nicol .............................28 6 Image acquisition ..........................Camera adapter ..................................29 7 Glossary of optical performance terminology ............. 8 Troubleshooting ............................
-
Page 5: Safety Precautions
CX43 Safety precautions If the product is used in a manner not specified by this manual, the safety of the user may be imperiled. In addition, the product may also be damaged. Always use the product according to this instruction manual. - Page 6 CAUTION - Electric safety - Always use the AC adapter and power cord provided by Olympus. If the proper AC adapter and the power cord are not used, the electric safety and the EMC (Electro-Magnetic Compatibility) performance of the product cannot be assured. If no power cord is provided, please select the proper power cord by referring to the section “Proper selection of the power cord”...
- Page 7 CX43 Handling precautions · This product is a precision instrument. Handle it with care and avoid subjecting it to a sudden or NOTE severe impact. · Never disassemble any part of the product. Otherwise, failure could be caused. Be careful not to apply the impact or let the dirt/dust attached to the microscope when carrying it.
- Page 8 Do not use a highly sealable cover, such as a plastic bag, etc. as a dust cover. The humidity in the NOTE microscope may increase to damage the product. When disposing of this product, be sure to follow the regulations and rules of your local government. Contact Olympus for any questions. Intended use This product has been designed to be used to observe magnified images of specimens in various routine work and research applications.
-
Page 9: Nomenclature Of Configuration Units
CX43 Nomenclature of configuration units · The units described on this page are configuration units of the CX43 system including options. · For other combinable units, refer to the latest catalogs or contact Olympus. Eyepieces Tube Intermediate attachment Microscope frame... -
Page 10: Nomenclature Of Operating Portions
Nomenclature of operating portions Pre-focusing lever Various filters Ring slit centering knob Ring slit centering knob Binocular portion Main switch Main switch : Power is ON. : Power is OFF. Diopter adjustment ring Specimen holder Revolving nosepiece fixing knobs Condenser top lens Ring slit centering knob Specimen holder Coarse focusing knob... -
Page 11: Transmitted Brightfield/Darkfield Observation Methods
CX43 Transmitted brightfield/darkfield observation methods This section describes the procedures of the transmitted brightfield/darkfield observation, which is the basic of all observations. The transmitted phase contrast observation and transmitted simple polarization observation are explained in "5 Various observation methods" on page 23. - Page 12 Make a copy of this observation procedure guide and put it near the microscope to use for observation.
-
Page 13: Operating Procedures Of Each Portion
CX43 Operating procedures of each portion 4-1 Base portion Turning ON the LED illumination Set the main switch a to (ON). Rotating the brightness adjustment knob b in the arrow direction increases the brightness and rotating it in the opposite direction decreases the brightness. -
Page 14: Stage Portion
4-2 Stage portion Placing the specimen When using the specimen holder for observing one slide glass Rotate the coarse focusing knob a in the arrow direction to fully lower the stage. Press the specimen holding lever knob b backward (arrow direction) to open the lever c , and slide the specimen from front to back on the stage to place it. -
Page 15: Moving The Specimen
CX43 (Option) When using thethe specimen holder CX3-HLDT Rotate the coarse focusing knob a in the arrow direction to fully lower the stage. Press the specimen holding lever knob b backward (arrow direction) to open the lever c , and slide the specimen from front to back on the stage to place it. - Page 16 Scale of specimen position By reading and taking a note of X-axis and Y-axis scales of the observation position on the specimen, you can return to the original observation position easily even if the specimen is moved. < Reading the scale > Read the "0"...
- Page 17 CX43 Slide glass It is recommended to use the following slide glasses a . Length: 76 mm, Width: 26 mm, Thickness: 0.9 to 1.4 mm (Thickness: 0.9 to 1.2 mm for darkfield observation) Use the cover glass b with the thickness of 0.17mm to NOTE fully deliver the performance of objective.
-
Page 18: Revolving Nosepiece Portion
4-3 Revolving nosepiece portion Selecting the objective Hold the revolving nosepiece a and rotate it so that the intended objective comes exactly above the specimen. · Do not rotate the revolving nosepiece by holding the NOTE objective. · Be careful if you rotate the revolving nosepiece while observing the edge of the slide glass with the high magnification objective (40X, etc.), the objective may interfere with the specimen holder. -
Page 19: Adjusting The Tension Of The Coarse Focusing Knob
CX43 Adjusting the tension of the coarse focusing knob The tension of the coarse focusing knob can be adjusted. Insert a commercially-available flathead screwdriver into the groove c of the tension adjustment ring. Rotating it clockwise (arrow direction) increases the tension and counterclockwise decreases the tension of the coarse focusing knob a . -
Page 20: Tube Portion
4-5 Tube portion Adjusting the interpupillary distance The interpupillary distance adjustment is to adjust the distance between two eyepieces according to the distance between your eyes. This makes it possible to observe a single image and to reduce eye strain during observation. -
Page 21: Adjusting The Diopter
CX43 Adjusting the diopter The diopter adjustment is to compensate for the difference in eyesights of left and right eyes of the observer. Attach the eyepiece equipped with diopter adjustment (WHB10X-H). Rotate the diopter adjustment rings a of the right and left eyepieces and move each scale “0”... -
Page 22: Trinocular Tube (U-Ctr30-2)
Trinocular tube (U-CTR30-2) Combining the trinocular tube allows you to acquire the image of the specimen using the camera. The ratio of the observation light intensity is fixed as: Eyepiece side 50%; Camera side 50%. (For attaching the trinocular tube to the microscope frame and attaching the camera adapter and the camera, see page 38.) Tilting binocular tube (U-CTBI) Combining the tilting binocular tube allows you to adjust the height... -
Page 23: Condenser Portion
CX43 4-6 Condenser portion Selecting the observation method Rotating the turret of the condenser allows you to select the observation method. Rotate the turret a to select the observation method from the following table (Display of turret) and display it on the front b . -
Page 24: Adjusting The Aperture Diaphragm
Adjusting the aperture diaphragm The aperture diaphragm is a diaphragm to adjust the numerical aperture of the condenser. Adjusting the numerical aperture of the condenser appropriately with respect to the numerical aperture of each objective allows you to observe the specimen with the best contrast and resolution. (For the aperture diaphragm, see page 31.) Move the aperture diaphragm lever a to right and left direction to match with the numerical aperture (NA) of the objective in use. -
Page 25: Immersion Objective
CX43 4-7 Immersion objective Using the 100X oil immersion objective · Apply the immersion oil specified by Olympus to the tip of the 100X oil immersion objective. NOTE Otherwise, the observed image is not in focus. · Always use the immersion oil provided by Olympus. - Page 26 After use, lower the stage and rotate the revolving nosepiece, and remove the objective attached with the immersion oil from the specimen. Wipe off the immersion oil thoroughly from the tip of the objective and the tip of the condenser lens with the cleaning paper or the gauze slightly moistened with absolute alcohol.
-
Page 27: Various Observation Methods
CX43 Various observation methods This section describes the procedures of observation methods other than brightfield/darkfield observations. For brightfield and darkfield observations, see "3 Transmitted brightfield/darkfield observation methods". 5-1 Transmitted phase contrast observation method For the phase contrast observation, the objective for phase contrast and the centering telescope (CT-5) are necessary. -
Page 29: Centering The Ring Slit For Phase Contrast
CX43 Centering the ring slit for phase contrast Engage the 10X objective for phase contrast in the light path and bring the specimen into focus. Rotate the turret of the condenser to select Ph1. Select the condenser turret position (Ph1/Ph2/Ph3) same as the Ph display a of the objective. -
Page 30: Transmitted Simple Polarization Observation Method
5-2 Transmitted simple polarization observation method For polarization observation, the objective for polarization, simple polarizing intermediate attachment, analyzer for simple polarization and polarizer are necessary. (For attaching procedures, see "11 Assembly" on page 37.) (Operation portion) (Page) Main switch 9 ... - Page 31 CX43...
-
Page 32: Adjusting The Crossed Nicol
Adjusting the crossed Nicol According to procedures on page 38, attach the simple polarizing intermediate attachment and the tube. Insert the analyzer for simple polarization a into the slider insertion opening of the simple polarizing intermediate attachment with the display surface facing up until it touches the end, and tighten the fixing knob b . -
Page 33: Image Acquisition
CX43 Image acquisition Camera adapter The observed image can be acquired by attaching the camera adapter and the digital camera for microscope to the trinocular tube. (For attaching procedures, see page 38.) When using the camera adapter, be sure to adjust the parfocality (camera adapter and eyepieces). -
Page 34: Glossary Of Optical Performance Terminology
Glossary of optical performance terminology Total magnification The size of the specimen image to be observed is obtained by multiplying the eyepiece magnification by the objective magnification. This value is referred to as the total magnification. Example: Eyepiece (10X) x Objective (40X) = 400X Resolution The resolution is the ability of the lens to separate the image created by multiple proximal points. - Page 35 CX43 Aperture diaphragm The aperture diaphragm is a diaphragm to adjust the numerical aperture of the condenser. Adjusting the numerical aperture of the condenser appropriately with respect to the numerical aperture of each objective allows you to observe the specimen with the best contrast and resolution.
-
Page 36: Troubleshooting
The performances of this microscope may not be fully delivered depending on how it is used, though that is not a failure. If problems occur, please review the following list and take remedial action as needed. If you cannot solve the problem after checking the entire list, please contact Olympus for assistance. Problem... - Page 37 Repair request If you cannot solve the problems even though taking actions described in "Troubleshooting", please contact Olympus for assistance. Please provide us the following information at that time. Product name and abbreviation (Ex.: Biological Microscope CX43RF)
-
Page 38: Specifications
Specifications Item Specification Optical system Infinity optical system Microscope frame CX43RF / CX43LF Illumination system Built-in LED light source Microscope frame (rated input power): 5 V 0.85 A AC adapter (rated input power): 100-240V 50-60 Hz 0.4A AC adapter (rated output power): 5V 2.5A Power consumption 2.4W... -
Page 39: List Of Optical Performances
CX43 List of optical performances Magnification The following table shows the optical performances when combining eyepieces and Numerical aperture objectives. Mechanical tube The picture on the right shows the various length performances indicated on the objectives. Field number Color band... - Page 40 Basic information by objective WHB10x/WHB10x-H-2 Optical performance Working Cover (Field number: 20) Numerical distance glass Resolution Magnification aperture Notes Actual field (WD) thickness (µm) Total Focal depth of view Objective (mm) (mm) magnification (µm) Notation (mm) Plan PLCN 0.10 27.8 3.36 175.0 Achromat...
-
Page 41: 11 Assembly
CX43 Assembly 11-1 Assembly diagram The number in the following diagram indicates the order to attach each unit. The detail assembly procedures are described on and after next page. Camera DP22 / DP27 Eyepiece micrometer Eyepiece Camera adapter U-TV1XC C3X-10X/18 Eyepiece U-TV0.63XC... -
Page 42: Assembly Procedures
11-2 Assembly procedures Attaching the intermediate attachment and the tube Loosen the tube clamping screw a of the microscope frame with the allen wrench. When attaching the intermediate attachment Fit the circular dovetail of the intermediate attachment into the tube attaching portion of the microscope frame, and tighten the tube clamping screw a to secure the intermediate attachment firmly. -
Page 43: Attaching The Eyepieces (Whb10X, Whb10X-H)
CX43 Attaching the eyepieces (WHB10X, WHB10X-H) Remove the eyepiece cap. Insert the eyepiece a into the eyepiece sleeve b until it touches the end. Tighten the eyepieces clamping screw provided with the microscope frame using the small flathead screwdriver to fix the eyepieces. -
Page 44: Attaching The Objective
Attaching the objective Screw the objective into the mount hole of the revolving nosepiece a carefully not to drop it. When changing the objective, hold the revolving nosepiece a and rotate it so that the intended objective comes exactly above the specimen. -
Page 45: Attaching The Specimen Hold Plate Cx3-Shp Or The Specimen Holder Cx3-Hldt
CX43 Attaching the specimen hold plate CX3-SHP or the specimen holder CX3-HLDT Rotate the coarse focusing knob to fully lower the stage. Loosen the specimen holder fixing knob a (2 pcs.) of the stage plate and remove the standard specimen holder by pulling it toward front side. -
Page 46: Connecting The Ac Adapter And Power Cord
Connecting the AC adapter and power cord Always use the AC adapter and power cord provided by Olympus. If the proper AC adapter and the power CAUTION cord are not used, the electric safety and the EMC (Electro-Magnetic Compatibility) performance of the product cannot be assured. -
Page 47: Attaching The Allen Wrench Holder
CX43 Attaching the allen wrench holder · It is recommended to attach the provided allen wrench holder a to the back of the microscope frame. · The provided allen wrench b can be fixed to the provided allen wrench holder a . - Page 48 If no power supply cord is provided, please select the proper power supply cord for the equipment by referring to “Specifications” and “Certified Cord” below: Caution : In case you use a non-approved power supply cord for Olympus products, Olympus can no longer warrant the electrical safety of the equipment.
- Page 49 CX43 Table 2 HAR flexible cord Approval organizations and cordage harmonization marking methods Alternative marking utilizing Printed or embossed black-red-yellow thread (Length harmonization marking (May be of color section in mm) Approval organization located on jacket or insulation of internal wiring)
- Page 50 Memo...
- Page 52 Manufactured by Shinjuku Monolith, 2-3-1 Nishi-Shinjuku, Shinjuku-ku, Tokyo 163-0914, Japan Distributed by 48 Woerd Avenue Waltham, MA 02453, U.S.A. 8F Olympus Tower, 446 Bongeunsa-ro, Gangnam-gu, Seoul, 06153 Korea Distributor Tengrant Inc. Tel.: +86(021)5428 6005 Fax: +86(021)5428 6005-8002 www.tengrant.com AX8878 03...
Need help?
Do you have a question about the CX43 and is the answer not in the manual?
Questions and answers
how to replace bulb on cx43