Table of Contents
Advertisement
Quick Links
Advertisement
Table of Contents
Troubleshooting

Related Manuals for Fronius TransTig 170


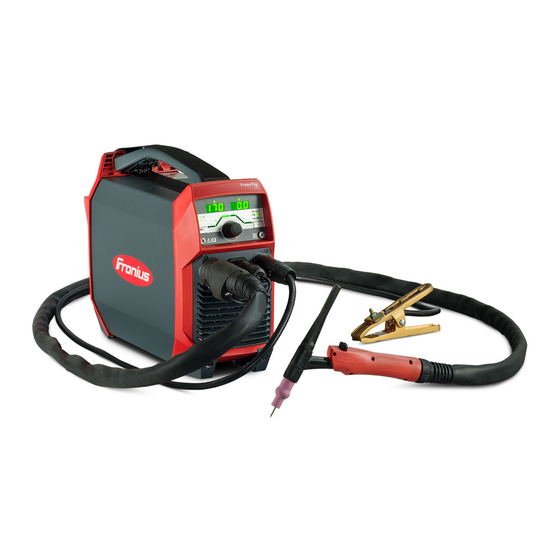
Summary of Contents for Fronius TransTig 170
- Page 1 Perfect Welding / Perfect Charging / / Solar Energy Operating Instructions TransTig 170 TransTig 210 TIG Power source 42,0426,0308,EA 005-03032020 Fronius prints on elemental chlorine free paper (ECF) sourced from certified sustainable forests (FSC).
-
Page 3: Table Of Contents
Table of contents Safety Instructions ............................. Explanation of Safety Instructions......................General ..............................Intended Use............................Environmental Conditions ........................Obligations of the Operating Company....................Obligations of Personnel........................Grid Connection ............................ Residual current circuit breaker ......................Personal Protection and Protection of Others..................Data regarding Noise Emission Values ....................Danger from toxic gases and vapors .................... - Page 4 Generator-Powered Operation......................Connecting the Mains Cable........................General ..............................Safety..............................Connecting the Mains Cable......................... Commissioning ............................Safety..............................General ..............................Connecting the Gas Cylinder ........................ Connecting the Welding Torch to the Power Source ................Establishing a Ground Earth Connection with the Workpiece .............. Measuring the welding circuit resistance "r"...
- Page 5 General ..............................Safety..............................Displayed Faults ........................... Service messages..........................No Function............................Inadequate function ..........................Service, maintenance and disposal ......................General ..............................Safety..............................During Each Start-up ..........................Every Two Months ..........................Disposal ..............................Appendix Technical Data ............................Special Voltage ............................. TT170 /EF, TT170 /np........................... TT 170 MV/B, TT 170 MV/np ........................
-
Page 7: Safety Instructions
Safety Instructions Explanation of DANGER! Safety Instruc- tions Indicates an immediate danger. ► Death or serious injury may result if appropriate precautions are not taken. WARNING! Indicates a possibly dangerous situation. ► Death or serious injury may result if appropriate precautions are not taken. CAUTION! Indicates a situation where damage or injury could occur. -
Page 8: Environmental Conditions
The device is intended exclusively for the welding process specified on the rating plate. Utilization for any other purpose, or in any other manner, shall be deemed to be "not in ac- cordance with the intended purpose." The manufacturer is not responsible for any damage resulting from improper use. -
Page 9: Residual Current Circuit Breaker
This may affect a number of device types in terms of: connection restrictions criteria regarding maximum permissible grid impedance criteria regarding the minimum required short-circuit power both at the interface with the public grid See technical data In this case, the operator or the person using the device should check whether or not the device is allowed to be connected, where appropriate through discussion with the power supply company. -
Page 10: Data Regarding Noise Emission Values
Data regarding The device produces a maximum noise level of <80 dB(A) (ref. 1pW) when idling and in Noise Emission the cooling phase following operation in relation to the maximum permitted operating point Values at standard loading in accordance with EN 60974-1. A workplace-specific emission value for welding (and cutting) cannot be specified because this value depends on the welding process and the environmental conditions. -
Page 11: Risks From Grid Current And Welding Current
Sparks and pieces of hot metal may also get into surrounding areas through small cracks and openings. Take appropriate measures to ensure that there is no risk of injury or fire. Do not undertake welding in areas at risk of fire and explosion, or on sealed tanks, drums, or pipes if these have not been prepared in accordance with corresponding national and international standards. -
Page 12: Stray Welding Currents
After opening the device: Discharge all electrically charged components Ensure that all components are disconnected from the power supply If work is needed on voltage-carrying parts, bring in a second person who will switch off the main switch at the correct time. Stray Welding If the following instructions are not observed, stray welding currents may occur, which pose Currents... -
Page 13: Emf Measures
Supporting measures to avoid EMC problems: Grid power supply If electromagnetic interference occurs despite a grid connection that complies with regulations, take additional measures (e.g., use a suitable grid filter). Welding power-leads Keep them as short as possible Route them close together (also to avoid EMF problems) Route them far from other lines Equipotential bonding Workpiece grounding... -
Page 14: Requirement For The Shielding Gas
Power sources for work in areas with increased electrical hazard (e.g. boilers) must be la- beled with the symbol (Safety). However, the power source may not be located in such ar- eas. Risk of scalding due to leaking coolant. Switch off the cooling unit before disconnecting connections for the coolant supply or return. -
Page 15: Danger Posed By Shielding Gas Leak
When no welding is taking place, close the valve of the shielding gas cylinder. Leave the cap on the valve of the shielding gas cylinder when the cylinder is not connected. Follow the manufacturer's instructions and applicable national and international provisions for shielding gas cylinders and accessories. -
Page 16: Maintenance And Repair
Safety devices that are not fully functional must be repaired before the device is switched Never bypass or disable safety devices. Before switching on the device, ensure that no one can be put in danger. The device must be examined at least once a week for externally detectable damage and functionality of the safety devices. -
Page 17: Disposal
(e.g. relevant product standards of the EN 60974 se- ries). Fronius International GmbH declares that the device complies with Directive 2014/53/EU. The full text of the EU Declaration of Conformity is available on the following website: http:/ /www.fronius.com... -
Page 19: General Information
General Information... -
Page 21: General
Applications The power source can be used in repair and maintenance for production and manufactur- ing tasks. Remote Control The TransTig 170 and TransTig 210 power sources can be operated using the following Operating Mode remote controls: RC Bar 1P... -
Page 22: Warning Notices On The Device
Warning Notices Warning notices and safety symbols can be found on power sources with the CSA test on the Device mark for use in the North American region (USA and Canada). These warning notices and safety symbols must not be removed or painted over. They warn against incorrect opera- tion, as this may result in serious injury and property damage. - Page 23 Safety symbols on the rating plate: Welding is dangerous. The following basic requirements must be met: Adequate welding qualifications Appropriate protective equipment Exclusion of unauthorized people Do not use the functions described here until you have fully read and understood the fol- lowing documents: These Operating Instructions All system component Operating Instructions, especially the safety rules...
-
Page 25: Operating Controls And Connections
Operating controls and connections... -
Page 27: Control Panel
Control Panel General NOTE! Because of software updates, certain functions may be available for your device but not described in these Operating Instructions or vice versa. In addition, individual figures may also differ slightly from the operating elements of your device. - Page 28 Item Name Special indicators HF ignition indicator (high frequency ignition) Illuminates when the "IGn" setup parameter has been set to "on" Tacking indicator Illuminates when the "tAC" setup parameter has been set to a period of time Pulsing indicator Illuminates when the "F-P" setup parameter has been set to a pulse frequen- Spot welding indicator Illuminates when the "SPt"...
- Page 29 HOLD indicator At the end of welding, the current actual values for the welding current and welding voltage are saved - the "hold" indicator illuminates. The "hold" indicator relates to the last main current I to be reached. Any further interaction with the power source will cause the "hold"...
- Page 30 Unit indicators s indicator Illuminates if the parameters "tup" and "tdown" have been selected, as well as the following setup parameters: GPr | GPo | SPt | tAC | t-S | t-E | Hti | Ito | ArC | St1 | St2 | SPb Hz indicator Illuminates: When a value for the pulse frequency has been set for the "F-P"...
- Page 31 The welding parameter overview contains the following welding parameters: Starting current I For TIG welding UpSlope t Period of time it takes to rise from the starting current I to the specified main cur- rent I during TIG welding T-u for the UpSlope is displayed on the left digital display. IMPORTANT! The UpSlope t is saved separately for the following operating modes:...
-
Page 32: Connections, Switches, And Mechanical Components
Connections, Switches, and Mechanical Compo- nents Operating Con- trols, Connec- tions, and Mechanical Com- ponents TT 170/210 (10) TT170/210 Control panel (-) Current socket with integrated gas connection For connecting: the TIG welding torch the electrode cable during manual metal arc welding TMC connection (TIG Multi Connector) For connecting the control plug of the TIG welding torch For connecting foot remote controls... -
Page 33: Installation And Startup
Installation and Startup... -
Page 35: Minimum Equipment For Welding Operations
Minimum equipment for welding operations General Depending on the welding process, a minimum level of equipment is required to work with the power source. The following describes the welding processes and the corresponding minimum equip- ment for welding operations. TIG DC Welding Power source Grounding cable TIG welding torch with or without rocker switch... -
Page 36: Before Installation And Initial Operation
Before installation and initial operation Safety WARNING! Danger due to incorrect operation. This can result in severe personal injury and damage to property. ► Do not use the functions described here until you have fully read and understood the Operating Instructions. ►... -
Page 37: Generator-Powered Operation
Generator-Pow- The power source is generator-compatible. ered Operation The maximum apparent power S of the power source is required for dimensioning the 1max necessary generator output. The maximum apparent power S of the power source is calculated as follows: 1max 1max 1max and U... -
Page 38: Connecting The Mains Cable
Connecting the Mains Cable General If a power source is delivered without a mains cable installed, a mains cable corresponding to the power source's connection voltage must be connected before commissioning. The mains cable is included in the scope of supply for the power source. Safety WARNING! Work performed incorrectly can cause serious injury and damage. -
Page 39: Commissioning
Commissioning Safety WARNING! An electric shock can be fatal. If the unit is connected to the grid during installation, there is a danger of serious injury and damage to property. ► Only carry out work on the device if the power switch is in the - O - position. ►... -
Page 40: Connecting The Welding Torch To The Power Source
Connecting the NOTE! Welding Torch to the Power Source Do not use pure tungsten electrodes for TransTig power sources (color code: green). Fit parts to the welding torch according to the welding torch's Operating Instructions TT 170 MV TT 170 TT 210 MV TT 210 Establishing a... -
Page 41: Welding Mode
Welding Mode... -
Page 43: Tig Operating Modes
TIG Operating Modes Safety WARNING! Danger due to incorrect operation. This can result in severe personal injury and damage to property. ► Do not use the functions described here until you have fully read and understood the Operating Instructions. ► Do not use the functions described here until you have fully read and understood all of the Operating Instructions of the system components, especially the safety rules. -
Page 44: 2-Step Mode
Gas pre-flow time Gas post-flow time 2-Step Mode Welding: Pull back the torch trigger and hold it in this position End of welding: Release the torch trigger down 2-step mode The Setup menu can be used to set a starting current time (t-S) and a final current time (t- E) for 2-step mode. -
Page 45: Spot Welding
With intermediate lowering, the welding current is lowered to the set lowering current I-2 during the main current phase. To activate intermediate lowering, push the torch trigger forward and hold it in this po- sition Release the torch trigger to resume the main current Spot Welding If a value has been set for the setup parameter SPt, then 2-step mode operating mode is the same as spot welding operating mode. -
Page 46: Tig Welding
TIG welding Safety WARNING! Danger due to incorrect operation. This can result in severe personal injury and damage to property. ► Do not use the functions described here until you have fully read and understood the Operating Instructions. ► Do not use the functions described here until you have fully read and understood all of the Operating Instructions of the system components, especially the safety rules. -
Page 47: Tig Welding
TIG Welding Select the desired TIG operating mode by pressing the operating mode button: Press selection dial In the welding parameter overview, the assigned welding parameters illuminate to around 50%. The segment of the currently selected welding parameter illuminates fully. Turn the selection dial and select the welding parameter to be set (so that the segment assigned to the welding parameter in the welding parameter overview illuminates) Press selection dial... -
Page 48: Welding Parameters
NOTE! All parameter set values that are set using the selection dial are saved until their next alteration. This applies even if the power source is switched off and on again. Commence welding process (ignite arc) Welding parame- ters down Starting current 1 - 200% of the main current I Factory setting 35%... - Page 49 Final current 1 - 100% (of the main current I Factory setting: 30% Pulses * F-P (pulse frequency) off / 0.2 - 990 Hz Factory setting: off Tacking * Duration of the pulsed welding current off / 0.1 - 9.9 s / on Factory setting: off The pulsing and tacking parameters are only displayed if the setup parameter "Ptd - pulse TAC display"...
-
Page 50: Igniting The Arc
Risk of injury due to an electric shock (HF ignition) Although Fronius devices comply with all relevant standards, the high frequency ignition can transmit a harmless but noticeable electric shock under certain circumstances. ► Use prescribed protective clothing, especially gloves! ►... -
Page 51: Contact Ignition For Welding Torch With Torch Trigger
Tilt the welding torch to the normal po- sition Carry out welding Contact Ignition When the setup parameter IGn is set to OFF, the HF ignition is deactivated. The arc ignites for Welding Torch when the workpiece makes contact with the tungsten electrode. with Torch Trig- Procedure for igniting the arc using contact ignition for welding torches with torch trigger: Position the gas nozzle at the ignition... -
Page 52: Contact Ignition For Welding Torch Without Torch Trigger
Contact Ignition When the setup parameter "IGn" is set to "oFF", the HF ignition is deactivated. The arc ig- for Welding Torch nites when the workpiece makes contact with the tungsten electrode. without Torch Trigger The setup parameter "Tri" must be set to "oFF". Procedure for igniting the arc using contact ignition for welding torches without torch trig- ger: Position the gas nozzle at the ignition... -
Page 53: Overloading Of The Tungsten Electrode
Overloading of If the tungsten electrode is overloaded, the "electrode overloaded" display illuminates on the Tungsten the control panel. Electrode Possible causes of an overloaded tungsten electrode: Diameter of the tungsten electrode is too small Main current I value is set too high Remedy: Use tungsten electrode with larger diameter (in this case, the "ELd"... -
Page 54: Special Functions
Special functions Arc Break Moni- If the arc breaks and no current flow takes place during the time set in the Setup menu, the toring Function power source automatically switches off. The control panel displays the service code "no | Arc". -
Page 55: Tacking Function
TIG pulsing in operation: 1/F-P down TIG pulsing - welding current progression curve Key: Starting current Pulse frequency *) Final current Duty cycle UpSlope Base current DownSlope Main current Down *) (1/F-P = Time between two impulses) Tacking Function There is a tacking function on the power source. When a period of time is set for the setup parameter tAC (tacking), the tacking function is assigned to the 2-step and 4-step modes. - Page 56 Key: Duration of pulsed welding current for tacking process Starting current Final current UpSlope DownSlope Down Main current IMPORTANT! When using a pulsed welding current: The power source automatically regulates the pulse parameters in relation to the set main current I No pulse parameters have to be set.
-
Page 57: Manual Metal Arc Welding
Manual Metal Arc Welding Safety WARNING! Danger due to incorrect operation. This can result in severe personal injury and damage to property. ► Do not use the functions described here until you have fully read and understood the Operating Instructions. ►... -
Page 58: Manual Metal Arc Welding
Manual metal arc welding Select the manual metal arc welding operating mode by pressing the operating mode button: IMPORTANT! If the manual metal arc welding operating mode is selected, the welding voltage is only available after a delay of 3 seconds. Turn selection dial to set the welding current The set value is immediately applied. - Page 59 NOTE! The power source regulates the duty cycle parameter "dcY" and the base current "I- G" according to the set pulse frequency. 1/F-P Pulse welding - welding current progression curve Adjustable parameters: Pulse frequency (1/F-P = Time between two pulses) SoftStart / HotStart Fixed parameters: Base current...
-
Page 60: Starting Current >100% (Hotstart)
Starting current Advantages > 100% (HotStart) Improved ignition properties, even when using electrodes with poor ignition properties Better fusion of parent material in the start phase, therefore less neutralization Slag inclusions largely avoided Key: I (A) Hot current time, 0-2 s, Factory setting 0.5 s HotStart current, 0-200%,... -
Page 61: Anti-Stick Function
Anti-Stick Func- As the arc becomes shorter, the welding voltage may also fall so that the rod electrode is tion more likely to stick to the workpiece. This can also cause the rod electrode to anneal. Activating the anti-stick function will prevent this annealing. If the rod electrode starts to stick to the workpiece, the power source switches off the welding current immediately. -
Page 63: Setup Settings
Setup Settings... -
Page 65: The Setup Menu
The Setup Menu General The power source Setup menu provides easy access to expert knowledge and additional functions. The Setup menu makes it possible to easily adjust the parameters for various tasks. Located in the Setup menu are: Setup parameters with a direct effect on the welding process Setup parameters for pre-setting the welding system Accessing the Setup Menu... -
Page 66: Adjusting Parameters
Adjusting Param- The parameters in the Setup menu are adjusted as follows: eters Turn the selection dial and select the desired setup parameter Press selection dial to adjust the value for the setup parameter The parameter is displayed on the left digital display. The currently set value for the parameter is displayed on the right digital display. -
Page 67: Tig Setup Menu
TIG Setup Menu Parameters in the The following parameters are available through the TIG Setup menu: TIG Setup menu Electrode diameter 0.0 - 3.2 mm Factory setting: 2.4 mm Spot welding time/interval welding time off / 0.05 - 25 s Factory setting: off If a value has been set for the setup parameter SPt, this means that 2-step mode corre- sponds to the spot welding mode. - Page 68 The tacking special display illuminates on the control panel if a value has been set. Pulse frequency off / 0.2 - 990 Hz Factory setting: off The set pulse frequency is also applied for the lowering current. The pulsing special display illuminates on the control panel if a value for the pulse frequency has been entered.
- Page 69 Gas pre-flow time Duration of the gas pre-flow 0 - 9.9 s Factory setting: 1.0 s Gas post-flow time Duration of the gas post-flow 0.0 - 9.9 s / Aut Factory setting: Aut Gas purging off / 0.1 - 9.9 minutes Factory setting: off Shielding gas pre-purging starts once a value has been set for GPU.
-
Page 70: Parameters In The Tig - 2Nd Level Setup Menu
Left display Right display TIG - 2nd level Setup menu For setting the following parameters: r (welding circuit resistance) Slope Time 1 (only in 4-step mode) Slope Time 2 (only in 4-step mode) Trigger HF ignition Pulse TAC display Ignition time out Arc break monitoring TIG Comfort Stop - Comfort Stop sensitivity Break voltage... - Page 71 In the event of an error: Inspect torch hosepack, welding torch, and grounding cable for damage Check connections and contacts Check the cleanliness of the workpiece surface Slope Time 1 (only available in 4-step mode) Ramping time from the main current I to the lowering current I off / 0.01 - 9.9 s Factory setting: 0.5 s...
- Page 72 CAUTION! Risk of injury due to an electric shock Although Fronius devices comply with all relevant standards, the high frequency ignition can transmit a harmless but noticeable electric shock under certain circumstances. ► Use prescribed protective clothing, especially gloves! ► Only use suitable, completely intact and undamaged TIG hosepacks! ►...
- Page 73 Process: Welding Briefly lift the welding torch at the end of welding The arc lengthens significantly. Lower welding torch The arc shortens significantly The TIG Comfort Stop function has triggered Maintain height of the welding torch The welding current continuously ramps down (DownSlope). The arc goes out.
-
Page 74: Parameters In The 2Nd Level Setup Menu
Main current changeover on / off Factory setting: on After welding has started, an automatic selection of the main current I takes place. The main current I can be adjusted immediately. During welding, the last selected parameter remains selected. The last selected parameter can be adjusted immediately. No automatic selection of the main current "I "... - Page 75 Max. welding current depending on the selected fuse Duty cycle = 40% Device Mains voltage Fuse Max. TIG welding Max. electrode current welding current 10 A 170 A 125 A 13 A 170 A 150 A 230 V 16 A 170 A 150 A TT 170...
-
Page 76: Rod Electrode Setup Menu
Rod Electrode Setup Menu Parameters in the The following parameters are available through the rod electrode setup menu: Rod Electrode Setup Menu HotStart current 1 - 200% Factory setting: 130% Starting current duration 0.1 - 2.0 s Factory setting: 0.5 s Start ramp To activate/deactivate the start ramp for the manual metal arc welding ignition process on / off... - Page 77 Electrode burn-out is prevented by activating the anti-stick function. If the rod electrode be- gins to stick, the power source immediately switches the welding current off. The welding process can be resumed without problems once the rod electrode has been detached from the workpiece.
- Page 78 Reset welding system No / YES / ALL Factory setting: No YES: Only the currently active welding mode is reset (2T / 4T / trigger = oFF / STICK / STICK CEL / foot-operated remote control) ALL: All operating modes are reset. 2nd level setup menu For viewing "system active time", "system on time", "fuse"...
-
Page 79: Troubleshooting And Maintenance
Troubleshooting and Maintenance... -
Page 81: Troubleshooting
Troubleshooting General The power source is equipped with an intelligent safety system, which completely negates the need for fuses. After correcting a possible error, the power source can be properly op- erated again without having to change any fuses. Safety WARNING! Danger from incorrect operation and work that is not carried out properly. -
Page 82: Service Messages
Service messag- If "Err" is displayed on the left display and an error code is displayed on the right display, this is an internal service code for the power source. Example: There can be multiple error codes. These appear by turning the selection dial. Take note of all displayed error codes as well as the serial number and configuration of the power source, and then contact the service center with a detailed error description. -
Page 83: No Function
Err | 19 Cause: Overtemperature or undertemperature Remedy: Operate device at permitted ambient temperature. For more information about environmental conditions see "Environmental Conditions" in the "Safety Rules" section Err | 20 Cause: Improper use of the device Remedy: Only use the device in accordance with the intended purpose Err | 22 Cause: Welding current set too high... -
Page 84: Inadequate Function
No welding current The power source is switched on, display for selected process illuminates Cause: Welding power-lead connections interrupted Remedy: Correctly establish welding power-lead connections Cause: Poor grounding or no grounding at all Remedy: Establish a connection with the workpiece Cause: Power cable in the welding torch or electrode holder interrupted Remedy:... - Page 85 Arc occasionally breaks during the welding process Cause: Break voltage (Uco) is set too low Remedy: Raise the break voltage (Uco) in the Setup menu Cause: Voltage of the electrode too high (e.g. grooved electrode) Remedy: Use alternative electrode if possible or use power source with higher welding power Rod electrode tends to stick to the workpiece Cause:...
-
Page 86: Service, Maintenance And Disposal
Service, maintenance and disposal General The power source only requires minimal care and maintenance under normal operating conditions. However, several points must be observed in order for the power source to re- main operational for years to come. Safety WARNING! An electric shock can be fatal. -
Page 87: Disposal
Disposal Materials should be disposed of according to valid local and national regulations. -
Page 89: Appendix
Appendix... -
Page 91: Technical Data
Technical Data Special Voltage For devices designed for special voltages, the technical data on the rating plate applies. TT170 /EF, Grid voltage U 1 x 230 V TT170 /np Mains voltage tolerance - 30% / +15% Grid frequency 50 / 60 Hz Mains fuse protection 16 A slow-blow Grid connection... - Page 92 Safety symbol Max. shielding gas pressure 5 bar / 73 psi Noise emissions (L 68.0 dB (A)
-
Page 93: Tt 170 Mv/B, Tt 170 Mv/Np
TT 170 MV/B, Grid voltage 1 x 120 V / 1 x 230 V TT 170 MV/np Mains voltage tolerance 1 x 120 V - 20% / +15% 1 x 230 V - 30% / +15% Grid frequency 50 / 60 Hz Mains fuse protection 1 x 120 V 20 A slow-blow... - Page 94 Degree of protection IP 23 Type of cooling Insulation class EMC device class (according to EN/IEC 60974-10) Overvoltage category Pollution degree according to IEC60664 Ambient temperature -10 °C - +40 °C / +14 °F - +104 °F Storage temperature -25 °C - +55 °C / -13 °F - +131 °F Dimensions l x w x h 435 x 160 x 310 mm / 17.1 x 6.3 x 12.2 in.
-
Page 95: Tt 210 Ef, Tt 210 Np
TT 210 EF, Grid voltage U 1 x 230 V TT 210 np Mains voltage tolerance - 30% / +15% Grid frequency 50 / 60 Hz Mains fuse protection 16 A slow-blow Grid connection at PCC = 261 MOhm Primary continuous power (100% D.C. 3.2 kVA Max. -
Page 96: Tt 210 Mv/B, Tt 210 Mv/Np
TT 210 MV/B, Grid voltage 1 x 120 V / 1 x 230 V TT 210 MV/np Mains voltage tolerance 1 x 120 V - 20% / +15% 1 x 230 V - 30% / +15% Grid frequency 50 / 60 Hz Mains fuse protection 1 x 120 V 20 A slow-blow... -
Page 97: Explanation Of Footnotes
Degree of protection IP 23 Type of cooling Insulation class EMC device class (according to EN/IEC 60974-10) Overvoltage category Pollution degree according to IEC60664 Ambient temperature -10 °C - +40 °C / +14 °F - +104 °F Storage temperature -25 °C - +55 °C / -13 °F - +131 °F Dimensions l x w x h 435 x 160 x 310 mm / 17.1 x 6.3 x 12.2 in. - Page 100 FRONIUS INTERNATIONAL GMBH Froniusstraße 1, A-4643 Pettenbach, Austria E-Mail: sales@fronius.com www.fronius.com Under www.fronius.com/contact you will find the addresses of all Fronius Sales & Service Partners and locations...
Need help?
Do you have a question about the TransTig 170 and is the answer not in the manual?
Questions and answers