Table of Contents
Advertisement
Advertisement
Table of Contents

Related Manuals for Wallbox QUASAR


Summary of Contents for Wallbox QUASAR
- Page 1 User Guide QUASAR ENGLISH...
-
Page 2: Table Of Contents
Contents Safety Recommendations Legal Notice Safety Instructions Identifying Symbols Connector Recommendations Welcome to Wallbox Get to know your Wallbox Quasar Charger Screen Charger info Charger Status LED State of Charge LEDs Charger Status Screens Icon area Lock/ Unlock the charger... - Page 3 Contents Installation options Firmware update myWallbox Portal Edit Profile Create a myWallbox account Access to the website Log in Forgotten password First access Charger info Chargers Modify charger name Charger info Interact with the charger Statistics / Sessions User list Statistics Users Add user to a group...
-
Page 4: Safety Recommendations
Wallbox device. Any resulting damage from such actions is excluded from the warranty. The installation of the Wallbox device must be performed by a qualified electrician in accordance with the perceptive regulation. -
Page 5: Identifying Symbols
• If the connector emits smoke or begins to melt, never touch the charging cable. If possible, stop the charging process. In any event, disconnect the power supply from the Wallbox device. • Keep the charging cable out of the reach of children. -
Page 6: Welcome To Wallbox
This user guide will show you how to charge your electric vehicle and will also show you the basic functionalities for your interaction with the Wallbox Quasar. -
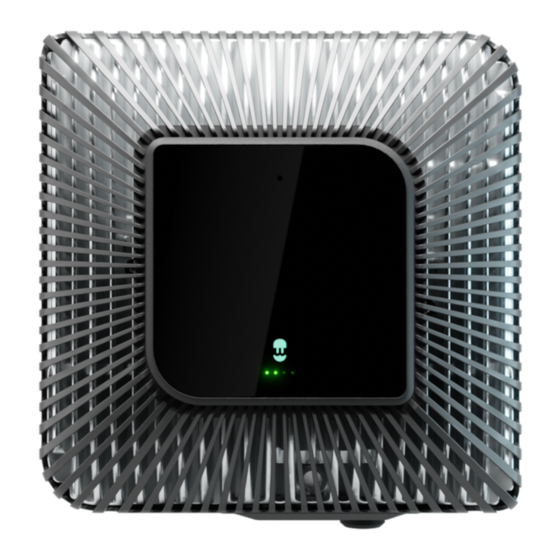
Page 7: Get To Know Your Wallbox Quasar
Electricity supply configuration Manufacturing country *Camera, Screen and Gesture Sensor are optional features. Once your Wallbox Quasar is ready and powered on, you can operate it through the mobile app. The software is specially designed to fully control and manage the charging and discharging process by simple commands, but remember that you will always be able to just plug and charge, it can be as simple as that. -
Page 8: Charger Screen
In this area, the following information is displayed: • State of charge “SOC”: the level of charge of the battery, in percentage. • Current limit settled, in amperes. • Power being charged/discharged, in kilowatts. *Available only for Standard Version of Quasar... -
Page 9: Charger Status Led
(LED blinking) The charger is locked. Only an authorized user can unlock it. User authentication can be done via RFID vehicled, Face Recognition, Wallbox app or myWallbox portal. ERROR The charger is in fault mode. Do not try to charge in this condition. Contact Wallbox Service so they can advise you on this topic. -
Page 10: State Of Charge Leds
State of Charge LEDs The 4 LED’s indicate the battery status in blocks of 25% each: First LED Blinking The battery is charge state is between 0 to 25% Second LED Blinking The battery is charge state is between 25% to 50% Thrid LED Blinking The battery is charge state is between 50% to 75% Fourth LED Blinking... -
Page 11: Charger Status Screens
Charger Status Screens SCHEDULED WIFI STATUS SYNCHRONISED TO myWallbox READY - processing face recognition TAKING PICTURE FOR FACE RECOGNITION READY... - Page 12 Charger Status Screens CONNECTED PAUSED...
- Page 13 Charger Status Screens STARTING TO CHARGE CHARGING...
- Page 14 Charger Status Screens DISCHARGING LOCKED...
- Page 15 Charger Status Screens ERROR...
-
Page 16: Icon Area
Icon area Additional information about the status on the charger is displayed as icons on the charger screen. The list of icons is described below. The charger is connected to a network using a Wi-Fi connection with a signal critically low, your charger is very likely to disconnect The charger is connected to a network using a Wi-Fi connection with a signal low, your charger is likely to disconnect... -
Page 17: Lock/ Unlock The Charger
Lock / Unlock the charger The Wallbox Quasar can be locked to prevent unauthorized use. You can lock it by moving your hand to the left and unlock it with face recognition. You can also lock and unlock your charger using the Wallbox app and the myWallbox portal. -
Page 18: Charging Plug Operation
Charging plug operation WARNING: After stopping the charging process, the vehicle connector and the equipment plug can be disconnected. Never use force to disconnect the vehicle connector from the inlet or the equipment plug power outlet. Such dangerous activity can cause serious injuries or even death. Review the instructions on the charging plug labels. -
Page 19: Discover Mywallbox
Discover myWallbox. -
Page 20: Wallbox App
Wallbox App Download the App Before you start using your Wallbox charger, we recommend that you download the Wallbox app on your smartphone and create a myWallbox account for managing the charger remotely. The Wallbox app is available on PlayStore and AppStore. -
Page 21: 3-Adding Your First Charger
Wallbox App You will receive an email in your inbox to confirm your account. If you do not see the email in your inbox, please check the spam folder. Having opened the email, click on the “Confirm” button to start using your account. -
Page 22: 5-Sync With Your Charger
Wallbox App Sync with your charger When you connect to a charger the charging sessions are synchronized with the myWallbox cloud through the app. The percentage of sessions synchronized is displayed. Managing the charger This screen is shown when you are connected to the charger. -
Page 23: 7-Configuration
Wallbox App Configuration In the charger configuration link button, you will find the active configuration options for the charger: CHARGER INFO CONNECTIVITY INSTALLATION OPTIONS ADVANCED OPTIONS FIRMWARE UPDATE (IF AVAILABLE) CHARGER INFO This shows information on the charger. • Name: Click to edit. -
Page 24: Connectivity
The Vehicle to Grid(V2G) feature can be configured through the Installation Options screen in the Configuration menu of the my Wallbox app. By selecting the applicable normative settings on the Grid Codes screen, the V2G feature can be enabled. -
Page 25: Advanced Options
Wallbox App ADVANCED OPTIONS In Advanced Options you can change the energy cost for the charger to make an estimated cost with its sessions. Also, you can perform a system restore on your charger from this screen. You can also restart the charger here. -
Page 26: Edit Profile
First access to the myWallbox portal. URL: https://my. w allbox.com/login NOTE: myWallbox Portal If you have already created an account using the Wallbox App, you can use the same username and password to log on to the website. Otherwise, you can create a new account now via the website. - Page 27 myWallbox Portal A confirmation pop-up will then appear. myWallbox Portal Then you will receive an email to confirm your account. If you do not see the email in your inbox, please check the spam folder. Once in your email, click the “Confirm”...
-
Page 28: Log In
myWallbox Portal Once your account has been created, you will belong to a group in which you are the super-administrator. When other users invite you to join their groups, you will not be the super-administrator. You will be just an administrator or user, depending on their group invitation specifications. -
Page 29: First Access
myWallbox Portal You will then receive an email with instructions on how to create a new password. If you do not see the email in your inbox, please check the spam folder. Having opened the email, click After clicking on this link, you A confirmation popup appears. -
Page 30: Charger Info
myWallbox Portal CHARGER INFO Once the charger is linked to the account, it is possible to check the current charger info from the myWallbox user account. The information that appears includes: Locking status: When yellow, the charger is locked. When green, the charger is unlocked. Charger image. -
Page 31: Modify Charger Name
myWallbox Portal Chargers Access the charger details by clicking on the charger in charger list. myWallbox Portal Here you can carry out the following: • Modify the “charger name”. • See charger info. • Interact with the charger. • See statistics graphs for the current year. •... -
Page 32: Statistics / Sessions
myWallbox Portal INTERACT WITH THE CHARGER From the charger details page you can interact with your charger in the following ways: • Lock/unlock charger. Locked charger, action available. Unlocked charger, action available. AMPS If it is not available, the icon is displayed in grey but still displays if the charger is locked/unlocked. -
Page 33: Statistics
myWallbox Portal USERS LIST List of users who have access to the current charger. The list shows which users are able to use the chargers and enables users to be assigned/unassigned to/from the charger. Only super administrators and administrators are able to see this list and interact with it. Colour meaning: Not possible to modify the charger assignment as it is an admin user. -
Page 34: Add User To A Group
myWallbox Portal At any moment you can generate an Excel report by just clicking on “Generate report”. Users Manage the users that have access to the chargers. myWallbox Portal ADD A USER TO YOUR GROUP Add a new/existing user to the group to give them access to the chargers. Fill in the user information and set user or administrator permissions. -
Page 35: User Info
myWallbox Portal myWallbox Portal Then invited user appears automatically in the users list (if it Once the invitation is sent, a confir- doesn’t appear, press Alt+F5 or refresh your browser). mation popup appears and confirms an invitation has been sent to the user. -
Page 36: User Details
myWallbox Portal USER DETAILS A user's account details can be accessed by clicking on the user on the user list. myWallbox Portal Here you can carry out the following: • See the user’ s main details. • See the list of the chargers assigned/not assigned to the user from the group, assign/unassign chargers to/from the user. -
Page 37: Maintenance
• Make sure that the power supply is turned off for at least one hour, before you start cleaning your charger. • If you want to clean your Wallbox we recommend that you use a soft, dry or damp cloth. Do not use a spray or direct water stream to clean your Wallbox charger. -
Page 38: Troubleshooting
• The charging session was programmed when the EV gun was plugged into the vehicle so the charging session was not taken into account. Please delete the programmed charge and make sure that the EV gun is not in the vehicle. Then, sync the app to the Wallbox, then programme the charging session. -
Page 39: Connectivity
There is no Wi-Fi coverage where the charger is installed If it is not possible to install the Wallbox charger anywhere else, a Wi-Fi extender could be the solution. The charger can also be connected to the Internet with an Ethernet cable. - Page 40 Check your Wi-Fi modem as well to make sure it is functioning properly. Warning messages Your power supply is constantly checked by the Wallbox in order to ensure safe operation. If one of the parameters is outside the correct operating range, the Wallbox will not allow you to charge your vehicle...
-
Page 41: Charging Logs
Bluetooth and allow the device to sync to your phone. Restore the charger: Inside the Wallbox app, go to: Settings > Advanced Options > Restore. Then allow the charger to restore to factory settings. Then reload the firmware by selecting Settings and then clicking the popup at the bottom of the screen saying “Updates are available for this device”.
Need help?
Do you have a question about the QUASAR and is the answer not in the manual?
Questions and answers