Table of Contents
Advertisement
Assembly instructions for use
with Jarvis Desktops 42" and
smaller
For assembly assistance,
visit fully.com/howtojarvis
call 888-508-3725
or email support@fully.com
In Europe call +32 9 269 44 83
or email help@fully.com
Advertisement
Table of Contents

Related Manuals for fully Jarvis Series


Summary of Contents for fully Jarvis Series
- Page 1 Jarvis standing desk Assembly instructions for use with Jarvis Desktops 42” and smaller For assembly assistance, visit fully.com/howtojarvis call 888-508-3725 or email support@fully.com In Europe call +32 9 269 44 83 or email help@fully.com...
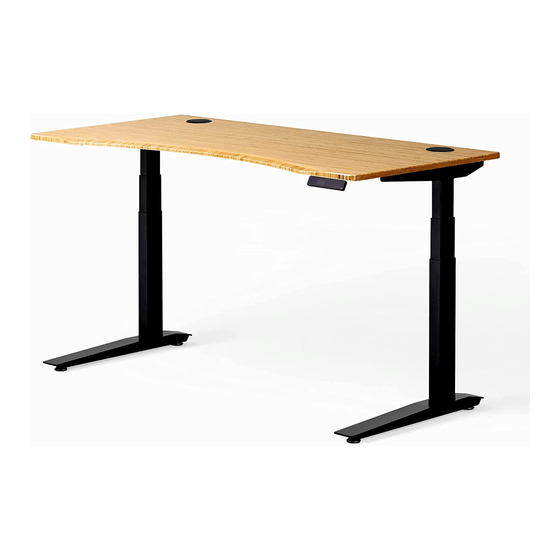
- Page 2 Thank you for choosing a Jarvis desk from Fully.
-
Page 3: Table Of Contents
Cautions and Use Before starting Specs In the box Assembly Initial calibration/Reset Custom settings Using your own desktop Contact... - Page 4 Any extracurricular use is at user’s own risk. Under no circumstances does the manufacturer accept warranty claims or liability claims for damage caused by improper use or handling of the desk frame. Jarvis is a registered trademark of Fully, LLC. All rights reserved.
-
Page 5: Before Starting
Before starting On a padded or carpeted area, take all of the items out of your Jarvis frame box and confirm that nothing is missing. Reference the included parts listings on page Using your own desk top If you are using your own desk top, refer to page 15 for instructions before beginning assembly. - Page 6 Jarvis standing desk A — L ifting Column x2 B — F rame End x2 C — F oot x2 D — C enter Rail x2 E — R ight Side Bracket F — L eft Side Bracket G ...
-
Page 7: Assembly
Assembly Step 1 Insert one of the Lifting Columns (either one; they’re identical) into one of the Frame Ends (also the same) as shown below. To secure the Frame End to the leg, thread four (4) of the Small Machine Screws into the holes as shown, but do not tighten them all the way. - Page 8 Step 3 Repeat Steps 1–2 for the remaining Lifting Column, Frame End, and Side Bracket. Step 4 Lay your desktop on a padded surface with the underside facing up, and the front of the desktop towards you. Place the Left Leg Assembly on the desktop to your right, with the Frame End point- ing towards the center of the top.
- Page 9 Step 5 Slide the Center Rails into the Frame End attached to the desktop, so that the mid- point mark is facing up and the cut-out slots are facing inwards. Slide the Right Leg Assembly onto the other end of the Center Rails (your left-hand side).
- Page 10 Step 7 Center the labeled midpoint marks on both Center Rails between the two Frame Ends, and use the pre-installed Set Screws to lock the Center Rails down firmly. O — M edium Set Screw x8 (Pre-Installed) Warning Skipping this step will result in stability issues.
- Page 11 Step 9 If you have a 30” or 36” Desktop, position the Control Box over the pre- drilled holes in front of the G — C ontrol Box Center Rails and secure it using the appropriate screws. H — P ower Cable If you have a 42”...
- Page 12 Step 10 Loosely attach a Foot to the bottom of each Lifting Column using four (4) Medium Machine Screws per Foot. C — F oot x2 Once all the screws are in place, tighten them down the rest of the way in an X pattern.
-
Page 13: Initial Calibration/Reset
Before you start using your Jarvis, you’ll need to get all the parts synced. Don’t worry — it’s easy. Up/Down Handset Press and hold the Fully logo located on the front face of the Up/Down handset until Jarvis reaches its lowest position. Release. Up/Down Handset Press and hold the Fully logo for about 10 seconds. -
Page 14: Custom Settings
Custom settings for Programmable Memory Handset Getting started To begin, access the menu by holding down M for 3 seconds until Lock/Unlock desk appears on screen. Use ▴ and ▼ icons to navigate through the menu. ‘1’ selects the feature you want to change and also confirms your selection. -
Page 15: Using Your Own Desktop
Using your own desktop The Jarvis comes in two foot lengths: short and long. If your foot is engraved with YQ-140, it is the Short If your foot is engraved with YQ-141, it is the Foot, which we recommend for desktops with Long Foot, which we recommended for desktops depths between 24”... -
Page 16: Contact
Position the frame assembly on the underside of your desktop, with the screw holes in the Side Brackets 2” or more from the side edges of the top, and the front-most hole the appropriate depth or more from the front (user-facing) edge of the top. Contact Fully North America Fully Europe Portland, Oregon Ghent, Belgium... - Page 17 Desks, chairs & things to keep you moving version 90.014.01.0663v.b...
Need help?
Do you have a question about the Jarvis Series and is the answer not in the manual?
Questions and answers