Table of Contents
Advertisement
Quick Links
Advertisement
Table of Contents

Related Manuals for Tennant EC-H2O T12


Summary of Contents for Tennant EC-H2O T12
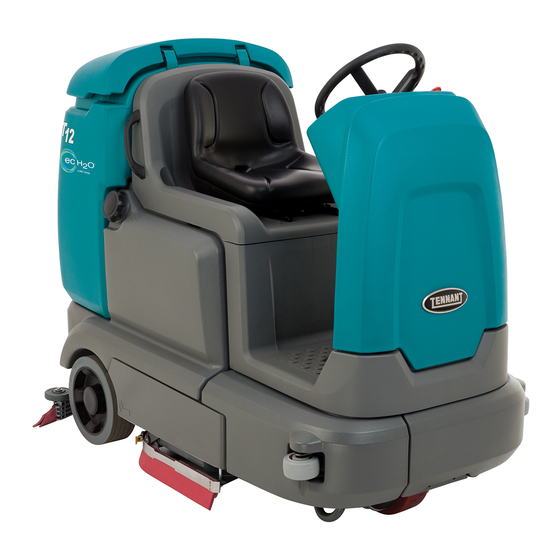
- Page 1 (Battery) Rider Scrubber Service Information Manual The Safe Scrubbing Alternative TennantTrue Parts IRISt a Tennant Technology North America / International 9009917 Rev. 00 (12-2012) To view, print or download the latest parts or operator’s 9009917 manual, visit:...
- Page 2 Phone: (800) 553--8033 or (763) 513--2850 www.tennantco.com Touch- -N- -Go, 1- -STEP, Grip- -N- -Go, Dura- -Track, SmartRelease, Duramer, are US registered and unregistered trademarks of Tennant Company. Flow-Rite is a registered trademark of Flow-Rite Controls Specifications and parts are subject to change without notice.
-
Page 3: Table Of Contents
CONTENTS Contents Page Contents Page Safety PrecautionS . . . . . . . . . . . . . . . . . . . . . . .1-1 rear SqueeGee bLadeS . - Page 4 CONTENTS Contents Page Contents Page maIn SCrub bruSheS . . . . . . . . . . . . . . . . 4-38 vaCuum fan aSSembLy .
-
Page 5: Safety Precautions
SAFETY PRECAUTIONS SAFETY PRECAUTIONS IMPORTANT SAFETY INSTRUCTIONS - - SAVE THESE INSTRUCTIONS The following precautions are used throughout FOR SAFETY: this manual as indicated in their description: 1. Do not operate machine: WARNING: To warn of hazards or - - Unless trained and authorized. - - Unless operator manual is read and unsafe practices that could result in understood. - Page 6 - - All repairs must be performed by a trained service mechanic. - - Do not modify the machine from its original design. - - Use Tennant supplied or approved replacement parts. - - Wear personal protective equipment as needed and where recommended in this manual.
- Page 7 SAFETY PRECAUTIONS SAFETY PRECAUTIONS The safety labels appear on the machine in the locations indicated. Replace damaged labels. WARNING LABEL - - Flammable WARNING LABEL - - Batteries WARNING LABEL - - materials can cause explosion emit hydrogen gas. Explosion Flammable materials or fire.
- Page 8 SAFETY PRECAUTIONS T12 Service Information 9009917 (12-12)
-
Page 9: General Information
GENERAL INFORMATION SECTION Contents Page General information . . . . . . . . . . . . . . . . . . . . . 2-1 ComponenT LoCaTor . -
Page 10: Component Locator
GENERAL INFORMATION COMPONENT LOCATOR components ec-h2o System Components* IrIS™ Inline 2 amp fuse holder* ec-h2o, Side brush, and Spray nozzle pumps* batteries Sv-3 Side brush water valve* wheel drive assembly (motor, encoder, Temp Sender Seat Switch Circuit breakers (1-8) warning Light/ backup alarm* Solution Tank vacuum fan housing rear Squeegee Lift actuator... - Page 11 GENERAL INFORMATION COMPONENT LOCATOR, continued components module, main Scrub module, Interface module, IrIS™ Telemetry main Scrub head Lift actuator module, water pickup diodes 1, 2, and 3 onboard battery Charger m2 relay, Circuit breaker 17 (Inside warning Light/bu alarm) Level Switch, recovery Tank * optional equipment T12 Service Information 9009917 (12-12)
- Page 12 GENERAL INFORMATION ELECTRICAL SCHEMATIC (1 of 6) ISOLATED GROUND OPTIONAL TELEMETRY CABLES: POST = STAND OFF CABLE: B+ TO M1/GND. CABLE: POWER/GND TO CURTIS. AC PROPEL MOTOR PROPEL MOTOR CONTROL HARNESS NOT USED AC PROPEL MOTOR (INCLUDES ENCODER, TEMP SENDER AND BRAKE SOL.) J1-13 36VDC SV-1...
- Page 13 GENERAL INFORMATION ELECTRICAL SCHEMATIC (2 of 6) CABLE: POWER/GND TO CURTIS. CAN+ /YEL CAN+ /YEL CAN- /GRN CAN- /GRN P1-7 SHUNT- P1-6 SHUNT+ 4/YEL 2/BRN 2/BRN 5/GRN T12 Service Information 9009917 (12-12)
- Page 14 GENERAL INFORMATION ELECTRICAL SCHEMATIC (3 of 6) 13/BLK GROUND CAN+ /YEL CAN+ /YEL CAN+ CAN- /GRN CAN- /GRN CAN- CAN BUS SEE SECTION E15 SWITCHED B+ 2/BRN 2/BRN T12 Service Information 9009917 (12-12)
- Page 15 GENERAL INFORMATION ELECTRICAL SCHEMATIC (4 of 6) GROUND CAN+/YEL CAN+/YEL CAN+ CAN-/GRN CAN-/GRN CAN- SWITCHED B+ (@ CURTIS B+) SWITCHED B+ SWITCHED B+ (@ M1 CONTACTOR) SIDE BRUSH MODULE (@ CURTIS B+) T12 Service Information 9009917 (12-12)
- Page 16 GENERAL INFORMATION ELECTRICAL SCHEMATIC (5 of 6) 15/GRN 94/YEL CB-15 92/BRN 2.5A-FRONT SWITCHED B+ (@ CURTIS B+) BACK UP ALARM/LIGHT T12 Service Information 9009917 (12-12)
-
Page 17: Electrical Schematic Symbols
GENERAL INFORMATION Note: Note: ecH2O Side Brush ecH2O Enable: ELECTRICAL SCHEMATIC SYMbOLS J7-12 Low=SV3 H20 Valve ON J7-10 Low=Turn ON ecH2O ecH2O Pump ON 100% IGN ST Battery Circuit Breaker DPDT Switch Key Switch Fuse Pressure Switch Connected Diode Motor Not Connected Single Continuation Tab Connector... -
Page 18: Operational Matrix
GENERAL INFORMATION T12 OPERATIONAL MATRIX FUNCTION ENABLED DISABLED Vacuum Fan, Scrubbing • 1-STEP Scrub ON • 1-STEP Scrub OFF • Squeegee/Vacuum ON • Squeegee/Vacuum OFF • Recovery Tank Full • Very Low Battery Voltage • Load Current Fault Rear Squeegee Down •... - Page 19 GENERAL INFORMATION T12 OPERATIONAL MATRIX, continued FUNCTION ENABLED DISABLED Side Brush Retract/Up • 1-STEP Scrub OFF • 1-STEP Scrub ON • Side Brush Switch OFF • Side Brush Switch ON • Recovery Tank Full • Solution Tank Empty • Very Low Battery Voltage •...
-
Page 20: Fastener Torque
GENERAL INFORMATION FASTENER TORQUE SAE (STANDARD) Thread Thread headless Square Size Grade 1 Grade 2 Cutting Grade 5 Grade 8 Socket Set head Set Carriage Thread Socket & Screws Screws bolts rolling Stainless Steel 4 ( .112) (5) - (6 .5) (4) - (6) 5 ( .125) (6) - (8) -
Page 21: Machine Dimensions
GENERAL INFORMATION MACHINE DIMENSIONS Rear Squeegee 990 mm (39 in) 2095 mm (82.5 in) 1420 mm (56 in) Frame (roller to roller) 1710 mm 945 mm (37.25 in) (67.25 in) Width (with side brush) 1065 mm (42 in) 2-13 T12 Service Information 9009917 (12-12) -
Page 22: General Machine Performance
GENERAL INFORMATION SPECIFICATIONS GENERAL MACHINE DIMENSIONS/CAPACITIES Item dimension/Capacity Length 1710 mm (67 .25 in) width (less squeegee) 945 mm (37 .25 in) width (with squeegee) 990 mm (39 in) width (with side brush) 1065 mm (42 in) height 1420 mm (56 in) height with overhead guard 2095 mm (82 .5 in) disk brush diameter for side brush (option) -
Page 23: Power Type
GENERAL INFORMATION SPECIFICATIONS GENERAL MACHINE PERFORMANCE Item measure runtime (economy mode) 240 ah, up to 2 .5 hours 360 ah, up to 4 .5 hours Ground clearance (transport) 65 mm (2 .5 in) vacuum fan speed 14500 rpm vacuum fan water lift 1650 mm (65 in) disk main brush speed 325 rpm... -
Page 24: Electrical Components
GENERAL INFORMATION SPECIFICATIONS ELECTRICAL COMPONENTS (For Reference Only) Component measure Contactor Coil, m1 126 Ω +/- 5% Contactor Coil, m2 0 .810 kΩ +/- 5% actuator, Scrub head lift 1 - 3 amps continuous actuator, Side brush lift 1 - 3 amps continuous, Internal limit switches actuator, rear squeegee lift 2 - 4 amps continuous, Internal limit switches motor, vacuum fan(s) - Page 25 MAINTENANCE SECTION Contents Page Contents Page maintenance ec-h2o moduLe fLuSh proCedure . . . . . 3-36 maInTenanCe CharT . . . . . . . . . . . . . . . . . . . . . 3-2 SToraGe InformaTIon .
-
Page 26: Maintenance Chart
MAINTENANCE MAINTENANCE 356389 356290 MAINTENANCE CHART The table below indicates the Person Responsible for each procedure. O = Operator. T = Trained Personnel. No. of Person Lubricant/ Service Resp. Fluid Interval Description Procedure Points Side and rear squeegees Check for damage and Daily wear Main brushes... - Page 27 LUBRICANT/FLUID ..Distilled water..Special lubricant, Lubriplate EMB grease (Tennant part number 01433--1) ..SAE 90 weight gear lubricant NOTE: More frequent maintenance intervals may be required in extremely dusty conditions.
-
Page 28: Lubrication
MAINTENANCE REAR SQUEEGEE CASTERS LUBRICATION Lubricate the rear squeegee caster pivot point on each squeegee caster after every 50 hours. FOR SAFETY: Before leaving or servicing machine, stop on level surface, turn off machine, and remove key. STEERING CHAIN (T12XP ONLY) The steering chain is located on the steering column directly under the control panel. -
Page 29: Batteries
MAINTENANCE CHECKING CONNECTIONS / CLEANING BATTERIES After every 200 hours of use check for loose battery connections and clean the surface of the The lifetime of the batteries is limited to the batteries, including terminals and cable clamps, number of charges the batteries receive. To get with a strong solution of baking soda and water. -
Page 30: Charging The Batteries
1. Drive the machine to a flat, dry surface in a 6. The Tennant charger will start automatically. well--ventilated area. When the batteries are fully charged, the Tennant charger will automatically turn off. -
Page 31: Charging The Batteries
MAINTENANCE CHARGING THE BATTERIES 5. The on--board charger will start charging the (ON- -BOARD CHARGER) batteries. Once the charging cycle begins, the indicator lights will progress from red, yellow IMPORTANT: Before charging, make sure that to green. When the green indicator light stays the charger setting is properly set for the on, the charging cycle is done. - Page 32 E03 reappears check battery or due to a sulfated or faulty battery. Interrupts replace it. charging cycle. Safety timer exceeded maximum charging Replace battery. time. Interrupts charging cycle. Possible internal short circuit. Contact a Tennant service representative. T12 Service Information 9009917 (12-12)
-
Page 33: On-Board Charger Settings
MAINTENANCE ON- -BOARD CHARGER SETTINGS To change the setting, unplug the charger and peel up the corner of the display label to access If the machine is equipped with the on--board the switches. The charger cord must be charger, the charger settings are properly set at unplugged when resetting. -
Page 34: Changing The On-Board Battery
MAINTENANCE CHANGING THE ON- -BOARD BATTERY 5. Remove the hardware holding the on--board CHARGER FUSE battery charger onto the machine FOR SAFETY: Before leaving or servicing machine, stop on level surface, turn off machine, and remove key. A 15 Amp fuse protects the on--board charger. Follow the instructions below to replace a blown fuse. -
Page 35: Flow-Rite™ Battery
MAINTENANCE FLOW- -RITE BATTERY WATERING SYSTEM 3. Connect the water supply hose to the fill (OPTION) regulator. The optional Flow--Rite battery watering system NOTE: Water quality is important to maintain the provides a safe and easy way to maintain the life of the battery. - Page 36 MAINTENANCE 5. Turn on the water supply. The red balls inside the flow indicator will spin. The red balls stop spinning when the batteries are full. 6. Disconnect the battery fill tube from the fill regulator. 7. Turn off the water supply. 8.
-
Page 37: Circuit Breakers
MAINTENANCE Circuit breaker 17 is located inside the optional CIRCUIT BREAKERS light assembly mounted on top of the recovery tank. Circuit breakers are resettable electrical circuit protection devices designed to stop the flow of current in the event of a circuit overload. Once a circuit breaker is tripped, reset it manually by pressing the reset button after the breaker has cooled down. -
Page 38: Electric Motors
MAINTENANCE ELECTRIC MOTORS Inspect the carbon brushes on the vacuum fan motor after every 500 hours of operation. Inspect the carbon brushes on the main brush motors and side brush motor after the first 1000 hours of operation and every 100 hours after the initial check. -
Page 39: Scrub Brushes
MAINTENANCE 4. Turn the brush until the spring handles are SCRUB BRUSHES visible. The machine can be equipped with either disk or cylindrical scrub brushes. Check scrub brushes daily for wire or string tangled around the brush or brush drive hub. Also check brushes or pads for damage and wear. -
Page 40: Replacing Disk Scrub Pads
MAINTENANCE REPLACING DISK SCRUB PADS 1. Remove the pad driver from the machine. 2. Squeeze the spring clip together and remove the center disk from the pad driver. 3. Remove the scrub pad from the pad driver. 4. Flip or replace the scrub pad. Center the scrub pad on the pad driver and reinstall the center disk to secure the pad in place on the pad driver. -
Page 41: Cylindrical Brushes
MAINTENANCE CYLINDRICAL BRUSHES 3. Remove the brush from the scrub head Rotate the brushes from front-to-rear after every 50 hours of operation. Replace the brushes when they no longer clean effectively. NOTE: Replace worn brushes in pairs. Scrubbing with brushes of unequal bristle length will result in diminished scrubbing performance. -
Page 42: Checking Cylindrical Scrub
MAINTENANCE 4. Press the Brush pressure button to enter the CHECKING CYLINDRICAL SCRUB BRUSH machine con guration modes. PATTERN FOR SAFETY: Before leaving or servicing T12 XP machine, stop on level surface and turn o machine. 1. Apply chalk, or a similar marking material, to a smooth and level section of oor. - Page 43 MAINTENANCE 6. Press the Brush pressure button to enter the 8. Press the Brush pressure button to enable down pressure test selection mode. the brush pressure test. T12 XP T12 XP T12 STANDARD T12 STANDARD C16: Dwn Pres Tst <Disabled (Down C16: Dwn Pres Tst Enabled should appear Pressure Test Disabled) should appear on the on the LCD display.
- Page 44 MAINTENANCE 10. Press the 1-STEP button and then 12. Press the 1-STEP button to raise the scrub immediately press one of the Solution on/o head. buttons to shut o the solution supply and prevent the brushes from getting wet. 13. Position the machine over the chalked area. 14.
-
Page 45: Brush Pattern
MAINTENANCE 16. Observe the brush patterns. If the brush ADJUSTING CYLINDRICAL BRUSH TAPER pattern is the same width across the entire FOR SAFETY: Before leaving or servicing length of each brush and both brushes are the machine, stop on level surface and turn o same width, no adjustment is necessary. - Page 46 MAINTENANCE ADJUSTING CYLINDRICAL BRUSH PATTERN WIDTH FOR SAFETY: Before leaving or servicing machine, stop on level surface and turn o machine. 1. Start the machine, completely lower the scrub head, and turn o the machine. 2. Open the side squeegee support door. 3.
-
Page 47: Side Brush (Option)
MAINTENANCE 2. Squeeze the spring handles and let the side SIDE BRUSH (OPTION) brush drop to the floor. FOR SAFETY: Before leaving or servicing machine, stop on level surface, turn off machine, and remove key. Check the side brush daily for wear or damage. Remove any tangled string or wire from the side brush or side brush drive hub. -
Page 48: Squeegee Blades
MAINTENANCE 3. Loosen both squeegee mounting handles. SQUEEGEE BLADES Check the squeegee blades for damage and wear daily. When the blades become worn, rotate the blades end--for--end or top--to--bottom to a new wiping edge. Replace blades when all edges are worn. - Page 49 MAINTENANCE 5. Loosen the retainer latch and remove the 8. Remove the inner frame from the outer frame. retainer from the squeegee assembly. 9. Remove the squeegee from the outer frame. 6. Remove the squeegee from the squeegee assembly. 10. Install the rotated or new squeegee blade into the outer frame.
- Page 50 MAINTENANCE 11. Install the inner frame over the squeegee and 14. Insert the hinge end of the retainer into the onto the outer frame. Be sure the inner frame hooks in the inner frame. is tight against the top of the outer frame. 15.
-
Page 51: Leveling The Rear Squeegee
MAINTENANCE LEVELING THE REAR SQUEEGEE 5. Turn the squeegee tilt adjust knob counter-clockwise to decrease the deflection Leveling the squeegee ensures the entire length at the ends of the squeegee blade. of the squeegee blade is in even contact with the surface being scrubbed. -
Page 52: Adjusting The Rear Squeegee
MAINTENANCE ADJUSTING THE REAR SQUEEGEE BLADE 3. To adjust the overall squeegee blade DEFLECTION deflection, loosen the lock knob. Deflection is the amount of curl the overall squeegee blade has when the machine moves forward. The best deflection is when the squeegee wipes the floor dry with a minimal amount of deflection. -
Page 53: Replacing Or Rotating The Side
MAINTENANCE REPLACING OR ROTATING THE SIDE 5. Remove the squeegee blade from the side SQUEEGEE BLADES squeegee assembly. 1. If necessary, raise the scrub head. FOR SAFETY: Before leaving or servicing machine, stop on level surface, turn off machine, and remove key. 2. - Page 54 MAINTENANCE REPLACING OR ROTATING THE SIDE 3. Remove the retaining band, squeegee blades, BRUSH SQUEEGEE BLADES (OPTION) and spacer from the squeegee frame. FOR SAFETY: Before leaving or servicing machine, stop on level surface, turn off machine, and remove key. Check the side brush squeegee blade for damage and wear daily.
- Page 55 MAINTENANCE 4. Install the rotated / new squeegee blades, spacer, and retaining band onto the side brush assembly. 5. Fasten the side brush retaining band latch. 6. Reinstall the side brush squeegee assembly onto the side brush assembly. 3-31 T12 Service Information 9009917 (12-12)
-
Page 56: Skirts And Seals
MAINTENANCE SKIRTS AND SEALS BELTS FOR SAFETY: Before leaving or servicing CYLINDRICAL BRUSH DRIVE BELTS machine, stop on level surface, turn off FOR SAFETY: Before leaving or servicing machine, and remove key. machine, stop on level surface, turn off machine, and remove key. RECOVERY TANK SEAL Check the recovery tank cover seal for damage The brush drive belts are located on the... -
Page 57: Pushing, Towing, And Transporting
MAINTENANCE 3. If the loading surface is not horizontal or is PUSHING, TOWING, AND TRANSPORTING higher than 380 mm (15 in) from the ground, THE MACHINE use a winch to load machine. If the loading surface is horizontal AND is PUSHING OR TOWING THE MACHINE 380 mm (15 in) or less from the ground, the machine may be driven onto the truck or... - Page 58 MAINTENANCE 6. Place a block behind each wheel to prevent 9. If the loading surface is not horizontal or is the machine from rolling. higher than 380 mm (15 in) from the ground, use a winch to unload machine. 7. Lower the scrub head and turn off machine. If the loading surface is horizontal AND is FOR SAFETY: When loading/unloading 380 mm (15 in) or less from the ground, the...
-
Page 59: Machine Jacking
MAINTENANCE Jacking point location at the rear of machines MACHINE JACKING equipped with the optional rear squeegee protector. FOR SAFETY: Before leaving or servicing machine, stop on level surface, turn off machine, and remove key. Empty the recovery and solution tanks before jacking the machine. -
Page 60: Ec-H2O Module Flush Procedure
MAINTENANCE 4. Connect the drain hose to the ec- -H2O ec- H2O MODULE FLUSH PROCEDURE manifold hose disconnected from the ec- -H2O manifold in the previous step. This procedure is only required when an alarm sounds and the ec- -H2O system indicator light begins to blink. - Page 61 MAINTENANCE 7. Start the machine. 8. Press and release the ec- -H2O module flush switch to start the flush cycle. NOTE: The module will automatically shut off when the flush cycle is complete (approximately 7 minutes). The module must run the full 7- -minute cycle in order to reset the system indicator light and alarm.
-
Page 62: Storage Information
MAINTENANCE 4. Press the 1- -Step button. STORAGE INFORMATION The following steps should be taken when storing the machine for extended periods of time. 1. Charge the batteries before storing machine to prolong the life of the batteries. 2. Thoroughly drain and rinse the solution and recovery tanks. - Page 63 MAINTENANCE 6. Machines with ec- H2O option only: Press 8. Drive the machine to circulate the RV the scrub mode button to place machine into antifreeze completely through all the systems the ec- -H2O mode. The ec- -H2O indicator and clear out any remaining water. light will illuminate.
-
Page 64: Preparing The Machine For
MAINTENANCE PREPARING THE MACHINE FOR OPERATION 6. Repeatedly press the Solution increase button AFTER STORAGE (+) until the solution flow is at the highest setting. All Propylene Glycol Based / Recreational Vehicle (RV) Antifreeze must be completely cleaned from the scrubbing system before the machine can be used for scrubbing. - Page 65 MAINTENANCE 8. Machines with side brush option only: Press the side brush switch to activate the side brush. T12XP 9. Drive the machine to circulate the clean water completely through the system and clear out the RV antifreeze. 10. Machines with side brush option only: Press the side brush switch to turn off the side brush.
-
Page 66: Priming The Ec-H2O System
MAINTENANCE PRIMING THE ec- H2O SYSTEM 4. Disconnect the outlet hose to the scrub head from the ec- -H2O manifold. Prime the ec- -H2O system if the machine has been stored for a long period with no water in the solution tank / ec- -H2O system. - Page 67 MAINTENANCE 9. Press and release the ec- -H2O module flush switch. Allow the system to drain water into the container for 2 minutes. 10. Press the ec- -H2O module flush switch to shut off the system. 11. Disconnect the drain hose from the ec- -H2O manifold hose.
- Page 68 MAINTENANCE 3-44 T12 Service Information 9009917 (12-12)
- Page 69 TROUbLESHOOTING SECTION Contents Page troubleShootinG onboard dIaGnoSTICS . . . . . . . . . . . . . . . . . . 4-2 SeLf-TeST mode .
-
Page 70: Self-Test Mode
CAN DIAG MODE 1. Turn Key Off. SELF TEST PROPEL DIAG MODE FIRMWARE UPDATE Tennant Quantum UI ver X.X 4 . press and release the brush pressure button to activate the self test . “SeLf-TeST STarTInG” will appear on the LCd . - Page 71 TROUbLESHOOTING 5 . The controller sequentially tests each output circuit 6 . The self test results are displayed in “jx-x,x” format . as shown below . jx = Connector, “-x,x” = Control board output pins as shown on the electrical schematic . ****SELF-TEST*** STARTING S1: **SELF-TEST**...
-
Page 72: Configuration Mode
1 . key switch off . press and hold the configuration mode button . STP001 1. Turn Key Off. T12 STANDARD Tennant Quantum UI ver X.X 4 . press and release the configuration mode button to scroll through a list of utilities as shown below . C1:Disk/Cyl... - Page 73 TROUbLESHOOTING 6 . press and release the brush pressure button to enable 5 . use the table below for further description of each the change . a “<” symbol will appear on the bottom Configuration mode utility . line of the LCd indicating the configuration utility is now enabled .
- Page 74 TROUbLESHOOTING T12 LCD Warning Messages WARNING WARNING WARNING DESCRIPTION SET/CLEAR CODE MESSAGE W1:Batt Low Low Battery SET: Battery discharge threshold of 30-32 Volts at KSI terminal or 32-33 Volts at batteries. CLEAR: Charge batteries to BDI reset threshold of 37 Volts at KSI terminal or 38 Volts at batteries W2:Sqge Stall Rear Squeegee Actuator Stalled SET: Rear squeegee actuator stall condition.
- Page 75 TROUbLESHOOTING T12 LCD Fault Messages FAULT FAULT MESSAGE FAULT DESCRIPTION SET/CLEAR CODE F1:Rcv Tank Full Recovery Tank Full SET: Recovery tank full for 5 seconds. CLEAR: Recovery tank not full for 5 seconds. SET: Solution tank empty for 60 seconds F2:SolTank Empty Solution Tank Empty CLEAR: Cycle key switch.
- Page 76 TROUbLESHOOTING T12 LCD Fault Messages, continued FAULT FAULT MESSAGE FAULT DESCRIPTION SET/CLEAR CODE F7:Right Br Flt# Right Brush Over Current, Fault # SET: Fault #1 = Current Exceeds 30A for 30 Seconds; Fault #2 = Current Exceeds 40A for 5 Seconds; Fault #3 = Over Current for 10 Seconds.
-
Page 77: Propel Diagnostic Mode
1. Turn Key Off. PROPEL DIAG MODE PROPEL DIAG MODE FIRMWARE UPDATE Tennant Quantum UI ver X.X 4 . press and release the brush pressure button to enter propel diagnostic mode . “p1:Curtis online . . . ” will appear on the LCd . - Page 78 TROUbLESHOOTING CONFIG MODE 5 . press and release the configuration mode button 6 . The table below describes how each input operates . SELF TEST to scroll through a list of Curtis 1232 controller inputs . T12 Propel Diagnostic Mode MANUAL MODE CODE LCD MESSAGE...
-
Page 79: Curtis 1232 Controller
TROUbLESHOOTING Curtis 1232 Controller Diagnostic LED Operation PMC002 PHASE B SW1/ANA1 TERM L COIL THR POT CAN H TERM H DRIVER 6 WIPER RETURN PHASE POT HI +12V CAN L SW16 DRIVER DRIVER DRIVER 1 PROP SW2/ANA2 WIPER DRIVER I/O GND DRIVER 2 DRIVER 4 Status LED... - Page 80 TROUbLESHOOTING Curtis 1232 Controller Diagnostic Codes, continued TROUBLESHOOTING CHART FAULT CONDITION CODE POSSIBLE CAUSE SET/CLEAR CONDITIONS EFFECT OF FAULT Controller Overcurrent Set: Phase current exceeded the 1. External short of phase U, V, or W current measurement limit. ShutdownMotor; motor connections. ShutdownMainContactor;...
- Page 81 TROUbLESHOOTING Curtis 1232 Controller Diagnostic Codes, continued TROUBLESHOOTING CHART, continued FAULT CONDITION CODE POSSIBLE CAUSE SET/CLEAR CONDITIONS EFFECT OF FAULT Severe Overvoltage 1. See Monitor menu » Battery: Set: Capacitor bank voltage exceeded Capacitor Voltage. the Severe Overvoltage limit with FET ShutdownMotor;...
- Page 82 TROUbLESHOOTING Curtis 1232 Controller Diagnostic Codes, continued TROUBLESHOOTING CHART, continued FAULT CONDITION CODE POSSIBLE CAUSE SET/CLEAR CONDITIONS EFFECT OF FAULT Set: Digital Output 7 (pin 20) current Digital Out 7 Overcurrent 1. External load impedance on Digital exceeded 15 mA. Output 7 driver (pin 20) is too low.
- Page 83 TROUbLESHOOTING Curtis 1232 Controller Diagnostic Codes, continued TROUBLESHOOTING CHART, continued FAULT CONDITION CODE POSSIBLE CAUSE SET/CLEAR CONDITIONS EFFECT OF FAULT PD Open/Short 1. Open or short on driver load. Set: Proportional driver (pin 2) is either 2. Dirty connector pins. open or shorted.
- Page 84 TROUbLESHOOTING Curtis 1232 Controller Diagnostic Codes, continued TROUBLESHOOTING CHART, continued FAULT CONDITION CODE POSSIBLE CAUSE SET/CLEAR CONDITIONS EFFECT OF FAULT Set: Pot2 wiper (pin 17) voltage Pot2 Wiper Low 1. See Monitor menu » Inputs: is lower than the low fault threshold Pot2 Raw.
- Page 85 TROUbLESHOOTING Curtis 1232 Controller Diagnostic Codes, continued TROUBLESHOOTING CHART, continued FAULT CONDITION CODE POSSIBLE CAUSE SET/CLEAR CONDITIONS EFFECT OF FAULT Set: Runtime VCL code error condition. VCL Run Time Error 1. VCL code encountered a runtime VCL error. Clear: Edit VCL application software to ShutdownMotor;...
- Page 86 TROUbLESHOOTING Curtis 1232 Controller Diagnostic Codes, continued TROUBLESHOOTING CHART, continued FAULT CONDITION CODE POSSIBLE CAUSE SET/CLEAR CONDITIONS EFFECT OF FAULT Set: Motor characterization failed during Motor Characterization Fault 1. Motor characterization failed during characterization process. See Monitor the motor characterization process. ShutdownMotor;...
- Page 87 TROUbLESHOOTING Curtis 1232 Controller Diagnostic Codes, continued TROUBLESHOOTING CHART, continued FAULT CONDITION CODE POSSIBLE CAUSE SET/CLEAR CONDITIONS EFFECT OF FAULT Set: Emergency Reverse was activated Emer Rev Timeout 1. Emergency Reverse was activated and ran until the EMR Timeout timer and concluded because the EMR ShutdownEMBrake;...
-
Page 88: Input Display Mode
CAN DIAG MODE INPUT DISPLAY PROPEL DIAG MODE FIRMWARE UPDATE Tennant Quantum UI ver X.X 4 . press and release the brush pressure button to enter Input display mode . “I1:Solution Tank, full Closed” will appear on the LCd . - Page 89 TROUbLESHOOTING 5 . press and release the configuration mode button to scroll through a list of hard-wired switch and sensor inputs . I1:Solution Tank I1:Solution Tank Full Closed Full Closed I2:Recovery Tank Not Full Open I4:Seat Switch: Seated I5: Horn Button Pressed I6:Vac Button Pressed...
-
Page 90: Manual Mode
1. Turn Key Off. MANUAL MODE PROPEL DIAG MODE FIRMWARE UPDATE Tennant Quantum UI ver X.X 4 . press and release the brush pressure button to enter manual mode . “m01: Left brush, 00% xx . x a” will appear on the LCd . - Page 91 TROUbLESHOOTING 5 . press and release the configuration mode button 6 . The output functions listed below have specific op- to scroll through a list of output functions . press the erating instructions . follow the instructions listed in brush down pressure button to activate the function the table below .
- Page 92 INPUT DISPLAY 1. Turn Key Off. CAN DIAG MODE CAN DIAG MODE PROPEL DIAG MODE Tennant Quantum UI ver X.X FIRMWARE UPDATE 4 . press and release the brush pressure button to enter Can diagnostic mode . “Cd1: Scrub” will appear on the LCd .
-
Page 93: Firmware Update Mode
Sd card . This mode should only be used by Tennant Service personnel follow- T12 XP ing an update kit Ib (Instruction bulletin) . -
Page 94: Battery Charger, Standard
When battery is not conn Number display. TROUbLESHOOTING Amber Flashing: Reduced Power Mode: L High internal charger tem battery Charger, Standard and Export Flashing: Charger error. Reset ch chanGinG charGer SettinG OPERATION 1 . key off . disconnect battery charger from aC power refer to Troubleshooting supply and the batteries . -
Page 95: Battery Charger, Onboard Opt
TROUbLESHOOTING battery Charger, Onboard (Option) OPERATION FAULTS fault messages automatically display when a fault exists . The onboard battery charger utilizes a 4 character digi- use the table below to identify possible causes . tal display, 3 control indicator Leds and a scroll button . The red control indicator illuminates at the beginning of the charging cycle . -
Page 96: Back-Up Alarm/Light
TROUbLESHOOTING back-Up Alarm/Light ON Note: Key Switch ON U/ORN PROG + J1-25 V/GRN Curtis 1232 J1-28 Controller W/WHT Cable J1-29 17/PUR COIL RETURN J1-13 J1-1 S-5 Seat Switch (N.O.) DRV4 9/WHT J1-3 INTERLOCK J1-9 DRV3 18/GRY J1-4 J1-22 11/PNK CAN TERM H J1-21 J1-33 CAN TERM L... - Page 97 TROUbLESHOOTING back-Up Alarm/Light Failed to Turn ON SteP action value(S) • key on See “LCd Go to Step #2 • enable back-up alarm/lights warnings” or • Is there a pertinent LCd warning or fault message “LCd faults” displayed? Sections • key on Correct fault Go to Step #3...
- Page 98 TROUbLESHOOTING Onboard battery Charging ON 6 Volt 6 Volt 6 Volt 6 Volt 6 Volt 6 Volt On Board Battery Charger AC Plug Note: Internal Switch Opens When Connected to AC Supply 1/RED 2.5A 2.5A Key Switch 50 Start BATT E-Stop Switch 6/BLU...
- Page 99 TROUbLESHOOTING batteries Failed to Charge SteP action value(S) • key off See “onboard Go to Step #2 • Is there a pertinent fault displayed on the onboard battery Char- charger (bat, e01, e02, e03, SCt, or Srt)? ger faults” Section of This manual •...
-
Page 100: Off Board
TROUbLESHOOTING Off board battery Charging ON 6 Volt 6 Volt 6 Volt 6 Volt 6 Volt 6 Volt BLACK Charger Connector AC Plug O Board Battery Charger 1/RED 2.5A 2.5A Key Switch 50 Start BATT E-Stop Switch 6/BLU 7/PUR 8/GRY S-3 Charger Battery Positive + Interlock Switch... - Page 101 TROUbLESHOOTING batteries Failed to Charge SteP action value(S) • key off Go to Step #2 Check aC • Check aC power supply Supply Circuit • Is the rated aC supply voltage present? protection • key off replace fuse Go to Step #3 •...
-
Page 102: Parking Brake, Electromagnetic
TROUbLESHOOTING Parking brake, Electromagnetic (Released) Propel Motor Assembly Note: Key Switch ON 17/PUR Amer Encoder 58GRY 58/GRY U/ORN PROG + J1-25 V/GRN Curtis 1232 J1-28 Controller W/WHT J1-29 17/PUR COIL RETURN J1-13 15/GRN J1-1 To: Back-Up S-5 Seat Switch (N.O.) DRV3 9/WHT Light Circuit... - Page 103 TROUbLESHOOTING Parking brake Failed to Release/Apply SteP action value(S) • key on See “LCd Go to Step #2 • Is there a pertinent LCd warning or fault message warnings” or displayed? “LCd faults” Sections • key on Correct fault Go to Step #3 •...
-
Page 104: Lighting
TROUbLESHOOTING Lighting ON Note: Key Switch ON Red Taillights (LED) Light Switch Position Lights OFF/Down = 2-1, 6-5 Headlights (LED) Headlight ON/Center = 2-3, 6-7 Headlight and Flashing ON/Up = 3-4, 7-8 CB12 CB13 (2.5A) 67/PUR (15A) 65/GRN CB14 (2.5A) 68/GRY 93/ORA 13/BLK... -
Page 105: Lighting
TROUbLESHOOTING Lighting Failed to Turn ON SteP action value(S) • key on reset and Go to Step #2 • Light switch on Test Lighting • firmly press circuit breaker #12 to reset operation • Is circuit breaker #12 tripped? • key on reset and Go to Step #3... -
Page 106: Main Scrub Brushes
TROUbLESHOOTING Main Scrub brushes ON 6 Volt 6 Volt 6 Volt 6 Volt 6 Volt 6 Volt 1/RED 2.5A 2.5A Key Switch 50 Start BATT E-Stop Charger Switch Interlock 6/BLU 7/PUR 13/BLK CB-1 T12 Scrub Module 2/BRN 33/ORA Switched B+ P1-1 (B+) From Buss Bar Rear/Right Brush... - Page 107 TROUbLESHOOTING Main Scrub brushes Failed to Turn ON SteP action value(S) • key on See “LCd Go to Step #2 • enable main scrub brushes subsystem warnings” or • Is there a pertinent LCd warning or fault message “LCd faults” displayed? Sections •...
-
Page 108: Power-Up
T12 Scrub Module 2/BRN 33/ORA Switched B+ P1-1 (B+) (B-) P2-1 From Buss Bar 13/BLK Instrument Panel Assembly Tennant T12 UI ver X.X Shield Battery Positive + (Key - On Position) Battery Positive + PUC001 (Key - Start Position) Battery Negative -... - Page 109 TROUbLESHOOTING Machine Failed to Power Up SteP action value(S) • key in Start position Go to Step #2 recharge • Test the total battery voltage using a voltmeter batteries and • Is the total battery voltage greater than 30 vdC? Test power-up Circuit opera- tion...
-
Page 110: Propel
TROUbLESHOOTING Propel Subsystem, Forward Propel Motor Assembly Note: Key Switch ON 17/PUR Amer Encoder 58GRY 58/GRY U/ORN PROG + J1-25 V/GRN Curtis 1232 J1-28 Controller W/WHT J1-29 17/PUR COIL RETURN J1-13 15/GRN J1-1 To: Back-Up S-5 Seat Switch (N.O.) DRV3 9/WHT Light Circuit J1-4... - Page 111 TROUbLESHOOTING Machine Failed to Propel SteP action value(S) • key on Correct fault Go to Step #2 • See “Curtis 1232 Controller diagnostics” section of Condition this manual • does a Curtis 1232 controller fault condition exist? • key off Go to Step #3 Correct faulty •...
- Page 112 TROUbLESHOOTING Rear Squeegee Down, OFF 6 Volt 6 Volt 6 Volt 6 Volt 6 Volt 6 Volt 1/RED 2.5A 2.5A Key Switch 50 Start BATT E-Stop Charger Switch Interlock 6/BLU 7/PUR 8/GRY 13/BLK T12 Water Pick-Up Module 2/BRN 31/PNK 13/BLK Switched B+ J3-1 B+ B- J3-4...
-
Page 113: Rear Squeegee Lift
TROUbLESHOOTING Rear Squeegee Failed to Raise/Lower SteP action value(S) • key on See “LCd Go to Step #2 • enable rear squeegee down warnings” or • Is there a pertinent LCd warning or fault message “LCd faults” displayed? Sections • key off Go to Step #5 Go to Step #3... -
Page 114: Scrub Head Lift
TROUbLESHOOTING Scrub Head Lift 6 Volt 6 Volt 6 Volt 6 Volt 6 Volt 6 Volt 1/RED 2.5A 2.5A Key Switch 50 Start BATT E-Stop Charger Switch Interlock 6/BLU 7/PUR 8/GRY 13/BLK T12 Scrub Module 2/BRN 33/ORA Switched B+ P1-1 B+ B(-) P2-1 From Buss Bar 13/BLK... -
Page 115: Main Brush
TROUbLESHOOTING Scrub Head Failed to Raise/Lower SteP action value(S) • key on See “LCd Go to Step #2 • enable scrub head down warnings” or • Is there a pertinent LCd warning or fault message “LCd faults” displayed? Sections • key off Go to Step #5 Go to Step #3... -
Page 116: Side Brush
TROUbLESHOOTING Side brush ON (Option) 6 Volt 6 Volt 6 Volt 6 Volt 6 Volt 6 Volt 1/RED 2.5A 2.5A Key Switch 50 Start BATT E-Stop Charger Switch Interlock 6/BLU 7/PUR 8/GRY T12 Side Scrub Module 22/BRN 37/PUR Switched B+ J3-1 B(+) B(-) J3-4 From Buss Bar... - Page 117 TROUbLESHOOTING Side brush Failed to Turn ON (Option) SteP action value(S) • key on See “LCd Go to Step #2 • enable side brush warnings” or • Is there a pertinent LCd warning or fault message “LCd faults” displayed? Sections •...
-
Page 118: Side Brush
TROUbLESHOOTING Side brush Extend/Down, OFF (Option) 6 Volt 6 Volt 6 Volt 6 Volt 6 Volt 6 Volt 1/RED 2.5A 2.5A Key Switch 50 Start BATT E-Stop Charger Switch Interlock 6/BLU 7/PUR 8/GRY T12 Side Scrub Module 22/BRN 37/PUR Switched B+ J3-1 B(+) B(-) J3-4 From Buss Bar... - Page 119 TROUbLESHOOTING Side brush Failed to Extend/Lower (Option) SteP action value(S) • key on See “LCd Go to Step #2 • enable side brush extend/down warnings” or • Is there a pertinent LCd warning or fault message “LCd faults” displayed? Sections •...
-
Page 120: Side Brush
TROUbLESHOOTING Side brush Retract/Up, OFF (Option) 6 Volt 6 Volt 6 Volt 6 Volt 6 Volt 6 Volt 1/RED 2.5A 2.5A Key Switch 50 Start BATT E-Stop Charger Switch Interlock 6/BLU 7/PUR 8/GRY T12 Side Scrub Module 22/BRN 37/PUR Switched B+ J3-1 B(+) B(-) J3-4 From Buss Bar... - Page 121 TROUbLESHOOTING Side brush Failed to Retract/Raise (Option) SteP action value(S) • key on See “LCd Go to Step #2 • enable side brush retract/up warnings” or • Is there a pertinent LCd warning or fault message “LCd faults” displayed? Sections •...
- Page 122 TROUbLESHOOTING Solution Control ON - Main brush (Conventional) 6 Volt 6 Volt 6 Volt 6 Volt 6 Volt 6 Volt 1/RED * SV2 (J6-2) H2O Valve Voltages Range Level PWM% 1-LED 2.5A 2-LEDs 3-LEDs 2.5A 1-LED 2-LEDs (Default) 3-LEDs 1-LED High 2-LEDs Key Switch...
- Page 123 TROUbLESHOOTING Solution Control Failed to Turn ON - Main brush (Conventional) SteP action value(S) • key on See “LCd Go to Step #2 • enable solution control (conventional) warnings” or • Is there a pertinent LCd warning or fault message “LCd faults”...
- Page 124 TROUbLESHOOTING Solution Control ON - Side brush (Conventional) 6 Volt 6 Volt 6 Volt 6 Volt 6 Volt 6 Volt 1/RED * Side Pump (J5-5) Voltages Range Level Voltage 10.5 V 2.5A 1-LED 16.5 V 2-LEDs 22 V 3-LEDs 2.5A 1-LED 16.5 V 2-LEDs...
- Page 125 TROUbLESHOOTING Solution Control Failed to Turn ON - Side brush (Conventional) SteP action value(S) • key on See “LCd Go to Step #2 • enable side brush solution control (conventional) warnings” or • Is there a pertinent LCd warning or fault message “LCd faults”...
-
Page 126: Solution Control, Ech2O
TROUbLESHOOTING Solution Control ON (ec-H2O) * Ec Pump (J4-4) Voltages Range Level Voltage + Side Br 9.5 V 1-LED 12 V 2-LEDs 14.3 V 3-LEDs 1-LED 12 V 2-LEDs 14.3 V (Default) 3-LEDs 11.5 V 16.7 V 1-LED 14.3 V High 2-LEDs 11.5 V... - Page 127 TROUbLESHOOTING Solution Control Failed to Turn ON (ec-H2O) SteP action value(S) • key on See “LCd Go to Step #2 • enable solution control (ec-H2O) warnings” or • Is there a pertinent LCd warning or fault message “LCd faults” displayed? Sections •...
-
Page 128: Spray Nozzle
TROUbLESHOOTING Spray Nozzle ON (Option) Note: Key Switch ON Spray Nozzle Switch CB11 63/ORA 64/YEL 13/BLK Spray Nozzle Pump 13/BLK 64/YEL Battery Positive + Battery Negative - SNC001 4-60 T12 Service Information 9009917 (12-12) - Page 129 TROUbLESHOOTING Spray Nozzle Failed to Turn ON (Option) SteP action value(S) • key on See “LCd Go to Step #2 • enable spray nozzle subsystem warnings” or • Is there a pertinent LCd warning or fault message “LCd faults” displayed? Sections •...
-
Page 130: Vacuum Fan
TROUbLESHOOTING Vacuum Fan ON 6 Volt 6 Volt 6 Volt 6 Volt 6 Volt 6 Volt 1/RED 2.5A 2.5A Key Switch 50 Start BATT E-Stop Charger Switch Interlock 6/BLU 7/PUR 8/GRY 13/BLK T12 Water Pick-Up Module 2/BRN 31/PNK 13/BLK Switched B+ J3-1 B+ B- J3-4 From Buss Bar... - Page 131 TROUbLESHOOTING Vacuum Fan Failed to Turn ON SteP action value(S) • key on See “LCd Go to Step #2 • enable scrubbing vacuum fan(s) warnings” or • Is there a pertinent LCd warning or fault message “LCd faults” displayed? Sections •...
- Page 132 TROUbLESHOOTING 4-64 T12 Service Information 9009917 (12-12)
-
Page 133: Service
SERVICE SECTION Contents Page Contents Page Service ComponenT TeSTInG (ConTInued) ServICe proCedureS . . . . . . . . . . . . . . . . . . . . . 5-2 rear SqGe LIfT aCTuaTor . -
Page 134: Rear Squeegee Lift Actuator
SERVICE remove forward lift actuator cotter and clevis pins REAR SQUEEGEE LIFT ACTUATOR and set hardware aside . Cut zip tie and disconnect lift actuator from wire harness . removinG rear SQueeGee lift actuator NOTE: Cylindrical Scrub Head Only: Remove debris tray for Safety: before leaving or servicing machine, stop from rear of scrub head to allow for additional clearance. - Page 135 Connect new lift actuator to wire harness . spring and hardware aside . RSAA001 key on, Squeegee/vacuum on and wait for actuator Tennant Quantum to extend completely and then turn key off . UI ver1.0 remove lift actuator cotter and clevis pins . note hardware orientation for re-assembly .
-
Page 136: Installation
SERVICE remove actuator mounting clevis (2) and cotter (2) SIDE bRUSH LIFT ACTUATOR pins . removinG SiDe bruSh lift actuator for Safety: before leaving or servicing machine, stop on level surface, turn off machine and remove key . NOTE: The side brush lift mechanism is under spring tension when in the raised/retracted position. - Page 137 SERVICE aDJuStinG SiDe bruSh SPrinG tube aSSembly key on, 1-STep scrub on, side brush switch on . allow the side brush to lower completely and then turn the for Safety: before leaving or servicing machine, stop key off . on level surface, turn off machine and remove key . NOTE: Jack the front of the machine to allow improved ac- cess to the side brush spring tube assembly.
-
Page 138: Side Brush Motor
SERVICE key on, 1-STep Scrub on, side brush on and allow SIDE bRUSH MOTOR side brush motor to lower completely . Turn key off . removinG SiDe bruSh motor remove side brush cover mounting hardware (2) and set aside . for Safety: before leaving or servicing machine, stop on level surface . - Page 139 SERVICE inStallinG SiDe bruSh motor Installation is the reverse of removal . . NOTE: Apply anti-seize to side brush motor shaft and mo- tor/hub mounting hardware. rePlacinG carbon bruSheS remove carbon brush caps (4) . remove carbon brushes (4) . T12 Service Information 9009917 (12-12)
-
Page 140: Main Brush Lift Actuator
SERVICE Cut zip tie securing actuator wire harness and discon- MAIN bRUSH LIFT ACTUATOR nect actuator from wire harness . remove actuator upper mounting pin from lift removinG main bruSh lift actuator mechanism . for Safety: before leaving or servicing machine, stop on level surface, turn off machine and remove key . -
Page 141: Main Scrub Head
SERVICE remove lift actuator cotter and clevis pins from scrub MAIN SCRUb HEAD head frame and set hardware aside . removinG main Scrub heaD for Safety: before leaving or servicing machine, stop on level surface, turn off machine and remove key . drain solution tank and turn key off . - Page 142 SERVICE remove upper lift actuator cotter and clevis pins . disconnect lift actuator from wire harness . remove lift actuator and set aside . disconnect water hoses from scrub head . 10 . disconnect water valve and brush motors from wire harness .
-
Page 143: Main Scrub Brush Motor
SERVICE remove belt cover bolts (2) and set cover and hard- MAIN SCRUb bRUSH MOTOR (CYLINDRICAL) ware aside . removinG main bruSh motor for Safety: before leaving or servicing machine, stop on level surface, turn off machine and remove key . for Safety: When servicing machine, jack machine up at designated locations only . - Page 144 SERVICE disconnect motor from wire harness and remove release spring tabs using a small screwdriver . motor . remove carbon brushes . inStallinG main bruSh motor Installation is reverse of removal . rePlacinG carbon bruSheS release the motor band clamp and set aside . Installation is the reverse of removal .
-
Page 145: Instrument Panel
SERVICE Loosen set screws (2) securing instrument panel INSTRUMENT PANEL mounting tube . removinG inStrument Panel for Safety: When servicing machine, disconnect bat- tery connections before working on machine . key off . disconnect battery . remove front access panel . remove instrument panel assembly . -
Page 146: Logic Board Replacement
SERVICE attach a wrist static strap tool to a bare metal frame LOGIC bOARD REPLACEMENT surface . removinG loGic boarD for Safety: When servicing machine, disconnect bat- tery connections before working on machine . key off . disconnect batteries . Lift seat . - Page 147 SERVICE Carefully squeeze the plastic standoffs and remove the logic board . inStallinG loGic boarD for Safety: When servicing machine, disconnect bat- tery connections before working on machine . 1 . attach a wrist static strap tool to a bare metal frame surface .
-
Page 148: Steering Wheel Timing
SERVICE align the front drive tire with the centerline of the STEERING WHEEL TIMING machine . for Safety: before leaving or servicing machine, stop on level surface, turn off machine and remove key . key off . disconnect batteries . remove front access panel . -
Page 149: Wheel Drive Assembly
SERVICE jack front of machine and remove jack stands or sup- WHEEL DRIVE ASSEMbLY port blocks so wheel drive assembly is supported by the floor . removinG Wheel Drive aSSembly for Safety: before leaving or servicing machine, stop on level surface, turn off machine and remove key . for Safety: When servicing machine, jack machine up at designated locations only . - Page 150 SERVICE Carefully jack front of machine until the drive wheel assembly can be removed from the side of the ma- chine . inStallinG Wheel Drive aSSembly for Safety: before leaving or servicing machine, stop on level surface, turn off machine and remove key . remove propel cable clamp mounting hardware (2) .
- Page 151 SERVICE rePlacinG the Drive tire 4 . remove aluminum hub and plastic cover . 1 . remove (4) flat head screws . 5 . replace the drive tire . 2 . use (4) m10-1 .5 x 70 (Class 12 .9) socket head bolts to mechanically press off the tire .
-
Page 152: Vacuum Fan Assembly
SERVICE remove sound insulation and set aside . VACUUM FAN ASSEMbLY removinG vacuum fan aSSembly for Safety: before leaving or servicing machine, stop on level surface, turn off machine and remove key . key off . disconnect hose from rear squeegee and move spray nozzle away from the vacuum fan access cover . - Page 153 SERVICE 9 . draw a line across the vacuum fan assembly and the 7 . Carefully pry on the vacuum fan mounting flange to mounting flange as an orientation indicator for re- break the silicone seal . remove the vacuum fan as- assembly .
-
Page 154: Tank Level Sensors
SERVICE 2 . Test the resistance of the recovery tank level sensor TESTING TANK LEVEL SENSORS using an ohmmeter as shown below . The tank level switch should test at 0-1 ohms or closed . for Safety: before leaving or servicing machine, stop on level surface . - Page 155 SERVICE 3 . The solution and recovery tank full sensor conditions are also viewable in Input display mode . See “Input display mode” in the TroubLeShooTInG section of this manual . I1: Solution Tank Full Closed I2: Recovery Tank Not Full Open RLT003 5-23 T12 Service Information 9009917 (12-12)
-
Page 156: Parking Brake, Electromagnetic
SERVICE TESTING PARKING bRAKE, ELECTROMAGNETIC 3 . key off . The brake applies when the key switch is turned off . attempt to manually rotate the brake as- sembly on the splined shaft as shown below . The for Safety: before leaving or servicing machine, stop brake assembly ShouLd noT rotate freely on the on level surface, turn off machine and remove key . - Page 157 SERVICE 5 . remove three flat head screws to disassemble the 7 . reassemble the brake assembly and slide it back onto brake assembly . the splined shaft . BET008 BET004 6 . measure the thickness of the brake rotor using a 8 .
- Page 158 50-60 Ohms at 70° F SERVICE 9 . remove brake wires from the b1 and b2 terminals 11 . apply battery voltage to the brake assembly using in the connection box . fuse-protected jumper leads as shown below . The brake energizes to release .
- Page 159 SERVICE TESTING PROPEL MOTOR 3 . Test the resistance of all three motor windings using an ohmmeter as shown below . The resistances of each winding should be within 5% of each other . an open for Safety: before leaving or servicing machine, stop or shorted winding indicates a faulty motor .
- Page 160 SERVICE 5 . The motor encoder and temperature sender are 4 . Test the resistance between all three motor terminals non-serviceable components of the drive motor . The and the motor case as shown below . The ohmmeter motor encoder senses rotor position, speed, and should read “o .L .
-
Page 161: Propel Motor Cables
SERVICE 3 . disconnect u, v, and w cables from Curtis 1232 TESTING PROPEL MOTOR CAbLES controller as shown below . for Safety: before leaving or servicing machine, stop on level surface, turn off machine and remove key . for Safety: When servicing machine, disconnect bat- tery connection before working on machine . - Page 162 SERVICE 5 . Test each cable using an ohmmeter for a short to 7 . Test each cable using an ohmmeter for end-to-end battery - as shown below . each cable should test as continuity . each cable should test between 0-1 ohm “o .L .
-
Page 163: Throttle/Brake Sensor
SERVICE 3 . key on . backprobe the power supply to the throttle/ TESTING THROTTLE/bRAKE SENSOR brake sensor terminals a and d using a voltmeter as shown below . The voltmeter should display battery voltage . for Safety: before leaving or servicing machine, stop on level surface . - Page 164 SERVICE 6 . key on . backprobe the brake sensor terminals 4 . key on . backprobe the throttle sensor output C and d using a voltmeter as shown below . The volt- terminals b and d using a voltmeter as shown below . meter should display 5 volts when the brake pedal is The voltmeter should display 0-5 volts proportional activated .
-
Page 165: Side Brush Lift Actuator
SERVICE 3 . reverse polarity and apply battery voltage to the lift TESTING SIDE bRUSH LIFT ACTUATOR actuator using fuse-protected jumper leads as shown below . Connect battery - to terminal 1 and battery + for Safety: before leaving or servicing machine, stop to terminal 2 . -
Page 166: Main Brush Lift Actuator
SERVICE 3 . reverse polarity and apply battery voltage to the lift TESTING MAIN bRUSH LIFT ACTUATOR actuator using fuse-protected jumper leads as shown below . Connect battery - to terminal 1 and battery + for Safety: before leaving or servicing machine, stop to terminal 2 . - Page 167 SERVICE 3 . reverse polarity and apply battery voltage to the lift TESTING REAR SQUEEGEE LIFT ACTUATOR actuator using fuse-protected jumper leads as shown below . Connect battery - to terminal 1 and battery + for Safety: before leaving or servicing machine, stop to terminal 2 .
- Page 168 SERVICE 3 . apply battery voltage to the vacuum fan(s) using TESTING VACUUM FAN fuse-protected jumper leads as shown below . The fan should turn on . replace the vacuum fan if it fails to for Safety: before leaving or servicing machine, stop turn on .
-
Page 169: Main Scrub Brush Motors
SERVICE Replacement Carbon Brush Length: 10mm (0.375 in) 6 Volt 6 Volt 6 Volt 6 Volt 6 Volt 6 Volt 3 . apply battery voltage to the main brush motor(s) us TESTING MAIN SCRUb bRUSH MOTOR(S) ing fuse-protected jumper leads as shown below . The brush motor should turn on . -
Page 170: Side Brush Motor
SERVICE Replacement Carbon Brush Length: 10mm (0.375 in) 6 Volt 6 Volt 6 Volt 6 Volt 6 Volt 6 Volt 3 . apply battery voltage to the side brush motor using TESTING SIDE bRUSH MOTOR fuse-protected jumper leads as shown below . The side brush motor should turn on . -
Page 171: Ec-H2O Pump
SERVICE 5 . use a stop watch to time how long it takes to fill a 5 TESTING ec-H20 PUMP gallon bucket . The open flow specification for the ec-h2o pump is 1 .35 Gpm . The pump should fill the for Safety: before leaving or servicing machine, stop 5 gallon bucket in approximately 3 .5 - 4 .0 minutes . -
Page 172: Ec-H2O Pressure Switch
SERVICE 3 . Test the resistance of the switch using an ohmmeter TESTING ec-H2O PRESSURE SWITCH 6 Volt 6 Volt 6 Volt 6 Volt 6 Volt 6 Volt between the common and normally open terminals . The switch should test as “o .L . ” or open . replace the for Safety: before leaving or servicing machine, stop switch if the n .o . - Page 173 We Need Your Help... As part of Tennant’s Zero Defects Program, we want to know about errors you have found or suggestions you may have regarding our machine manuals. If you find an error or have a suggestion, please complete this postage-paid form and mail it to us.
- Page 175 We Need Your Help... As part of Tennant’s Zero Defects Program, we want to know about errors you have found or suggestions you may have regarding our machine manuals. If you find an error or have a suggestion, please complete this postage-paid form and mail it to us.
Need help?
Do you have a question about the EC-H2O T12 and is the answer not in the manual?
Questions and answers