Dormakaba ED900 Installation Instructions Manual
Low energy swing door operator (fine cover) double egress doors
Hide thumbs
Also See for ED900:
- Installation instructions manual (80 pages) ,
- Troubleshooting instructions (54 pages) ,
- Owner's manual (14 pages)

Related Manuals for Dormakaba ED900


Summary of Contents for Dormakaba ED900
- Page 1 ED900 Low Energy Swing Door Operator (Fine cover) Double egress doors Installation Instructions 08125330 – 02-2020 | EN |...
-
Page 2: Table Of Contents
ED900 Installation Instructions – Double egress door Table of Contents Table of contents Table of contents Recommended tools and torque chart General information 11.1 Recommended tools General information 11.2 Standard tightening torque ED900 Arm configurations 11.3 Drill bits Product description... - Page 3 ED900 Installation Instructions – Double egress door Table of Contents J/Push arm installation Install ED900 cover, end caps and spindle caps 16.1 Push arm installation templates 16.2 Push arm installation 28.1 Install cover and end caps Arm with track mount installation 28.2...
-
Page 4: Ed900 Arm Configurations
1.1.6 Symbols used in these instructions. This manual provides installation instructions for WARNING ED900 low energy swing door operators used in double egress door installations. This symbol warns of hazards which could result in personal injury or threat to health. -
Page 5: Handing Of Door
Reference Para. 6.2, Operating specifications. used exclusively for opening and closing interior swing doors. 2.1.4 ED900 hardware – double swing doors. The ED900 operator must be installed on an interior Reference Chapter 5 for ED900 hardware overview. building surface. Fig. 2.1.1 ED900 operator 2.1.2 Low energy operator. -
Page 6: Double Egress Door Installation Configurations
1. Inactive door ED900 power switch controls power to both ED900 operators. 2. ED900 single program switch located on active door controls both ED900 operators. Fig. 2.3.2 ED900 installation – full width cover (option) installation example Single program switch Power switch Active door... -
Page 7: Safety Information
ED900 Installation Instructions – Double egress door Chapter 3 3 Safety information 3.1 Safety instructions. WARNING This document contains important instructions for installation of the ED900 swing door operators. Hand pinch point and crushing hazards at door Review these instructions thoroughly prior to... -
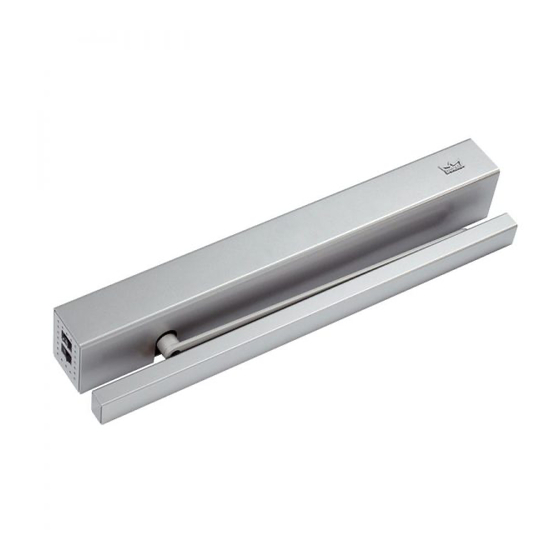
Page 8: Ed900 Product Overview
ED900 Installation Instructions – Double egress door Chapter 4 4 ED900 Product overview ED900 push arm system Fig. 4.1.1 ED900 RH push arm system example ED900 operator J/pull arm assembly Axle extension Standard cover End cap, program switch End cap, power... -
Page 9: Ed900 - Double Egress Door Configurations
Standard width cover 0 - 8” 5 1/8” 27” [686] [0 - 203] [130] Fig. 4.3.2 ED900 RH double egress Fig. 4.3.3 ED900 LH double egress full cover option Fig. 4.3.4 ED900 RH double egress full cover option ED900 08125330 02-2020... -
Page 10: Ed900 Operator Component Views
ED900 Installation Instructions – Double egress door Chapter 4 ED900 operator component views Fig. 4.4.1 ED900 component view 1 Fig. 4.4.2 ED900 component view 2 Power switch 120 Vac cable Splined shaft spindle Operator (motor, gear, spring) Spring tension... - Page 11 ED900 Installation Instructions – Double egress door Blank page This page left intentionally blank. ED900 08125330 02-2020...
-
Page 12: Ed900 Hardware - Double Door
ED900 Installation Instructions – Double egress door Chapter 5 5 ED900 hardware – double door ED900 operator and mounting plate Fig. 5.1.1 Two - ED900 operator and mounting plate Fig. 5.1.2 Two- Accessory terminals Fig. 5.1.3 5 mm T-handle hex key... -
Page 13: Arm Assemblies
ED900 Installation Instructions – Double egress door Chapter 5 Arm assemblies Fig. 5.4.1 J8 – Splined push arm assembly, Fig. 5.4.2 J12 – Splined push arm assembly, 225 mm, 0 - 8" reveal 500 mm, 8" - 12" reveal... -
Page 14: Ed900 Mounting Plate Screw Kit
ED900 Installation Instructions – Double egress door Chapter 5 ED900 mounting plate screw kit Fig. 5.6.1 Two sets - Mounting plate fasteners 15,16 Mounting plate (12) 15 fastener kit 08120570 (12) 16 1/4-20 x 1" FH machine screw No. 14 x 1 "FH wood... -
Page 15: Ed900 Full Width Cover, Mounting Plate Extension, And Cables - Option
ED900 Installation Instructions – Double egress door Chapter 5 ED900 full width cover, mounting plate extension, and cables – option Fig. 5.9.1 Full width cover kit 08125264 Fine cover double 08120370 End and spindle (4) 16 cap set (4) 15... -
Page 16: Key Switch Panels - Option
ED900 Installation Instructions – Double egress door Chapter 5 5.10 Key switch panels – option Fig. 5.10.2 Communication cable Fig. 5.10.1 Key switch panels Key switch panel, with RJ45 Key switch panel Communication cable for program switch panel comm Wiring diagrams: port , 10 ft. -
Page 17: Conduit Box And Wiring Kit - Options
ED900 Installation Instructions – Double egress door Chapter 5 5.12 Conduit box and wiring kit – options Fig. 5.12.1 Conduit box Conduit box 08120730 Fig. 5.12.2 Power cord wiring kit 08121110 Power cord Conduit box 08075390 08120730 Wire nut... -
Page 18: Technical Data
ED900 Installation Instructions – Double egress door Chapter 6 6 Technical data ED900 Technical data 6.1.4 Outputs Maximum wire size 6.1.1 Required operating conditions. 16 AWG Connector plug 1/16” screw size Ambient temperature 5 to 122 °F Sr parameter... -
Page 19: Operating Specifications
ED900 Installation Instructions – Double egress door Chapters 6 and 7 Operating specifications 6.2.1 ED900 Maximum power [20] 13/16" 120 watt Axle extensions, consumption [30] 1 3/16" [mm] inches [60] 2 3/8" Opening force Minimum Maximum N (lbf) Reveal depth for pull 20 (4.5) -
Page 20: User Interface
ED900 Installation Instructions – Double egress door Chapter 8 8 User interface Overview Fig. 8.1.1 Operator keypad and display 8.1.1 Operator user interfaces. 2 digit display 1. 4 button keypad and 2 digit display. 4 button keypad • 4 button keypad; to select, input and adjust door parameter values. -
Page 21: Program And Exit Only Switches
ED900 Installation Instructions – Double egress door Chapter 8 Program and Exit Only switches 8.3.1 Program switch control modes. • Auto, door opens following pulse • Open, door opens automatically and generation by a knowing act device or remains open. -
Page 22: System Accessories
ED900 Installation Instructions – Double egress door Chapter 9 9 System accessories System accessory electrical connections Fig. 9.1.1 Electrical connections, double egress door External program 3 x 12 AWG switch, mechanical 115 Vac power 3 x 4.0 mm External program... -
Page 23: Ed900 Terminal Board Interfaces
ED900 Installation Instructions – Double egress door Chapter 9 ED900 terminal board interfaces Fig. 9.3.1 Terminal board electrical connections Green LED (Para. 8.4) Night- Activation inputs Yellow LED (Para. 8.4) Interior Exterior bank Safety sensors Red LED (Para. 8.4) -
Page 24: Ed900 Door Signage
ED900 Installation Instructions – Double egress door Chapter 10 10 ED900 door signage 10.1 Low energy operator 10.1.1 Overview Fig. 10.1.1 AUTOMATIC CAUTION DOOR decal Signage and warnings are specified in ANSI /BHMA A156.19, American National Standard for power assist AUTOMATIC and low energy power operated doors. -
Page 25: Door Signage, Low Energy Double Egress Swing Door
ED900 Installation Instructions – Double egress door Chapter 10 10.2 Door signage, low energy double egress swing door 10.2.1 Knowing act switch used to initiate door operation. Fig. 10.2.1 LH approach side Fig. 10.2.2 LH swing side AUTOMATIC AUTOMATIC... -
Page 26: Safety Information Label, Low Energy Swing Doors
ED900 Installation Instructions – Double egress door Chapter 10 10.3 Safety Information label, low Fig. 10.3.1 Safety Fig. 10.3.2 Annual information compliance energy swing doors label inspection label 10.3.1 Low energy swinging door safety information ANNUAL COMPLIANCE SAFETY INFORMATION label. -
Page 27: 11 Recommended Tools And Torque Chart
ED900 Installation Instructions – Double egress door Chapter 11 11 Recommended tools and torque chart 11.1 Recommended tools Fig. 11.1.1 Recommended tools T-handle hex key, 5 mm Supplied with ED900 Hex keys, 2.5 mm, 3 mm, 6 mm Screwdriver, flat... -
Page 28: 12 Ed900 Installation Overview
ED900 Installation Instructions – Double egress door Chapter 12 12 ED900 installation overview 12.1 Installation preparation 12.1.4 ED900 mounting plate installation preparation. NOTICE CAUTION Installation steps listed in Chapter 14 through 17 are a recommendation. Structural, local Using applicable ED900 installation template... - Page 29 ED900 Installation Instructions – Double egress door Blank page This page left intentionally blank. ED900 08125330 02-2020...
-
Page 30: 12.2 Ed900 Operator Installation With Standard Covers
Inactive door Active door Power switch Single program switch 12.4 ED900 operators – assign active door and inactive door type Table 12.4.1 Door-type parameter dL. 12.4.1 ED900 active and inactive door assignments. 1. Position ED900 operators on a flat surface Door type orientated as shown in Fig. -
Page 31: Ed900 Operators - 115 Vac Customer
• Standard program switches are disabled in double door operation. • Reference Para.14.7 for single program switch installation. Fig. 12.5.2 ED900 installation with optional full width cover ED900 – Inactive door ED900 – Active door Program switches Program switches Spindle... -
Page 32: 13 Ed900 Installation Templates
ED900 Installation Instructions – Double egress door Chapter 13 13 ED900 installation templates 13.2 Installation templates – pull arm Fig. 13.2.1 Assembly on hinge side, pull version with slide channel and long pivot pin 5 7/8” [150] 4 3/16”... - Page 33 ED900 Installation Instructions – Double egress door Chapter 13 Fig. 13.2.2 Assembly on hinge side, pull version with slide channel CPD and short pivot pin 5 7/8” [150] 4 3/16” [106] 4 3/4” 4 3/4” 4 3/4” 3 3/4”...
- Page 34 ED900 Installation Instructions – Double egress door Chapter 13 Fig. 13.2.3 Assembly on hinge side, pull version with slide channel CPD and long pivot pin 5 7/8” [150] 4 3/16” [106] 3 15/16” 4 3/4” 4 3/4” 4 3/4”...
-
Page 35: Installation Templates - Pull As Push
ED900 Installation Instructions – Double egress door Chapter 13 13.3 Installation templates – pull as push Fig. 13.3.1 Assembly on opposite hinge side, push version with slide channel and short pivot pin 5 7/8” [150] 4 3/16” [106] 3 3/4”... -
Page 36: Installation Templates - Push Arm
ED900 Installation Instructions – Double egress door Chapter 13 13.4 Installation templates – push arm Fig. 12.4.1 Assembly on opposite hinge side, push version with J/arm assembly 5 7/8” [150] 4 3/16” [106] 3 3/4” 4 3/4” 4 3/4”... - Page 37 ED900 Installation Instructions – Double egress door Chapter 13 Fig. 13.4.2 Assembly on opposite hinge side, push version with J8/arm assembly 9 7/8” [250] 8 1/8” 3 3/4” 4 3/4” 4 3/4” 4 3/4” 3 15/16” [206] [95] [120]...
-
Page 38: Installation Templates, Double Doors
ED900 Installation Instructions – Double egress door Chapter 13 13.3 Installation templates, double doors Fig. 13.3.1 Pull version, mounting on hinge side, Professional cover, standard axle extension 5/8” 5/8” 5 1/8” [130] [15] [15] 2 3/4” [70] 5 7/8”... - Page 39 ED900 Installation Instructions – Double egress door Chapter 13 Fig. 13.3.2 Pull version with CPD lever, mounting on hinge side, Professional cover, standard axle extension 5/8” 5/8” 5 1/8” [130] [15] [15] 2 3/4” [70] 2 3/8” [61] 5 7/8”...
- Page 40 ED900 Installation Instructions – Double egress door Chapter 13 Fig. 13.3.3 Push version with track, mounting on opposite hinge side, Professional cover, standard axle extension 5/8” 5/8” 5 1/8” [130] [15] [15] 2 3/4” [70] 5 7/8” 5 7/8”...
- Page 41 ED900 Installation Instructions – Double egress door Chapter 13 Fig. 13.3.4 Push version with arm, mounting on opposite hinge side, Professional cover, standard axle extension 5/8” 5 1/8” [130] 5/8” [15] 2 3/4” [70] [15] 1 5/16” [33] EN 7 = EN 7 = 9 7/8”...
-
Page 42: 14 Ed900 Operator And Mounting Plate
ED900 Installation Instructions – Double egress door Chapter 14 14 ED900 operator and mounting plate preparation 14.1 Remove mounting plate from each ED900 operator 14.1.1 Remove 115 Vac plug from Fig. 14.1.1 115 Vac plug removal receptacle. 115 Vac plug 1. - Page 43 • Wiring between mounting plates is facilitated by removing terminal block. Fig. 14.2.3 ED900 mounting plates – installation with optional full width cover example Inactive door 115 VAC terminal Guide pin mounting plate block...
-
Page 44: Operator
ED900 Installation Instructions – Double egress door Chapter 14 14.3 Options – Customer 115 Vac connection to terminal blocks Fig. 14.3.1 115 Vac terminal block WARNING 115 VAC terminal block Work on electrical equipment and Ground terminal 115 Vac wiring installation must... - Page 45 ED900 Installation Instructions – Double egress door Chapter 14 Fig. 14.3.5 115 Vac terminal block mounting 14.3.3 Install conduit box (option). 115 VAC terminal block TIPS AND RECOMMENDATIONS Ground terminal 115 Vac terminal block is secured M3.5 screw to mounting plate by M3 x 25 115 Vac plug to Phillips head screw.
-
Page 46: Full Width Cover Option
14.4.2 Remove ED900 115 Vac plug. 1. Swing open upper bracket (3). 2. Remove ED900 115 Vac plug (5) from power supply circuit board socket (6). 14.4.3 Remove power supply circuit board. 1. Remove power supply circuit board (4) from its slot in ED900. - Page 47 ED900 Installation Instructions – Double egress door Chapter 14 Fig. 14.4.4 Mounting plate assembly Mounting plate, Mounting plate, 14.4.5 Drill two holes in pair mounting plate for M6 operator pair fastener. Fig. 14.4.5 Pair mounting plate hole for M6 fastener 1.
-
Page 48: 15 Ed900 Mounting Plate And Operator
ED900 Installation Instructions – Double egress door Chapter 15 15 ED900 mounting plate and operator installation 15.1 ED900 mounting plate attachment to jamb and/or wall examples Fig. 15.1.1 Double egress door mounting plate installation – standard covers example ED900 mounting... -
Page 49: Install Ed900 Mounting Plate To Jamb And/Or Wall
ED900 Installation Instructions – Double egress door Chapter 15 15.2 Install ED900 mounting plate to jamb and/or wall 15.2.1 Select installation template. Fig. 15.2.1 Mounting plate fasteners 1. Select applicable installation template. (12) 15 NOTICE (12) 16 Installation templates: Reference Chapter 13. -
Page 50: Full Width Cover Option - Install Cables Between Mounting Plates
ED900 Installation Instructions – Double egress door Chapter 15 15.3 Full width cover option – Install cables between mounting plates Fig. 15.3.1 Double door mounting plate installation – optional full width cover Mounting plate, Mounting plate Conduit box (option) - Page 51 ED900 Installation Instructions – Double egress door Chapter 15 Fig. 15.3.5 Single program switch 15.3.4 Fasten 115 Vac cable ground wires 3 position program to mounting plate ground studs. switch 1. Inactive door mounting plate – fasten 3 conductor cable ground wire ring lug to mounting plate ground stud (Fig.
-
Page 52: Connect Customer 115 Vac To Ed900 Mounting Plate Terminal Block
ED900 Installation Instructions – Double egress door Chapter 15 15.4 Connect customer 115 Vac to ED900 mounting plate terminal block Fig. 15.4.1 Double door mounting plate installation with standard covers ED900 mounting 115 Vac terminal plate block Fig. 15.4.2 Double door mounting plate installation – optional full width cover... -
Page 53: Route Accessory Wiring To Active Door Mounting Plate
ED900 Installation Instructions – Double egress door Chapter 15 Fig. 15.4.3 115 Vac wiring example 15.4.4 Connect customer 115 Vac wiring. 115 Vac terminal block Ground post WARNING Routing and connection of 115 Vac wiring to ED900 must be... -
Page 54: Remove Protective Film Strips From Each Ed900 Operator
ED900 Installation Instructions – Double egress door Chapter 15 15.6 Remove protective film strips from each ED900 operator Fig. 15.6.1 Operator protective film strips 15.6.1 Remove protective film strips. Heat conductive 1. Remove two protective film strips from pads each operator's heat conductive pads. -
Page 55: Full Width Cover Option - Install Program Switch, Active Door Ed900
ED900 Installation Instructions – Double egress door Chapter 15 15.8 Full width cover option – Install program switch, active door ED900 Fig. 15.8.1 Program switch installation on active door Single program Inactive door Active door switch Power switch Fig. 15.8.2 Program switch and cable... -
Page 56: Full Width Cover Option - 115 Vac Pair Power Cable Connections
115 Vac interconnect (5) into ED900 power supply circuit board cable plug, male socket (4) (Fig.15.9.2). connection Fig. 15.9.2 ED900 115 Vac pair power cable – inactive door ED900 115 Vac plug from 115 Vac socket, female connection ED900 power... -
Page 57: Push Arm Installation Templates
ED900 Installation Instructions – Double egress door Chapter 16 16 J/Push arm installation 16.1 Push arm installation templates NOTICE Reference Chapter 13 for push arm installation templates. Fig. 16.1.1 Push arm assemblies J8/Standard push arm, reveal depths 0 - 8" maximum... - Page 58 ED900 Installation Instructions – Double egress door Chapter 16 Fig. 16.2.3 Drive arm 16.2.2 Attach drive arm to operator. Drive arm Socket CAUTION Arm axle sleeve Door must be fully closed! WARNING Fig. 16.2.4 Drive arm axle extension installation Use caution when working in proximity of door and push arm!.
- Page 59 ED900 Installation Instructions – Double egress door Chapter 16 Fig. 16.2.7 Arm assemblies attached to door and ED900 16.2.5 Connect adjustment arm to drive arm. 1. Loosen the two adjustment M6 x 10 mm flanged button head screws (Fig. 16.2.9).
-
Page 60: Arm With Track Mount Installation
ED900 Installation Instructions – Double egress door Chapter 17 17 Arm with track mount installation 17.1 Arm with track installation NOTICE Reference Chapter 13 for pull arm and pull arm as push installation templates. 17.2 Splined arm and track assemblies Fig. -
Page 61: Slide Shoe Assembly
ED900 Installation Instructions – Double egress door Chapter 17 17.4 Slide shoe assembly 17.4.1 Install pivot pin into slide shoe. Fig. 17.4.1 Slide shoe and pivot pin 1. Insert pivot pin into slide shoe. Slide shoe Pivot pin 2. Install spring clip into pivot pin slot. -
Page 62: Fasten Track Assembly To Door
ED900 Installation Instructions – Double egress door Chapter 17 17.6 Fasten track assembly to door 17.6.1 Mount track assembly on door. Fig. 17.6.1 Track assembly Track CAUTION Fixing piece Insure track hardware is Slide shoe assembled for hand of door. -
Page 63: Arm Assembly
ED900 Installation Instructions – Double egress door Chapter 17 17.7 Arm assembly Fig. 17.7.1 Arm assembly 17.8 Arm assembly with CPD lever 17.8.1 Arm with CPD lever assembly. Fig. 17.8.1 Slotted Fig. 17.8.2 M6 x 10 spring SHCS M6 x 10 SHCS... -
Page 64: Fasten Arm To Ed900 Operator
ED900 Installation Instructions – Double egress door Chapter 17 17.9 Fasten arm to ED900 operator 17.9.1 Mount drive arm to operator. Fig. 17.9.1 Mount drive arm to operator at 12 degrees WARNING 12˚ Use caution when working in proximity of door and pull arm!. - Page 65 ED900 Installation Instructions – Double egress door Chapter 17 Fig. 17.9.7 Fastening drive arm to pivot pin 17.9.2 Attach drive arm to pivot pin. 1. Open door as required to access pivot pin M8 socket head. 2. Use 6 mm T handle hex key to rotate pivot pin M8 socket head into drive arm and tighten.
-
Page 66: Measure Door Width, Reveal Depth
ED900 Installation Instructions – Double egress door Chapter 18 18 Measure door width, reveal depth 18.1 Door width parameter Tb 18.3 Tb parameter values 15.3.1 ED900 door width Parameter Reference Description paragraph, Door width measurement parameters Width Inches [mm]... -
Page 67: Reveal Depth Parameter Rd
ED900 Installation Instructions – Double egress door Chapter 18 18.3 Reveal depth parameter rd Fig. 18.3.1 Positive reveal Parameter Description Reference paragraph Positive reveal depth Reveal depth Mounting surface 18.3.1 Reveal depth parameter. 1. Reveal depth is set in increments of 10 mm Door (approximately 3/8"). -
Page 68: Operator Spring Tension
ED900 Installation Instructions – Double egress door Chapter 19 19 Operator spring tension 19.1 Set ED900 operator spring tension Fig. 19.1.1 Spring tension adjustment Spring tension adjustment 19.1.1 Spring tension setting revolutions. 19.1.2 Operator spring tension function. 1. Spring tension sets closing force on door. -
Page 69: Braking Circuit Plug
ED900 Installation Instructions – Double egress door Chapter 20 20 Braking circuit plug 20.1 Braking circuit plug position Fig. 20.1.1 Braking circuit socket and plug; plug factory installed in pull arm location Braking circuit plug Braking circuit 3 pin socket User interface 20.1.1 Braking circuit plug. -
Page 70: Power Fail Closing Speed
ED900 Installation Instructions – Double egress door Chapter 21 21 Power fail closing speed 21.1 Set power fail closing speed Fig. 21.1.1 Power fail closing speed potentiometer Power fail closing speed potentiometer Control board 21.1.1 Power fail closing speed Fig. -
Page 71: Parameters
ED900 Installation Instructions – Double egress door Chapter 22 22 Parameters 22.1 Parameters 22.1.1 Firmware version and updates. 22.1.4 Changing parameter values. • Operator firmware version is displayed during first 1. Set program switches to the CLOSE position commissioning. Reference Chapter 23. - Page 72 ED900 Installation Instructions – Double egress door Chapter 22 22.1.5 Configuration parameters TIPS AND RECOMMENDATIONS Parameter Description Driving parameter details can be found in Appendix A. Installation type Reveal depth Driving parameter Door width Description Input 4/4a and X3, 1G 24V locking...
- Page 73 CPD lever in a pull installation. • Example: ED900 with arm and CPD lever in pull installation with reveal of 30 mm (1 1/8"). Parameter rd setting = 0 (Reveal of 30 mm - 30 mm).
-
Page 74: Single Door First Commissioning
ED900 Installation Instructions – Double egress door Chapter 23 23 Single door first commissioning 23.1 First commissioning TIPS AND RECOMMENDATIONS Conditions prior to commissioning. Accessory wiring. 1. ED900 operators are installed. Termination of accessory wiring to the ED900 2. Standard push arms or arm with tracks are active door operator should be done only after installed. -
Page 75: Set Configuration Parameters
ED900 Installation Instructions – Double egress door Chapter 23 23.2 Set configuration parameters 23.2.1 Set parameter AS, installation type. Fig. 23.2.1 4 button keypad, 2 digit display Step 1 Press PRG greater than 3 s to enter Four button... -
Page 76: Set Parameter Ps, Program Switch Type
ED900 Installation Instructions – Double egress door Chapter 23 23.2.3 Set parameter Tb, door width. Fig. 23.2.2 4 button keypad, 2 digit display Step 13 Four button Press Scroll to Tb parameter. keypad < 3s Quit Two digit display >... -
Page 77: Perform Learning Cycle
ED900 Installation Instructions – Double egress door Chapter 23 23.4 Perform learning cycle CAUTION Step 1 Secure motion range of door. Learning cycle must be performed while Set program switch to CLOSE position, Step 2 motor is cold! Fig. 20.4.1. -
Page 78: Double Door First Commissioning
ED900 Installation Instructions – Double egress door Chapter 24 24 Double door first commissioning 24.1 Separately commission active and inactive doors 24.1.1 Commission active door first. 1. Refer to Chapter 23 and commission active door. 24.1.2 Commission inactive door. - Page 79 ED900 Installation Instructions – Double egress door Chapter 24 24.2.2 Active door, set parameters dL and Ad. Door type 1. Set active door program switches to CLOSE. 2. Set parameters dL (door type) and Ad (caster angle ) Parameter for active door.
-
Page 80: Connect Communication Cable Between Operators
ED900 Installation Instructions – Double egress door Chapter 24 24.2.3 Inactive door, set parameter dL. 1. Set program switch to CLOSE. 2. Set parameter dL (door type) for inactive door. Step 1 Step 5 Press and hold PRG > 3 s to enter... -
Page 81: Connect Accessory Wiring And Test
ED900 Installation Instructions – Double egress door Chapter 25 25 Connect accessory wiring and test 25.1 Install accessory wiring 25.1.1 Connect accessory wiring. Fig. 25.1.1 ED900 terminal connectors Connectors • All accessory wiring terminates at active Jumpers door ED900 terminals. -
Page 82: Set Track Bumper Stop
ED900 Installation Instructions – Double egress door Chapter 26 26 Set track bumper stop 26.1 Set track bumper stop position 26.1.1 Set bumper stop position. Fig. 26.1.1 Program switch OPEN position 1. Set program switch to OPEN. 2. Door moves to set opening angle. -
Page 83: Install Push Arm Door Stop
ED900 Installation Instructions – Double egress door Chapter 27 27 Install push arm door stop 27.1 Install push arm door stop (optional assembly) 27.1.1 Assemble bumper stop. Fig. 27.1.1 Door stop assembly 1. Attach bumper to bumper mounting Door stop assembly plate with 1/2"... -
Page 84: 28 Install Ed900 Cover, End Caps And 57 Spindle Caps
ED900 Installation Instructions – Double egress door Chapter 28 28 Install ED900 cover, end caps and spindle caps 28.1 Install cover and end caps 28.1.1 Install covers. Fig. 28.1.1 ED900 standard cover 1. Align cover with operator, press inward until cover snaps into place. -
Page 85: Install Spindle Caps
ED900 Installation Instructions – Double egress door Chapter 28 28.2 Install spindle caps Fig. 28.2.1 Spindle caps 28.2.1 Install spindle caps. 1. Install spindle caps on ED900 cover. Spindle cap Spindle cap Fig. 28.2.2 Spindle cap installation, ED900 cover top... -
Page 86: Full Width Cover Option - Install Cover And End Caps
ED900 Installation Instructions – Double egress door Chapter 28 28.3 Full width cover option – Install cover and end caps 28.3.1 Install end caps. Fig. 28.3.1 ED900 end caps 1. Install power switch and program switch end caps. TIPS AND RECOMMENDATIONS Active door and inactive door may be reversed from Fig. -
Page 87: 29 Install Door Signage
ED900 Installation Instructions – Double egress door Chapter 29 29 Install door signage 29.1 Install door signage 29.1.1 Install door signage based on type of door operation. Install applicable door signage as outlined in Chapter 10, ED900 door signage. -
Page 88: 30 Ansi/Bhma Standards
ED900 Installation Instructions – Double egress door Chapter 30 30 ANSI/BHMA standards 30.1 A156.19 Low energy power operated doors The following table references portions of content from ANSI/BHMA A156.19. Refer to the standard, available through ANSI or BHMA for additional information. Standard material reprinted with BHMA permission. - Page 89 ED900 Installation Instructions – Double egress door Chapter 30 30.1.2 A156.19, Table I: Minimum opening and closing times. "W" door weight, pounds [kg] "D" door width, inches [mm] 100 [45.4] 125 [56.7] 150 [68] 175 [79.4] 200 [90.7] 30 [762] 36 [914] 3.0 s...
-
Page 90: 31 Upgrade Cards
31 Upgrade cards 31.1 Upgrade cards 31.2 Container module 31.1.1 Upgrade card installation. 31.2.1 Container module dormakaba upgrade cards can be used to expand the range of • The first upgrade card installed becomes functions of ED900 operators. the container module. -
Page 91: Installing Upgrade Cards
ED900 Installation Instructions – Double egress door Chapter 31 31.3 Installing upgrade cards 31.3.1 Set program switch to CLOSE. 31.3.3 Installing additional upgrade cards. Upgrade card slot Next upgrade card Set program switch to Close. Container module 1. Remove container... -
Page 92: Safety Label, Low Energy Swing Doors
ED900 Installation Instructions – Double egress door Chapter 32 Fig. 32.1.2 Annual Fig. 32.1.1 Safety compliance information 32 Maintenance inspection label label ANNUAL COMPLIANCE SAFETY INFORMATION 32.1 Safety label, low energy swing INSPECTION Low Energy Swinging Doors INSPECT FOR AND... -
Page 93: Ed900 Environment And Cleaning
Areas around doors and door swing radius must be kept clear of all obstacles. 32.2.3 Cleaning WARNING Cleaning of ED900 cover surfaces should be done with program switches in Close position! ED900 cover can be cleaned with a damp cloth and AUTOMATIC AUTOMATIC CAUTION CAUTION DOOR DOOR commercial cleaning agents. -
Page 94: Pull Arm Maintenance
ED900 Installation Instructions – Double egress door Chapter 32 32.4 Pull arm maintenance Fig. 32.4.1 Arm and track assembly Fig. 32.4.5 Program switch 32.4.1 Track mounting screws. 1. Set program switch to CLOSE. 2. Remove track end caps 3. Check tightness of track mounting screws. -
Page 95: Arm Fasteners - Torque Requirements
ED900 Installation Instructions – Double egress door Chapter 32 32.5 Arm fasteners – torque requirements 32.5.1 Check drive arm M8 SHCS torque. Fig. 32.5.1 Arm M8 SHCS cap 1. Set program switch to CLOSE. 2. Remove cap over M8 SHCS. -
Page 96: Push Arm Maintenance
ED900 Installation Instructions – Double egress door Chapter 32 32.6 Push arm maintenance Fig. 32.6.1 Push arm assembly 32.6.1 Push arm maintenance. WARNING Set program switch to CLOSE before performing maintenance! 1. Adjustment arm. • Check for wear or damage. -
Page 97: Ed900 Brake Maintenance
ED900 Installation Instructions – Double egress door Chapter 32 32.7 ED900 brake maintenance 32.7.1 Adjustment of air gap: Fig. 32.7.1 ED900 operator brake to brake disc (Fig. 32.7.2). TIPS AND RECOMMENDATIONS Reference drawing: 254197-01-50 WARNING Brake assembly Set program switch to CLOSE Fig. - Page 98 ED900 Installation Instructions – Double egress door Chapter 32 32.7.2 Torque setting of M3 x 5 SHCS. Fig. 32.7.5 M3 x 5 SHCS • 5.3 in-lb + 0.9 in-lb [0.6 Nm +0.1 Nm] Brake assembly Brake disc assembly M3 x 5 SHCS Fig.
-
Page 99: Appendix A - Driving Parameters - Detail
2 - 27* See Chapter 30. °/s *ED900: maximum closing speed 27⁰/s in low energy mode. Hold open time, automatic mode 1. Hold open time starts once all internal, external, safety and push and go inputs have been opened or dropped, and door is in an open position. - Page 100 ED900 Installation Instructions – Double egress door Appendix A A.1.1 Driving parameters detail. Value Factory Parameter Units Description range setting Safety sensor test Safety sensor parameter ST must be set to sensors used and if they are active-high or active-low. See E 04 safety sensor test error, Appendix B.
- Page 101 .45- 3.4 1.35 See Chapter 30. 4. ED900 low energy operator: static force range is reduced. Static force in closing direction 1. Static force in closing direction (basic parameter for wind load control). Static force on door closing edge can be changed using this parameter.
- Page 102 ED900 Installation Instructions – Double egress door Appendix A A.1.1 Driving parameters detail. Value Factory Parameter Units Description range setting Motor driven latching action angle Door opening angle at which motor driven latching action EP is activated. • Starting angle of the latching angle adjustable from 10°.
- Page 103 1. Status relay activated when door is opened further than opening angle parameter OA, set during learning cycle. 2. Parameter OA value can only be changed using dormakaba handheld or by performing another learning cycle. Locking device output configuration;...
- Page 104 Service interval is reset to 12 months. • Yellow LED not illuminated. 0 - 1 2. Parameter is then automatically reset to "0". 3. Values other than default values must be set using dormakaba USA, Inc. handheld: • Maintenance interval •...
- Page 105 ED900 Installation Instructions – Double egress door Appendix A A.1.1 Driving parameters detail. Value Factory Parameter Units Description range setting Door closer mode 1. Automatic mode. This mode is applicable whenever door is mainly opened automatically and where motion detectors are installed.
- Page 106 ED900 Installation Instructions – Double egress door Appendix A A.1.1 Driving parameters detail. Value Factory Parameter Units Description range setting Not used. Upgrade card professional, impulse relay 1. Once upgrade card installed, parameter value will automatically change to 1.
- Page 107 ED900 Installation Instructions – Double egress door Appendix A A.1.1 Driving parameters detail. Value Factory Parameter Units Description range setting Backcheck when door opened manually 1. Angle after which door is braked when manually opened. 2. Back check level is automatically optimized during manual door opening cycles. This...
-
Page 108: Appendix B - Troubleshooting
ED900 Installation Instructions – Double egress door Appendix B Appendix B – Troubleshooting Information and error codes Fig. B.1.1 User interface B.1.1 Overview 4 button keypad Operator monitors internal circuits and external safety 2 digit display circuits managed by the operator. -
Page 109: Red Led Status Codes
ED900 Installation Instructions – Double egress door Appendix B B.1.7 Error message memory. 1. There are ten error message memory locations; E 0 through E 9. 2. The latest error message is always stored in error memory location E 0: •... -
Page 110: Troubleshooting Chart, "Ln" Codes
3. If ln 08 still present, check activators or system wiring. Upgrade card error 1. Installed upgrade card cannot be removed from ED900. • Installed upgrade card has 2. If more than one upgrade card is installed, the first card installed becomes been removed. -
Page 111: Troubleshooting Chart, "E" Codes
ED900 Installation Instructions – Double egress door Appendix B B.3.1 Troubleshooting chart, information messages. Display Description Troubleshooting information messages Communication error, double Reference ED900 double door installation manual. door system 1. Check communication cable connection at the two operators. - Page 112 ED900 Installation Instructions – Double egress door Appendix B B.4.1 Troubleshooting chart, "E" codes. Display Red LED • Description Troubleshooting error codes Overcurrent detection 1. Motor is consuming too much power, check for any external • Motor is consuming more Flashing causes.
-
Page 113: Appendix C - Dormakaba Handheld
ED900 Installation Instructions – Double egress door Appendix C Appendix C – dormakaba handheld dormakaba handheld terminal C.1.2 Handheld key functions. 1. OFF ON, switches Handheld on or off. Fig. C.1.1 dormakaba handheld 2. Function keys F1 - F3, trigger functions shown in bottom line of display (e.g., "RPT"... -
Page 114: Dormakaba Handheld; Configuration Parameters
ED900 Installation Instructions – Double egress door Appendix C NOTICE Parameters and detail may change depending on firmware version. dormakaba handheld; configuration parameters "#" refers to reference numbers in Parameter list, Chapter 22. C.2.1 Configuration parameters. Parameter and Parameter and... -
Page 115: Dormakaba Handheld; Driving Parameters
ED900 Installation Instructions – Double egress door Appendix C C.2.1 Configuration parameters. Parameter and Parameter and Description / Selections Description / Selections default default Manual mode on. NO contact; night- Manual bank function mode Normal* Manual mode disabled. triggered while contact closed. -
Page 116: Dormakaba Handheld; Special Functions
ED900 Installation Instructions – Double egress door Appendix C dormakaba handheld; special functions (Upgrade cards) ED900 C.4.1 Special functions (upgrade cards). Parameter and Parameter and Description / Selection Description / Selection default default • locked: not available locked Upgrade •... -
Page 117: Dormakaba Handheld; Diagnostics
ED900 Installation Instructions – Double egress door Appendix C dormakaba handheld; diagnostics C.5.1 Diagnostics Parameter name Description Setting Parameter name Description Setting FW vers BM Displays firmware (FW) x.x y y (e.g.,0190 Wartungs x x y y (month, version of basic module v 1.9.0) - Page 118 ED900 Installation Instructions – Double egress door Appendix C C.5.1 Diagnostics Parameter name Description Setting Parameter name Description Setting Clamp X3, 1G and 3, 0, low active Klemme 1G 24 V out Setting code (function on) 1, function off...
-
Page 119: New Dormakaba Handheld; Language
ED900 Installation Instructions – Double egress door Appendix C New dormakaba handheld; language change to English C.6.1 New dormakaba handheld; language 5. Press to select Sprachen (Fig. 26.6.6). ENTER Fig. C.6.1 change. Fig. C.6.7 Sprachauswahl (Language dormakaba handheld If German language is displayed on screen... -
Page 120: Dormakaba Handheld; Firmware Update
ED900 Installation Instructions – Double egress door Appendix C dormakaba handheld; firmware update C.7.1 Firmware update procedure CAUTION For all firmware changes, set program switch to CLOSE and allow door to close completely before any updates are made! Fig. C.7.1... - Page 121 ED900 Installation Instructions – Double egress door Appendix C Fig. C.7.5 Select Firmware upload Fig. C.7.4 Select UpDoLd ENTER button F2 button Up/down arrows Connected with: DOWN/UPLOAD ED900_US Download data FW-Version: 01.30 Upload file Revision: Firmware upload Door Again UpDoLd Door 4.
-
Page 122: Appendix D - Wiring Diagrams
ED900 Installation Instructions – Double egress door Appendix D Appendix D - Wiring diagrams D1.1 Key Switch Panel with RJ45 connector Fig. D1.1.1 Key switch panel Fig. D1.1.2 Key switch panel wiring diagram, active door 3 B A 1... -
Page 123: D2.1 Key Switch Panel
ED900 Installation Instructions – Double egress door Appendix D D2.1 Key Switch Panel Fig. D2.1.1 Key switch panel Fig. D2.1.2 Key switch panel wiring diagram, active door 3 B A 1 57 57a 15 17 13 3 Swing Approach... - Page 124 USA, Inc. 1 Dorma Drive, Drawer AC Reamstown, PA 17567 T: 717-336-3881 www.dormakaba.com F: 717-336-2106...
Need help?
Do you have a question about the ED900 and is the answer not in the manual?
Questions and answers