
Related Manuals for Whirlpool duet GGW9200L Series


Summary of Contents for Whirlpool duet GGW9200L Series
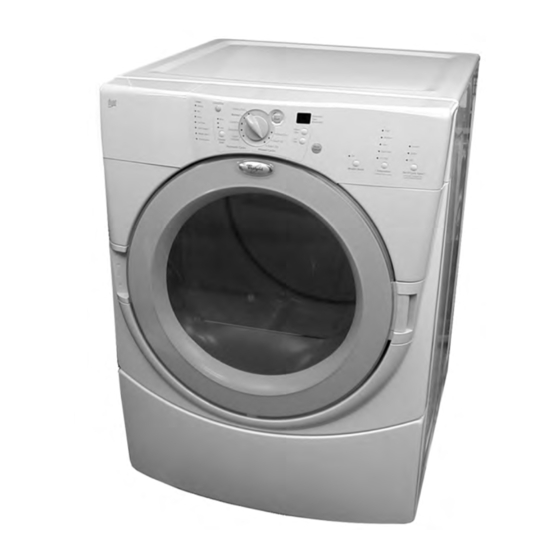
- Page 1 CONSUMER SERVICES TECHNICAL L-69 EDUCATION GROUP PRESENTS ™ GAS AND ELECTRIC DRYERS Model Numbers: GGW9200L & GEW9200L JOB AID Part No. 8178071...
- Page 2 GOALS AND OBJECTIVES The goal of this Job Aid is to provide detailed information that will enable the service technician to properly diagnose malfunctions and repair the Whirlpool Gas and Electric Dryers. The objectives of this Job Aid are to: •...
-
Page 3: Table Of Contents
TABLE OF CONTENTS Page GENERAL............................. 1-1 Important Safety Information ......................1-1 Model & Serial Number Designations ..................... 1-2 Model & Serial Number Label And Tech Sheet Locations ............. 1-3 Specifications ..........................1-4 Warranty ............................1-5 INSTALLATION INFORMATION ......................2-1 Electrical Requirements For Electric Dryers ................... 2-1 Electrical Connections For Electric Dryers .................. - Page 4 — NOTES — - iv -...
-
Page 5: General
GENERAL IMPORTANT SAFETY INFORMATION Your safety and the safety of others is very important. Important safety messages have been pro- ELECTROSTATIC DISCHARGE vided in this Job Aid. Always read and obey all (ESD) SENSITIVE ELECTRONICS safety messages. ESD problems are present everywhere. ESD This is the safety alert symbol. -
Page 6: Model & Serial Number Designations
MODEL & SERIAL NUMBER DESIGNATIONS MODEL NUMBER (DRYER) MODEL NUMBER 9200 PRODUCT GROUP G = Domestic Laundry Gold PRODUCT IDENTIFICATION E = Electric Dryer G = Gas Dryer FEATURE CODE W = High Efficiency FEATURE LEVEL YEAR OF INTRODUCTION L = 2002 COLOR CODE W = White / Grey Q = White / Blue... -
Page 7: Model & Serial Number Label And Tech Sheet Locations
MODEL & SERIAL NUMBER LABEL AND TECH SHEET LOCATIONS The Model/Serial Number label and Tech Sheet locations are shown below. Tech Sheet Location (Located Under Top Cover) Model & Serial Number Label Location... -
Page 8: Specifications
SPECIFICATIONS BRAND Whirlpool Whirlpool Whirlpool Whirlpool MODEL NUMBER GEW9200LW GEW9200LQ GGW9200LW GGW9200LQ FUEL Electric Electric CABINET COLOR White/Grey White/Blue White/Grey White/Blue INSTALLATION OPTIONS FREESTANDING PEDESTAL STACKABLE CAPACITY (cu ft) CAPACITY NOMENCLATURE SUPER CAPACITY SUPER CAPACITY SUPER CAPACITY SUPER CAPACITY AUTO CYCLE TERMINATION... -
Page 9: Warranty
LIMITED FIVE YEAR WARRANTY ON PORCELAIN TOP For five years from the date of purchase, Whirlpool will replace parts for the po top should it be perforated by rust or chippage. PEDESTAL OPTION WARRANTY... - Page 10 — NOTES —...
-
Page 11: Installation Information
INSTALLATION INFORMATION ELECTRICAL REQUIREMENTS FOR ELECTRIC DRYERS GROUNDING INSTRUCTIONS It is your responsibility: • To contact a qualified electrical installer. WARNING • To be sure that the electrical connections are adequate and in conformance with the Na- tional Electrical Code, ANSI/NFPA 70-latest ELECTRICAL SHOCK HAZARD edition and all local codes and ordinances. -
Page 12: Electrical Connection
ELECTRICAL CONNECTION If the outlet looks like this: If using a power supply cord, the cord must • U.L.-listed or CSA certified • 120/240 volt minimum • 30 amp • Type SRD or SRDT • At least 4 ft (122 cm) long The wires that connect to the dryer must end in ring terminals, or spade terminals with up- 3-Wire Receptacle (10-30R) -
Page 13: Electrical Connections For Electric Dryers
ELECTRICAL CONNECTIONS FOR ELECTRIC DRYERS Connect the ground wire (green or bare) of WARNING the power supply cord to the external ground conductor screw. ELECTRICAL SHOCK HAZARD Connect the neutral wire (white or center wire) of the power supply cord to the Disconnect power before making electrical center screw of the terminal block. - Page 14 4-WIRE DIRECT CONNECTION Connect the ground wire (green or bare) of the power supply cable to the external Strip 5″ (12.7cm) of outer covering from ground conductor screw. the end of the cable. Cut 1-1/2″ (3.8 cm) from the 3 insulated wires.
- Page 15 3-WIRE POWER SUPPLY Connect the ends of the remaining power supply wires to the left and right terminal CORD CONNECTION block screws. IMPORTANT: Use this procedure only where local codes permit connecting a cabinet-ground conductor to the neutral wire. Remove the terminal block cover hold- down screw and open the cover at the back of the dryer.
- Page 16 3-WIRE DIRECT CONNECTION Connect the neutral wire (white or center wire) of the power supply cable, to the IMPORTANT: Use this procedure only where center terminal block screw. local codes permit connecting a cabinet-ground conductor to the neutral wire. Strip 3-1/2″ (8.9 cm) of outer covering from the end of the cable.
- Page 17 OPTIONAL 3-WIRE CONNECTION Check the wire connections and make sure that they are all tight. IMPORTANT: Use this procedure for connect- Tighten the strain relief clamp screws. ing a direct wire or power supply cord (where local codes permit) to a cabinet-ground con- Insert the tab of the terminal block cover ductor to the neutral wire.
-
Page 18: Electrical Requirements For Gas Dryers
ELECTRICAL REQUIREMENTS FOR GAS DRYERS GROUNDING INSTRUCTIONS WARNING For A Grounded Power Cord Connected Dryer ELECTRICAL SHOCK HAZARD This dryer must be grounded. In the event of Check with a qualified electrician if you malfunction or breakdown, grounding will re- are in doubt as to whether the appliance duce the risk of electric shock by providing a is properly grounded. -
Page 19: Gas Supply Requirements
13″ ″ ″ ″ ″ (33 cm) water column. contact your local Whirlpool Service Center. Examples of a qualified person include: L.P. Gas Conversion: Licensed heating personnel. -
Page 20: Optional Exhaust Information
OPTIONAL EXHAUST INFORMATION WARNING Number Of Type Of Box Or Angled 90° ° ° ° Turns Vent Louvered Hoods Or Elbows Hoods Rigid metal 64 ft (20 m) 58 ft (17.7 m) Flexible metal 36 ft (11 m) 28 ft (8.5 m) Rigid metal 54 ft (16.5 m) 48 ft (14.6 m) Flexible metal... -
Page 21: Reversing The Door Swing
REVERSING THE DOOR SWING NOTE: Keep the original handle filler and hinge Door Reversal Kit: cover in case you decide to return the door to its original position. A new handle filler and Description hinge cover are provided in the door reversing Handle Filler kit that will be installed in a later step. - Page 22 Remove the two screws from the door REVERSE THE HINGE handle and remove the handle by pulling & HINGE BRACKET straight out on it. Set the handle aside and Place the inner door, screw head side keep it in case you ever want to restore the facing up, on the padded work surface.
- Page 23 REINSTALL THE DOOR Install a screw halfway into the second hole from the top. If necessary, clean both sides of the door glass before reassembling it. Place the inner door assembly into the outer door assembly and align the hinge in the opening on the side.
-
Page 24: Installing The Optional Pedestal
INSTALLING THE OPTIONAL PEDESTAL Partially install the two lower #12 x 5/8″ WARNING (1.6 cm) hex-head sheet metal screws, leaving a space of about 3/8″ (1 cm) be- tween the screw head and the bottom of EXCESSIVE WEIGHT HAZARD the dryer. Use two or more people to move and install pedestal. - Page 25 13. Place a spirit level on the top of the pedes- 15. Pull both drawer slides out and reassemble tal. Use a 1/4″ (6.4 mm) hex-head ratchet the drawer to the drawer slides with the or open-end wrench, and adjust the four two phillips screws.
-
Page 26: Optional Stack Kit (#8519492)
OPTIONAL STACK KIT (#8519492) An optional stack kit will be made available to The kit parts will be attached to the washer so mount the dryer on top of the matching Duet that the dryer can be mounted on top. Use the washer. -
Page 27: Product Operation
PRODUCT OPERATION Control On Status Heavy Duty Sensing Estimated 88:88 Time Hold To Normal Start Remaining More Damp High Casual More Cool Down Time Medium Less Delicate Timed Dry Cycle Complete Less Louder Super Time Touch Up Wrinkle Shield Delicate Dryness Pause Extra Low... - Page 28 • Press the Wrinkle Shield feature button, if During a Manual Cycle, you can change the this option is desired. settings for Time, Temperature, the Wrinkle Shield feature, and the End of Cycle Signal • Press the End Of Cycle Signal button to set functions.
- Page 29 STATUS LIGHTS Damp The Damp light indicates that the load has The Status indicator lights show the progress reached a damp dry level. of the dryer. Each of the lights indicate as follows: NOTE: The Damp light is not used with Manual Status Cycles.
-
Page 30: Cycle Descriptions
CYCLE DESCRIPTIONS Heavy Duty Hold To Normal Start Heavy Duty Hold To Casual Normal Start Casual Delicate Timed Dry Super Touch Up Delicate Timed Dry Delicate Quick Dry Super Touch Up Automatic Cycles Manual Cycles Delicate Quick Dry Manual Cycles Automatic Cycles Manual Cycles The Manual Cycles allow the user to select a... -
Page 31: End Of Cycle Signal
• For the Casual Cycle, the Wrinkle Shield End of Cycle Signal feature is preset to On. The other Automatic The End of Cycle Signal produces an audible Cycles will retain the Wrinkle Shield feature sound when the drying cycle is finished. setting. - Page 32 — NOTES —...
-
Page 33: Component Access
COMPONENT ACCESS This section instructs you on how to service each component inside the Gas and Electric Dryers. The components and their locations are shown below. WARNING FIRE HAZARD Shut off gas supply line valve before ELECTRICAL SHOCK HAZARD servicing. Disconnect power before servicing. -
Page 34: Removing The Machine Control Electronics Board
REMOVING THE MACHINE CONTROL ELECTRONICS BOARD NOTE: Sharp edges may be present. Remove the three screws from the ma- chine control electronics board bracket Turn off the gas to the dryer and discon- and pull the bracket away from the side of nect the electrical power. - Page 35 Squeeze the two board supports and re- move the electronics board from the bracket. Squeeze Ends Of Supports To Remove Board...
-
Page 36: Removing The Console & The Touchpad Subassembly
REMOVING THE CONSOLE & THE TOUCHPAD SUBASSEMBLY NOTE: Sharp edges may be present. Open the door and pull out on the bottom of the console to release the locking tabs Turn off the gas to the dryer and discon- from the door panel. nect the electrical power. - Page 37 Remove the four hex-head screws from 10. Remove the selector knob. the console bracket and remove the 11. Remove the touchpad subassembly from bracket. the console by unsnapping the six catches. Console Bracket Screws Use your thumb or a screwdriver. Console Bracket Touchpad Subassembly Console...
-
Page 38: Removing The Door Switch
REMOVING THE DOOR SWITCH NOTE: Sharp edges may be present. Turn off the gas to the dryer and discon- nect the electrical power. Screwdriver Removal Pull the dryer away from the wall and remove the top cover (see steps 3 and 4 Wire Holder on page 4-2 for the procedure). -
Page 39: Removing The Thermal Fuse, Thermistor, Drive Motor, & Belt Switch
REMOVING THE THERMAL FUSE, THERMISTOR, DRIVE MOTOR, & BELT SWITCH Remove the hex-head screw from the lint NOTE: Sharp edges may be present. duct bracket and remove the bracket. Turn off the gas to the dryer and discon- Lint Duct Screws nect the electrical power. - Page 40 To remove the drive motor: e) Remove the three hex-head screws from the blower housing and remove it. a) Remove the wires from the thermal fuse and thermistor terminals (see the photo at the bottom of the previous page). b) Remove the two hex-head screws from the blower cover (see the previous page) and remove the cover.
- Page 41 g) Lift the top locking tab of the motor To remove the belt switch: harness plug and pull the top pins away a) If not already done, remove the drive from the motor connector, then release motor (see step 7 on page 4-8). the bottom tab, and remove the plug.
-
Page 42: Removing The Heater, The High-Limit Thermostat, & Thermal Cutoff
REMOVING THE HEATER, THE HIGH-LIMIT THERMOSTAT, & THERMAL CUTOFF To remove the heater: NOTE: Sharp edges may be present. a) Remove the two wires from the termi- Turn off the gas to the dryer and discon- nal block (see bottom photo). nect the electrical power. -
Page 43: Removing The Belt, Drum, & Rollers
REMOVING THE BELT, DRUM, & ROLLERS NOTE: Sharp edges may be present. Disconnect the 3-wire door switch con- nector from the machine control electron- Turn off the gas to the dryer and discon- ics board connector. nect the electrical power. Pull the dryer away from the wall and remove the top cover (see steps 3 and 4 on page 4-2 for the procedure). - Page 44 10. To remove the belt and drum: c) Lift the drum and remove it from the unit. a) Grasp the sides, lift, and pull the front panel forward so that the top screws are free of the keyhole slots. Lower the panel so that the drum sits on the com- ponents inside the cabinet, and slide the front panel and rollers away from...
- Page 45 DRUM INSTALLATION NOTE: Be sure to po- 11. To remove a roller: sition the drum with the clip toward the front a) Pry the sides of the triangular ring out when you reinstall it. of the groove in the roller support with a small screwdriver.
-
Page 46: Removing The Drum Light Socket
REMOVING THE DRUM LIGHT SOCKET NOTE: Sharp edges may be present. Disconnect the wire connectors from the light socket terminals. Turn off the gas to the dryer and discon- nect the electrical power. Open the dryer door. Remove the screw from the drum light lens and remove the lens. -
Page 47: Removing The Moisture Sensor
REMOVING THE MOISTURE SENSOR Remove the three inside screws from the NOTE: Sharp edges may be present. outlet grille. Turn off the gas to the dryer and discon- Outlet Grille nect the electrical power. Screw Screw Open the dryer door and remove the lint filter screen. - Page 48 — NOTES — 4-16...
-
Page 49: Component Testing
COMPONENT TESTING WARNING ELECTRICAL SHOCK HAZARD Disconnect power before servicing. Replace all panels before operating. Failure to do so could result in death or electrical shock. Before servicing, check the following: • Check for wire connectors that are not pressed tightly onto their terminals. •... -
Page 50: Drive Motor
DRIVE MOTOR 5. Touch one ohmmeter test lead to the blue motor wire connector, and the other test Refer to page 4-7 for the procedure for servic- lead to connector pin 3 (violet wire). The ing the drive motor. ohmmeter should indicate between 2.4 and 1. -
Page 51: Heater
HEATER Refer to page 4-10 for the procedure for ser- vicing the heater. 1. Disconnect the electrical power to the dryer. 2. Set the ohmmeter to the R X 1 scale. 3. Disconnect one of the wire connectors from the heater terminal block. 4. -
Page 52: Thermal Fuse
THERMAL FUSE Refer to page 4-7 for the procedure for servic- ing the thermal fuse. Electric Dryers: The thermal fuse is wired in series with the drive motor. If the thermal fuse Thermal Fuse opens, 91°C (196°F), power to the motor is 91°C (196°F) turned off. -
Page 53: Thermistor
THERMISTOR 8. Hold a glass bulb thermometer capable of reading from 32°C to 82°C (90° to 180°F) Refer to page 4-7 for the procedure for servic- in the center of the exhaust outlet. Mea- ing the thermistor. sure the exhaust temperatures with the The thermistor monitors the exhaust temper- heater on and off. -
Page 54: Thermal Cutoff (Electric Dryers Only)
THERMAL CUTOFF (ELECTRIC DRYERS ONLY) Refer to page 4-10 for the procedure for ser- vicing the thermal cutoff. Thermal Cutoff The thermal cutoff is a non-resettable device. The cutoff temperature is 178°C (352°F). If the dryer does not heat and there is 240 VAC to the dryer, perform the following test. -
Page 55: Gas Valve (Gas Dryers Only)
GAS VALVE (GAS DRYERS ONLY) 1. Disconnect the electrical power to the dryer. 2. Set the ohmmeter to the R X 1 scale. 3. Disconnect the wires from the gas valve terminals. 4. Touch the ohmmeter test leads to the ter- minal numbers shown in the chart. -
Page 56: Moisture Sensor
MOISTURE SENSOR CONSOLE PUSHBUTTONS & LEDS Refer to page 4-15 for the procedure for ser- Refer to page 4-4 for the procedure for servic- vicing the moisture sensor. ing the console. Perform this test if the dryer shuts off too soon Refer to the Diagnostic Tests on page 6-1, and when set to an automatic cycle. - Page 57 A PARTICULAR GROUP OF LEDS NO DRYER FUNCTION IS ACTIVATED DOES NOT LIGHT WHEN A PARTICULAR PUSHBUTTON IS PRESSED A group or combination of LEDs share a com- mon electronic connection. If this connection If the associated LEDs do light up, the machine is open, all of the LEDs in the group will be control electronics board may have failed.
-
Page 58: Door Switch
DOOR SWITCH RESISTANCE TESTS Refer to page 4-6 for the procedure for servic- 1. Disconnect the electrical power to the ing the door switch. dryer. 1. Set the dryer to the “Diagnostic Test Mode” 2. Close the dryer door. (refer to the procedure on page 6-1). 3. -
Page 59: Diagnosis And Troubleshooting
DIAGNOSIS AND TROUBLESHOOTING DIAGNOSIS DISPLAY FAULT/ERROR CODES EXPLANATION & RECOMMENDED DISPLAY DESCRIPTION PROCEDURE “PF” Flashes to indicate that a power failure occurred while the dryer was running. Power Failure Press START to continue the cycle, or press STOP/CANCEL to clear the display. “E1”... -
Page 60: Keypad Test
“g” for ing in the large spaces between the Manual gas models. The first number will be a 3 and Automatic cycle groups, only a beep (Whirlpool access). should be heard. Touch the Sensing keypad. Touch the More Time keypad. -
Page 61: Troubleshooting Guide
TROUBLESHOOTING GUIDE PROBLEM POSSIBLE CAUSE/TEST Check the 120 VAC electrical supply. Unit will not power up. Check the wiring harness connections. Check the control electronics. Be sure to hold the Start pushbutton down for Unit will not cycle when Start 3 seconds. - Page 62 — NOTES —...
-
Page 63: Wiring Diagrams
WIRING DIAGRAMS ELECTRIC DRYER GAS DRYER... - Page 64 — NOTES —...
- Page 65 — NOTES —...
- Page 66 — NOTES —...
-
Page 67: Product Specifications
PRODUCT SPECIFICATIONS WARRANTY INFORMATION SOURCES IN THE UNITED STATES: FOR PRODUCT SPECIFICATIONS AND WARRANTY INFORMATION CALL: FOR WHIRLPOOL PRODUCTS: 1-800-253-1301 FOR KITCHENAID PRODUCTS: 1-800-422-1230 FOR ROPER PRODUCTS: 1-800-447-6737 FOR TECHNICAL ASSISTANCE WHILE AT THE CUSTOMER’S HOME CALL: THE TECHNICAL ASSISTANCE LINE: 1-800-253-2870... - Page 68 CORPORATION...