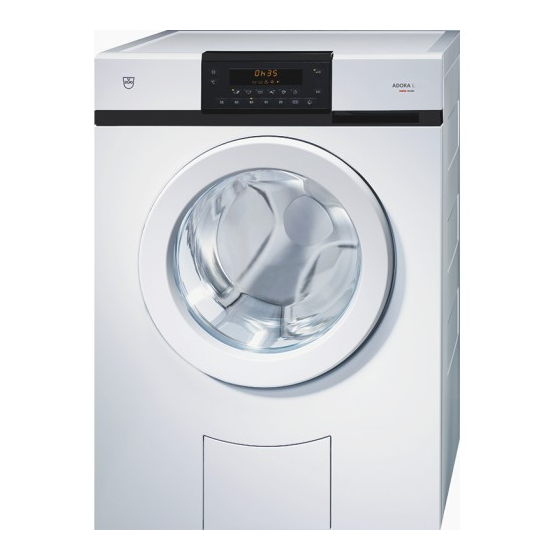
V-ZUG Adora L Installation Instructions Manual
Hide thumbs
Also See for Adora L:
- Operating instructions manual (84 pages) ,
- Operating instructions manual (36 pages) ,
- Installation instructions manual (7 pages)
Table of Contents
Advertisement
Quick Links
Installation instructions
«Front loader» washing machine
One-family household
The appliance should be installed by qualified personnel only.
Each step must be carried out and checked in full in the order specified.
Validity
These installation instructions apply to the models: L (11001), S (11002), SL (11003), SLQ WP (11004), SLQ (11006)
Identification plate
Open the drain tray at the front bottom of the appliance. For
details, see
«1. Opening the appliance door (without power)».
– Identification 1*
* Depending on the serial number (FN)
Applicable only to model SLQ WP (11004)
To avoid damaging the compressor of the heat pump aggregate, in the event that the appliance was tilted during transporta-
tion or installation it is not to be put into operation for two hours.
1*
1
J11001113-R05
22/03/2016
Advertisement
Table of Contents

Summary of Contents for V-ZUG Adora L
- Page 1 Installation instructions J11001113-R05 22/03/2016 «Front loader» washing machine One-family household The appliance should be installed by qualified personnel only. Each step must be carried out and checked in full in the order specified. Validity These installation instructions apply to the models: L (11001), S (11002), SL (11003), SLQ WP (11004), SLQ (11006) Identification plate Open the drain tray at the front bottom of the appliance.
-
Page 2: Installation
Installation instructions J11001113-R05 22/03/2016 «Front loader» washing machine One-family household Installation accessories supplied Installation set W4.1152 The installation set is located in the drum of the washing machine and can be taken out after opening the appliance door (see 1. Opening the appliance door). -
Page 3: Removing The Transportation Lock
Installation instructions J11001113-R05 22/03/2016 «Front loader» washing machine One-family household 2. Removing the transportation lock The transportation locks F on the rear side have to be removed before using the appliance for the first time. Remove the hexagon head screws E of the transportation locks F using a 10 mm ring or open- end wrench. - Page 4 Installation instructions J11001113-R05 22/03/2016 «Front loader» washing machine One-family household 3. Positioning the installation plate Use the installation plate to install the appliance. It fixes the appliance in position, and is for use with both free-standing appliances and appliances positioned in a niche. The installation plates for the washing machine and tumble dryer are the same.
- Page 5 Installation instructions J11001113-R05 22/03/2016 «Front loader» washing machine One-family household Positioning in a niche Centre the installation plate in the niche. Cut-out for lateral connections, to the left or right side, min. 100 × 100 mm Niche height min. 860 mm Variant Positioning Niche depth A...
- Page 6 Installation instructions J11001113-R05 22/03/2016 «Front loader» washing machine One-family household 4. Levelling To ensure fault-free operation, the appliance must stand level with all 4 feet firmly on the ground and not wobble. Setting height Tools: Open-end wrench SW 10 S and spirit level W Rear adjuster feet: Maximum height adjustment of 14 mm/1.5 mm per turn.
-
Page 7: Water Supply
Installation instructions J11001113-R05 22/03/2016 «Front loader» washing machine One-family household 5. Plumbing in Observe the regulations of the local water authorities. Any old water supply and drain hoses must always be replaced with new hoses. Water supply • Only cold water G¾", possible pressure range 0.1–0.6 MPa (1–6 bar). •... -
Page 8: Electrical Connections
Installation instructions J11001113-R05 22/03/2016 «Front loader» washing machine One-family household 6. Electrical connections Electrical connections Electrical connections must be carried out by qualified personnel in accordance with the guidelines and standards for low- voltage installations and the specifications of the local electricity supply companies. A plug-in appliance may only be connected to a socket outlet with earthing contact, installed according to specifications. -
Page 9: Initial Setup
Installation instructions J11001113-R05 22/03/2016 «Front loader» washing machine One-family household 7. Initial set-up Deliberately strong vibrations are produced during the stability check in order to test whether the appliance is firmly seated. Model L (11001) (stability check) Plug the appliance in at the mains or turn the wall switch on. –...


Need help?
Do you have a question about the Adora L and is the answer not in the manual?
Questions and answers