V-ZUG Adora L Operating Instructions Manual
Hide thumbs
Also See for Adora L:
- Operating instructions manual (36 pages) ,
- Installation instructions manual (7 pages) ,
- Installation instructions manual (9 pages)
Table of Contents
Advertisement
Advertisement
Table of Contents

Related Manuals for V-ZUG Adora L


Summary of Contents for V-ZUG Adora L
- Page 1 V-ZUG Ltd Washing machine Adora L Operating instructions...
- Page 2 The product family (model number) corresponds to the first alphanumerics on the identification plate. These operating instructions apply to: Model Type Product family Adora L WA-AL 11001 Variations depending on the model are noted in the text. © V-ZUG Ltd, CH-6301 Zug, 2014...
-
Page 3: Table Of Contents
Contents Safety precautions Symbols used ..................General safety precautions ..............Appliance-specific safety precautions ..........Instructions for use ................Disposal Using for the first time Where is the identification plate? ............13 Appliance description Appliance overview ................14 Appliance construction ................15 Operating and display elements ............ - Page 4 End of programme ................. 46 At the end of the wash day ..............47 Care and maintenance Cleaning the detergent dispenser drawer ......... 48 Cleaning the water inlet filter ..............49 Emergency draining ................50 Cleaning the foreign body trap ............51 Trouble-shooting What to do if …...
-
Page 5: Safety Precautions
Safety precautions Symbols used Denotes important safety precautions. Failure to observe said precautions can result in injury or in damage to the appliance or fittings! Information and precautions that should be observed. Information on disposal Information about the operating instructions Indicates step-by-step instructions. -
Page 6: General Safety Precautions
1 Safety precautions General safety precautions • Read the operating instructions before using the appliance for the first time! • This appliance can be used by children aged 8 and above and by persons with reduced physical, sensory or mental capabilities, or lack of experience and/or knowledge, provided they are supervised or have been instructed on the safe use of the appliance... - Page 7 1 Safety precautions • If an appliance is not equipped with a mains cable and a plug or other means for discon- necting from the mains with a contact opening on each pole complying with the conditions of overvoltage category III for full isolation, an isolating device must be incorporated into the permanently installed electrical installation in accordance with the installation regulations.
-
Page 8: Appliance-Specific Safety Precautions
1 Safety precautions Appliance-specific safety precautions • Children under 3 years of age must be kept away unless constantly supervised. • The appliance has a maximum dry load capacity of 8 kg. -
Page 9: Instructions For Use
1 Safety precautions Instructions for use Before using for the first time • The appliance must be installed and connected to the electricity supply in accordance with the separate installation instructions. Have a qualified fitter/ electrician carry out the necessary work. •... - Page 10 1 Safety precautions Caution: Burns hazard! • Textiles that have been cleaned, treated or soaked with flammable chemi- cals, detergents or solvents such as benzene, alcohol, stain remover, oil, paint, wax, etc. are not to be washed in the appliance. Fire or explosion hazard! Wash materials containing such substances first by hand with water or allow the solvent to evaporate completely.
- Page 11 1 Safety precautions How to avoid damaging the appliance • Close the appliance door carefully. • Before closing the appliance door and starting a programme, ensure that there are no foreign objects or pets in the washing drum, detergent dispenser drawer or around the foreign body trap. Foreign objects such as coins, nails, paper clips, etc.
-
Page 12: Disposal
Disposal Packaging • All packaging materials (cardboard, plastic film (PE) and polystyrene (EPS)) are marked and should, if possible, be collected for recycling and disposed of in an environmentally friendly way. Disconnection • Disconnect the appliance from the mains. With a fixed appliance, this is to be carried out by a qualified electrician! Safety •... -
Page 13: Using For The First Time
Using for the first time • The appliance must be installed and connected to the electricity supply in accordance with the separate installation instructions. Have a qualified fitter/ electrician carry out the necessary work. The appliance was tested with water before being shipped. There may therefore still be traces of water left in the appliance. -
Page 14: Appliance Description
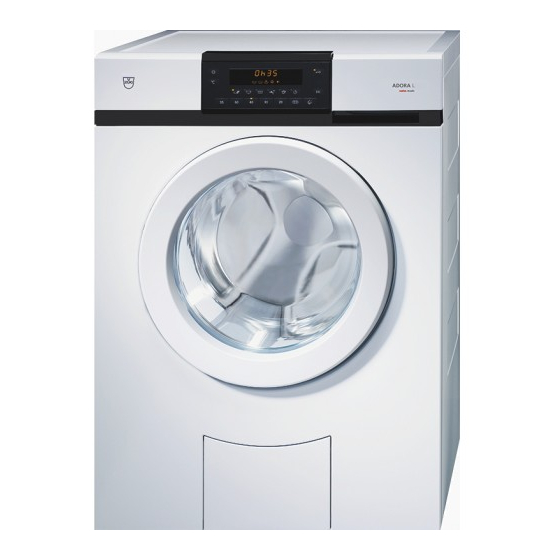
Appliance description Appliance overview • Load capacity: 8 kg dry washing • 7 main programmes • 2 standard programmes • Additional programmes – Sprint – Intensive programme – Easy care – Soaking – Pre-wash – Soap wash – AquaPlus including skin –... -
Page 15: Appliance Construction
4 Appliance description Appliance construction The appliance door can be set to open to the left or to the right. Our Customer Services can make the necessary adjustments to the appli- ance. 1. Operating and display elements (pivoting operating panel) 2. -
Page 16: Operating And Display Elements
4 Appliance description Operating and display elements Main programmes °C * Depending on the serial number (FN) Whites 95 °C Coloureds 20 °C Coloureds 60 °C Woollens 30 °C Coloureds 40 °C Hand wash 20 °C Coloureds 30 °C Standard programmes •... - Page 17 4 Appliance description Additional functions Spin speed Delayed start Temperature setting Fast forward / End of °C programme Pause / Door opener* or Door opener* * Depending on the serial number (FN) Programme progress display The programme progress display shows the stage at which the programme is Pre-wash / Main wash Rinsing Final rinse / Conditioning...
- Page 18 4 Appliance description Indicator lights Indicator light flashes Programme or function can be selected. Indicator light is illuminated Programme or function is active. Indicator light is dark Programme or function is switched off.
-
Page 19: Programme Overview
Programme overview Main wash programmes To select the right programme, follow the fabric care symbols on the labels of the wash items, e.g. Whites 95 °C 1–8 kg White cottons, linens with the fabric care symbol e.g. bed and table linen, towels, white or colour-fast underwear. Coloureds 60 °C 1–8 kg Coloured cottons with the... -
Page 20: Standard Programmes
5 Programme overview Coloureds 20 °C 1–8 kg Energy-saving programme for lightly soiled textiles with fabric care symbols Woollens 30 °C 1–2 kg Gentle wash for woollens and other delicates. Only for woollens with a felt-free finish and labelled as «machine washable». Hand wash 20 °C 1–2 kg Very gentle wash for items labelled with the... -
Page 21: Additional Programmes
5 Programme overview Additional programmes Sprint Short programme for lightly soiled washing • Programme duration for 2.5 kg wash load : 28 minutes : 32 minutes : 35 minutes : 45 minutes • 2 instead of 3 rinsing cycles Add a small quantity of washing detergent. A large washing load or too much washing detergent can significantly lengthen the programme duration. - Page 22 5 Programme overview AquaPlus There are 5 different settings for rinsing intensity. «Standard» • Normal water level «More water» • The water level is increased by 1–3 cm during the main wash and each rinse cycle. «+1 rinse» • An extra rinse cycle is added to each programme. «More water +1 rinse»...
-
Page 23: Separate Rinsing / Separate Spinning
5 Programme overview Soaking An additional soaking cycle is carried out before the main wash. – Press the button to set the soaking time (0.5–6 hours). Separate rinsing / Separate spinning It is possible to skip parts of the programme selected. Select main programme according to fabric care labels. -
Page 24: Additional Functions
5 Programme overview Additional functions Function/Symbol Uses Temperature setting The temperature can be changed in steps of 10 °C or 15 °C, allowing slightly soiled (not °C stained) textiles to be washed with a saving in energy. Cold wash: Not heated Spin speed The spin speed can be changed in steps of 200 rpm (1200, 1000, 800, 600, 400 rpm, stop after... -
Page 25: User Settings
User settings Adjusting user settings Providing no programme is running and no error message is displayed, the user settings can be changed with the appliance door open or closed. The procedure is generally the same for all settings. Changing user settings Hold the button depressed for 5 seconds. - Page 26 6 User settings Possible user settings The following diagram gives an overview of the possible user settings. Hold the button depressed for 5 seconds. Standard * More water AquaPlus +1 rinse More water +1 rinse Skin protection OFF * Soaking 1200 rpm * Spin speed 1500, 1400, 400, 600, 800...
-
Page 27: Aquaplus
6 User settings AquaPlus There are 5 different settings for rinsing intensity. «Standard» • Normal water level «More water» • The water level is increased by 1–3 cm during the main wash and each rinse cycle. «+1 rinse» • An extra rinse cycle is added to each programme. «More water +1 rinse»... -
Page 28: Soaking
6 User settings Press the button repeatedly until the digital display goes out. Soaking If «Soaking ON» has been programmed, after selecting the main programme press the button to set the desired soaking time «in intervals of 30 minutes». Possible settings: (30 minutes soaking time) to (6 hours soaking time). -
Page 29: Spin Speed
6 User settings Spin speed Each programme and combination of programmes is assigned an optimum spin speed at the factory. This can be adjusted to suit individual needs. Increasing the spin To protect delicates, can only be used with suitable speed: programmes (e.g. -
Page 30: Childproof Lock
6 User settings Press the button repeatedly until the required setting appears in the digital display, e.g.: for hygiene recommendation OFF. – The setting is taken over automatically and must not be confirmed. Press the button repeatedly until the digital display goes out. Childproof lock The childproof lock is to prevent children accidentally starting or stopping a programme. -
Page 31: Automatic Door Opener
6 User settings Automatic door opener If the automatic door opener is switched on, the appliance door opens auto- matically at the end of the programme. Otherwise it remains closed and can be opened by pressing the button. Switching the automatic door opener on/off Hold the button depressed for 5 seconds. -
Page 32: Washing
Washing Preparing the appliance Ensure that the foreign body trap 1 is sitting properly. Plug the appliance in at the mains or turn the wall switch on. – The appliance switches on. Turn on the water tap. Press the button to open the appliance door. -
Page 33: Loading The Appliance
7 Washing Loading the appliance Load dry washing (max. 8 kg). • If washing normally soiled whites and coloureds, fill the washing drum. • If washing heavily soiled whites and coloureds, fill the washing drum max. ¾ full. • If washing easy care cotton fabrics, white and coloured synthetic fabrics as well as mixed fabrics, fill the washing drum max. -
Page 34: Adding Washing Detergent
7 Washing Adding washing detergent Pull the detergent dispenser drawer out as far as it will go. Powder detergent If using powder detergent, flap 1 in compart- ment II must be removed. Pull flap 1 upwards and out of position 3 and insert in position 2. - Page 35 7 Washing Liquid detergent and a delayed start If a delayed start has been selected, after loading the washing the liquid deter- gent should be added to a dosing aid (e.g. ball). It is important that the liquid detergent does not spill onto the washing during the delayed start period, otherwise the washing could be damaged through a possible chemical reac- tion.
- Page 36 7 Washing Compartment Pre-wash detergent Add to compartment I Main detergent Add to compartment II Fabric conditioner (soft- Add to compartment ener) Bio wash Alkaline detergent Add to compartment II Bleach Add to compartment I Fabric conditioner (softener) Add to compartment Soap wash Add to compartment I Water softener...
-
Page 37: Programme Selection
7 Washing Dyeing textiles Textiles can be dyed in the appliance using suitable dyeing agents. Please follow the manufacturer’s safety instructions and warnings carefully. Each wash programme starts with brief draining and for this reason liquid dye components should be added after this. After adding the wash detergent Push the detergent dispenser drawer back in. - Page 38 7 Washing Selecting main programme Close the appliance door. – The indicator lights for the programme buttons flash. °C Press the desired programme button (press 1 or 2×) or hold it depressed for 3 seconds for the intensive programme. – The indicator light for the programme selected illuminates. –...
- Page 39 7 Washing AquaPlus °C Immediately after selecting a programme, press the button repeatedly until the desired rinsing intensity appears in the digital display. • «Standard» • «More water» • «+ 1 rinse» • «More water + 1 rinse» • «Skin protection» –...
- Page 40 7 Washing Changing the spin speed °C Immediately after selecting a programme, press the button repeatedly until the desired spin speed appears in the digital display. It is possible to change the current setting while a programme is running. The suggested and maximum settable spin speed depends on the programme selected.
- Page 41 7 Washing Changing the temperature °C Immediately after selecting a programme, press the button repeatedly °C until the desired temperature appears in the Digital display. It is still possible to change the temperature once the programme has started running.
- Page 42 7 Washing Selecting a delayed start °C Immediately after programme selection, hold the button depressed or press repeatedly until until the desired delayed start period (max. 24 hours) appears in the digital display. – The Digital display goes dark. – When the the delayed start time set is up, the programme selected starts automatically.
- Page 43 7 Washing If the water used for soaking is not to be used for the main wash, pre-wash has also to be selected using the button Selecting bio wash / soap wash Select programme. Press the button 2×. – appears in the digital display for bio wash. Press the button 3×.
-
Page 44: Changing Selection
7 Washing For appliances with the button Press the button. – The appliance door opens. – The Digital display flashes. Add or unload wash items. Close the appliance door. – The programme is resumed. In the event of a power failure, the appliance door can only be opened using the emergency door release. -
Page 45: Programme Selection With Childproof Lock Activated
7 Washing Programme selection with childproof lock activated How to switch the childproof lock on/off is described in 'User settings'. Close the appliance door. – The following appears in the digital display: – The indicator lights for the programme buttons flash. Hold the desired programme button depressed and at the same time press button. -
Page 46: End Of Programme
7 Washing End of programme Loosening up the washing Shortly before the end of the programme, the washing is loosened up. This takes about 1–2 minutes. Press the button to unload the washing at any time during the loosening-up phase. With «Automatic door opener OFF»... -
Page 47: At The End Of The Wash Day
7 Washing At the end of the wash day Clean the detergent dispenser drawer if necessary. After finishing washing for the day, remove any deposits or foreign bodies from out of the door seal Push the appliance door to, but do not close. –... -
Page 48: Care And Maintenance
Care and maintenance Using the correct dosage of detergent will automatically clean the inside of the appliance. Immediately wipe away all traces of detergent with a soft cloth to avoid staining. Cleaning the detergent dispenser drawer If the correct dosage of detergent is used, the compartments in the detergent dispenser drawer are cleaned by the water flowing in. -
Page 49: Cleaning The Water Inlet Filter
8 Care and maintenance Cleaning the water inlet filter To avoid blockages, the filter 1 in the water inlet must be periodically checked and, if necessary, cleaned. The water inlet should be tested for leaks following maintenance work. -
Page 50: Emergency Draining
8 Care and maintenance Emergency draining The water in the appliance may be hot. Scalding hazard! Allow to cool before emergency draining. In the event of a blocked water outlet or drain pump, a malfunction or a power failure, if there is water still in the appliance it must be drained off as follows: Open the drain tray 1 by pressing it at the bottom. -
Page 51: Cleaning The Foreign Body Trap
8 Care and maintenance Cleaning the foreign body trap The foreign body trap 1 must be periodically cleaned of any deposits. The foreign body trap should also be cleaned after washing e.g. pet blankets or other wash items that cause a thick build-up of fluff. Drain off any residual water, see section on 'Emer- gency draining'. -
Page 52: Trouble-Shooting
Trouble-shooting What to do if … This section lists faults that can be solved simply by following the instructions given. If another fault is displayed or the fault cannot be remedied, please call Customer Services. Before calling Customer Services, please note down the serial number (FN) and the error message in full, e.g. - Page 53 9 Trouble-shooting ... in the display appears Possible cause Solution Wash large and small items together to • Large items are unevenly reduce the possibility of unbalanced loads distributed in the washing forming. drum. • Pillows or similar items in Remove the pillows.
- Page 54 9 Trouble-shooting ... in the displayappears Possible cause Solution • The water tap is turned Resolve the cause of the problem or wait until the water supply is restored. off. • The mesh filter in the Cancel the error message by pressing the water connection is button.
- Page 55 9 Trouble-shooting ... in the display appears Possible cause Solution • Various situations can Cancel the error message by pressing the lead to an «F» message. button. Disconnect the power supply for about 1 minute. Switch the power supply back on again and select a new programme.
- Page 56 9 Trouble-shooting ... in the display appears Possible cause Solution • Faulty electrical connec- Cancel the error message by pressing the tion. button. • Overvoltage Disconnect the power supply for about 1 minute. Switch the power supply back on again and select a new programme.
- Page 57 9 Trouble-shooting ... in the display appears Possible cause Solution • If there is very heavy Reduce the amount of washing detergent foaming during the wash used next time. Adjust the amount of washing detergent cycle, the programme is used to the water hardness. automatically extended by an additional rinsing cycle.
- Page 58 9 Trouble-shooting ... in the display appears Possible cause Solution • Inlet water very cold. Heating is extended..in the display appears Possible cause Solution With the next wash cycle adjust the amount • Selected programme is of articles to the max. washing load (see intended for a reduced 'Programme overview').
- Page 59 9 Trouble-shooting ... in the display appears Possible cause Solution Wash large and small items together to • Large unbalanced load in reduce the possibility of unbalanced loads the washing drum. The forming. appliance tries to improve the distribution of the wash load.
- Page 60 9 Trouble-shooting … water sounds are heard at the end of the programme when the washing drum is turned by hand Possible cause Solution No action is necessary. The expelled water is • The water that the vanes automatically pumped out and there are no were filled with to negative consequences.
- Page 61 9 Trouble-shooting ... traces of fabric conditioner or water left behind in the fabric conditioner compartment Possible cause Solution Ensure the siphon is in place correctly. • The siphon in the fabric conditioner compartment is missing or is not in place correctly.
-
Page 62: Opening The Appliance Door In The Event Of A Power Failure
9 Trouble-shooting Opening the appliance door in the event of a power failure Ensure that the washing drum is stationary. Do not touch the drum while it is still in motion – risk of serious injury. If the emergency door release tool 2 is missing, a screw driver can be used instead. -
Page 63: Washing Tips
Washing tips 10.1 Fabric care symbols To wash items correctly, please follow the fabric care symbols on the labels of the wash items. 10.2 Washing detergent The wash temperature selected should agree with the recommended tempera- ture range of the washing detergent to ensure the washing detergent is at its most effective. -
Page 64: Net Curtains
10 Washing tips 10.4 Net curtains If washing curtains made from mixed or man-made fibres: • Ask the retailer whether the curtains are machine washable and, if so, at what water temperature. • Fill the washing drum only a quarter full. •... -
Page 65: Saving Energy And Water
10 Washing tips 10.5 Saving energy and water • Use the maximum wash load capacity of the particular programme. • Select «Pre-wash» or «Soaking» only for washing that is heavily soiled or stained. • For lightly soiled washing without staining select the main programme or the additional «Sprint»... -
Page 66: Most Efficient Programmes
10 Washing tips 10.6 Most efficient programmes ... for normally soiled cottons at 60 °C Press the button 1×. – The standard 60 °C cotton programme is selected. – The symbol is briefly displayed in the digital display. Load capacity Programme Water Energy... - Page 67 10 Washing tips Grey residue on washing Possible cause Solution Use more detergent next time. • Grease and dirt particles have not been removed Use heavy-duty washing detergent. from fabric effectively. Adjust amount of detergent to water hard- ness and degree of soiling of washing. •...
- Page 68 10 Washing tips Unsatisfactory wash result using liquid detergent Possible cause Solution Use washing detergent containing bleach. • Liquid detergent used does not contain bleach. Fruit, coffee and tea stains cannot be removed. Soap deposits on washing Possible cause Solution Only use soap detergent if the water hard- •...
- Page 69 10 Washing tips Fabric stains Possible cause Solution Brush out work overall pockets. • Rust stains. • Chemical effect. Residues from hair care products, cosmetics and plants can react with the suds to cause a chemical reaction that can result in staining. Wash items with metal parts separately.
- Page 70 10 Washing tips Fabric wear Possible cause Solution Put less laundry into the washing drum. • Washing drum over- loaded. • Friction between fabrics Select the additional «Easy care» during washing. programme. Turn items inside out before washing. • Pilling.
-
Page 71: Spare Parts
Spare parts Please give product family and exact designation when ordering parts. Drain hose 1.5 m / 4.0 m Emergency door release tool Foreign body trap Drain tray Siphon Detergent dispenser drawer Liquid detergent flap... -
Page 72: Technical Data
Technical data 12.1 Dimensions Height: 85 cm Width: 59.5 cm Depth: 60 cm Empty weight: 63 kg Dry load capacity: 8 kg 12.2 Plumbing in Connection to water supply: Cold water G¾" Permitted pressure of water supply: 0.1–0.6 MPa (1–6 bar) Max. -
Page 73: Product Fiche
12 Technical data 12.5 Product fiche In accordance with EU Regulation No. 1061/2010 Brand V-ZUG Ltd The model identifier corresponds to the 11001 first alphanumerics on the identification plate. Rated capacity for cotton laundry at full load Energy efficiency class... - Page 74 12 Technical data Programme time of the standard 60 °C mins. cotton programme at full load Programme time of the standard 60°C mins. cotton programme at partial load Programme time of the standard 40°C mins. cotton programme at partial load Duration of the left-on mode mins.
-
Page 75: Consumption Data
12 Technical data 12.6 Consumption data Whites and coloureds programmes The consumption data and programme durations given serve only as a guide. They refer to the maximum load capacity and can vary with, for instance, towelling material, a very cold water feed, the degree of soiling selected or a smaller wash load. -
Page 76: Vas Vibration Absorbing System
12 Technical data 12.8 VAS Vibration Absorbing System As the washing drum starts to spin, if the control unit detects that the load is out of balance it will interrupt the spinning action once or more. In this case, the appliance tries to improve the distribution of the wash load in the washing drum. -
Page 77: Notes
Notes... - Page 78 13 Notes...
-
Page 79: Index
Index Additional functions ....17, 24 Before using for the first time ..9 Additional programmes ..14, 16 Bio wash ........23, 43 Anti-mite ........14 AquaPlus / Skin protection ..14 Bio wash ........14 Care ..........48 Easy care ........14 Caution: Burns hazard! .... - Page 80 14 Index Damage to fabrics ......69 Fabric care symbols ......63 Delayed start .....24, 35, 42 Fabric conditioner ....15, 36 Deposits on washing .....68 Conditioning ......23 Detergent dispenser drawer .. 15, 71 Traces .........61 Cleaning ........48 Fabric stains ........69 Traces .........60 Fabric wear ........
- Page 81 14 Index Main programmes ....14, 16 Packaging ........12 Selecting ........38 Pause Main wash detergent .....15 Door opener ......24 Main wash programmes ....19 Programme pause ....24 Maintenance ........48 Resuming the programme ..24 Malfunctions ........52 Plumbing ..........
- Page 82 14 Index Safety ..........12 Unsatisfactory rinsing performance Safety precautions ............68 Before using for first time ...9 Unsatisfactory wash result using General ..........6 detergent for coloureds ... 67 Saving Unsatisfactory wash result using Energy ......... 65 liquid detergent ......68 Water ...........
-
Page 83: Repair Service
FN _______________________ Appliance _______________________ Please have these details to hand when contacting V-ZUG in connection with a malfunction. You will find them on the identification plate of your appliance. Open up drain tray. – The identification plate is located on the left-hand* or right-hand* side next to the foreign body trap. - Page 84 At the end of the wash day: If necessary, clean the detergent dispenser drawer Push the appliance door to, but do not close V-ZUG Ltd Industriestrasse 66, 6301 Zug Tel. +41 58 767 67 67, Fax +41 58 767 61 61 info@vzug.ch, www.vzug.com...
Need help?
Do you have a question about the Adora L and is the answer not in the manual?
Questions and answers