
Summary of Contents for Treif PRIMUS smart
- Page 1 Operating manual PRIMUS 400 PRIMUS smart PRIMUS 400 -Black Edition- PRIMUS smart -Black Edition- ID number: 244156V03 Machine type: 6900, 6910 Language: English Translation of the original operating manual...
-
Page 5: Ec Declaration Of Conformity
TREIF – ID – NR. 245036 EC Declaration of Conformity For the purpose of the EC Machinery Directive 2006/42/EC, Annex II No. 1 A. Machinery category: Bread slicer Machine designation: PRIMUS - Black Edition - Series / part number: 690003.236951.- 691003.236954.-... - Page 6 TREIF – ID – NR. 244188 EC Declaration of Conformity For the purpose of the EC Machinery Directive 2006/42/EC, Annex II No. 1 A. Machinery category: Bread slicer Machine designation: PRIMUS Series / part number: 690003.236950.- 691003.236953.- We hereby declare that the design of the above mentoined machine in the supplied version complies with the applicable provisions of the EC Machinery Directive 2006/42/EC.
-
Page 8: Table Of Contents
Dimension sheet PRIMUS smart ........ - Page 9 Table of contents 4.3.1 Electrical connection........... . 31 Set-up .
- Page 10 Table of contents 10. Maintenance ..............89 10.1 Safety instructions for maintenance .
- Page 11 Table of contents 07/2019 244156V03_EN...
-
Page 12: Before You Continue
1. Before you continue... This operating manual is intended for the operator and all persons who work on or with the machine, and for all those who install, set up, repair or clean it. The operating manual provides important information for the safe and effi- cient handling of the machine. -
Page 13: Using These Operating Instructions
Using these operating instructions Using these operating instructions These operating instructions have been structured in such a way that the information is compiled based on related activities. Notes within a chapter provide cross references to information in other chapters. An overview of the chapters is provided below. -
Page 14: Conventions
Conventions Conventions 1.2.1 Warnings in the operating instructions Hazard warnings and notices are clearly marked in the operating manual. The following system is applied: Danger Danger! Indicates a hazardous situation that results in serious personal injuries or death. Description to avoid the hazard. Warning Warning Indicates a possible hazard that can result in serious personal injuries or... -
Page 15: Typographical Conventions
Conventions Additional Information Additional information is provided here for better understanding of the pro- cesses. 1.2.2 Typographical conventions The following explanations for the typographical conventions must be not- ed to ensure correct working with this operating manual: Chapter A chapter is the breakdown level within a part of the operating manual. Subheading The subheading is used for the subdivision into chapters and is not part of the table of contents. -
Page 16: Manufacturer Address
Manufacturer Address Manufacturer Address TREIF Maschinenbau GmbH Toni-Reifenhäuser-Str. 1 D-57641 Oberlahr Tel: +49 (0) 2685 944 0 Fax: +49 (0) 2685 1025 E-mail: info@treif.de website: www.treif.de Limitation of liability All information and instructions in this manual have been compiled taking account of applicable standards and regulations, state-of-the-art technolo- gy and our many years of knowledge and experience. -
Page 17: Copyright
The TREIF company reserves the right for permission for use for publica- tions or transfer of copies of or information from this operating manual to third parties. -
Page 18: Safety
2. Safety This chapter provides an overview of important safety aspects for the pro- tection of the owner and the operators against possible hazards. Significant hazards can arise in the event of failure to observe the stated handling instructions, warnings and safety instructions. NOTICE Create operating instruction. -
Page 19: Intended Use
Intended use Intended use You are only allowed to cut food such as bread and baked products with this machine. The machine may only be put into circulation as commercial work equipment and not as a consumer product. The machine may only be operated by instructed workers. Intended use also includes compliance with the operating manual and compliance with the maintenance conditions. -
Page 20: Owner Of The Machine
Use the template in the Chapter “Appendix for this purpose. If you require more copies of the operating manual, contact either your TREIF sales partner or TREIF direct- 2.3.2 Obligations of the owner The organisational measures concern the work processes in the company where the machine is operated. - Page 21 The operator must also ensure that foreign language personnel have really understood the operating manual. Ask your TREIF sales partner or TREIF if you require foreign-lan- guage copies of the operating manual! The specialist personnel are regularly instructed about occupational health and safety and protection of the environment.
-
Page 22: Personnel
Personnel Personnel 2.4.1 Responsibility of personnel The machine is solely for commercial use. The personnel are therefore subject to the legal obligations for occupational health and safety. In addition to the warnings and safety instructions in this manual, the appli- cable safety, accident prevention and environmental protection regulations for the area of application must be complied with. -
Page 23: Personnel Qualification
Personnel 2.4.2 Personnel qualification Skilled mechanical personnel Skilled mechanical or electrical/electronic personnel are people whose pro- fessional training, knowledge and experience, as well as knowledge of the pertinent regulations, renders them capable of properly carrying out work, independently identifying possible risks to avoid personal injury and mate- rial damage. -
Page 24: Who Does What
Personnel 2.4.4 Who does what..Groups of people Work / Life cycle Transport Loading and unloading Installation Wiring Start-up Operation Cleaning Decommissioning Dismantling Assembly Troubleshooting Repair 4) 5) Maintenance Inspection Disposal Qualified specialist company or employee with a qualification to trans- port goods. -
Page 25: Information Signs On The Machine
Information signs on the machine Information signs on the machine Information signs are fitted to the machine to identify danger points. Danger points can no longer be identified if these information signs are missing or illegible. Missing or illegible information signs can be reordered! Article number Symbol Description... -
Page 26: Placement Of The Information Signs
Placement of the information signs Placement of the information signs Information signs in blade box/removal chute The information signs “AUDIBLY ENGAGE LATCHING“ are located on the front side of the removal chute In the blade box there is the information sign “BLADE CHANGE”... - Page 27 Placement of the information signs The information sign “ERROR MESSAGES” is located on the inside of the door The information sigh “BLADE SHARPENING SERVICE” is located on the inside of the door 07/2019 244156V03_EN...
-
Page 28: Placement Of Rating Plate And Electrical Wiring Diagram
Placement of rating plate and electrical wiring diagram Placement of rating plate and electrical wiring diagram DANGER Risk of fatal injury from electric shock! The wiring diagram is located behind the rear cover, directly in front of the electrical control. A non-instructed person is at risk of sustaining injuries from electric shock. -
Page 29: Safety Instructions
Switch off the machine and secure against restarting. The machine may not be put back into operation until the cause of the fault has been eliminated by an authorised person (TREIF ser- vice personnel if necessary). W_009-02 2.8.2... -
Page 30: Safety Layout
Safety layout Safety layout The safety layout designates the location of the safety elements. Door to machine housing, opening during operation immediately caus- es the standstill of all machine movements. Infeed cover with tumbler; the infeed cover is held shut by a lock during operation. - Page 31 Safety layout 07/2019 244156V03_EN...
-
Page 32: Product Information
3. Product information Technical information about your TREIF machine is summarised in this chapter. If you require more information or have any questions, please con- tact your TREIF sales partner directly. “Your service partner” on page 96 This chapter covers the following: The machine at a glance . -
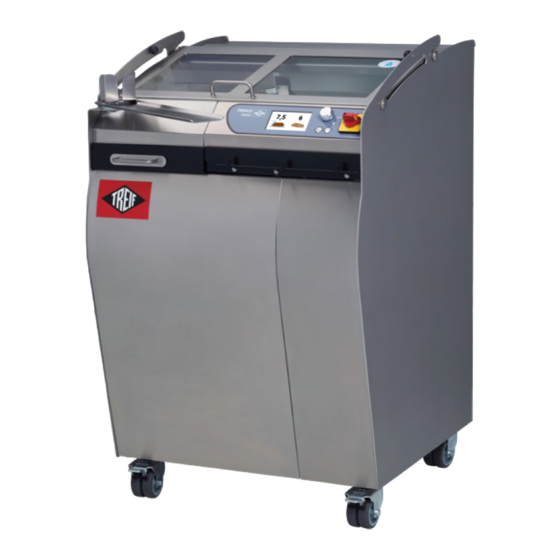
Page 33: The Machine At A Glance
The machine at a glance The machine at a glance 3.1.1 General overview Front door interlock Infeed cover Bagging plate Control panel Holder for bread bags Master switch Front door Castors (4x – front 2x with parking brake) 07/2019 244156V03_EN... - Page 34 The machine at a glance AR1009 / 0 Removal chute interlock (2x) Removal chute Front door Blade Crumb tray 07/2019 244156V03_EN...
- Page 35 The machine at a glance Removal chute Slice support Blade chute Infeed chute Product feed holder 07/2019 244156V03_EN...
-
Page 36: The Control Panel
The control panel The control panel Display START-/STOP eco button (section per minute on page 59) Rotary switch START-/STOP button (section per minute on page 59) Mains power disconnecter (master switch) 07/2019 244156V03_EN... -
Page 37: Technical Information
Technical Information Technical Information 3.3.1 Technical specifications Description PRIMUS 400 Primus 400 (400 V) Primus smart Length x Width x 800 x 700 x 1050 800 x 700 x 1050 650 x 700 x 1050 Height Weight Max. insertion length Max. -
Page 38: Dimensional Drawing
Dimensional drawing Dimensional drawing 3.4.1 Dimension sheet PRIMUS 400 07/2019 244156V03_EN... -
Page 39: Dimension Sheet Primus Smart
Dimensional drawing 3.4.2 Dimension sheet PRIMUS smart 07/2019 244156V03_EN... -
Page 40: Transport And Installation
4. Transport and installation We recommend that you have the machine installed and connected solely by your TREIF sales partner. It would be useful if your own maintenance personnel were present during installation and assembly. The steps for transport and installation are described in this chapter as well as the assembly processes that may become necessary from time to time during the complete service life of the machine. -
Page 41: Transport And Unpacking
Transport and unpacking Transport and unpacking 4.2.1 Unloading the machine 1. Observe the safety instructions. 2. Take the weight of the packages from the shipping paperwork. 3. Use means of transport with sufficient load-bearing strength to trans- port the packages. 4. -
Page 42: Installation And Connection
Installation and connection Installation and connection 4.3.1 Electrical connection DANGER Danger from electrical voltage! If the machine is connected to the electrical power supply by persons with- out specialist knowledge, this can result in injuries to persons / machine damage. ... - Page 43 Installation and connection 07/2019 244156V03_EN...
-
Page 44: Set-Up
5. Set-up The information and instructions for setting up the machine can be found in this chapter. It is addressed to the personnel responsible for setting up the machine. This chapter covers the following: Safety instructions for set-up ....... . 33 Installing the blade . -
Page 45: Dismantling The Blade
Dismantling the blade Dismantling the blade CAUTION Risk of injury on the upright knife! The cut-off knife is very sharp. There is increased risk of injury in the case of unsafe handling of the cut-off knife. Wear personal protective equipment. ... -
Page 46: Installing The Blade
Installing the blade Installing the blade CAUTION Risk of injury on the upright knife! The cut-off knife is very sharp. There is increased risk of injury in the case of unsafe handling of the cut-off knife. Wear personal protective equipment. ... -
Page 47: Checking That The Knife Runs Freely
Installing the blade The locating pins protruding through the blade must engage in the holes on the pressure plate so that it rests fully against the blade. 4. Screw the nut onto the knife shaft and tighten the nut hand-tight with a ring spanner. -
Page 48: Start-Up
6. Start-up This chapter is intended for the person who puts the machine into operation and for all persons who work on or with the machine. This chapter covers the following: Safety instructions for start-up ....... 38 Start-ups . -
Page 49: Safety Instructions For Start-Up
Safety instructions for start-up Safety instructions for start-up WARNING Risk of injury from unfastened components! Incorrectly fastened components may loosen and, in the worst case, de- tach during operation. Before starting the machine, always check that all installed compo- nents such as the blade and product feed holder are firmly fastened. -
Page 50: Start-Ups
Start-ups CAUTION Crushing hazard from closing covers! Limbs can be crushed by covers closing on their own. Always open covers completely so that they contact the limit stop. V_006-01 Start-ups A distinction is made between the following types of start-up. Initial start-up Restart Start-up after EMERGENCY STOP... -
Page 51: Restart
Start-ups 6.2.2 Restart The machine is restarted after: each time the machine is switched off/shut down all maintenance and repair work whenever the power outlet is replaced on the machine (power outlet re- placement) 1. Perform a visual inspection during which you check the proper clean- ing. -
Page 52: Functional Test Of The Safety Switches
In this case, prevent the machine from being started up and imme- diately arrange for repair. Only allow TREIF Customer Service or a qualified electrician to re- place faulty safety switches. Ensure subsequently that the gap di- mensions have been set correctly and the safety requirements are thus met. - Page 53 Also unplug and secure the mains plug. Only restart the machine when this error has been remedied by TREIF Customer Service! H_042-05 TEST 1 1. Open the infeed cover. 2. Press the START/STOP button.
- Page 54 Also unplug and secure the mains plug. Only restart the machine when this error has been remedied by TREIF Customer Service! H_042-05 1. Press the START/STOP button. The cutting process begins (blade rotation).
- Page 55 Also unplug and secure the mains plug. Only restart the machine when this error has been remedied by TREIF Customer Service! H_042-05 The machine is operational. 1. Perform an initialisation ( “Initialisation” on page 49).
-
Page 56: Switch-Off
Switch-off Switch-off 6.4.1 Switch-off at the end of production 1. Switch off machine via the main switch. 2. Clean the machine ( “Cleaning” on page 75). 6.4.2 Switching off for maintenance and repair work 1. Switch off machine via the main switch. 2. - Page 57 Switch-off 07/2019 244156V03_EN...
-
Page 58: Operation
7. Operation This chapter is intended for the operator and all persons who work on or with the machine. Here, you will find basic safety instructions and other general information that must be observed for safe and careful handling of the machine. -
Page 59: Safety Instructions For Operation
Safety instructions for operation Safety instructions for operation WARNING Action in the case of danger! Hazards arising from the machine for the operator and the machine must be dealt with immediately. Press the master switch or open any cover to interrupt the cutting process immediately. -
Page 60: Initialisation
Initialisation ADDITIONAL INFORMATION Check the function of the safety switches ( “Functional test of the safety )daily before each initial operation. switches” on page 41 Always check whether the machine is perfectly clean( “Cleaning” on page 75). I_039-00 Initialisation When you insert the plug into the socket and switch on the main switch, the machine must be initialised. -
Page 61: Inserting And Cutting Product
Inserting and cutting product Inserting and cutting product 7.4.1 Inserting the product The machine is operational. The product feed holder is in clamping posi- tion. 1. Open the infeed cover. 2. Place the product in the insertion chamber on the right against the product feed holder. -
Page 62: Slicing The Product
Inserting and cutting product 7.4.2 Slicing the product ADDITIONAL INFORMATION Not all products can be sliced with the desired quality at double knife speed. I_024-00 The machine is operational. The product feed holder is in clamping posi- tion. 1. Insert the product ( “Inserting the product” on page 50). 2. -
Page 63: Cutting A Pre-Selected Number Of Slices
Inserting and cutting product 7.4.3 Cutting a pre-selected number of slices The machine is operational. The product feed holder is in clamping posi- tion. 1. Insert the product ( “Inserting the product” on page 50). 2. Set the required slice thickness by turning the rotary switch. Turning the rotary pushbutton switch clockwise (a) = increases the slice thickness. -
Page 64: Halving The Product
Inserting and cutting product 7.4.4 Halving the product The product fits into the insertion chamber The machine is operational. The product feed holder is in clamping posi- tion. ADDITIONAL INFORMATION You can cut the part product that is still in the insertion chamber directly. I_024-00 1. - Page 65 Inserting and cutting product The product is longer than the insertion chamber The machine is operational. The product feed holder is in clamping posi- tion. 1. Insert the product ( “Inserting the product” on page 50). 2. Press the rotary pushbutton. The machine switches to halving mode.
-
Page 66: Slice Product Half With Previously Set Slice Thickness
Slice product half with previously set slice thickness Slice product half with previously set slice thickness The machine is operational. The product feed holder is in clamping posi- tion. 1. Insert the product ( “Inserting the product” on page 50). 2. -
Page 67: Menu "Basic Slice Thickness
Menu “Basic slice thickness” Menu “Basic slice thickness” The basic slice thickness can be preset via the menu “Basic slice thick- ness”. The set basic slice thickness is always used when the slice thickness was not changed before the cut is triggered. A change of the slice thickness prior to a cutting process always applies only to this one cutting process. - Page 68 If a malfunction occurs Malfunction Cause Remedy Display shows: Infeed cover not closed Close the infeed cover ERR 1 Safety switch is maladjusted or Call service department. defective Display shows: Front door not locked Lock front door ERR 2 Safety switch is maladjusted or Call service department.
- Page 69 If a malfunction occurs 07/2019 244156V03_EN...
-
Page 70: Visualisation
Additional information on the display ......71 General information about the display and accessing visualisation The display is used to show the menu pages. The Treif logo will first appear on the display after switching on the machine. -
Page 71: Main Menu
Main menu 4. Press the START/STOP button. The blade performs a reference run. First counterclockwise and then clock- wise. The product feed holder moves back to the clamping position. The main menu is displayed and the machine is operational. Main menu The main menu is used to select the individual cutting modes. - Page 72 Main menu Presentation Description Rotary pushbutton functions The full cutting mode is selected. Pushing the rotary pushbutton The slice thickness can be set by = halving mode is selected. turning the rotary pushbutton. Turning the rotary pushbutton The entire bread is sliced by press- clockwise = increases the ing a Start/Stop button.
-
Page 73: Menu Bar
Menu bar Menu bar The visualisation features a menu bar allowing access to additional menu pages. The menu bar is opened via the rotary pushbutton. Open the menu bar 1. Press the rotary pushbutton for at least 3 seconds. The menu bar (1) appears in the left area of the main menu. - Page 74 Menu bar Open menu The following is an example of how to open the menu “Basic slice thick- ness”. The other menus are opened in the same way. 1. Select the corresponding menu symbol by turning the rotary pushbut- ton. The green border indicates which menu symbol is selected.
- Page 75 Menu bar Close menu The following is an example of how to close the menu “Basic slice thick- ness”. The other menus are closed in the same way. 1. Press the rotary pushbutton. The menu is locked. The menu bar is highlighted in black and lock- ing of the menu is indicated by the green frame around the menu symbol.
-
Page 76: Menu "Basic Slice Thickness
Menu “Basic slice thickness” Menu “Basic slice thickness” The basic slice thickness can be preset via the menu “Basic slice thick- ness”. The set basic slice thickness is always used when the slice thickness was not changed before the cut is triggered. A change of the slice thickness prior to a cutting process always applies only to this one cutting process. -
Page 77: Menu "Statistics
Menu “Statistics” Menu “Statistics” This menu displays the data for the uncut product and the cut products. The display stretches over two pages. The individual pages can be accessed by turning the rotary pushbutton. Some of the displays listed below are also shown on the start screen during initialisation of the machine (Page 59). - Page 78 Menu “Statistics” Menu “Statistics”, page 2 Page 2 of the menu “Statistics” shows the following counters: Indicator Explanation Time passed since last cleaning Time until next cleaning Display of current blade wear. Blade OK Blade change imminent. Make sure a spare blade is available. Blade must be changed.
-
Page 79: Menü „Service
Menü „Service“ Menü „Service“ With this menu you can select the cleaning position for cleaning the blade and carry out cleaning of the blade. Clean the blade at least once daily. CAUTION Risk of injury on the upright knife! The blade is very sharp; there is increased risk of injury when handling the blade in an unsafe manner. - Page 80 Menü „Service“ Manual movement of the blade to a changed cleaning position (alter- native) In addition, you can also move the blade manually to a changed cleaning position. 1. Close the infeed cover 2. Adjust the position of the blade using the rotary pushbutton. The infeed cover is locked automatically.
-
Page 81: Menu "General
Menu “General” Menu “General” This menu shows the machine specifications as well as error messages. The display stretches over two pages. The individual pages can be ac- cessed by turning the rotary pushbutton. Menu “General”, page 1 Page 1 of the menu “General” shows the following machine specifications: Indicator Explanation Display of the software version... -
Page 82: Additional Information On The Display
Additional information on the display Menu “General”, page 2 Page 2 of the menu “General” displays the error list with corresponding er- ror number as well as the time of occurrence. Additional information on the display The information below may be displayed on the main menu, depending on the machine condition. - Page 83 Display that the automatic test of the brake function is carried out. Display that the automatic test of the brake function was negative. Contact Treif Service without delay. Animation for opening or closing the cover. Animation for closing the front door.
- Page 84 Additional information on the display Presentation Function Prompt to swivel the removal chute up after cleaning is completed. 07/2019 244156V03_EN...
- Page 85 Additional information on the display 07/2019 244156V03_EN...
-
Page 86: Cleaning
9. Cleaning This chapter is intended for cleaning personnel and all persons authorised to clean the machine. Regularly clean the machine: after each work period or depending on the product to be cut and dirt accu- mulation on the machine, but at least once daily! This chapter describes the steps and instructions for daily cleaning. -
Page 87: Safety Instructions For Cleaning
Safety instructions for cleaning Safety instructions for cleaning CAUTION Risk of injury from dismantled parts! Risk of injury if dismantled parts are put down in an unsafe manner. Attach the blade guard to the dismantled blade. Put down components so that they cannot cause injuries by falling down or due to their position. - Page 88 Safety instructions for cleaning CAUTION Risk of injury on the product holder! Hands or fingers in the operating range of the product feed holder can be injured during closing or opening. Make sure that hands and fingers are not in the danger area when closing and opening the product feed holder! V_008-10 07/2019 244156V03_EN...
-
Page 89: Cleaning Position For Blade
Cleaning position for blade Cleaning position for blade The cleaning position must be assumed before the installed blade is cleaned. Clean the blade at least once daily. CAUTION Risk of injury on the upright knife! The cut-off knife is very sharp. There is increased risk of injury in the case of unsafe handling of the cut-off knife. - Page 90 Cleaning position for blade Leaving the cleaning position after cleaning After cleaning has been performed, the blade must be moved to its working position. 1. Close the infeed cover. 2. Press the STOP button and keep it pressed for approx. 5 seconds. The blade leaves its cleaning position and moves to its working po- sition.
-
Page 91: Preparation For Complete Cleaning
Preparation for complete cleaning Preparation for complete cleaning Opening feeding lid The feeding lid can be pushed open and closed when the machine is switched on. It is guided in the lateral grooves of the casing. 1. Push (a) the infeed cover at the handle so far up that the lower guide rollers engage in the upper end position. - Page 92 Preparation for complete cleaning Lowering removal chamber: Proceed as follows to lower the removal chute for cleaning: 1. Open the front door of the machine ( “Opening the front door:” on page 80). 2. First release one of the two locks (1) of the removal chute. 3.
-
Page 93: Instructions For Cleaning
Instructions for cleaning Instructions for cleaning Clean the machine according to the cleaning schedule to prevent damage to the machine and to ensure that it is cleaned hygienically ( “Cleaning schedule for daily cleaning” on page 83). Requirements for successful cleaning The cleaning may only be carried out by trained personnel! Comply with the steps described in the cleaning schedule. -
Page 94: Cleaning Schedule For Daily Cleaning
Cleaning schedule for daily cleaning Cleaning tools for manual cleaning: Use the following tools: CAUTION Risk of product contamination from unclean cleaning devices! If the cleaning devices are soiled dirt particles may remain on the machine and later contaminate the product. ... - Page 95 Cleaning schedule for daily cleaning ADDITIONAL INFORMATION The contents of the crumb drawer are unfit for consumption! 8. Step Empty the crumb drawer and dispose of the contents. Use a clean hand brush to remove product scraps and crumbs. CAUTION Risk of injury on the upright knife! The cut-off knife is very sharp.
- Page 96 Cleaning schedule for daily cleaning 14. Step Switch on the machine (master switch in the 1/ON position). 15. Step Perform an initialisation. page 49 16. Step Now carry out a function test of the safety switches ( “Functional test of the safety switches”...
-
Page 97: Completion Work After The Cleaning
Completion work after the cleaning Completion work after the cleaning Lifting removal chamber: 1. Lift the removal chute 1 to the top end position (working position) and hold it in this position from underneath with one hand. 2. Secure the two locks so that the removal chamber is held securely. AR1019 / 0 Inserting crumb tray: 1. - Page 98 Completion work after the cleaning Closing front door: ADDITIONAL INFORMATION The handle must be opened for closing the door. Pressing the door closed directly is not possible. I_082-00 1. Swivel the opened front door 1 to the machine. 2. Pull the handle 2 to the machine outer side and close the front door completely.
- Page 99 Completion work after the cleaning WARNING Risk of injury from not recognisable danger areas! Safety signs that are not legible or not present cannot warn the user about risks. Check the safety signs after every each cleaning process. The safety signs must be legible and complete.
-
Page 100: Maintenance
10. Maintenance This chapter is intended for persons who maintain and repair the machine as well as for the owner. NOTICE The owner must compile an operating instruction that sets out the respon- sibilities for the maintenance. The maintenance work listed in the chapter "Maintenance overview" is indispensable for the safety of the operating personnel and func- tionality of the machine. -
Page 101: Personal Protective Equipment
41). In this case, prevent the machine from being started up and imme- diately arrange for repair. Only allow TREIF Customer Service or a qualified electrician to re- place faulty safety switches. W_002-00 10.2 Personal protective equipment Provide your personnel with the necessary personal protective equipment. -
Page 102: Maintenance Overview
There is a circumferential seal in the area of the knife drive in the knife box. 1. Perform a visual inspection of the seal (1). 2. If the seal is damaged or you can establish abrasion: Contact TREIF Customer Service to arrange replacement of the seal. -
Page 103: Sharpening The Blade
I_036-01 It is not possible for you to re-sharpen the blade on site because a special grinding jig is required. Contact your TREIF sales partner or send your blunt blade directly to TREIF marked “FOR RESHARPENING”: TREIF Maschinenbau GmbH Toni-Reifenhäuser Str. 1... - Page 104 Sharpening the blade 07/2019 244156V03_EN...
- Page 105 Sharpening the blade 07/2019 244156V03_EN...
-
Page 106: Help And Service
11. Help and Service This chapter provides you with additional information about service as well as troubleshooting. This chapter covers the following: Your service partner ........96 If any fault occurs . -
Page 107: Your Service Partner
TREIF provides a unique service package, from start-up and induction on the machine to training of the operating personnel including individual ser- vice and maintenance contracts to IT-supported remote maintenance for your machines. -
Page 108: If Any Fault Occurs
Slice support is bent Replace slice support if necessary Sensor defective Contact TREIF Service The product feed holder does not The feed motor is overheated Let the feed motor cool down advance... - Page 109 If any fault occurs 07/2019 244156V03_EN...
-
Page 110: Disposal
12. Disposal This chapter provides you with the necessary information on the disposal of your end-of-life device. This chapter covers the following: Decommissioning ........100 Disposal . -
Page 111: Decommissioning
Decommissioning 12.1 Decommissioning 1. Switch off machine and secure against restarting. 2. Physically disconnect entire energy supply of the machine, discharge residual energies. Check for the absence of voltage. 3. Clean assemblies and components correctly and dismantle in compli- ance with applicable local occupational health and safety and environ- mental regulations. -
Page 112: Appendix
13. Appendix Forms of proof for instruction and maintenance are stored in the appendix. This chapter covers the following: Proof of training ......... 101 Maintenance record . -
Page 113: Maintenance Record
Maintenance record 13.2 Maintenance record In your capacity as the owner, obtain confirmation from your maintenance personnel in the table below that the maintenance work and function checks have been performed. Maintenance task performed Date Name Signature 07/2019 244156V03_EN... -
Page 114: Index
14. Index Accident prevention regulations ............. . 1 Action . - Page 115 TREIF ........
- Page 116 Workplace lighting ............... 10 07/2019 244156V03_EN...
- Page 117 07/2019 244156V03_EN...
Need help?
Do you have a question about the PRIMUS smart and is the answer not in the manual?
Questions and answers
Was bedeutet Sa 13,4