Table of Contents
Advertisement
Anker Innovations Limited. All rights reserved. eufy Security and eufy Security
Logo are trademarks of Anker Innovations Limited, registered in the United
States and other countries. All other trademarks are the property of their
respective owners.
51005001867 V01
QUICK
START GUIDE
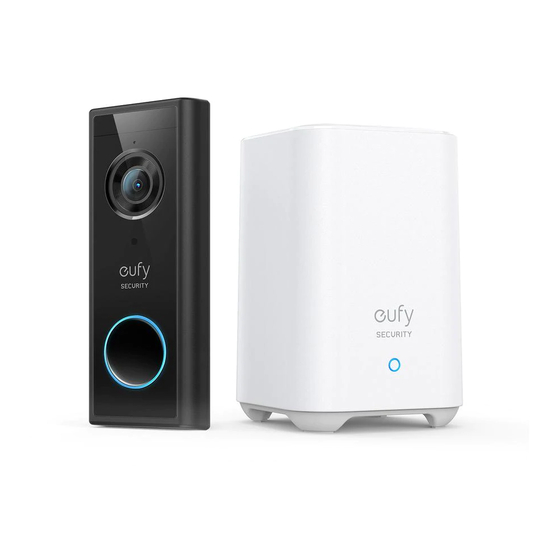
Video Doorbell 2K (Battery-Powered) Set
Advertisement
Table of Contents

Related Manuals for eufy Security HomeBase 2


Summary of Contents for eufy Security HomeBase 2
- Page 1 START GUIDE Video Doorbell 2K (Battery-Powered) Set Anker Innovations Limited. All rights reserved. eufy Security and eufy Security Logo are trademarks of Anker Innovations Limited, registered in the United States and other countries. All other trademarks are the property of their respective owners.
- Page 2 TABLE OF CONTENTS What’s Included Mounting The Bracket Product Overview Mounting The Doorbell How The System Works Detaching The Doorbell Connecting The Homebase Recharging The Doorbell Powering The Doorbell With Existing Setting Up The System Doorbell Wires Determining The Power Option Notice Finding A Mounting Spot Customer Service...
-
Page 3: What's Included
WHAT’S INCLUDED For HomeBase 2 Installation For Video Doorbell Installation Model: HomeBase 2 Power Adapter for Ethernet Cable for HomeBase 2 HomeBase 2 Video Doorbell 2K Mounting Bracket Screw Hole Positioning 15° Mounting Wedge (Battery-Powered) Card (Optional) FCC ID: 2AOKB-T8010... -
Page 4: Product Overview
PRODUCT OVERVIEW Video Doorbell (Battery Powered) Video Doorbell (Battery Powered) Front view: 1. Motion Sensor 2. Microphone 3. Camera Lens 4. Ambient Light Sensor 4 5 6 5. LED Ring 6. Doorbell Button 7. Speaker 1. Status LED 5. Ethernet port 2. -
Page 5: How The System Works
HomeBase stores video clips on its built-in storage. When someone rings the doorbell, people in the house will be notified. Doorbell Chime 2. The LED indicator turns blue (this may take up to 1min) when HomeBase 2 is ready for setup. Video Doorbell... -
Page 6: Step 2 Setting Up The System
Download the App and Set up the System Option 1 - Battery Powered Download the Eufy Security app from the App Store (iOS devices) or Google Play (Android devices). 1. If you don’t have existing doorbell wiring at the front door, use the built-in battery. - Page 7 Option 2 - Doorbell Wire Powered STEP 4 FINDING A MOUNTING SPOT 1. If you have existing and working doorbell wiring at the front door, the doorbell will be powered by the wires constantly. So you don’t need to detach and charge Find a Mounting Spot it after installation.
-
Page 8: Step 5 Mounting The Bracket
STEP 5 MOUNTING THE BRACKET Place the Screw Hole Positioning Card against the wall to mark the position. Mount the Doorbell on a Wooden Surface If you’re mounting the doorbell on a wooden surface, you don’t need to pre-drill pilot holes. Use the provided screws to secure the Mounting Bracket on the wall, The Screw Hole Positioning Card indicates the position of the screw holes. - Page 9 Mount the Doorbell on Surfaces Made Out of Hard Materials 1. If you’re mounting the doorbell on a surface made out of hard materials, like brick, concrete, stucco, drill 2 holes through the Screw Hole Positioning Card with a 15/64”(6mm) drill bit. 2.
- Page 10 STEP 6 MOUNTING THE DOORBELL APPENDIX 1 DETACHING THE DOORBELL Mount the Doorbell Detach the Doorbell Align the doorbell on top and then snap it on the bottom. Press it down until it clicks 1. Use the doorbell detaching pin provided if you wish to detach the doorbell from into place.
- Page 11 APPENDIX 2 RECHARGING THE APPENDIX 3 POWERING THE DOORBELL DOORBELL WITH EXISTING DOORBELL WIRES 3.1 Verify whether the doorbell wires are working Recharge the Doorbell 1. Ring the existing doorbell to check if it is working. If the doorbell doesn’t ring, your doorbell wires may be defective.
- Page 12 What is required: Philips-Head Screwdriver 15° 1.76m(5’9”) 1.2m (48") 0.3m Door Video Doorbell Door Video Doorbell (40") (12") Phillips-Head Screwdriver (User provides it.) Without 15° Mounting wedge With 15° Mounting wedge 2. Place the Screw Hole Positioning Card against the wall to mark the position. 3.3 Find a Mounting Spot 1.
-
Page 13: Mount The Bracket
3.4 Mount the Bracket If you’re mounting the doorbell on a surface made out of hard materials, like brick, concrete, stucco: ① Drill 2 holes through the Screw Hole Positioning Card with 15/64”(6mm) drill If you’re mounting the doorbell on a wooden surface, you don’t need to pre-drill bit. - Page 14 3.5 Connect the Doorbell Wires to the Doorbell Connect the wires to the terminals at the back of the doorbell, then tighten the terminal screws. Wire can connect to any terminal. What is required: Wires and Wire Nuts (Optional), Video Doorbell, Philips-head Screwdriver Wall Mounting...
-
Page 15: Fcc Radio Frequency Exposure Statement
3.6 Mount the Doorbell on the Bracket NOTICE Align the doorbell on top and then snap it on the bottom. FCC Statement This device complies with Part 15 of the FCC Rules. Operation is subject to the following two conditions: (1) this device may not cause harmful interference, and (2) this device must accept any interference received, including interference that may cause undesired operation. -
Page 16: Declaration Of Conformity
IC Statement expose the Device under strong sunshine or too wet environment. The suitable temperature for HomeBase 2 and accessories is -10°C-45°C. This device complies with Industry Canada licence-exempt RSS standard(s). Operation The suitable temperature for Video Doorbell 2K (Wired) and accessories is -20°C - is subject to the following two conditions: 50°C . -
Page 17: Customer Service
CUSTOMER SERVICE • Warranty 12-month limited warranty • Call Us United States +1 (800) 988 7973 Mon-Fri 9AM-5PM (PT) United Kingdom +44 (0) 1604 936 200 Mon-Fri 6AM-11AM (GMT) Germany +49 (0) 69 9579 7960 Mo-Fr 6:00-11:00 • Email Us Customer Support: support@eufylife.com Anker Innovations Limited Room 1318-19, Hollywood Plaza, 610 Nathan Road, Mongkok, Kowloon,...
Need help?
Do you have a question about the HomeBase 2 and is the answer not in the manual?
Questions and answers
can homebase2 16GB continually record? and how many cameras? Is it possible to add SSD to Homebase?