Starline ROLDECK User Manual
Hide thumbs
Also See for ROLDECK:
- User manual (76 pages) ,
- Instruction manual (49 pages) ,
- Instruction manual (54 pages)

Related Manuals for Starline ROLDECK

Summary of Contents for Starline ROLDECK
- Page 1 STARLINE ROLDECK USER MANUAL ANLEITUNG GEBRUIKERSHANDLEIDING MANUAL DEL USUARIO MANUAL D‘UTILISATION...
- Page 2 The usage names, trade names, trade marks etc., used by Starline, cannot be considered free in virtue of legislation concerning the protection of trade marks.
-
Page 3: Table Of Contents
Overview RDEB2013 Roldeck Control ....................9 S-Switch Control panel ........................10 Operating the Key Switch ........................11 Remote Control ...........................11 Programming the Roldeck Control with S-Switch ........12 Roldeck Control ..........................12 Fine tuning the Roldeck with S-Switch ....................15 Programming Remote Control ......................17 Releasing Keylock S-Switch ....................... -
Page 4: General
Do not step on it! 1.3 Disposal and Environment If the Roldeck is discarded, it must be disposed of according to locally valid regulations. Enquire at the local recycling centre for possibilities for reuse and for environment-friendly processing of the product and the packing. -
Page 5: Overview
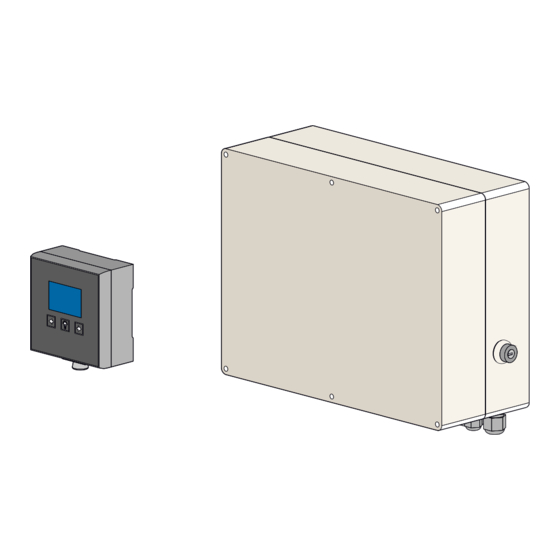
User manual Starline Roldeck Overview Roldeck S-Switch Roldeck Control On /off switch Key switch Optional Level Control Optional Level Measurement Point Remote Control RDCM V03-1015... -
Page 6: Safety
To operate the Roldeck the key switch must be in position 1. Set the key switch to the 0 position if the Roldeck has been opened. If the key switch is in postion 0 it works as emergency stop and the Roldeck is not operable. -
Page 7: Roldeck
3.4 Roldeck Always make sure that the Roldeck has been fully opened when the pool is being used. Use of the pool while the Roldeck has been closed partially or completely may result in injury and/or Roldeck damage. Don’t stand/walk on the Roldeck. -
Page 8: Operation
User manual Starline Roldeck Operation 4.1 Overview Control Roldeck control RDEB2013 On/Off switch Key Switch S-Switch Remote control 4.2 Removal of the RDEB2013 front panel REMOVAL OF THE RDEB2013 PANEL PLEASE NOTE: 1.Before the housing is opened the equipment must be switched off. -
Page 9: Overview Rdeb2013 Roldeck Control
User manual Starline Roldeck 4.3 Overview RDEB2013 Roldeck Control Closing Speed Closing Speed J401 13 14 15 16 10 11 12 N L1 Ls J200 bl. br. sw. Power Switch J200 J2 J1 J502 U501 U500 5A/T S400 X200 J104... -
Page 10: S-Switch Control Panel
Key “Open” / “Close” By pressing this key the Roldeck will run. Key “Open” / “Close” By pressing this key the Roldeck will run. Control – “Open” / “Close” Status reading the Roldeck and other functions. Time Time indication Temperature... -
Page 11: Operating The Key Switch
D Garden Light E LED: will indicate that the remote control is functioning. Roldeck open / stop /close (A). With the button (A) the Roldeck can be “opened” or “closed”. Notes • Be sure you can see the swimming pool when opening and closing;... -
Page 12: Programming The Roldeck Control With S-Switch
5.1 Roldeck Control Programming of the Roldeck control occurs with the help of the S-switch control panel. • First turn on the Roldeck Control by means of the red button (1) and connect the jumper of the RD2013 into socket (2). - Page 13 By pressing the arrow key the motor will be detected. The “OPEN” position is programmed by pressing the arrow key . Press the arrow key until the Roldeck fully opened. CLOSE OPEN The arrow above the position “open”...
- Page 14 “CLOSE“ position. The hourglass “” shows CLOSE OPEN again a short waiting time. 1 sec. When the Roldeck is programmed, PROG the display changes to the programming menu. The “” indicates that the programming was successful.
-
Page 15: Fine Tuning The Roldeck With S-Switch
or . By pressing the middle key “light symbol” shortly the fine tuning is called (| flashes). The Roldeck is in the “CLOSE” position, this CLOSE OPEN indicates that fine tuning is possible for the position “close”. - Page 16 User manual Starline Roldeck The position of the Roldeck is saved with the “light symbol” key. After programming of the fine CLOSE OPEN tuning, the S-Switch shows if the programming is correct or incorrect successful. With a correct programming a “” is displayed.
-
Page 17: Programming Remote Control
User manual Starline Roldeck 5.3 Programming Remote Control The remote control transmitter is pre- programmed. If the transmitter is replaced, or if the number of transmitters is expanded, follow the procedure below. Make sure that the transmitter and the receiver will not be more than 5 meter distance from each other during programming. - Page 18 With the button (B) the pool lights can be switched on or off. When the pool lights are on, and the Roldeck is running, the pool lights are switched off. After the Roldeck has stopped the pool lights will switch on MENU again.
-
Page 19: Releasing Keylock S-Switch
User manual Starline Roldeck 5.4 Releasing Keylock S-Switch The display shows the keylock active. 11: 45 ROLDECK MENU When pressing 1x at any key, the 11: 45 ROLDECK “KEY LOCK HOLD OK” overlay screen will appear automatically after 15 minutes (timeout). -
Page 20: Autolock Function
The menu returns to the symbol time. 19 : 11 5.6 Changing position of the Roldeck (afterwards) First turn on the Roldeck Control by means of the red button and connect the jumper of the RD2013 into socket. The position of the Roldeck can be changed... -
Page 21: Cleaning And Maintenance
Clean the slatted cover at least twice a year with a high-pressure cleaner and a hard brush. Algae growth on the slats can develop itself both on the top side and the bottom side of the Roldeck. • The water circulation system (filter system) must run during daytime when solar or transparent slats are being used. -
Page 22: Disassembling Slats
User manual Starline Roldeck 6.4 Disassembling slats Upward the left slat in relation to the right slat (this can be reversed), the upper hook latch of the right slat can come out of the lock. Next, the lower hook latch can be taken out of the lock. -
Page 23: Assembling Slats
(this can be reversed). Try to make the connection across the entire length of the slats by moving up and down. Note Slide the Roldeck towards the edge as close as possible. This will simplify replacement of the slats. RDCM V03-1015... -
Page 24: Clips And Brackets
Child Safety Handle The child safety handle has been mounted onto the first slats and it serves as locking hole for the child safety lock’s hook latch, in order that the roldeck cannot be pushed open. RDCM V03-1015... - Page 25 User manual Starline Roldeck Roldeck guiding bracket (below-ground system) The function of the directional guide handle fitting is to guide the slats that come upward out of the water into the correct direction. As the clip was mounted onto the second slats, the rounded part will ensure that the first slats can only pivot one way.
-
Page 26: Descaling
Let the descaler act on the surface for about 1 or 2 hours. • Spray the roldeck in bands from left to right in order to spray all calcium out of the cavities. Brush the slats first with a scrubber if necessary. -
Page 27: Failures
Water Level Sensor Input Open (RD Model: SK) • Key switch off “0” • Under pressure Roldeck driver, low pressure in in-roller motor Roldeck • Under pressure liddriver, low pressure in in-roller motor of moveable bottom flap For error F04, F11 and F12: switch control off... -
Page 28: Failure Prevention
Roldeck. Obstacles Remove all floating objects from the water and from the Roldeck before opening and closing. Wave Action Don‘t close until water wave action has disappeared and the water is behaving calmly. -
Page 29: Water Level Control
The correct water level will be set by the installer. Level Control The level control is fitted with 4 LED indicators: A Max. water level (Roldeck cannot open or close) B Water level correct C Water supply enabled D Min. water level (refer to A) If all LED’s light, the level control has run for... -
Page 30: Manual Roldeck Operation
User manual Starline Roldeck 7.4 Manual Roldeck Operation If the Roldeck motor fails due to a malfunction with one of the sensors (error code is readable in LED display or s switch). The function of the sensor can be switched off by means of a button combination together with the jumper. -
Page 31: Technical Specifications
User manual Starline Roldeck Technical Specifications Slats material Hard PVC / PC Slats weight 4,8 kg/m - 5 kg/m Available colors White Blue Gray Cream Translucent (especially suitable for internal swimming pools) Solar (especially for external swimming pools) Control RDEB2013... - Page 32 Verbesserung der Produkte, und wir behalten uns deshalb das Recht vor Änderungen anzubringen. Die hier gelieferten Informationen betreffen das Produkt, so wie es von Starline produziert wurde. Starline ist demnach nicht verantwortlich für eventuelle Schäden aus Abweichungen der ursprünglichen Spezifikationen dieses Produktes.
- Page 33 Roldecksteuerung ..........................42 Feineinstellung des Roldecks mit dem S-Schalter ................45 Programmieren der Fernbedienung ....................47 Releasing Keylock S-Switch ....................... 49 AutoLock function ..........................50 Changing position of the Roldeck (afterwards) ...................50 Reinigung und Unterhalt ................51 Lamellen ..............................51 Verschmutzungen ..........................51 Abdeckung ............................51 Lamellen demontieren .........................52...
-
Page 34: Allgemeines
WARNUNG! Nicht darauf stehen. 1.3 Entsorgung und Umwelt Wenn das Roldeck einmal ausgedient hat, muss es gemäß den lokalen gültigen Regelungen entsorgt werden. Fragen Sie beim Reinigungsdienst nach den Möglichkeiten der Wiederverwendung und der umweltfreundlichen Verarbeitung des Produktes und der Verpackung. -
Page 35: Übersicht
Anleitung Starline Roldeck Übersicht Roldeck S-Schalter Bedienungstafel Roldecksteuerung Ein-/Ausschalter Schlüsselschalter / Notstopp Standregelung Standmesspunkt Fernbedienung RDCM V03-1015... -
Page 36: Sicherheit
3.1 Notstop Wenn der Schlüsselschalter am Schaltkastens auf 0 steht wirkt er als Notstop, und das Roldeck kann nicht durch unbefugte Personen bedient werden. Das Betätigen der Taster A, B oder C wirkt ebenfalls als Notstop, wenn der Motor läuft. -
Page 37: Roldeck
Anleitung Starline Roldeck 3.4 Roldeck Stellen Sie sicher, dass das Roldeck immer vollständig geöffnet ist, wenn das Schwimmbad benutzt wird. Wenn das Schwimmbad bei teilweise oder vollständig geschlossenem Roldeck benutzt wird, können die Personen Verletzungen erleiden und/oder das Roldeck kann beschädigt werden. -
Page 38: Bedienung
Anleitung Starline Roldeck Bedienung 4.1 Übersicht über die Steuerung Roldeck Schaltkasten RDEB2013 Ein-/Ausschalter Schlüsselschalter S-Schalter Bedienungstafel Fernbedienung 4.2 Die Entfernung des RDEB2013 Frontpanel DIE ENTFERNUNG DES RDEB2013 PANEL ACHTUNG: 1. Vor dem Öffnen des Gehäuses muss das Gerät spannungslos gemacht werden. -
Page 39: Übersicht Den Schaltschrank Rdeb2013
Anleitung Starline Roldeck 4.3 Übersicht den Schaltschrank RDEB2013 Closing Speed Closing Speed J401 13 14 15 16 10 11 12 N L1 Ls J200 bl. br. sw. Power Switch J200 J2 J1 J502 U501 U500 5A/T S400 X200 J104 J103... -
Page 40: S-Schalter Bedienungstafel
Poolbeleuchtung eingeschaltet ist. Auto-Lock-Funktion: Nach 15 Minuten “gesperrt” die S-Schalter entsperren durch Drücken die Menü-Taste ein paar Sekunden. “Offen” key Beim Betätigen dieser Taste wird das Roldeck aufgerollt. “Schließen” key Beim Betätigen dieser Taste wird das Roldeck entrollt. Kontroll – “Open” / “Close” Status des Roldecks und weiterer Funktionen ablesen. -
Page 41: Bedienung Den Schlüsselschalter
B Beckenbeleuchtung C Jetstream D Gartenbeleuchtung E LED: zeigt an, dass die Fernsteuerung funktioniert. Roldeck öffnen / Stopp / schließen (A). Mit der Taste (A) die Roldeck kann “geöffnet” oder “geschlossen” werden. Bemerkungen • Stellen Sie sicher, dass Sie beim Öffnen und Schliessen das... -
Page 42: Programmieren Der Roldecksteuerung Mit Dem S-Schalter
S-Schalter programmiert werden! The display shows the following picture PROG “programming“ the Roldeck. The running direction of the Roldeck can be changed. During first programming use the arrow keys or to change the running direction. Press the middle key “light symbol“ shortly to save the running direction. - Page 43 Pfeil angezeigt. Das “” zeigt an, dass der Motor nicht erkannt wird. Die Position “OPEN” wird durch Drücken der Pfeiltaste gedrückt halten, bis das Roldeck ganz geöffnet ist. Der Pfeil über CLOSE OPEN der Position “Open” blinkt. Der Typ des Antriebsmotor wird automatisch erkannt.
- Page 44 Position “CLOSE” zu speichern. CLOSE OPEN Die Sanduhr “” zeigt eine kurze Wartezeit an. 1 sec. Sobald das Roldeck programmiert PROG ist, erscheint im Display das Programmierungs-Hauptmenü. Das Häkchen “”zeigt an, dass die Programmierung gelungen ist. Hinweis: Durch Berühren der Taste mit dem Lampensymbol wird die Prorgrammierung beendet.
-
Page 45: Feineinstellung Des Roldecks Mit Dem S-Schalter
OPEN CLOSE Position “CLOSE” Dies zeigt an, dass eine Feineinstellung der Position “CLOSE” möglich ist. 1 sec. Das Roldeck wird mit den Tasten “OPEN” oder “CLOSE” in die richtige Position bewegt. öffnen Schließen Die Feineinstellung des Roldecks 100% wird in Prozentzahlen angegeben. - Page 46 Anleitung Starline Roldeck Die Position des Roldecks wird mithilfe der Taste mit dem Lampensymbol gespeichert. CLOSE OPEN Nach dem Programmieren der Feineinstellung zeigt der S-Schalter an, ob die Programmierung gelungen oder fehlgeschlagen ist. Eine korrekte Programmierung wird mit einem Häkchen “” angezeigt.
-
Page 47: Programmieren Der Fernbedienung
Anleitung Starline Roldeck 5.3 Programmieren der Fernbedienung Der Sender der Fernbedienung ist vorprogrammiert. Gehen Sie wie folgt vor, wenn der Sender ersetzt, oder die Anzahl der Sender erweitert wird. Beim Programmieren sollten Sie darauf achten, dass Sender und Empfänger nicht mehr als 5 Meter von einander entfernt sind. - Page 48 Fernbedienungsfunktionen Beckenbeleuchtung (B). 00 : 55 ROLDECK Mithilfe der Taste (B) kann die Beckenbeleuchtung ein- oder ausgeschaltet werden. Wird das Roldeck bei eingeschalteter Beckenbeleuchtung in Betrieb gesetzt, wird die MENU Beckenbeleuchtung ausgeschaltet. Nach dem Stoppen des Roldecks wird die Beckenbeleuchtung wieder eingeschaltet.
-
Page 49: Releasing Keylock S-Switch
Anleitung Starline Roldeck 5.4 Releasing Keylock S-Switch The display shows the keylock active. 11: 45 ROLDECK MENU When pressing 1x at any key, the 11: 45 ROLDECK “KEY LOCK HOLD OK” overlay screen will appear automatically after 15 minutes (timeout). -
Page 50: Autolock Function
The menu returns to the symbol time. 19 : 11 5.6 Changing position of the Roldeck (afterwards) First turn on the Roldeck Control by means of the red button and connect the jumper of the RD2013 into socket. The position of the Roldeck can be changed... -
Page 51: Reinigung Und Unterhalt
Anleitung Starline Roldeck Reinigung und Unterhalt 6.1 Lamellen Die Lamellen sollten zweimal im Jahr mit einem Hochdruckreiniger und einer harten Bürste gereinigt werden. Es können sich Algenablagerungen an der Oberseite und an der Unterseite des Roldecks entwickeln. • Die Wasserzirkulation (Filteranlage) muss den ganzen Tag in Betrieb sein wenn eine Solar oder Transparente Abdeckung auf dem Wasser liegt. -
Page 52: Lamellen Demontieren
Anleitung Starline Roldeck 6.4 Lamellen demontieren Wenn Sie die linke Lamelle gegenüber der rechten (oder umgekehrt) nach oben bewegen, können Sie den oberen Haken aus der Rasterung nehmen. Anschliessend können Sie den unteren Haken aus der Rasterung nehmen. Die Lamellen können jetzt über eine Länge von etwa 10 cm getrennt werden. -
Page 53: Lamellen Montieren
Haken der rechten Lamelle (oder spiegelverkehrt). Stellen Sie eine Verbindung über die ganze Länge her in dem Sie die Lamellen auf und ab bewegen. Bemerkung Schieben Sie das Roldeck möglichst nahe zum Rand. So können die Lamellen einfacher ersetzt werden. RDCM V03-1015... -
Page 54: Clips Und Bügel
Art Buggelenk geformt wird. Antirutschclip Der Antirutschclip soll verhindern, dass die Lamellen in die Nische abgleiten bei einem Roldeck mit einem extremen Einlauf des Treppenteils. In diesem Fall sollte der Endkunde den Installateur warnen, damit die Clips wieder eingesetzt werden können. - Page 55 Anleitung Starline Roldeck Führung des Bügeleinbaus Der geführte Bügeleinbau dient zur Führung in die richtige Richtung der Lamellen, die aus dem Wasser kommen. Weil der Clip an der zweiten Lamelle montiert ist, sorgt der abgerundete Teil dafür, dass die erste Lamelle nur an einer einzigen Seite aufklappen kann.
-
Page 56: Entkalken
(1 Liter pro 10 m2). • Das Entkalkungsmittel 1 bis 2 Stunden einwirken lassen. • Das Roldeck in Bahnen von links nach rechts abspritzen, so dass der Kalk aus den Rillen gespritzt wird. Wenn nötig die Lamellen zuerst mit einem Schrubber abbürsten. -
Page 57: Störungen
Kurzschluss (Motorstrom > 30 A) • Zu viel Strom (Motorstrom für 10 s > 9,5 A) • Laufzeitfehler (Roldeck > 900 s, Klappe > 120 s) • Überspannung (Motorspannung für 5 s > 45 V) • Überhitzung des Chopper-Moduls (Temp. > 100 °C) •... -
Page 58: Störungen Vorbeugen
Entfernen Sie alle auf dem Wasser treibenden Gegenstände vor dem Öffnen und Schliessen des Roldecks. Wellen Warten Sie bis sich das Wasser vollständig beruhigt hat und alle Wellen verschwunden sind, bevor Sie das Roldeck schliessen. Warten Sie mindestens 30 Sekunden. RDCM V03-1015... -
Page 59: Wasserstand Regeln
Der Wasserstand wird vom Installateur eingestellt. Standregler Der Standregler ist mit 4 LED-Anzeigen ausgestattet: A Max. Wasserstand (Roldeck kann nicht geöffnet oder geschlossen werden) B Wasserstand in Ordnung C Wasserzufuhr ein D Min. Wasserstand (siehe A) Wenn alle LEDs leuchten, hat der Standregler 12 Mal hintereinander nachgefüllt, wenn... -
Page 60: Manuelle Roldeckbedienung
Open Prog. Close Mode Roldeck die gewünschte Position erreicht hat, manuell bedient werden. Wenn die Taste losgelassen wird, stoppt das Roldeck automatisch. Achten Sie beim Öffnen oder Schließen der Roldeck dass das Roldeck nicht zu weit zu bewegen. RDCM V03-1015... -
Page 61: Technische Spezifikationen
Anleitung Starline Roldeck Technische Spezifikationen Material der Lamellen Hart-PVC / PC Gewicht der Lamellen 4,8 kg/m - 5 kg/m Verfügbare Farben Weiss Blau Grau Creme Transparent (vor allem geeignet für Innenbäder) Solar (spezial für Freibäder) Steuerung RDEB2013 Microprozessorsteuerung (EEPROM) 230 V / 24 V... - Page 62 Starline voert een beleid van continue productverbetering, wijzigingen zij derhalve voorbehouden. De verstrekte informatie is geldig voor het product zoals dit door Starline is geproduceerd. Starline kan derhalve niet aansprakelijk worden gesteld voor eventuele schade voortvloeiend uit afwijkingen van de oorspronkelijke specificaties van het product.
- Page 63 Verwijderen van het RDEB2013 voorpaneel ..................68 Overzicht RDEB2013 Roldeckbesturingskast ..................69 S-Switch bedieningspaneel ........................ 70 Bediening sleutelschakelaar ....................... 71 Afstandsbediening ..........................71 Programmering Roldeck besturing met de S-Switch ......... 72 Roldeckbesturing ..........................72 Fijnafstelling Roldeck met de S-Switch ....................75 Afstandsbediening programmeren ...................... 77 Toetsenblokkering opheffen........................ 79 AutoLock functie ..........................80...
-
Page 64: Algemeen
1.4 Service en onderhoud • Laat de installatie van het Roldeck minstens éénmaal per jaar door uw installateur controleren. • Meld storingen aan het Roldeck altijd aan uw installateur. • Bescherm ongebruikte lamellen tegen direct zonlicht. -
Page 65: Overzicht
Gebruikershandleiding Starline Roldeck Overzicht Roldeck S-Switch Roldeckbesturing Aan/uit schakelaar Sleutelschakelaar Niveauregeling Niveau meetpunt Afstandsbediening RDCM V03-1015... -
Page 66: Veiligheid
Zet de sleutelschakelaar in stand 0 als het Roldeck geopend is. Als de sleutelschakelaar in stand 0 staat werkt deze als noodstop en is het Roldeck niet bedienbaar. (kinderveiligheid) Zorg ervoor dat bij het sluiten van het Roldeck geen personen of voorwerpen in het zwembad aanwezig zijn. -
Page 67: Roldeck
Gebruikershandleiding Starline Roldeck 3.4 Roldeck Zorg er altijd voor dat het Roldeck volledig is geopend wanneer het zwembad in gebruik is. Het gebruik van het zwembad terwijl het Roldeck gedeeltelijk of volledig gesloten is kan leiden tot letsel en/of beschadiging van het Roldeck. -
Page 68: Bediening
Gebruikershandleiding Starline Roldeck Bediening 4.1 Overzicht besturing Roldeck besturingskast RDEB 2013 Aan/uit schakelaar Sleutelschakelaar / Noodstop S-Switch bedieningspaneel Afstandsbediening 4.2 Verwijderen van het RDEB2013 voorpaneel VERWIJDEREN VAN RDEB2013 PANEEL LET OP: 1.Vóór het openen van de behuizing dient het apparaat spanningsvrij te worden gemaakt. -
Page 69: Overzicht Rdeb2013 Roldeckbesturingskast
Gebruikershandleiding Starline Roldeck 4.3 Overzicht RDEB2013 Roldeckbesturingskast Closing Speed Closing Speed J401 13 14 15 16 10 11 12 N L1 Ls J200 bl. br. sw. Power Switch J200 J2 J1 J502 U501 U500 5A/T S400 X200 J104 J103 J102... -
Page 70: S-Switch Bedieningspaneel
Door deze toets in te drukken, wordt het Roldeck opgerold. “Close” toets Door deze toets in te drukken, wordt het Roldeck afgerold. Control – “Open” / “Close” Status aflezen van het Roldeck en overige func- ties. Tijd Tijdsaanduiding Temperatuur Watertemperatuur aflezen (optioneel) Indicator symbolen Geeft bijv. -
Page 71: Bediening Sleutelschakelaar
D Tuinverlichting E LED: geeft aan dat de afstandsbediening functioneert. Roldeck open / stop /close (A). Met de knop (A) kan het Roldeck “geopend” of “gesloten” worden. Notes • Zorg bij het openen en sluiten ervoor dat er zicht is op het zwembad;... -
Page 72: Programmering Roldeck Besturing Met De S-Switch
S-switch! Het scherm toont het volgende beeld PROG “programmeren“ van het Roldeck. De looprichting van de Roldeck kan veranderd worden. Gebruik tijdens de eerste programmering de pijltoetsen of om de looprichting te veranderen. Druk kort op de middelste toets “lamp symbool“... - Page 73 Gebruikershandleiding Starline Roldeck Het scherm toont het volgende beeld. Er kan worden gestart met het programmeren van de “OPEN” positie van het Roldeck. CLOSE OPEN De looprichting van het Roldeck wordt aangegeven door de pijl . De “” geeft weer dat de motor niet herkend wordt.
- Page 74 De “” geeft aan dat de programmering geslaagd is. Opmerking: door het lamp symbool aan te raken wordt de programmering beëindigd. Verwijder ook de jumper op de printplaat van de besturing! Voor “fijn” afstelling Roldeck zie vervolg pagina’s. RDCM V03-1015...
-
Page 75: Fijnafstelling Roldeck Met De S-Switch
“fijn afstelling” te gaan en bevestig het menu met een druk op het lampsymbool. Nu kan de fijn afstelling uitgevoerd worden De positie van het Roldeck kan nu alleen nog met de pijltoetsen of aan te raken aangepast worden. - Page 76 Gebruikershandleiding Starline Roldeck De positie van het Roldeck wordt opgeslagen met de toets “lamp symbool” CLOSE OPEN Na het programmeren van de fijninstelling geeft de S-Switch aan of de programmering geslaagd of niet geslaagd is. Bij een juiste programmering wordt een “”...
-
Page 77: Afstandsbediening Programmeren
Gebruikershandleiding Starline Roldeck 5.3 Afstandsbediening programmeren De zender van de afstandsbediening is voorgeprogrammeerd. Als de zender wordt vervangen, of als het aantal zenders wordt uitgebreid, volg dan de onderstaande procedure. Let er bij het programmeren op dat de zender en ontvanger niet verder dan 5 meter van elkaar verwijderd zijn. - Page 78 ROLDECK Met de knop (B) kan de zwembadverlichting aan of uitgeschakeld worden. Indien de zwembadverlichting aan is, en het Roldeck wordt in werking gesteld gaat de zwembadverlichting uit. Nadat het Roldeck MENU gestopt is gaat de zwembadverlichting weer aan. Het lampsymbool licht in de display op.
-
Page 79: Toetsenblokkering Opheffen
Gebruikershandleiding Starline Roldeck 5.4 Toetsenblokkering opheffen Het display toont dat de toetsenblokkering actief is. 11: 45 ROLDECK MENU Bij het indrukken van een willekeurige toets, 11: 45 ROLDECK zal het scherm met “KEY LOCK HOLD OK” automatisch na 15 minuten (time-out) worden weergegeven. -
Page 80: Autolock Functie
Zet eerst de besturing aan door middel van de rode schakelaar (1) en plaats de jumper van de RDEB2013 op de 2 connector aansluitingen (2). De positie van de Roldeck kan na het PROG programmeren worden veranderd door op de “lampsymbool“ toets van de S-Switch te drukken. -
Page 81: Reiniging En Onderhoud
Algaanslag aan de lamellen kan zich zowel aan de bovenzijde als aan de onderzijde van het Roldeck ontwikkelen. • De filterinstallatie dient overdag te zijn ingeschakeld aangezien zich anders warmte onder de afdekking ophoopt, waardoor blijvende vervorming van de lamellen optreedt. -
Page 82: Uit Elkaar Halen Lamellen
Gebruikershandleiding Starline Roldeck 6.4 Uit elkaar halen lamellen Door de linker lamel ten opzichte van de rechter lamel (kan in spiegelbeeld zijn) omhoog te bewegen kan het bovenste haakje van de rechter lamel uit de sluiting komen. Vervolgens kan het onderste haakje uit de sluiting genomen worden. -
Page 83: In Elkaar Zetten Lamellen
Probeer door op en neer te bewegen de verbinding over de gehele lengte van de lamellen tot stand te brengen. Opmerking Schuif het Roldeck zo dicht mogelijk naar de rand. Dit vergemakkelijkt het vervangen van de lamellen. RDCM V03-1015... -
Page 84: Clips En Beugels
Voor de eindklant is het erg moeilijk om de juiste positie te bepalen. Kinderveiligheidsbeugel De kinderveiligheidsbeugel zit op de eerste lamel gemonteerd en dient als slotgat voor de haak van het kinderveiligheidsslot zodat het roldeck niet kan worden opengeduwd. RDCM V03-1015... - Page 85 Gebruikershandleiding Starline Roldeck Richtinggeleiding beugel inbouw De functie van de richtinggeleiding beugel inbouw is om de lamellen die van uit het water omhoog komen de juiste richting op te geleiden. Doordat de clip aan de tweede lamel is gemonteerd zorgt het afgeronde deel ervoor dat de eerste lamel maar een kant op kan schanieren.
-
Page 86: Ontkalken
(1 liter per 10 m • Laat de ontkalker gedurende 1 à 2 uur op het oppervlak inwerken. • Spuit het roldeck af in banen van links naar rechts zodat alle kalk uit de groeven wordt gespoten. Indien nodig de lamellen eerst met een schrobber af borstelen. -
Page 87: Storingen
Ingang Waterniveau sensor open (Model RD: SK) • Sleutelschakelaar op “0” • Onder druk Roldeckaandrijving, te lage druk in buismotor Roldeck • Onder druk klepaandrijving, te lage druk in buismotor automatische klep Bij foutmelding F04, F11 en F12: besturing uitschakelen. -
Page 88: Voorkomen Van Storingen
Gebruikershandleiding Starline Roldeck 7.2 Voorkomen van storingen Let op dat bij het bewegen van het Roldeck bodemstofzuigerslang niet meegetrokken wordt. Obstakels Verwijder voor het openen en sluiten alle drijvende voorwerpen uit het water en van het Roldeck. Golfslag Wacht met sluiten totdat de golfslag in het water is verdwenen en het water zich rustig gedraagt. -
Page 89: Waterniveau Regeling
De niveauregeling dient voor het optimaal nivelleren van het waterniveau in het zwembad. Houd het waterniveau op het juiste peil zodat het Roldeck geen hinder ondervindt van randstenen, de veiligheidsrand of grijpstangen. Overloop De overloop in de skimmer zorgt ervoor dat overtollig water onmiddellijk wordt afgevoerd in het riool. -
Page 90: Handmatige Roldeck Bediening
Gebruikershandleiding Starline Roldeck 7.4 Manual Roldeck Operation Als de motor van het roldeck niet meer functioneert als gevolg van een storing aan de sensor (foutcode afleesbaar in LED display of s-switch). De functie van de sensor wordt uitgeschakeld door middel van een knoppen/ jumper. -
Page 91: Technische Specificaties
Gebruikershandleiding Starline Roldeck Technische specificaties Materiaal lamellen Hard PVC / PC Gewicht lamellen 4,8 kg/m - 5 kg/m Beschikbare kleuren Blauw Grijs Crème Transparant (vooral geschikt voor binnenbaden) Solar (speciaal voor buitenbaden) Besturing RDEB2013 microprocessor gestuurd (EEPROM) 230 V / 24 V... - Page 92 La información emitida no pueden multiplicarse y / o divulgación en cualquier forma, por cualquier medio, (electrónico o mecánico), sin su consentimiento explícito, previo permiso por escrito de Starline Grupo de Países Bajos. La información proporcionada se basa en los datos que se conocían al momento de la expedición del producto.
- Page 93 Overview RDEB 2013 Roldeck Control ....................99 S-Switch Control panel ........................100 Key Switch ............................101 Control remoto ..........................101 Programming the Roldeck Control with S-Switch ........102 Roldeck control ..........................102 Fine tuning Roldeck with the S-Switch ..................... 105 Programming Remote Control ......................107 Releasing Keylock S-Switch ......................
-
Page 94: General
1.3 Consideraciones medio-ambientales. Si se descarta la Roldeck, debe desecharse de acuerdo con las disposiciones medio ambientales vigentes a nivel local. Transportar al centro de reciclaje local para la reutilización del producto y de su embalaje , sin dañar el medio ambiente. -
Page 95: Descripción General
Manual del usuario Starline Roldeck Descripción general A Cubierta Roldeck B S-Interruptor C Panel de control D Encendido / apagado E Botonera F Control de nivel opcional G Punto de medición de nivel opcional H Mando a distancia RDCM V03-1015... -
Page 96: Seguridad
S-Switch will work as emergency shutdown as well if the motor is running. 3.2 Operación To operate the Roldeck the key switch must be in position 1. Situe la llave en la posición 0 si la cubierta ha sido abierta. If the key switch is in postion 0 it works as emergency stop and the Roldeck is not operable. -
Page 97: Roldeck
Todas las ventajas que proporciona la cubierta Roldeck no se aprovechan si se usa una lona de invernaje dejando la Roldeck en posición abierta. Es cierto que la cubierta Roldeck puede ensuciarse al usarse en combinación con una lona de invernaje, pero la piscina será... -
Page 98: Operación
Manual del usuario Starline Roldeck Operation 4.1 Overview Control Roldeck control RDEB 2013 On/Off switch Key Switch S-Switch Remote control 4.2 Removal of the RDEB2013 front panel REMOVAL OF THE RDEB2013 PANEL PLEASE NOTE: 1.Before the housing is opened the equipment must be switched off. -
Page 99: Overview Rdeb2013 Roldeck Control
Manual del usuario Starline Roldeck 4.3 Overview RDEB2013 Roldeck Control Closing Speed Closing Speed J401 13 14 15 16 10 11 12 N L1 Ls J200 bl. br. sw. Power Switch J200 J2 J1 J502 U501 U500 5A/T S400 X200... -
Page 100: S-Switch Control Panel
“Open” key By pressing this key the Roldeck will roll up. “Close” key By pressing this key the Roldeck will be unrolled. Control – “Open” / “Close” Status reading the Roldeck and other functions. Time Time indication Temperature Water temperature reading (optional) Indicator symbols Indicates for example lights or jetstream are on. -
Page 101: Key Switch
D Garden Light E LED: will indicate that the remote control is functioning. Roldeck open / stop /close (A). With the button (A) the Roldeck can be “opened” or “closed”. Notes • Be sure you can see the swimming pool when opening and closing;... -
Page 102: Programming The Roldeck Control With S-Switch
5.1 Roldeck Control Programming of the Roldeck control occurs with the help of the S-switch control panel. • First turn on the Roldeck Control by means of the red button (1) and connect the jumper of the RD2013 into socket 3,15A/T (2). - Page 103 By pressing the arrow key the motor will be detected. The “OPEN” position is programmed by pressing the arrow key . Press the arrow key until the Roldeck fully opened. CLOSE OPEN The arrow above the position “open”...
- Page 104 Manual del usuario Starline Roldeck Press the middle key “light symbol” again once to save the “CLOSE“ position. The hourglass “” shows CLOSE OPEN again a short waiting time. 1 sec. When the Roldeck is programmed, PROG the display changes to the programming menu.
-
Page 105: Fine Tuning Roldeck With The S-Switch
or . By pressing the middle key “light symbol” shortly the fine tuning is called (| flashes). The Roldeck is in the “CLOSE” position, this CLOSE OPEN indicates that fine tuning is possible for the position “close”. - Page 106 Manual del usuario Starline Roldeck The position of the Roldeck is saved with the “light symbol” key. After programming of the fine CLOSE OPEN tuning, the S-Switch shows if the programming is correct or incorrect successful. With a correct programming a “” is displayed.
-
Page 107: Programming Remote Control
Manual del usuario Starline Roldeck 5.3 Programming Remote Control The remote control transmitter is pre- programmed. If the transmitter is replaced, or if the number of transmitters is expanded, follow the procedure below. Make sure that the transmitter and the receiver will not be more than 5 meter distance from each other during programming. - Page 108 With the button (B) the pool lights can be switched on or off. When the pool lights are on, and the Roldeck is running, the pool lights are switched off. After the Roldeck has stopped the pool lights will switch on MENU again.
-
Page 109: Releasing Keylock S-Switch
Manual del usuario Starline Roldeck 5.4 Releasing Keylock S-Switch The display shows the keylock active. 11: 45 ROLDECK MENU When pressing 1x at any key, the 11: 45 ROLDECK “KEY LOCK HOLD OK” overlay screen will appear automatically after 15 minutes (timeout). -
Page 110: Autolock Function
The menu returns to the symbol time. 19 : 11 5.6 Changing position of the Roldeck (afterwards) First turn on the Roldeck Control by means of the red button and connect the jumper of the RD2013 into socket. The position of the Roldeck can be changed... -
Page 111: Limpieza Y Mantenimiento
Manual del usuario Starline Roldeck Limpieza y mantenimiento 6.1 Láminas Es aconsejable limpiar al menos dos veces al año la cubierta con un cepillo rígido y una máquina de agua a presión. Las algas puede aparecer tanto en la parte superior de la cubierta como en la inferior. -
Page 112: Desmontaje De Láminas
Manual del usuario Starline Roldeck 6.4 Desmontar láminas Para el desmontaje de una lámina, es necesario forzar hacia arriba la situada a la derecha del punto de vista del dibujo, sobre la del lado izquierdo. Una vez que el gancho inferior del macho supera el alojamiento, se extrae la lámina hacia la... -
Page 113: Montaje De Láminas
Manual del usuario Starline Roldeck 6.5 Montaje de láminas Aproxime las láminas el lado macho contra el hembra de la siguiente. El gancho inferior del lado macho, debe entrar en primer lugar. A continuación, efectúe un movimiento hacia abajo de las dos láminas al mismo tiempo. -
Page 114: Clips Y Soportes
Manual del usuario Starline Roldeck 6.6 Clips y Guías Guía direccional. El propósito de la guía direccional es dirigir la cubierta en la posición correcta cuando esta entra en contacto con el agua. Esto lo hace, manteniendo la primera lámina bajo un angulo mas inclinado que la segunda Clip anti deslizante. - Page 115 Manual del usuario Starline Roldeck Guía direccional En este caso, la guía direccional conduce la cubierta desde la primera lámina en la dirección correcta. El clip va montado sobre la segunda lámina para mantener inclinada la primera, asegurando que esta gire hacia el sentido deseado.
-
Page 116: Descalcificación
Manual del usuario Starline Roldeck 6.7 Descallcificando La cal del agua puede depositarse sobre la superficie de la cubierta. Para eliminarla, siga las siguientes instrucciones utilizando Roldeck Ontkalker: Extienda el producto sobre la cubierta con un spray, y una proporción de 1 litro por 10 m •... -
Page 117: Detección De Averías
Water Level Sensor Input Open (RD Model: SK) • Key switch off “0” • Under pressure Roldeck driver, low pressure in in-roller motor Roldeck • Under pressure liddriver, low pressure in in-roller motor of moveable bottom flap For error F04, F11 and F12: switch control off... -
Page 118: Prevención De Fallos
Manual del usuario Starline Roldeck 7.2 Prevención de fallos Asegúrese de que el limpiafondos automático no se encuentre en el interior de la piscina cuando proceda a cubrir la misma. Obstáculos: Elimine cualquier objeto flotante de la piscina antes de abrirla o cerrarla. -
Page 119: Control De Nivel De Agua
Manual del usuario Starline Roldeck 7.3 Control de nivel Control de nivel El controlador de nivel Starline va en combinación con un rebosadero. El propósito de esta combinación, es mantener un nivel optimo para el funcionamiento Mantener el correcto nivel de agua, evita que la cubierta se frene contra la piedra de coronación, o... -
Page 120: Operación Manual
Manual del usuario Starline Roldeck 7.4 Manual Roldeck Operation If the Roldeck motor fails due to a malfunction with one of the sensors (error code is readable in LED display or s switch). The function of the sensor can be switched off by means of a button combination together with the jumper. -
Page 121: Especificaciones Técnicas
Manual del usuario Starline Roldeck Especificaciones técnicas Laminas PVC endurecido/ PC (policarbonato) Peso láminas 4,8 kg/m - 5 kg/m Colores disponibles Blanco azul gris crema transparentes (especialmente recomendadas para piscinas interiores) solares (especialmente recomendadas para piscinas exteriores) Panel de control. - Page 122 The usage names, trade names, trade marks etc., used by Starline, cannot be considered free in virtue of legislation concerning the protection of trade marks.
- Page 123 Overview RDEB2013 Roldeck Control ....................129 S-Switch Control panel ........................130 Operating the Key Switch ......................... 131 Remote Control ..........................131 Programming the Roldeck Control with S-Switch ........132 Roldeck Control ..........................132 Fine tuning Roldeck with the S-Switch ..................... 135 Programming Remote Control ......................137 Releasing Keylock S-Switch ......................
-
Page 124: General
Do not step on it! 1.3 Disposal and Environment If the Roldeck is discarded, it must be disposed of according to locally valid regulations. Enquire at the local recycling centre for possibilities for reuse and for environment-friendly processing of the product and the packing. -
Page 125: Overview
Manuel d‘utilisation Starline Roldeck Overview Roldeck S-Switch Roldeck Control On /off switch Key switch Optional Level Control Optional Level Measurement Point Remote Control RDCM V03-1015... -
Page 126: Safety
To operate the Roldeck the key switch must be in position 1. Set the key switch to the 0 position if the Roldeck has been opened. If the key switch is in postion 0 it works as emergency stop and the Roldeck is not operable. -
Page 127: Roldeck
3.4 Roldeck Always make sure that the Roldeck has been fully opened when the pool is being used. Use of the pool while the Roldeck has been closed partially or completely may result in injury and/or Roldeck damage. Don’t stand/walk on the Roldeck. -
Page 128: Operation
Manuel d‘utilisation Starline Roldeck Operation 4.1 Vue d‘ensemble des organes de commande Boîtier de commande Roldeck RDEB2013 Interrupteur Marche/Arrêt Interrupteur à clé / Arrêt d‘urgence Panneau de commande S-Switch Télécommande 4.2 Removal of the RDEB2013 front panel REMOVAL OF THE RDEB2013 PANEL PLEASE NOTE: 1.Before the housing is opened the equipment... -
Page 129: Overview Rdeb2013 Roldeck Control
Manuel d‘utilisation Starline Roldeck 4.3 Overview RDEB2013 Roldeck Control Closing Speed Closing Speed J401 13 14 15 16 10 11 12 N L1 Ls J200 bl. br. sw. Power Switch J200 J2 J1 J502 U501 U500 5A/T S400 X200 J104... -
Page 130: S-Switch Control Panel
Cette touche commande l'enroulement du Roldeck “Close” touche Cette touche commande le déroulement du Roldeck Control – “Open” / “Close” Lecture du statut du Roldeck et autres fonctions Time Indication de l’heure Temperature Lecture de la température de l’eau (en option) Indicator symbols Indicates for example lights or jetstream are on. -
Page 131: Operating The Key Switch
D Éclairage de jardin E LED: indiquera que la télécommande fonctionne. Roldeck ouvrir / arrêter / fermer. (A). With the button (A) the Roldeck can be “opened” or “closed”. Notes • Be sure you can see the swimming pool when opening and closing;... -
Page 132: Programming The Roldeck Control With S-Switch
Manuel d‘utilisation Starline Roldeck Programmation de la commande Roldeck avec le S-Switch 5.1 Roldeck Control Programming of the Roldeck control occurs with the help of the S-switch control panel. • Activez d‘abord la commande au moyen de l‘interrupteur rouge (1) et placez le cavalier dans le connecteur (2). - Page 133 L‘écran affiche l‘image suivante. Il est possible de démarrer la programmation de la position “OPEN” du Roldeck. La direction CLOSE OPEN de marche du Roldeck est indiquée par la flèche . Le “” indique que le moteur n‘est pas reconnu.
- Page 134 “CLOSE” position. Le sablier CLOSE OPEN “” indique de nouveau un bref délai d‘attente. 1 sec. Une fois que le Roldeck a été PROG programmé, s‘affiche le menu principal de programmation. Le “” indique que la programmation a été effectuée avec succès.
-
Page 135: Fine Tuning Roldeck With The S-Switch
Le Roldeck est dans la position “CLOSE” ce qui indique qu‘un réglage de précision est possible pour la position “close”. 1 sec. Le Roldeck est amené, par le biais des flèches “OPEN” ou “CLOSE” vers la position correcte. OPEN CLOSE Le réglage de précision du Roldeck... - Page 136 Manuel d‘utilisation Starline Roldeck La position du Roldeck est sauvegardée au moyen de la touche “symbole lampe”. CLOSE OPEN Après la configuration du réglage de précision, le S-Switch indique si la programmation a été ou non réussie. Si la programmation a été réussie est affichée un “”.
-
Page 137: Programming Remote Control
Manuel d‘utilisation Starline Roldeck 5.3 Programmation de la télécommande The remote control transmitter is pre- programmed. If the transmitter is replaced, or if the number of transmitters is expanded, follow the procedure below. Make sure that the transmitter and the receiver will not be more than 5 meter distance from each other during programming. - Page 138 L‘éclairage de la piscine peut être activé et désactivé au moyen de la touche (B). Lorsque l‘éclairage de la piscine est allumé et que le Roldeck est mis en marche, l‘éclairage de la piscine s‘éteint. Lorsque MENU le Roldeck s‘est arrêté, l‘éclairage de la piscine s‘allume de nouveau.
-
Page 139: Releasing Keylock S-Switch
Manuel d‘utilisation Starline Roldeck 5.4 Releasing Keylock S-Switch The display shows the keylock active. 11: 45 ROLDECK MENU When pressing 1x at any key, the 11: 45 ROLDECK “KEY LOCK HOLD OK” overlay screen will appear automatically after 15 minutes (timeout). -
Page 140: Autolock Function
The menu returns to the symbol time. 19 : 11 5.6 Changing position of the Roldeck (afterwards) First turn on the Roldeck Control by means of the red button and connect the jumper of the RD2013 into socket. The position of the Roldeck can be changed... -
Page 141: Cleaning And Maintenance
Clean the slatted cover at least twice a year with a high-pressure cleaner and a hard brush. Algae growth on the slats can develop itself both on the top side and the bottom side of the Roldeck. • The water circulation system (filter system) must run during daytime when solar or transparent slats are being used. -
Page 142: Disassembling Slats
Manuel d‘utilisation Starline Roldeck 6.4 Disassembling slats Upward the left slat in relation to the right slat (this can be reversed), the upper hook latch of the right slat can come out of the lock. Next, the lower hook latch can be taken out of the lock. -
Page 143: Assembling Slats
(this can be reversed). Try to make the connection across the entire length of the slats by moving up and down. Note Slide the Roldeck towards the edge as close as possible. This will simplify replacement of the slats. RDCM V03-1015... -
Page 144: Clips And Brackets
Child Safety Handle The child safety handle has been mounted onto the first slats and it serves as locking hole for the child safety lock’s hook latch, in order that the roldeck cannot be pushed open. RDCM V03-1015... - Page 145 Manuel d‘utilisation Starline Roldeck Roldeck guiding bracket (below-ground system) The function of the directional guide handle fitting is to guide the slats that come upward out of the water into the correct direction. As the clip was mounted onto the second slats, the rounded part will ensure that the first slats can only pivot one way.
-
Page 146: Descaling
Let the descaler act on the surface for about 1 or 2 hours. • Spray the roldeck in bands from left to right in order to spray all calcium out of the cavities. Brush the slats first with a scrubber if necessary. -
Page 147: Failures
• entrée interrupteur à clé est ouvert • Sous-pression entraînement Roldeck, pression trop faible dans moteur tubulaire Roldeck • Sous-pression entraînement clapet, pression trop faible dans moteur tubulaire du clapet automatique En cas de messages d‘erreur F04, F11 en F12 : désactivation de la commande... -
Page 148: Failure Prevention
Roldeck. Obstacles Remove all floating objects from the water and from the Roldeck before opening and closing. Wave Action Don‘t close until water wave action has disappeared and the water is behaving calmly. -
Page 149: Water Level Control
The correct water level will be set by the installer. Level Control The level control is fitted with 4 LED indicators: A Max. water level (Roldeck cannot open or close) B Water level correct C Water supply enabled D Min. water level (refer to A) If all LED’s light, the level control has run for... -
Page 150: Manual Roldeck Operation
“Open” ou “Close” de l‘interrupteur à clé, Open Prog. Close Mode jusqu‘à ce que le Roldeck se trouve dans la position désirée. Le Roldeck ne s‘arrête pas automatiquement. Veillez donc à ce que, lors de son ouverture ou fermeture, il n‘avance pas trop loin. -
Page 151: Technical Specifications
Manuel d‘utilisation Starline Roldeck Technical Specifications Slats material Hard PVC / PC Slats weight 4,8 kg/m - 5 kg/m Available colors White Blue Gray Cream Translucent (especially suitable for internal swimming pools) Solar (especially for external swimming pools) Control RDEB2013... -
Page 152: Supplement
Manuel d‘utilisation User manual/Anleitung/Gebruikershandleiding/Manual del usuario/ Supplement/Suplemento Sticker/Kleber/Sticker/Etiqueta/Autocollant Installer Stamp/Installateursaufdruck/Installateur stempel/ Instalador de sello RDCM V03-1015... - Page 153 Manuel d‘utilisation User manual/Anleitung/Gebruikershandleiding/Manual del usuario/ Notes/Bemerkungen/Opmerkingen/ Comentarios/ Commentaires RDCM V03-1015...
- Page 154 STARLINE, LEADING IN POOLS & EQUIPMENT...
Need help?
Do you have a question about the ROLDECK and is the answer not in the manual?
Questions and answers