Table of Contents
Advertisement
Advertisement
Table of Contents
Troubleshooting

Related Manuals for EdgeStar BIDW1802SS


Summary of Contents for EdgeStar BIDW1802SS
- Page 1 18” Built-In Dishwasher BIDW1802SS / BIDW1802WH BIDW1802BL Owner’s Manual For more information on other great EdgeStar products on the web, go to https://www.edgestar.com To use the EdgeStar self-diagnostic tool, go to https://support.edgestar.com V1.0-12052018...
-
Page 2: Important Safety Information
IMPORTANT SAFETY INFORMATION Read all instructions carefully prior to use. For your safety, the information detailed in this manual should be followed. Improper use and/or handling can cause serious damage to the appliance and/or to the user including but not limited to fire, explosion, and/or electric shock, resulting in personal injury, or death. - Page 3 General Safety Installation, maintenance and repair should be performed by a qualified installer. Work by unqualified persons could be dangerous and may void the warranty. This dishwasher should be properly installed and placed in a location in accordance with the Installation Instructions prior to operation.
-
Page 4: Table Of Contents
Cleaning the Lower Spray Arm ............................. 18 Protecting Against Freezing ..............................18 Preparation for Storage ................................. 18 Moving the Dishwasher ................................. 18 TROUBLESHOOTING ........................19 Error Codes ................................... 19 Troubleshooting Guide ................................20 SPECIFICATIONS ..........................22 EDGESTAR LIMITED WARRANTY ....................23... -
Page 5: First Time Operating Instructions
Introduction Thank you for purchasing this EdgeStar dishwasher. We hope that this purchase will be the beginning of a lasting and rewarding relationship between you and EdgeStar. We will provide the customer support and exemplary products necessary to nurture that relationship. -
Page 6: Parts Identification
Parts Identification Front View with Door Open... -
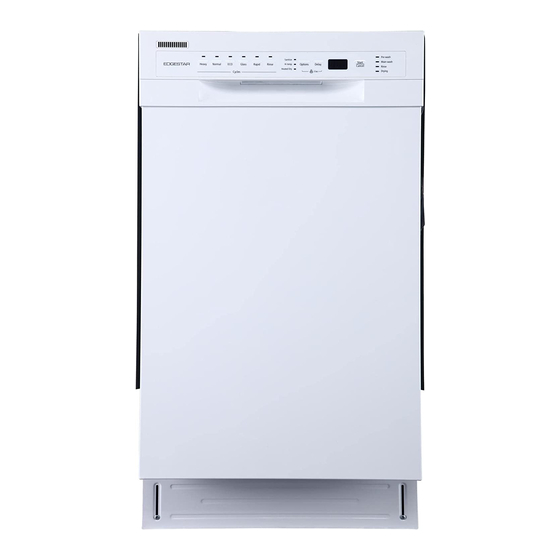
Page 7: Front View With Door Closed
Front View with Door Closed Unpacking the Dishwasher Use at least two people to move and install the dishwasher to prevent injuries. Always lift the dishwasher to move it as sliding it can damage its base and feet, or floor surfaces. ... -
Page 8: Features Of Your New Dishwasher
Features of Your New Dishwasher Multiple Filter System Your dishwasher has a Multiple Filter System. In the system there are three filters that can separate soiled water and clean water in different chambers. This Multiple Filter System improves your dishwasher’s performance with less water and energy use. -
Page 9: Quick Start
Quick Start 1. Load the dishwasher (see Preparing and Loading Dishes section.) 2. Add detergent (see Filling the Detergent Dispenser.) 3. Add LIQUID rinse aid (see Filling the Rinse Aid Dispenser.) Rinse aid greatly improves drying and reduces water spots and film. The heated drying option will not perform as well without rinse aid. - Page 10 Status Display – If the Delay Start function is selected, the number of HOURS (H:01 – H:24) remaining in the delay time is shown. After a Wash Cycle is selected, the remaining time of the cycle is shown in hours and minutes (2:45 – END or -:--.) In certain situations that are critical to the dishwasher’s function and safe operation, the display may show error codes.
-
Page 11: Cycle Chart
Cycle Chart Note: The remaining time can suddenly increase or decrease by several minutes. This means the Smart Sensor has checked the soil level and determined if additional water fills need to be added or subtracted. Wash Cycle Description Water Use (Gal./Lit.) Cycle Time (Min.) Pre-wash Main-wash (140°F/60°C) -
Page 12: Preparing And Loading Dishes
Preparing and Loading Dishes Dish Preparation Scrape away large pieces of food, bones, pits, toothpicks, etc. The continuously filtered wash system will remove the remaining food particles. Burned-on foods should be loosened before loading. Empty any liquids from glasses and cups. Foods such as mustard, mayonnaise, vinegar, lemon juice and tomato based products may cause discoloration of stainless steel and plastics if allowed to sit for a long period of time. -
Page 13: Loading The Upper Basket
Loading the Upper Basket The upper basket is designed for glasses, mugs, cups, small plates, bowls and plastic items marked “dishwasher safe.” For best results, place the items with their soiled surfaces facing down or toward the center. Tilt slightly for better drainage. Adjusting the Upper Basket The upper basket can be raised to allow for dishes up to 11”... -
Page 14: Loading The Silverware Basket
Loading the Silverware Basket The silverware basket is divided into separate compartments (illustrated below) to allow for maximum cleaning efficiency. Spoons and forks should be placed in the basket with their handles pointing downward. Knives and other sharp utensils should be placed in the basket with their handles pointed upward. -
Page 15: Forgot To Add A Dish
Forgot to Add a Dish? A dish can be added any time before the detergent dispenser opens: 1. Open the door slightly and wait several seconds for the wash cycle to stop. 2. You can open the door completely after the spray arms stop spinning. 3. - Page 16 2. Add the recommended amount of dishwasher detergent to the main wash compartment. Close the cap by sliding it forward and pressing down Caution: Use only detergent specifically made for use in dishwashers. Do not use dish detergent designed for hand washing dishes as it will cause the dishwasher to overflow with suds.
-
Page 17: Filling The Rinse Aid Dispenser
Filling the Rinse Aid Dispenser The rinse aid is released during the final rinse to remove spots, prevent new film build-up on your dishes, glasses, flatware, cookware and plastic, and to improve drying time. Your dishwasher is designed to use ONLY LIQUID rinse aids. DO NOT use powdered rinse aids which will clog the dispenser and cause malfunctions. -
Page 18: Completing A Wash Cycle
4. Refill the rinse aid when the Status Display shows the “LSb” error code. Your dishwasher will run with low or no rinse aid, but your rinsing and drying results will suffer. Note: Only use branded rinse aid, such as Jet-Dry, for the dishwasher. ... -
Page 19: Dishwasher Maintenance
Dishwasher Maintenance Keeping your dishwasher clean improves its performance, reduces unnecessary repairs and lengthens its life. Cleaning the Exterior It is best to clean spills on the outside of your dishwasher as they occur. Use a soft, damp cloth on the control panel and door to gently wipe away spills and dust. - Page 20 Removing, Cleaning and Replacing the Filter Assembly 1. Turn off the dishwasher. 2. Rotate the filter assembly counterclockwise to unlock it, then pull up to remove it. 3. Take apart the three filters by pulling the fine and course filters in opposite directions, then separate them from the main (flat) filter.
- Page 21 4. Remove all debris from the filters by rinsing them under warm, running water. You may loosen trapped particles with a soft bristled brush. 5. Once clean, reassemble the filters and place the entire filter assembly back into its compartment. Then, rotate the course filter clockwise until it locks into place and the arrows on the main filter and the course filter line up.
-
Page 22: Cleaning The Lower Spray Arm
Cleaning the Lower Spray Arm The lower spray arm can be removed for periodic cleaning of the nozzles to prevent clogging and maintain the efficiency of your dishwasher. When removing the spray arm, exercise care so you don’t damage or break it. To remove, clean and replace the lower spray arm: 1. -
Page 23: Troubleshooting
Troubleshooting Error Codes Under certain conditions warning or malfunction codes will be shown on the Status Display. Error Meaning Possible Causes Code The water supply may not be opened or the water Long water inlet time pressure may be too low. The water inlet may also be restricted or kinked. -
Page 24: Troubleshooting Guide
Troubleshooting Guide Issue Possible Cause Solution Fuse is blown or Replace fuse or reset circuit breaker. Remove any other circuit breaker is appliances sharing the same circuit with the dishwasher. tripped Power Supply is not Call a certified technician to check and/or connect the Dishwasher connected or power supply. - Page 25 Issue Possible Cause Solution Rattling noise inside Item is not securely placed in Pause the wash cycle and secure the of dishwasher dish rack items in the dish rack. Black or gray marks Utensils may have rubbed Use a mild abrasive cleaner to eliminate on dishes against dishes marks.
-
Page 26: Specifications
Specifications 18” Built-In Dishwasher Description of product Model BIDW1802BL / BIDW1802SS / BIDW1802WH Color Black / Stainless Steel / White Number of Place Settings Maximum Diameter of Place Settings 11" Voltage/Frequency 120V AC/60Hz Input Power Wash motor 100W, Heater 700W... -
Page 27: Edgestar Limited Warranty
WHAT IS COVERED: For a period of ONE (1) YEAR from the date of original retail purchase, EdgeStar will repair or replace any part free of charge including labor that fails due to a defect in materials or workmanship. Labor will be performed free of charge at an authorized EdgeStar repair facility and EdgeStar will supply new, rebuilt, or refurbished parts free of charge.
Need help?
Do you have a question about the BIDW1802SS and is the answer not in the manual?
Questions and answers
E4 error, done all troubleshooting water feed is ok though not filling after reset, it is draining nothing plugged, filled and drained multiple times, whta now.
The E4 error on the EdgeStar BIDW1802SS dishwasher indicates water in the base pan, likely due to an overfill or small leak.
Next troubleshooting steps if the dishwasher is not filling after a reset:
1. Remove any water from the base pan.
2. Ensure the main water supply is turned on.
3. Check that the dishwasher door is properly closed and latched.
4. Confirm that the power supply is connected and turned on.
5. Verify the fuse is not blown or circuit breaker is not tripped.
6. Call a certified technician if the issue continues.
This answer is automatically generated