Table of Contents

Related Manuals for EdgeStar DWP62BL


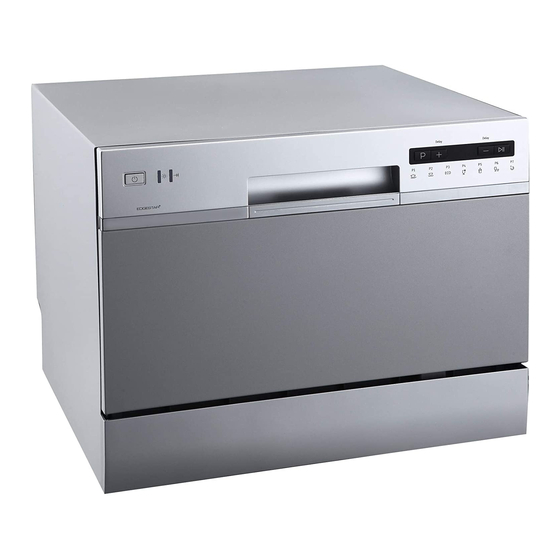
Summary of Contents for EdgeStar DWP62BL
- Page 1 Countertop Dishwasher DWP62BL / DWP62WH / DWP62SV Owner’s Manual For more information on other great EdgeStar products on the web, go to https://www.edgestar.com To use the EdgeStar self-diagnostic tool, go to https://support.edgestar.com V2.0-12292017...
- Page 2 IMPORTANT SAFETY INFORMATION Read all instructions carefully prior to use. For your safety, the information detailed in this manual should be followed. Improper use and/or handling can cause serious damage to the appliance and/or to the user including but not limited to fire, explosion, and/or electric shock, resulting in personal injury, or death.
- Page 3 General Safety This dishwasher should be properly installed and placed in a location in accordance with the Installation Instructions prior to operation. Do not attempt to repair or replace any part of your dishwasher unless it is specifically recommended in this manual.
-
Page 4: Table Of Contents
Table of Contents IMPORTANT SAFETY INFORMATION ....................I TABLE OF CONTENTS ........................III First Time Operating Instructions ............................1 INTRODUCTION ..........................1 PARTS IDENTIFICATION ........................2 Front View ....................................2 Back View ....................................2 Accessories ..................................... 2 PREPARING THE DISHWASHER FOR USE ..................2 INSTALLATION REQUIREMENTS ...................... -
Page 5: First Time Operating Instructions
Introduction Thank you for purchasing this EdgeStar dishwasher. We hope that this purchase will be the beginning of a lasting and rewarding relationship between you and EdgeStar. We will provide the customer support and exemplary products necessary to nurture that relationship. -
Page 6: Parts Identification
Parts Identification Front View Cup Shelf Cutlery Basket Filter System Filter System Spray Arm Detergent Dispenser Rinse Aid Dispenser Back View Accessories... -
Page 7: Preparing The Dishwasher For Use
Preparing the Dishwasher for Use Unpacking the Dishwasher Use at least two people to move and install the dishwasher to prevent back and other types of injuries. Carefully remove the packaging materials. Remove any shipping tape and glue from your dishwasher before using. Do not use sharp instruments, rubbing alcohol, flammable fluids, or abrasive cleaners to remove tape or glue. -
Page 8: Electrical Requirements
Electrical Requirements Read all safety precautions listed at the beginning of this manual. It is recommended that you use receptacles that cannot be turned off by a switch or pull chain. Make sure there is an electrical supply (outlet) within reach of the electrical power supply cord ”). -
Page 9: Connecting The Dishwasher
Connecting the Dishwasher Your dishwasher comes equipped with a Faucet Adapter, Quick Connect, Drain Hose, and Inlet Hose. The Faucet Adapter must be installed on the faucet before you can connect the dishwasher. This adapter comes packaged inside your dishwasher. The Faucet Adapter is compatible with faucets inclusive of either male (outside) or female (inside) threaded faucet connections. - Page 10 If your existing Faucet Adapter is not compatible with the “quick connect” hose assembly supplied, then the following procedures should be followed: • Connect the Faucet Adapter (included with dishwasher) to your faucet. • If your faucet is inclusive of a ‘female’ type (threaded) connection, both rubber washers must be installed inside the faucet adapter.
-
Page 11: Disconnecting Your Dishwasher
Disconnecting your Dishwasher 1. Close the hot water supply at the faucet. 2. Disconnect the power supply cord. 3. Remember to release the water pressure inside the inlet hose. 4. The inlet hose is pressured when the water supply line is opened, even if closed immediately. 5. -
Page 12: Control Panel Functions
Control Panel Functions 1. Power Button: Press to turn the dishwasher ON/OFF. 2. Rinse Aid Warning Light: Indicates when the rinse aid dispenser needs to be refilled. 3. Wash Cycle Complete Light: Indicates when the current wash cycle has ended. 4. - Page 13 Wash Cycles Chart...
-
Page 14: Loading The Dishwasher Basket
Loading the Dishwasher Basket A properly loaded dishwasher is key for optimal performance. Overfilling the dishwasher can reduce the dishwasher’s efficiency. Furthermore, improper placement of items can hinder the performance of the unit. This unit is optimized for holding six (6) place settings including: ... -
Page 15: Detergent And Rinse Aid Dispensers
Cutlery Basket Silverware should be placed in the cutlery basket with handles directed toward the bottom. If the rack has side baskets, spoons should be loaded individually into the appropriate slots. Knives and other sharp utensils should be placed in the basket with handles up. Longer utensils should be placed in the horizontal position in the basket or on the cup shelf Caution: ... - Page 16 Detergent Dispenser The dispenser must be refilled before the start of each wash cycle. Your dishwasher uses less detergent and rinse aid than a conventional dishwasher. Generally, only one tablespoon of detergent is needed for a normal wash load. Always add the detergent just before starting the dishwasher, otherwise it could get damp and will not dissolve properly during the wash cycle.
- Page 17 Rinse Aid Dispenser The rinse aid is released during the final rinse to remove spots, prevent new film build-up on your dishes, glasses, flatware, cookware and plastic, and improve drying time. Your dishwasher is designed to use liquid rinse aids. The rinse aid dispenser is located inside the door next to the detergent dispenser.
-
Page 18: Starting A Wash Cycle
Starting a Wash Cycle Once the dishwasher is fully loaded follow these procedures to start the wash cycle: Ensure that the unit is connected to the power supply. Ensure that the water supply is turned on to full pressure. ... -
Page 19: Completing A Wash Cycle
Forgot to Add a Dish? A dish can be added any time before the detergent dispenser opens. 1. Press the START/PAUSE button. 2. Open the door slightly to stop the washing. 3. You can open the door after the spray arms stop spinning. 4. -
Page 20: General Maintenance
General Maintenance Cleaning the Filter System The filter system consists of a coarse filter, a main (flat) filter, and a micro (fine) filter. 1. Coarse filter: Larger items, such as pieces of bone or glass that could block the drain are trapped in the coarse filter. - Page 21 Removing the Filter System In order to remove the filter system for cleaning please follow these steps: 1. Turn the entire filter system counterclockwise and then pull upward. 2. Lift the coarse and fine filters out from the main filter. 3.
-
Page 22: Cleaning The Dishwasher
Cleaning the Dishwasher The control panel can be cleaned by using a lightly dampened cloth. Dry thoroughly with a soft towel. Never use sharp objects, scouring pads, or harsh cleaners on any part of the dishwasher. Cleaning the Door To clean the edge around the door, you should use only a soft warm damp cloth. To prevent water into the door lock or electrical components, do not use a liquid spray or cleaner of any kind. -
Page 23: Protecting The Dishwasher Against Freezing
Protecting the Dishwasher Against Freezing Please take frost protection measures on the dishwasher in winter. Each time after washing cycles, please take the following steps: 1. Turn off the dishwasher. 2. Turn off the water supply and disconnect the water inlet hose from the back of the unit. 3. -
Page 24: Error Codes
Steel items subject to rusting. Wooden platters. Items made from synthetic fibers. Silver and aluminum parts have a tendency to discolor during washing. Glazed patterns may fade if machine washed. Some types of glasses can become dull after a large number of washes. Error Codes Error Meaning... -
Page 25: Troubleshooting
Troubleshooting Follow the troubleshooting guide below to resolve common issues: Issue Possible Cause Solution Dishwasher does not Fuse is blown or Replace fuse or reset circuit breaker. Remove any start circuit breaker is other appliances sharing the same circuit with the tripped dishwasher. - Page 26 Troubleshooting Continued Issue Possible Cause Solution Black or gray marks Utensils may have Use a mild abrasive cleaner to on dishes rubbed against eliminate marks. Load carefully. dishes Detergent left in Dishes are blocking Re-load dishwasher according to dispenser cup detergent cups instructions in this manual.
-
Page 27: Specifications
Specifications Description of product Dishwasher (Portable / Countertop) Model DWP62BL / DWP62WH / DWP62SV Color Black / White / Silver Number of Place Settings Maximum Diameter of place Settings 10.5" Wash Cycles Accessories Quick Connect Adapter Faucet Adapter Drain Hose... - Page 28 PARTS: For a period of ONE (1) YEAR from the date of original purchase, EdgeStar will supply new, rebuilt, or refurbished parts free of charge. EdgeStar may request a defective part be returned in exchange for the replacement part. All replacement parts or products will be new, remanufactured, or refurbished.
Need help?
Do you have a question about the DWP62BL and is the answer not in the manual?
Questions and answers
Even after cleaning all the filters and check the lines I **** still getting an E1 error message on every cycle. How can I fix this issue?