Table of Contents
Advertisement
Advertisement
Table of Contents

Related Manuals for ALDI FERREX GDSS72N


Summary of Contents for ALDI FERREX GDSS72N
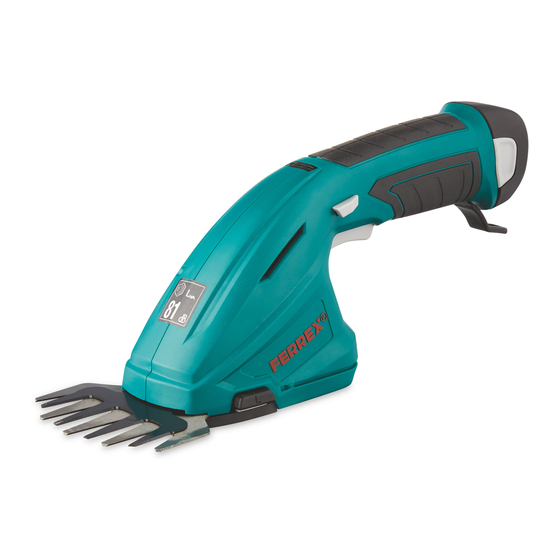
- Page 1 User Manual CORDLESS GRASS AND HEDGE TRIMMING SHEARS Original User Manual...
-
Page 2: Overview
Overview... - Page 3 Overview...
-
Page 4: Scope Of Delivery/Device Components
Scope of delivery/device components Scope of delivery/device components Motor unit Rechargeable battery Charger Grass blade Grass blade guard Shrub blade Shrub blade guard Operating and indicator parts Battery indicator Switch lock Battery pack release Charger socket On/off switch Charger operation indicator Release buttons Blade cover... -
Page 5: Table Of Contents
Table of content Table of content Overview........................2 Scope of delivery/device components..............4 General information....................6 Reading and storing the operating manual..............6 Proper use...........................6 Explanation of symbols...................6 Safety........................9 Explanation of instructions....................9 General safety notes for power tools................9 Residual risks........................18 Before first use.......................18 Check the device and scope of delivery................18 Cleaning the device and accessories................19 Operation....................... -
Page 6: General Information
General information General information Reading and storing the operating manual This operating manual belongs to this cordless grass and shrub cutter (referred to as the “device” below). It contains important information on how to set up and use the product. Before using the device, read the operating manual carefully, in particular the safety instructions. - Page 7 Explanation of symbols Wear hearing protection. Wear protective goggles. Wear safety shoes. Wear protective gloves. The symbol shows the maximum sound power level L Cutting system runs on after motor is switched off. General warning sign. Warning! Cutting injuries. Keep other people away. Do not use the device in the rain.
- Page 8 Explanation of symbols IPX1 The device only is protected against dripping water. Specifies the cutting width of the grass blade. 90mm Specifies the cutting length of the shrub blade. 170mm 10 m Risk of electric shock! Keep a distance of at least 10 m from live cables. DC voltage Do not expose the battery to a temperature over 45 °C.
-
Page 9: Safety
Explanation of symbols IPX0 It offers no protection against the penetration of water for the charger. Only operate the power supply unit indoors. This symbol describes the power adaptor’s polarity: negative (-), positive (+). Safety Explanation of instructions The following signal words are used in this operating manual. This signal symbol/word denotes a WARNING! hazard with an average risk level that... - Page 10 Safety The term "power tool" used in the safety notes refers to both mains-operated power tools (with power cord) and battery- powered power tools (without power cord). Workplace safety Clutter or unlit work - Keep your work area tidy and well lit. areas can lead to accidents.
- Page 11 Safety operating the power tool may result in serious personal injury. - Use personal protective equipment and always wear Wearing personal protective equipment, protective goggles. such as dust masks, non-skid safety shoes, safety helmets or hearing protection, depending on the type and use of the power tool, reduces the risk of injury.
- Page 12 Safety Using and handling the power tool - Do not overload the power tool. Use the appropriate The right power tool allows you to power tool for your work. work better and safer in the specified power range. - Do not use any power tool that has a defective switch. Power tools that can no longer be switched on or off are dangerous and must be repaired.
- Page 13 Safety The use of power tools for applications other performed. than those intended can lead to dangerous situations. - Keep handles and grip surfaces dry, clean and free of oil Slippery handles and grip surfaces hinder safe and grease. operation and control of the power tool in unforeseen situations.
- Page 14 Safety Incorrect charging or specified in the operating manual. charging outside the permitted temperature range can destroy the battery and aggravate the fire hazard. Service - Have your power tool repaired only by qualified This ensures that the personnel using original spare parts. power tool remains safe to use.
- Page 15 Safety - Always allow sufficient ventilation when charging the battery; gases may develop. - Only use the charger to charge batteries authorised by the manufacturer. - Do not charge non-rechargeable batteries. - Do not connect a burst or otherwise damaged battery to the charger.
- Page 16 Safety - Do not operate the device when other people (especially children) or pets are nearby. - Do not use the device if there is a risk of lightning. - Never operate the device with faulty safety devices/covers or without safety devices. - Always disconnect the device from the power supply (remove the plug from the socket and/or detach the removable battery) if:...
- Page 17 Safety - Carry the hedge trimmer by the handle with the blade stopped and fingers away from all power switches. Proper carrying of the hedge trimmer will decrease the risk of inadvertent starting and resultant personal injury from the blades. - When transporting or storing the hedge trimmer, always fit the blade cover.
-
Page 18: Residual Risks
Safety - Wear suitable clothing and work gloves when working with the device. Never touch or pick up the device by the cutting blade. Injuries may occur from contact with the cutting blade. Residual risks Despite proper use, hidden residual risks cannot be completely excluded. -
Page 19: Cleaning The Device And Accessories
Before first use 3. Inspect the device and individual parts for damage. Do not operate a damaged device; instead contact the manufacturer via the service centre listed on the warranty card. Cleaning the device and accessories Remove the packaging and all protective film. 2. - Page 20 Operation Charging the battery WARNING! Fire hazard! Charging at temperatures below 10°C leads to chemical damage of the cell and can cause a fire. - Charge the battery at room temperature. Allow the battery to cool down to room temperature before charging it. You can only charge the battery once it has been removed.
-
Page 21: Removing/Inserting The Blade
Operation Removing/inserting the blade Removing the blade Put on the scissor blade guard 2. Remove the battery (see “Removing the battery”). 3. Press both release buttons the same time and carefully remove the blade from the motor unit holding the blade cover The blade has been removed. -
Page 22: Cutting
Operation NOTE! Risk of injury Remove the scissor blade guard before each use and replace it after use and during interruptions. Switch on device Hold the motor unit by the hand grip in your hand. 2. Remove the scissor blade guard Keep all parts away from the cutting blade so that the motor can start safely. -
Page 23: Maintenance
Inspection Before each use check that: The device is undamaged. The operating controls are undamaged. The accessories are in perfect condition. The vents are clear and clean. Do not operate a damaged device or accessory. Instead, get it inspected and repaired by the manufacturer or their customer service or a similarly qualified person. -
Page 24: Storage
Cleaning 3. Clean all smooth surfaces with a damp cloth. 4. Apply some oil (e.g. sewing machine oil or printer’s oil) on the cutting blade to keep it running smoothly and let the device operate briefly to distribute the oil. Storage NOTE! Risk of damage! -
Page 25: Technical Data
Troubleshooting Problem Possible cause Remedy Inadequate Blade blocked by plant remains or Check the blade and remove performance, uneven foreign objects. any foreign objects. running. Insufficient lubrication. Oil the blade. Blunt or defect blade. Sharpen or replace blade. If the problem persists, contact the customer service listed on the last page. Technical data Device Model:... - Page 26 Technical data Charging time: approx. 3–4 hours Grass blade Sound pressure level (L 60.7 dB(A); K =3 dB(A) Sound power level (L 80.7 dB(A); K =0,6 dB(A) Vibration on hand grip: 1.4 m/s ; K=1.5 m/s Cutting width: 90 mm Shrub blade Sound pressure level (L 71,3 dB(A);...
-
Page 27: Disposal
Disposal Disposal Disposing of packaging Dispose of packaging according to type. Sort the paperboard and cardboard as waste paper and the film as recyclable material. Dispose of old electrical device (Applicable in the European Union and other European countries with systems for separate collections of recyclable waste.) Old electrical devices may not be disposed of as household waste! If the product cannot be used anymore, each consumer is obligated... -
Page 28: Declaration Of Conformity
Declaration of conformity Declaration of conformity Original EU Declaration of Conformity MEROTEC GmbH Otto-Brenner-Str. 8, D-47877 Willich, Germany herewith declare under our own, sole responsibility that our product Gras and Hedge Shear Model no. GDSS72N complies with the following directives: 2006/42/EC Machinery Directive 2014/30/EU EMC-Directive... - Page 29 PRODUCED IN CHINA FOR: ALDI STORES LTD. PO BOX 26, ATHERSTONE WARWICKSHIRE, CV9 2SH ALDI STORES (IRELAND) LTD.
Need help?
Do you have a question about the FERREX GDSS72N and is the answer not in the manual?
Questions and answers