Table of Contents
Advertisement
Stock #
2341
2342
2347
© Blonder Tongue Labs, Inc.
All Rights Reserved. Specifications subject to change without notice. All trademarks are property of their respective owners.
Model Name
Description
BT-CMTS-31000
DOCSIS/EuroDOCSIS 3.1/3.0/2.0 CMTS
BT-CMTS-3210
DOCSIS/EuroDOCSIS 3.0/2.0 CMTS
BT-CMTS-3000
DOCSIS/EuroDOCSIS 3.0 CMTS
ISO 9001:2015 Certified
P/N: 651251700A | Rev: 021220
Advertisement
Table of Contents

Related Manuals for Blonder tongue BT-CMTS Series

Summary of Contents for Blonder tongue BT-CMTS Series
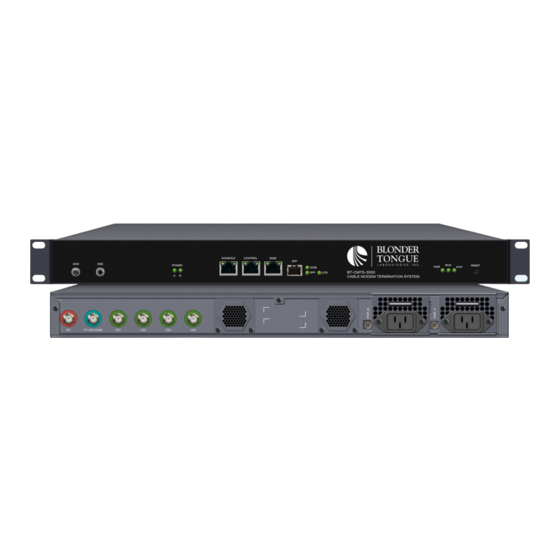
- Page 1 2342 BT-CMTS-3210 DOCSIS/EuroDOCSIS 3.0/2.0 CMTS 2347 BT-CMTS-3000 DOCSIS/EuroDOCSIS 3.0 CMTS © Blonder Tongue Labs, Inc. P/N: 651251700A | Rev: 021220 ISO 9001:2015 Certified All Rights Reserved. Specifications subject to change without notice. All trademarks are property of their respective owners.
- Page 2 Returning Product for Repair (or Credit) A Return Material Authorization (RMA) Number is required on all products returned to Blonder Tongue, regardless if the product is being returned for repair or credit. Before returning product, please contact the Blonder Tongue Service www.blondertongue.com Department at 1-800-523-6049, Ext.
-
Page 3: Table Of Contents
BT-CMTS Series Setup Guide Table of Contents SECTION 1 – GENERAL & SAFETY INSTRUCTIONS ....................... 4 SECTION 2 – PRODUCT SUMMARY ..........................5 2.1 FIRMWARE RELEASE VERSIONS ..........................5 2.2 ABOUT THIS GUIDE ..............................5 2.3 ACRONYM USAGE ..............................5 SECTION 3 - PRE-REQUISITES ............................ -
Page 4: Section 1 - General & Safety Instructions
å Do not use accessories or attachments not recommended by Blonder Tongue, å Do not overload wall outlets or extension cords, as this can result in a risk of fire as they may cause hazards, and will void the warranty. -
Page 5: Section 2 - Product Summary
2.2 About this Guide Scope: The purpose of this document, Setup Guide, is to describe the initial set-up of the BT-CMTS Series. This includes the BT- CMTS-3000, BT-CMTS-3210, and the BT-CMTS-31000 models. The guide covers the requirements and recommendations as pre-requisites for configuration of the CMTS, including setting up proper IP requirements and setting & configuration of RF QAM upstream and downstream channels. -
Page 6: Section 3 - Pre-Requisites
6 BT-CMTS Series Setup Guide Section 3 - Pre-Requisites This guide assumes a router is already configured on the WAN side; the LAN side of the router should have DHCP turned off. During the initial set up the only devices that should be on the network; connected to the router are the CMTS. -
Page 7: Section 5 - Getting Started
BT-CMTS Series Setup Guide 4.2 Ethernet Access (continued) The following steps explain how to do this for a computer with Windows 7 (or higher) operating software: (a) On your computer, navigate to the “Network and Sharing Center”. (Note: It can be found using the search box in the Start Menu or for Windows 8.x, the Start Screen) (b) Once open, click on “Change Adapter Settings”... -
Page 8: Basic Menu User Interface
8 BT-CMTS Series Setup Guide 5.2 Basic Menu User Interface The Basic Menu for the Web Management System is shown upon login with simplified menu options of the setup so that the user may quickly begin set up of the unit. This menu structure provides links to the following areas: Figure 5.2 - “Basic Menu”... -
Page 9: Advanced Menu User Interface
BT-CMTS Series Setup Guide 5.3 Advanced Menu User Interface The Advanced Web Management System dashboard consists of three parts: A menu bar along the top of the page providing shortcuts for saving your configuration, rebooting and logging out of the application. -
Page 10: Section 6 - Configuring Dhcp/Tftp
10 BT-CMTS Series Setup Guide Section 6 - Configuring DHCP/TFTP In the CMTS web interface, the left menu navigation has a menu item titled “Local-Provision Management”. Click that and a new tab will open that will allow you to set up the DHCP server and TFTP server to allow the CMTS to assign IP addresses and send the config file to the CMs. -
Page 11: Local-Provision Ipv4 Address Pool Config" Tab
BT-CMTS Series Setup Guide 6.1 “Local Provision IPv4 Global Config” Tab (continued) Download CM Config Opens a dialog box to select a CM Config file to download from the CMTS for editing. CM Profile: Select <cm.cfg OR cm30.cfg> allows user to select which config file to download, The DOCSIS 2.0 or... -
Page 12: Section 7 - Configuring The Cmts
12 BT-CMTS Series Setup Guide 6.2 “Local-Provision IPv4 Address Pool Config” Tab (continued) Figure 6.2 - “Local-Provision IPv4 Address Pool Config” Tab DHCP Address Pool Configuration Address Pool: set the IP address of the starting IP for the range you want to offer (ex: 192.168.200.0 will give out IP addresses 192.168.200.1 - 192.168.200.254) -
Page 13: Ds Channel" Panel
BT-CMTS Series Setup Guide 7.1 “US Channel” and “DS Channel” Panels (continued) To turn ON the Upstream Channels (Figure 7.1), do the following: Find “RF Information” under the left navigation pane, expanding the category if needed. Click on the sub-category “US Channel”... -
Page 14: Dhcp Relay" Panel
14 BT-CMTS Series Setup Guide 7.2 “DHCP Relay” Panel To set up the DHCP Relay (Figure 7.2a), do the following: Find “Network Management” under the left navigation pane, expanding the category if needed. Click on the sub-category “DHCP Relay” to open in the right pane. -
Page 15: Section 8 - Accessing The Embedded User Manual
BT-CMTS Series Setup Guide 7.2 “DHCP Relay” Panel (continued) Click “Add Giaddr” and make sure the following parameters are set: Client Type: Set to “all” Relay IP Address: 192.168.9.2 Subnet Mask: 255.255.255.0 Figure 7.2e - “Add Giaddr” Section 8 - Accessing the Embedded User Manual The BT-CMTS ship installed with an embedded reference manual onboard the units. -
Page 16: Section 9 - Modem Connection Steps
16 BT-CMTS Series Setup Guide Section 9 - Modem Connection Steps When hooking up a modem for the first time pay close attention to the front panel LEDs of the cable modem; each step must be completed before moving on to the next... -
Page 17: Section 10 - Frequently Asked Questions
BT-CMTS Series Setup Guide Section 10 - Frequently Asked Questions 1. What additional IP equipment do I need to setup the CMTS? At first you only need a router with its DHCP turned off and the WAN side configured for internet access... - Page 18 18 BT-CMTS Series Setup Guide NOTES:...
- Page 19 10. The cost of the extended warranty is 8% of the purchase price for a 1 or 2 year extension beyond the Blonder Tongue standard warranty. e.g. A product price of $1000 will be $80 for the 1 year (12 mos) and additional $80 for 2 year (24 mos) extension for a total of $160.
-
Page 20: Limited Warranty
BT may determine) any product manufactured by BT which proves to be defective in materials or workmanship or fails to Blonder Tongue Laboratories, Inc. (BT) will at its sole option, either repair or replace (with a new or factory reconditioned product, as BT may the case of software, licensed) by Seller which is defective in materials or workmanship or fails to meet the applicable specifications that are in effect on the date of meet the specifications which are in effect on the date of shipment or such other specifications as may have been expressly...
Need help?
Do you have a question about the BT-CMTS Series and is the answer not in the manual?
Questions and answers