Philips CED750/55 User Manual
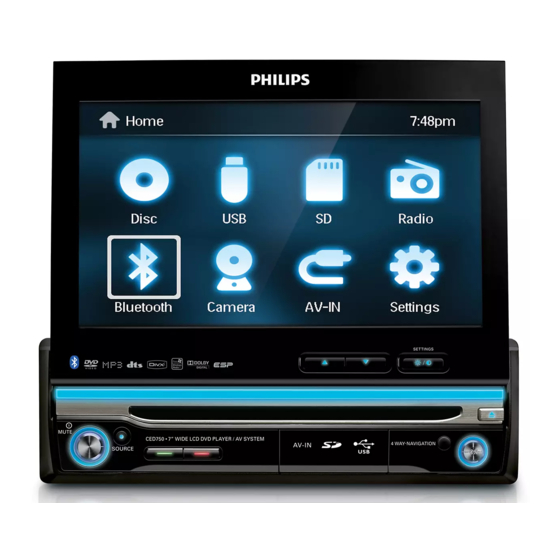
Philips car entertainment system ced750 17.8 cm (7") touch screen dvd bluetooth
Hide thumbs
Also See for CED750/55:
- Quick start manual (1 page) ,
- Service manual (53 pages) ,
- Service manual (53 pages)

Related Manuals for Philips CED750/55


Summary of Contents for Philips CED750/55
- Page 1 Register your product and get support at CED750 www.philips.com/welcome EN User manual...
-
Page 3: Table Of Contents
Contents 1 Important Safety Notice 2 Your Car Entertainment System Introduction What’s in the box Overview of the main unit Overview of the remote control 3 Get started Install the car audio Install remote control battery Turn on Set clock 4 Listen to radio Tune to a radio station Store radio stations in memory... -
Page 4: Important
1 Important Safety • Read and understand all instructions before you use your unit. If damage is caused by failure to follow instructions, the warranty does not apply. • Use of controls or adjustments or performance of procedures other than herein may result in hazardous radiation exposure or other unsafe operation. - Page 5 DivX, Inc. and are used under license. The Bluetooth® word mark and logos are registered trademarks owned by Bluetooth SIG, Inc. and any use of such marks by Philips is under license. Manufactured under license from Dolby Laboratories.
-
Page 6: Your Car Entertainment System
2 Your Car Entertainment System Congratulations on your purchase, and welcome to Philips! To fully benefi t from the support that Philips offers, register your product at www.Philips.com/welcome. Introduction With the car entertainment system, you and your passengers can enjoy: •... -
Page 7: Overview Of The Main Unit
Overview of the main unit a OPEN • Open or close the screen. b INTRO.SCH • Search for radio station. • Search for radio station and save the top six stations with strong signal into preset channels automatically. c EQ •... -
Page 8: Overview Of The Remote Control
h 4 WAY NAVIGATION • Navigate to left/right Tune for radio station. Skip to the previous/next track/ chapter. Move cursor to left/right. • Navigate up/down Skip to the previous/next preset station. Skip to the previous/next folder Search backward/forward. Move cursor up/down. •... - Page 9 e DISC AUDIO • Select audio language or audio channel. • Change to wide screen display. g REPT A->B • Set A-B repeat play. h REPT • Select repeat play mode. • Return to previous menu or exit. j VOLUME +/- •...
-
Page 10: Get Started
Use the controls only as stated in this user manual. Always follow the instructions in this chapter in sequence. If you contact Philips, you will be asked for the model and serial number of your unit. The model number and serial number are on the bottom of your unit. - Page 11 Connect wires: ISO connectors Caution • Ensure that all loose leads are insulated with electrical tape. Pull out the ISO connectors from the car dashboard and connect them to the bigger end of the supplied standard connector. Connect the other end of supplied standard connector to the unit.
- Page 12 Check the car’s wiring carefully, then connect them to the standard connector. Connector Connect to Blue/white wire Pink wire Yellow wire The +12V car battery Blue wire Orange/ white wire Black wire The electric antenna control lead or power supply lead of the antenna booster If there is no electric antenna or antenna...
- Page 13 Red wire The +12V power terminal which is live in the accessory (ACC) position of the ignition switch If there is no accessory position, connect to the +12V car battery terminal that is always live. Be sure to connect the black ground (earth) lead to a metal surface of the car fi...
- Page 14 Connect reverse driving cable Refer to the illustration below to connect reverse driving wire. Connect parking brake wire Refer to the illustration below to connect parking brake wire. Green/White Green/White...
-
Page 15: Mount In The Dashboard
Mount in the dashboard Note • Check wire connection before you mount the unit into a car. • If preset radio stations are lost when the ignition key is turned OFF and then back ON, reconnect the red leads crosswise to the yellow ones. If the car does not have an on-board drive or navigation computer, disconnect the negative terminal of the car battery. -
Page 16: Install Remote Control Battery
Place the rubber cushion over the end of the bolt. Slide the unit into the dashboard until a click sound is heard. • If the unit cannot fi t into the dashboard, remove the mounting bracket on the both side of the unit and replace them with the supplied short mounting brackets. -
Page 17: Turn On
Turn on Caution • Risk of road accidents! Never watch video or adjust settings while you drive. Press to turn on the unit. The screen opens automatically. » The available OSD (On-Screen » Display) languages are displayed. Touch a language to select. The OSD language is changed to the »... -
Page 18: Listen To Radio
4 Listen to radio Tune to a radio station Touch to display the main menu. Touch [Radio] . Band and frequency information is » displayed. Touch [Band] repeatedly to select: FM band options: [FM1] , [FM2] , [FM3] • AM band options: [AM1] , [AM2] •... -
Page 19: Tune To A Preset Station
Store stations manually Tune to the station (see ‘Tune to a radio station’ on page 18 ) . Touch [Save] . The preset stations are displayed. » Touch one of the preset stations. The station is saved in the selected »... -
Page 20: Play
5 Play Load discs You can play video, audio or images stored on the following discs: • DVD video, DVD-R, DVD-RW • • Audio CD, CD-R, CD-RW Note • Ensure that the disc contains playable content. Insert the disc into the disc slot with label side facing up. -
Page 21: Play/Pause
Remove the USB device Press SOURCE to switch to another source. Remove the USB device. Remove the SD/MMC card Press SOURCE to switch to another source. Press the card until you hear a click sound. The card is now disengaged. »... -
Page 22: Repeat
For video fi les, touch [Options] fi rst, » then touch [Goto] . Touch the numbers to enter chapter/fi le number, then touch [Enter] . Repeat During play, you can select different repeat play modes. For DVD/VCD movie disc: Touch anywhere except for the upper left corner to display menu on the screen, if necessary. -
Page 23: Select Audio Language
• You can also press SHUFF on the remote control to select random play mode. Select audio language For video discs that contain two or more audio channels. During play, touch anywhere except for the upper left corner to display menu on the screen, if necessary. -
Page 24: Select Slide Show Duration
During view pictures, touch anywhere except for the upper left corner to display menu on the screen, if necessary. Touch [Zoom] repeatedly to zoom in the picture. Touch to pan through the enlarged picture. Select slide show duration Touch anywhere except for the upper left corner to display menu on the screen, if necessary. -
Page 25: Play With Bluetooth Device
6 Play with Bluetooth device You can make or receive phone calls with Bluetooth-enabled phones through the unit. You can also listen to music from a Bluetooth- enabled device. Pair the Bluetooth-enabled devices The fi rst you connect your Bluetooth device to the unit, you need to pair the device to the unit. -
Page 26: Receive Call
Touch to dial. Receive call By default, all incoming calls are received automatically. You can select to receive calls manually. (see ‘Adjust Bluetooth settings’ on page 29 ) If there is incoming call, [Incoming call…] fl ashes on the screen. Speak into the Bluetooth microphone. -
Page 27: Adjust Sound
7 Adjust sound Adjust volume Turn clockwise/anticlockwise to increase/decrease volume. Mute You can turn off the sound of your audio. During play, press MUTE . • To turn the sound back on, press MUTE again. Select preset equalizer You can select preset equalizer: [User] •... -
Page 28: Adjust Settings
8 Adjust settings Adjust general system settings Touch to display main menu. Touch [Settings] . The settings menu is displayed. » Touch [General] . Touch an option repeatedly to select: System Options settings [Clock [12hr] mode] [24hr] [Time] [LCD panel [Auto] open] [Manual]... -
Page 29: Adjust Sound Settings
Adjust sound settings Touch to display main menu. Touch [Settings] . Touch [Sound] . Touch an option repeatedly to select: Sound Options Description settings [Sub.w] [On] Turn on the subwoofer. [Off] Turn off the subwoofer. [Sub.w [80 Hz] Select subwoofer fi lter fi... -
Page 30: Adjust Language Settings
Touch an option repeatedly to select: Bluetooth Options Description settings [Bluetooth] [On] Turn on the Bluetooth function. [Off] Turn off the Bluetooth function. [Auto [On] If the pre-paired device connect] is within the effective range, the unit re- connects to pre-paired device automatically. -
Page 31: Adjust Dvd Rating
Touch to assign value: 0 to 12. When switches to the source, the » volume will increase or decrease accordingly. Press to exit. Adjust DVD rating Touch to display main menu. Touch [Settings] . Touch [DVD rating] . Touch an option repeatedly to select: Options Description rating [Set... -
Page 32: Others
9 Others Listen to other devices You can connect an external audio/video device to the unit. Connect the device to the unit with the supplier AV cable. AV IN AV IN AV IN AV IN Touch to display main menu. Touch [AV IN] . -
Page 33: Replace Fuse
Check the electric connection. Buy a fuse that matches the voltage of the damaged fuse (15A) Replace the fuse. If the fuse gets damaged immediately after it has been replaced, there may be an internal malfunction. In such case, consult your Philips dealer. -
Page 34: Product Information
10 Product information Note • Product information is subject to change without prior notice. General Power supply 12 V DC (11 V - 16 V), negative ground Fuse 15 A Suitable speaker 4 - 8 impedance Maximum power output 50 W x 4 channels Continuous power 24 W x 4 channels output... - Page 35 Communication Bluetooth Standard version system Output Bluetooth Standard Power Class 2 Maximum Line of sight approx.10m communication range Frequency band 2.4 GHz band (2.4000 GHz - 2.4835 GHz) Modulation FHSS method Compatible Hands-Free Profi le (HFP) Bluetooth Hands-Free Profi le (HFP) profi...
-
Page 36: Troubleshooting
If the problem remains unsolved, go to the Philips web site (www.Philips.com/support). When you contact Philips, ensure that your unit is nearby and the model number and serial number are available (see ‘Get started’ on page 10 ) . - Page 37 • The unit is not in the pairing mode. • The unit is already connected with another Bluetooth-enabled device. Disconnect that device or all other connected devices and then try again. The paired mobile phone connects and disconnects constantly. • The Bluetooth reception is poor.
-
Page 38: Glossary
12 Glossary Bite rate The max data transfer through the USB port. Bluetooth Bluetooth® is a short-rang wireless protocol that is meant to allow mobile devices to share information and applications without the worry of cables or interface incompatibilities. The name refers to a Viking King who unifi... - Page 40 © 2008 Koninklijke Philips Electronics N.V. All rights reserved.