Philips CED750/51 User Manual
Philips car entertainment system ced750 17.8 cm (7") bluetooth dvd
Hide thumbs
Also See for CED750/51:
- Quick start manual (2 pages) ,
- Service manual (53 pages) ,
- Service manual (53 pages)

Related Manuals for Philips CED750/51


Summary of Contents for Philips CED750/51
- Page 1 Register your product and get support at CED750 www.philips.com/welcome EN User manual...
-
Page 2: Table Of Contents
Contents 1 Important Safety Notice 2 Your in-car entertainment system Introduction What’s in the box Overview of the main unit Overview of the remote control 3 Get started Install the car audio Install remote control battery Turn on Set clock 4 Listen to radio Tune to a radio station Store radio stations in memory... -
Page 3: Important
DivX ® The Bluetooth word mark and logos are registered trademarks owned by Bluetooth SIG, Inc. and any use of such marks by Philips is under license. Manufactured under license from Dolby Laboratories. “Dolby” and the double-D symbol are trademarks of Dolby Laboratories. - Page 4 This apparatus includes this label: Any changes or modifi cations made to this device that are not expressly approved by Philips Consumer Lifestyle may void the user’s authority to operate the equipment. Environmental information All unnecessary packaging has been omitted.
-
Page 5: Your In-Car Entertainment System
2 Your in-car entertainment system Congratulations on your purchase, and welcome to Philips! To fully benefi t from the support that Philips offers, register your product at www.philips.com/welcome. Introduction With the car entertainment system, you and your passengers can enjoy: •... -
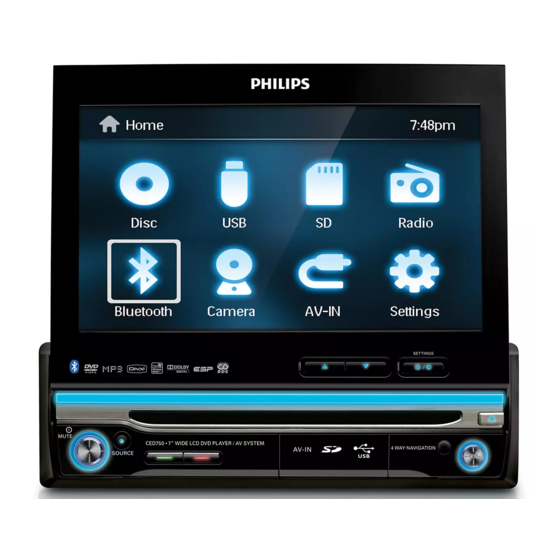
Page 6: Overview Of The Main Unit
h AV cable i Microphone and holder j USB cable k Remote control battery l User manual m Quick start guide Overview of the main unit AV IN... - Page 7 a OPEN • Open or close the screen. b INTRO.SCH • Search for radio station. • Search for radio station and save the top six stations with strong signal into preset channels automatically. c EQ • Select equalizer (EQ) setting. d DISP •...
-
Page 8: Overview Of The Remote Control
Overview of the remote control TILT • Adjust tilt of the screen. b OPEN/CLOSE • Open or close the screen. c SUBTITLE • Select DVD or DivX subtitle language. d ANGLE • Select a difference angle/version of the current DVD scene. e DISC AUDIO •... - Page 9 t AUDIO • Access audio setting menu. u Navigation buttons • Tune for radio station. Skip to previous/next track/chapter. Move cursor to left/right. • Skip to the previous/next preset station. Skip to the previous/next folder. Search backward/forward for DVD video. Move cursor up/down.
-
Page 10: Get Started
Always follow the instructions in this chapter in sequence. If you contact Philips, you will be asked for the model and serial number of this apparatus. The model number and serial number are on the bottom of the apparatus. Write the numbers here: Model No. - Page 11 a Trim plate b Standard connector c Short mounting bracket x 2 pcs d Rubber cushion e Screws - M5x16mm x 1 pc - M4x3mm x 4 pcs - M5x5mm x 2 pcs - M5x5.5mm x 4 pcs - M5x6mm x 1 pc Connect wires: ISO connectors Caution •...
- Page 12 Red cable Front line out L White Front line out R cable Red cable Rear line out L white cable Rear line out R Connect wires: without ISO connectors Caution • Ensure that all loose leads are insulated with electrical tape. Cut off the bigger end of the supplied standard connector.
- Page 13 Connect the supplied standard connector to the unit. • If necessary, do the other connections. (See the last step in section Connect wires: ISO connector) Connect reverse driving cable Refer to the illustration below to connect reverse driving wire.
-
Page 14: Mount In The Dashboard
Connect parking brake wire Refer to the illustration below to connect parking brake wire. Green/White Mount in the dashboard Note • Check wire connection before you mount the unit into a car. • If preset radio stations are lost when the ignition key is turned OFF and then back ON, reconnect the red leads crosswise to the yellow ones. - Page 15 Remove the screws on the both side of the unit. Remove the mounting sleeve. Install the sleeve into the dashboard and bend the tabs outward to fi x the sleeve. Place the rubber cushion over the end of the bolt. Slide the unit into the dashboard until a click sound is heard.
-
Page 16: Install Remote Control Battery
Reconnect the negative terminal of the car battery. Install remote control battery Caution • Risk of explosion! Keep batteries away from heat, sunshine or fi re. Never discard batteries in fi re. Note • Remove batteries if they are exhausted or if the remote control is not to be used for a long time. - Page 17 Touch [Settings]. » The setup menu is displayed. Touch [General]. Touch the [Clock mode] repeatedly to select: • [12hr] : 12 hour mode • [24hr] : 24 hour mode Touch the hour digits, then touch Touch the minute digits, then touch If 12 hour mode is selected, touch to select [AM] or [PM].
-
Page 18: Listen To Radio
4 Listen to radio Tune to a radio station Touch to display the main menu. Touch [Radio]. » Band and frequency information is displayed. Touch [Band] repeatedly to select: • FM band options: [FM1], [FM2], [FM3] • AM band options: [AM1], [AM2] Briefl... -
Page 19: Tune To A Preset Station
Store stations manually Tune to the station (see ‘Tune to a radio station’ on page 19 ). Touch [Save]. » The preset stations are displayed. Touch one of the preset stations. » The station is saved in the selected preset number. Tune to a preset station Touch [Radio]. -
Page 20: Select Alternate Frequencies
Item Program type Description NEWS News services AFFAIRS Politics and current affairs INFO Special information programs SPORT Sports EDUCATE Education and advanced training DRAMA Radio plays and literature CULTURE Culture, religion and society SCIENCE Science VARIED Entertainment programs POP M Pop music ROCK M Rock music... - Page 21 Touch [RDS]. Touch on [TA] until [TA ON] is displayed. • When there is traffi c announcement, the unit switches to the tuner mode (regardless of the current mode) and begins to broadcast the announcement on traffi c conditions. When the traffi c announcement is over, it returns to the previous mode.
-
Page 22: Play
5 Play Load discs You can play video, audio or images stored on the following discs: • DVD video, DVD-R, DVD-RW • • Audio CD, CD-R, CD-RW Note • Ensure that the disc contains playable content. You can play DVD discs with the following region codes: Russia, India Insert the disc into the disc slot with label... -
Page 23: Play/Pause
Remove the USB device Press SOURCE to switch to another source. Remove the USB device. Remove the SD/MMC card Press SOURCE to switch to another source. Press the card until you hear a click sound. » The card is now disengaged. Remove the SD or MMC card. -
Page 24: Search Within A Title/Folder
Touch a picture fi le to select, then touch to start play. Search within a title/folder Search by step Touch anywhere except for the upper left corner to display menu on the screen, if necessary. Touch [Previous] or [Next] to skip to the previous or next chapter/track. -
Page 25: Random Play
• [Repeat A-B]: the the end of the section to repeat. • The selected section plays repeatedly. To exit A-B repeat mode, touch A-B repeatedly until [Repeat A-B off] is displayed. • You can also press A-B on the remote control to set A-B repeat play. -
Page 26: Rotate Pictures
• You can also change view angle by pressing ANGLE on the remote control. Rotate pictures When you view pictures, touch anywhere except for the upper left corner to display menu on the screen, if necessary. Touch [Rotate] repeatedly to rotate the picture. -
Page 27: Play With Bluetooth Device
6 Play with Bluetooth device You can make or receive phone calls with Bluetooth-enabled phones through the unit. You can also listen to music from a Bluetooth- enabled device. Pair the Bluetooth-enabled devices The fi rst you connect your Buetooth device to the unit, you need to pair the device to the unit. -
Page 28: Make A Call
• Or clip it on the sun-shield. Make a call Pair the phone with the unit. (see ‘Pair the Bluetooth-enabled devices’ on page 28 ) Touch to return to main menu. Touch [Bluetooth]. » The Bluetooth menu is displayed. Touch to select phone number from the following list: •... -
Page 29: Listen To Music From Bluetooth Device
Listen to music from Bluetooth device If the connected Bluetooth device supports Advanced Audio Distribution Profi le (A2DP), you can listen to the music stored on the device through the unit. If the device also supports Audio Video Remote Control Profi le (AVRCP) profi... -
Page 30: Adjust Sound
7 Adjust sound Adjust volume Turn clockwise/anticlockwise to increase/decrease volume. Mute You can turn off the sound of your audio. During play, press MUTE . • To turn the sound back on, press MUTE again. Select preset equalizer You can select preset equalizer: •... -
Page 31: Adjust Settings
8 Adjust settings Adjust general system settings Touch to display main menu. Touch [Settings]. » The settings menu is displayed. Touch [General]. Touch an option repeatedly to select: System Options settings [Clock mode] [12hr] [24hr] [Time] [LCD panel [Auto] open] [Manual] [Beep] [Calibration]... -
Page 32: Adjust Video Settings
Sound Options Description settings [Sub.w] [On] Turn on the subwoofer. [Off] Turn off the subwoofer. [Sub.w [80 Hz] Select subwoofer fi lter fi lter] criteria. [120 Hz] [160 Hz] [DBB] [DBB The Dynamic Bass Boost (DBB) function is on. [DBB The DBB function is off. -
Page 33: Adjust Language Settings
[Auto [On] If the pre-paired connect] device is within the effective range, the unit re-connects to pre-paired device automatically. [Off] Need to re-connect manually. [Auto [On] Answer paired answer] phone call automatically. [Off] Answer phone call manually. [Pairing View code for code] pairing the unit with other Bluetooth... -
Page 34: Adjust Dvd Rating
Adjust DVD rating Touch to display main menu. Touch [Settings]. Touch [DVD rating]. Touch an option repeatedly to select: DVD rating Options Description [Set Set password to password] restrict the play of discs. The default password is 0000. [Rating] [1. Kid Acceptable for safe] children. -
Page 35: Others
9 Others Listen to other devices You can connect an external audio/video device to the unit. Connect the device to the unit with the supplier AV cable. AV IN AV IN Touch to display main menu. Touch [AV IN]. Begin play on the device (see the device instructions). -
Page 36: Replace Fuse
Check the electric connection. Buy a fuse that matches the voltage of the damaged fuse (15A) Replace the fuse. If the fuse gets damaged immediately after it has been replaced, there may be an internal malfunction. In such case, consult your Philips dealer. -
Page 37: Product Information
10 Product information Note • Product information is subject to change without prior notice. General Power supply 12 V DC (11 V - 16 V), negative ground Fuse 15 A Suitable speaker 4 - 8 impedance Maximum power 50 W x 4 channels output Continuous power 24 W x 4 channels... - Page 38 Bluetooth Communication Bluetooth Standard system version 2.0 Output Bluetooth Standard Power Class 2 Maximum Line of sight approx. 8m communication range Frequency band 2.4 GHz band (2.4000 GHz - 2.4835 GHz) Compatible Hands-Free Profi le (HFP) Bluetooth Handset Profi le (HSP) profi...
-
Page 39: Troubleshooting
If you encounter problems when using this apparatus, check the following points before requesting service. If the problem remains unsolved, go to the Philips web site (www. philips.com/welcome). When you contact Philips, ensure that the apparatus is nearby and the model number and serial number are available. -
Page 40: About Bluetooth Device
About Bluetooth device Cannot pair the Bluetooth enabled device with the car audio system. • The device does not support the profi les required for the system. • The Bluetooth function of the device is not enabled. Refer to the user manual of the device for how to enable the function. -
Page 41: Glossary
12 Glossary Bite rate The max data transfer through the USB port. Bluetooth ® Bluetooth is a short-rang wireless protocol that is meant to allow mobile devices to share information and applications without the worry of cables or interface incompatibilities. The name refers to a Viking King who unifi... - Page 42 © 2009 Koninklijke Philips Electronics N.V. All rights reserved. Document order number: CED750_51_UM_V3.0...