Cognex DataMan 470 Series Reference Manual
Hide thumbs
Also See for DataMan 470 Series:
- Quick reference manual (40 pages) ,
- Reference manual (173 pages) ,
- Quick reference manual (31 pages)
Table of Contents
Advertisement
Advertisement
Table of Contents

Related Manuals for Cognex DataMan 470 Series


Summary of Contents for Cognex DataMan 470 Series
- Page 1 ® DataMan 470 Series Reference Manual 2019 March 22 Revision: 6.1.6.168...
-
Page 2: Legal Notices
Copyright © 2019. Cognex Corporation. All Rights Reserved. Portions of the hardware and software provided by Cognex may be covered by one or more U.S. and foreign patents, as well as pending U.S. and foreign patents listed on the Cognex web site at: cognex.com/patents. -
Page 3: Table Of Contents
Setting Up Your DataMan 470 Reader Layout Dimensions DataMan 470 Series with High Power Integrated Light (HPIL) DataMan 470 Series with High Power Illumination Accessory (HPIA) DataMan 470 Series with High Power Illumination Torchlight (HPIT) Assembling DataMan 470 Series Lens and Lights... - Page 4 Incremental Training for Multiple Symbologies Industrial Protocols Advanced Features DataMan 470 Image Filtering Package Detection Support DataMan 470 Series Multi-Reader Sync Option Connections, Optics, and Lighting External Light Control 5m Breakout Cable (CCBL-05-01) 5m Breakout Cable (CCB-M12x12Fy-xx) 15m Breakout Cable (CCB-PWRIO-XX)
-
Page 5: Symbols
Symbols Symbols The following symbols indicate safety precautions and supplemental information: WARNING: This symbol indicates a hazard that could cause death, serious personal injury or electrical shock. CAUTION: This symbol indicates a hazard that could result in property damage. Note: This symbol indicates additional information about a subject. Tip: This symbol indicates suggestions and shortcuts that might not otherwise be apparent. -
Page 6: Getting Started
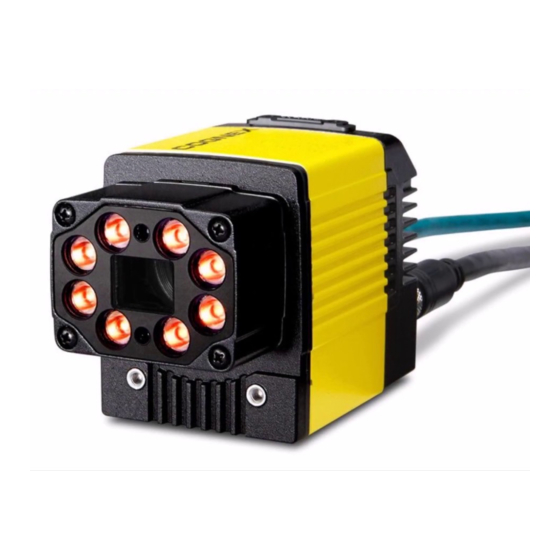
Getting Started Getting Started This section provides general information about the DataMan 470 series readers as well as about the DataMan 470 accessories and systems. About the DataMan 470 Readers The DataMan 470 series readers are high-performance, fixed-mount ID readers that, among others, offer the following... - Page 7 The SetupTool Reference Manual describes the user interface of the DataMan Setup Tool software. Cognex->DataMan Software v x.x.x->Documentation->English->SetupTool Reference Manual The Release Notes lists detailed system requirements and additional information about this DataMan software release. Cognex->DataMan Software v x.x.x->Documentation->English->DataMan v x.x.x Release Notes...
-
Page 8: Dataman 470 Series Accessories
Getting Started DataMan 470 Series Accessories Lens Options DM474 DM475 Accessory 12 mm F8 fixed aperture lens LEC-CFF12-F8 16 mm F8 fixed aperture lens LEC-CFF16-F8 25 mm F8 fixed aperture lens LEC-CFF25-F8 35 mm F8 fixed aperture lens LEC-CFF35-F8 40 mm F8 fixed aperture lens... -
Page 9: High Power Illumination Accessories
Getting Started DM474 DM475 Accessory Red LED high power integrated light, ESD safe, 10.3 mm DM360-HPIL-RE lens (Risk Group Red LED Exempt acc. IEC 62471, Risk Group Green LED Aimer Exempt acc. IEC 62471) Polarized red LED high power integrated light, ESD safe, DM360-HPIL-RE-P 10.3 mm lens (Risk Group Red LED Exempt acc. -
Page 10: High Power Illumination Torchlight Accessories
Getting Started DM474 DM475 Accessory Linear Polarizer Kit DM30X-HPIA3-LP DM500 C-Mount cover (use with HPIA) DM500-CMTLC-000 DM500 Lens cover extender DM500-LNSEXT-000 Laser aimer (use with HPIA) DM300-AIMER-00 High Power Illumination Torchlight Accessories DM474 DM475 Accessory HPIT, Red wide, 10 and 16 mm high-speed liquid lens DMLT-HPIT-RE-W (Risk Group Red LED exempt risk acc. -
Page 11: External Lights
Getting Started External Lights DM474 DM475 Accessory Ring Light CLRR-R7030G1CLR Back light CLRB-F100100G1 Coaxial (DOAL) light CLRO-K5050G1 Spot light CLRS-P14G1 Dark-field light CLRD-D120G1 Brick light, narrow blue IVSL-ODDM-S75-470 Brick light, narrow red IVSL-ODDM-S75-625 Brick light, narrow white IVSL-ODDM-S75-WHI Bar light, wide red IVSL-YLW2X-625 Bar light, narrow red, linear polarizer IVSL-YLW2X-625P... -
Page 12: Cables And Power Supply
Getting Started Cables and Power Supply DM474 DM475 Accessory CCB-M12x12Fy-xx Connection cable 24V, I/O, RS-232 (y straight/angled, xx specifies length) Connection cable 24V, I/O, RS-232 CCBL-05-01 CCB-PWRIO-xx Power and I/O breakout cable, M12-12, straight, xx CCB-PWRIO-xxR specifies length: 5m, 10m, 15m, angled, xx specifies length: 5m, 10m, 15m Strobe cable for multiple bar lights (use in CCB-FOV25-MAL-... -
Page 13: Dataman 470 Systems
Getting Started DataMan 470 Systems 1DMax+™ — IDQuick™ — 2DMax+™ — Omni- Multi-Reader Resolution Best-In- High-Speed for hard to directional 1- Sync Class 1-D 2DMax+™ read DPM D Code Reading Reading and damaged Reading PowerGrid™ codes DMR-474A-0000-M √ 2048x1536 DMR-474L-0000 √... -
Page 14: Setting Up Your Dataman 470
Reader Layout The following image shows the built-in lighting system of the DataMan 470 series reader, underneath the plastic lighting cover and the mounting holes. - Page 15 Setting Up Your DataMan 470 Trigger button Power Train status Good/bad read Network Error Peak meter Indicator light ring SD card slot Tuning button Ethernet External light control Power, I/O, and RS-232 Type Signal Color Meaning Power GREEN Power ON GREEN Trained Status...
-
Page 16: Dimensions
Dimensions are in millimeters [inches] and are for reference purposes only. All specifications are for reference purposes only and can change without notice. Observe the following DataMan 470 series reader dimensions when installing your reader. DataMan 470 Series with High Power Integrated Light (HPIL) -
Page 17: Dataman 470 Series With High Power Illumination Accessory (Hpia)
Setting Up Your DataMan 470 DataMan 470 Series with High Power Illumination Accessory (HPIA) -
Page 18: Dataman 470 Series With High Power Illumination Torchlight (Hpit)
Setting Up Your DataMan 470 DataMan 470 Series with High Power Illumination Torchlight (HPIT) Assembling DataMan 470 Series Lens and Lights You can choose between a variety of different (High-Speed) Liquid Lenses and C-Mount lens options to be installed on your DataMan 470 reader. -
Page 19: Installing The Liquid Lens Module With High Power Illumination (Hpil)
DMLT-HPIL-IR-W Tools needed: Wrench for lens locking ring (10.3 mm LL only - delivered by Cognex with Liquid Lens module) Phillips screwdriver To install a 10.3 mm or a 24 mm liquid lens module of a DataMan 470 reader, perform the following steps: WARNING: Disconnect the DataMan reader from power before continuing. - Page 20 Setting Up Your DataMan 470 1. Remove the adhesive protective film covering the threaded lens opening. 2. Attach the 24mm Lens to the device by using the screw thread on the metal ring. Insert an S-Mount adapter, thread the 10.3mm Lens into the reader, and tighten the locking ring.
- Page 21 Setting Up Your DataMan 470 3. Insert the Liquid Lens cable into the connector of the reader. WARNING: To avoid equipment damage, the cables must be routed as shown in the figure. 4. Attach the Liquid Lens to the front side of the 24mm Lens. In case of the 10.3mm Lens, attach the liquid lens module onto the nose of the lens.
- Page 22 Setting Up Your DataMan 470 5. Place the HPIL unit on the front of the device. CUSTOMIZED CAPTIVE SCREW, PHILLIPS PAN HEAD, M3x28mm 6. Screw in the four screws. Note: Use 0.2 Nm torque on the screws and tighten in sequence.
-
Page 23: Installing A Lens With High Power Illumination Accessory (Hpia)
DMLN-C24F10-MF Narrow Tools needed: Wrench for lens locking ring (10.3 mm LL only - delivered by Cognex with Liquid Lens module) Phillips screwdriver (PH0) Phillips screwdriver (PH1) To install a lens module of a DataMan 470 reader with HPIA, perform the following steps: 1. - Page 24 Setting Up Your DataMan 470 3. Insert the lens cover mounting plate into the HPIA and secure them to the reader using the four M3 screws. M3 x 16mm screws Note: Use a Phillips screwdriver (PH1) to torque the screws to 0.34 Nm (3 in-lb). Tighten in sequence. 4.
-
Page 25: Installing High Power Illumination Torchlight (Hpit)
Setting Up Your DataMan 470 Installing High Power Illumination Torchlight (HPIT) The possible hardware configurations using High-power Illumination Torchlight with a DataMan 470 reader are the following: Light Lens Front cover Wide opening angle 10 mm F5 HSLL Polarized (RED ONLY) (RED/WHITE) Clear (RED/WHITE) Diffuse (RED/WHITE) 16 mm F8 HSLL... - Page 26 Setting Up Your DataMan 470 M3 x 6 mm screws Note: Use a 2 mm hex wrench to torque the screws to 0.34 Nm (3 in-lb). Tighten in sequence. 4. Attach the lens module and fix the lens with the captive screws. Note: Use a Phillips screwdriver (PH0) to torque the screws to 0,08 Nm (0.7 in-lb).
- Page 27 Setting Up Your DataMan 470 M3 x 6.35 mm captive screws Note: Use a 2 mm hex wrench to torque the captive screws to 0.34 Nm (3 in-lb). Tighten in sequence. 6. Attach the front cover. M3 x 12mm captive screws Note: Use a Phillips Screwdriver (PH0) to torque the captive screws to 0.31 Nm (2.75 in-lb).
-
Page 28: Installing A C-Mount Lens
Setting Up Your DataMan 470 Installing a C-Mount Lens 1. Remove the adhesive protective film. 2. Thread the lens into the reader. 3. Place the reader at the desired working distance from focus target. Note: Make sure to set focus for the reader before fitting the lens cover. a. - Page 29 Setting Up Your DataMan 470 d. Adjust focus for maximum sharpness. Enhance image quality in the DataMan Setup Tool for better guidance. 4. Attach the C-Mount cover base.
- Page 30 Setting Up Your DataMan 470 5. Add the screws to the C-Mount cover base. PHILLIPS PAN HEAD M2 X 6MM Note: Tighten in sequence. Torque limit: 0.4Nm (3.54 in-lbs). 6. Attach the front cover. Note: Do not unscrew the front-most part of the nose of the cover to avoid risking the glass lens falling out.
-
Page 31: Mounting The Reader
Setting Up Your DataMan 470 7. Align the peg on the reader and the slot on the cover so that the cover locks in place. Mounting the Reader The reader provides mounting holes for attachment to a mounting surface. The accessory mounting bracket kit (DMBK-470-MNT) includes the mounting bracket, four Phillips flat head M3 DIN 965 screws for attaching the reader to the mounting bracket and four M6 DIN 912 (ISO 4762) screws for securing the bracket to a mounting surface. - Page 32 Setting Up Your DataMan 470 2. Insert the M3x5, DIN 965 (4x) screws into the mounting holes. Note: Use a 2.5 mm hex wrench to torque the captive screws to 0.60 Nm (5 in-lb). Tighten in sequence. 3. Align the mounting holes on the mounting plate with the M6 drop-in nuts and the M6, DIN 912 (ISO 4762) socket head screw in the mounting surface.
- Page 33 Setting Up Your DataMan 470...
-
Page 34: Setting Focus
Setting Up Your DataMan 470 Setting Focus There is a range of reading distances available for different code sizes and focus positions. To set focus on your reader, use the following options depending on whether you use a liquid lens or a manual focus lens. DataMan readers are compatible with multiple different lenses. - Page 35 Setting Up Your DataMan 470 2. Click the Optimize Focus button to optimize the focus of the liquid lens. You can find this button in the lower left section of the image panel, or you can also optimize focus during tuning by checking the box in the tune dropdown.
-
Page 36: Manual Focus Lens
Setting Up Your DataMan 470 Manual Focus Lens Click the Focus Feedback button in the image panel in SetupTool to enable focus feedback. This enables a color-coded focus feedback bar on the right side of the image panel. Once focus feedback is enabled, enter live mode and manually adjust the lens until the focus feedback bar is green. -
Page 37: Focus Feedback
Setting Up Your DataMan 470 Focus Feedback Focus is indicated by colors ranging from red (bad focus) to green (sharp focus). When focusing the reader, you need to adjust its position until the focus column becomes green. Best Practices Both Optimize Focus and the Focus Feedback use the same procedure for testing the current focus. They consider various sub-regions of the image. - Page 38 Setting Up Your DataMan 470 The supplied 120x120mm focus target is appropriate for typical working distances. If you use such a working distance that the target does not completely fill the image, make sure that there are no high-contrast features visible outside of the target (see previous bullet).
-
Page 39: Field Of View And Reading Distances
Setting Up Your DataMan 470 Field of View and Reading Distances The following maps show the field of view of the DataMan 470 series readers. Reading distance values are also provided for 1-D and 2-D example code distances. For the C-mount (or other non-Cognex) and S-Mount lenses, the focal length of the lens, focus setting, and aperture setting determine the field of view and reading distance. -
Page 40: Reading Distance And Field Of View (Dataman 470 Readers With A 24 Mm High-Speed Liquid Lens)
Reading Distance and Field of View (DataMan 470 Readers with a 24 mm High-Speed Liquid Lens) The following map shows the FoV of the DataMan 470 series readers with a 24 mm high-speed liquid lens. The FoV values are shown as follows:... -
Page 41: Maintenance
Setting Up Your DataMan 470 Distances in mm / 1D min code Distances in mm / 2D min code Device 24 mm HSLL 24 mm HSLL 1029 6 MIL 6 MIL 1370 8 MIL 8 MIL 1711 10 MIL 1178 10 MIL DM47x 2223 13 MIL... - Page 42 Setting Up Your DataMan 470 4. Insert the SD card from the broken reader into the Micro SD card slot to clone the old reader. Ensure the card is properly oriented. 5. Replace the SD card cover and reinsert the screws. Note: Torque the screws to 0.18 Nm (25 in-oz).
-
Page 43: Additional Information
Setting Up Your DataMan 470 Additional Information DataMan 470 Specifications 373 g with S-mount adapter, without rubber front cover Weight Power 24VDC ±10%, 1.5A maximum (HPIL* and HPIT**) Consumption 24VDC , 250mA maximum (non-HPIL)* 24VDC, 1000mA (HPIA)*** Supplied by LPS or NEC class 2 only. *HPIL denotes one of the DM360-HPIL-xxx-xx or DMLT-HPIL-xxx-xx accessories. -
Page 44: Dataman 470 Series Imager Specifications
55 Hz Image Acquisition at max. 37 Hz Full Resolution DataMan 470 Series Accessories on page 8 Lens Type *Limitations to C-Mount lenses: The length of the thread may not exceed 5.4 mm. For a chosen lens, the distance from the C-mount shoulder to the bottom of the lens may not exceed 5.4mm. -
Page 45: Using Your Dataman 470
3. Connect the DataMan 470 Series reader to your PC using the x-coded Ethernet cable or the RS-232 cable and power the reader using the breakout cable. See Connections, Optics, and Lighting on page 56 for breakout cable pinouts.*... - Page 46 Using Your DataMan 470 4. Launch the DataMan Setup Tool and click Refresh. Note: Detected readers will appear under COM ports or Network devices, or both. If the reader does not appear, you can use either the Add Device or Force Network Settings options in the DataMan Setup Tool under Repair &...
- Page 47 5. Select a reader from the list and double click it or click Connect. 6. Click the Live button and position your code under the DataMan 470 Series reader. You can see the live display of the reader in the Image Panel.
-
Page 48: Dataman 470 Triggering
Using Your DataMan 470 8. Click the Trigger button and have the DataMan 470 Series reader acquire image and decode the code. You can see the results of the code in the Result History panel. In case you need image enhancement, image filtering might improve the image quality and code readability. -
Page 49: External Triggers
Using Your DataMan 470 External Triggers If you are using external triggering, you can use any of the following methods to trigger your DataMan 470 reader: Press the trigger button on the reader. Send a pulse on the I/O cable: Trigger + (orange or red) Trigger - (black) Send a serial trigger command over the RS-232 connection or Ethernet connection. -
Page 50: Training Feedback
Using Your DataMan 470 Press and hold the trigger button for a minimum of 3 seconds. Click and hold the trigger button in the DataMan Setup Tool for a minimum of 3 seconds. Click Train Code under Actions on the ribbon bar. You can use training in Single, Burst, Continuous or Self trigger modes. - Page 51 Using Your DataMan 470 If you cannot present a single image showing all the necessary symbologies, you can enable incremental training under Training on the Advanced tab of the Code Details pane: With incremental training enabled, you can train the reader using multiple images showing the symbologies you expect to decode.
-
Page 52: Industrial Protocols
Using Your DataMan 470 Industrial Protocols The DataMan 470 readers support the following industrial protocols: EtherNet/IP™ PROFINET SLMP Protocol Modbus TCP Select industrial protocol samples and tools you want to use when you install the DataMan Setup Tool. There are three ways to enable or disable industrial protocols. Using either method, a reboot is required for the changes to come into effect. -
Page 53: Dataman 470 Image Filtering
DataMan 470 Image Filtering You can define a stack of filters to be applied to each image acquired by your DataMan 470 series reader. To select the following filters in DataMan Setup Tool, click the Optimize Image pane, select the Advanced tab, click the triangle next to Image filtering, click "..."... -
Page 54: Package Detection Support
For more information, see the DataMan Fixed Mount Readers Reference, available through the Windows Start menu or the DataMan Setup Tool Help menu. DataMan 470 Series Multi-Reader Sync Option For trigger modes other than Presentation, the DataMan 470 supports multi-reader trigger synchronization, also known as Multi-Reader Sync. - Page 55 Using Your DataMan 470 In Single, Burst, Continuous, and Self trigger modes, it is possible to synchronize image acquisition on multiple devices using the synchronization interface. Synchronization allows using one shared strobe illumination to expose all sensors simultaneously. You can synchronize multiple readers, with optionally triggering them in a defined sequence to avoid that opposing readers blind each other.
-
Page 56: Connections, Optics, And Lighting
Connections, Optics, and Lighting Connections, Optics, and Lighting This section contains descriptions about the external light control, I/O Cables, high-speed outputs, high-speed output wiring, Ethernet M12 to RJ45 cable, and acquisition trigger. External Light Control A 4-pin cable is provided for the external light control. The External Light cable is used to connect to an external lighting device, providing power and strobe control. -
Page 57: Breakout Cable (Ccbl-05-01)
Connections, Optics, and Lighting 5m Breakout Cable (CCBL-05-01) The Breakout cable provides access to trigger and high-speed outputs. You can clip unused wires short or use a tie made of non-conductive material to tie them back. For RS-232, use the Power Supply return path for ground. The figure on the left shows the plug on the device. -
Page 58: Breakout Cable (Ccb-M12X12Fy-Xx)
Connections, Optics, and Lighting 5m Breakout Cable (CCB-M12x12Fy-xx) The Breakout cable provides access to trigger and high-speed outputs. You can clip unused wires short or use a tie made of non-conductive material to tie them back. The figure on the left shows the plug on the device. -
Page 59: Breakout Cable (Ccb-Pwrio-Xx)
Connections, Optics, and Lighting 15m Breakout Cable (CCB-PWRIO-XX) The Breakout cable provides access to trigger and high-speed outputs.You can clip unused wires short or use a tie made of non-conductive material to tie them back. For RS-232, use the Power Supply return path for ground. The figure on the left shows the plug on the device. -
Page 60: High-Speed Outputs
Connections, Optics, and Lighting High-Speed Outputs Specification Description Voltage 26.4V maximum through external load Current 50mA maximum sink current OFF state leakage current 100µA External load resistance 240 Ohms to 10K Ohms Each line rated at a maximum 50mA, protected against over-current, short circuits and transients from switching inductive loads. -
Page 61: High-Speed Output Wiring
Connections, Optics, and Lighting High-Speed Output Wiring To connect to an NPN-compatible PLC input, connect High-Speed Output 0, Output 1, Output 2, or Output 3 directly to the PLC input. When enabled, the output pulls the PLC input down to less than 3V. To connect to a PNP-compatible PLC input, connect High-Speed Output 0, Output 1, Output 2 or Output 3 directly to the PLC input. -
Page 62: Rs-232 Connection Cable (Ccb-M12Xdb9Y-05)
Connections, Optics, and Lighting 5m RS-232 Connection Cable (CCB-M12XDB9Y-05) You can clip unused wires short or use a tie made of non-conductive material to tie them back. The figure on the left shows the plug on the device. -
Page 63: Ethernet X-Coded To Rj45 Cable (Ccb-84901-Y00X-Xx)
Connections, Optics, and Lighting Ethernet X-coded to RJ45 Cable (CCB-84901-y00x-xx) The Ethernet cable provides Ethernet connection for network communications. The Ethernet cable can be connected to a single device or provide connections to multiple devices via a network switch or router. CAUTION: The Ethernet cable must always be connected to a grounded Ethernet connector. -
Page 64: Cleaning/Maintenance
Cleaning/Maintenance Cleaning/Maintenance Cleaning the Reader Housing To clean the outside of the reader housing, use a small amount of mild detergent cleaner or isopropyl alcohol on a cleaning cloth. Do not pour the cleaner directly onto the reader housing. CAUTION: Do not attempt to clean any DataMan product with harsh or corrosive solvents, including lye, methyl ethyl ketone (MEK) or gasoline. -
Page 65: Compliance Information, Warnings And Notices
Compliance Information, Warnings and Notices Precautions To reduce the risk of injury or equipment damage, observe the following precautions when you install the Cognex product: The reader is intended to be supplied by a UL or NRTL listed power supply with a 24VDC output rated for at least 2A continuous and a maximum short circuit current rating of less than 8A and a maximum power rating of less than 100VA and marked Class 2 or Limited Power Source (LPS). -
Page 66: Regulations/Conformity
2014/30/EU Electromagnetic Compatibility Directive and the 2011/65/EU RoHS Directive. For further information, please contact: Cognex Corporation, One Vision Drive, Natick, MA 01760, USA. Cognex Corporation shall not be liable for use of our product with equipment (i.e., power supplies, personal computers, etc.) that is not CE. -
Page 67: Reader Programming Codes
Compliance Information, Warnings and Notices The crossed out wheeled bin symbol informs you that the product should not be disposed of along with municipal waste and invites you to use the appropriate separate take-back systems for product disposal. If you need more information on the collection, reuse, and recycling systems, please contact your local or regional waste administration. - Page 68 Copyright © 2019 Cognex Corporation. All Rights Reserved.
Need help?
Do you have a question about the DataMan 470 Series and is the answer not in the manual?
Questions and answers