Advertisement
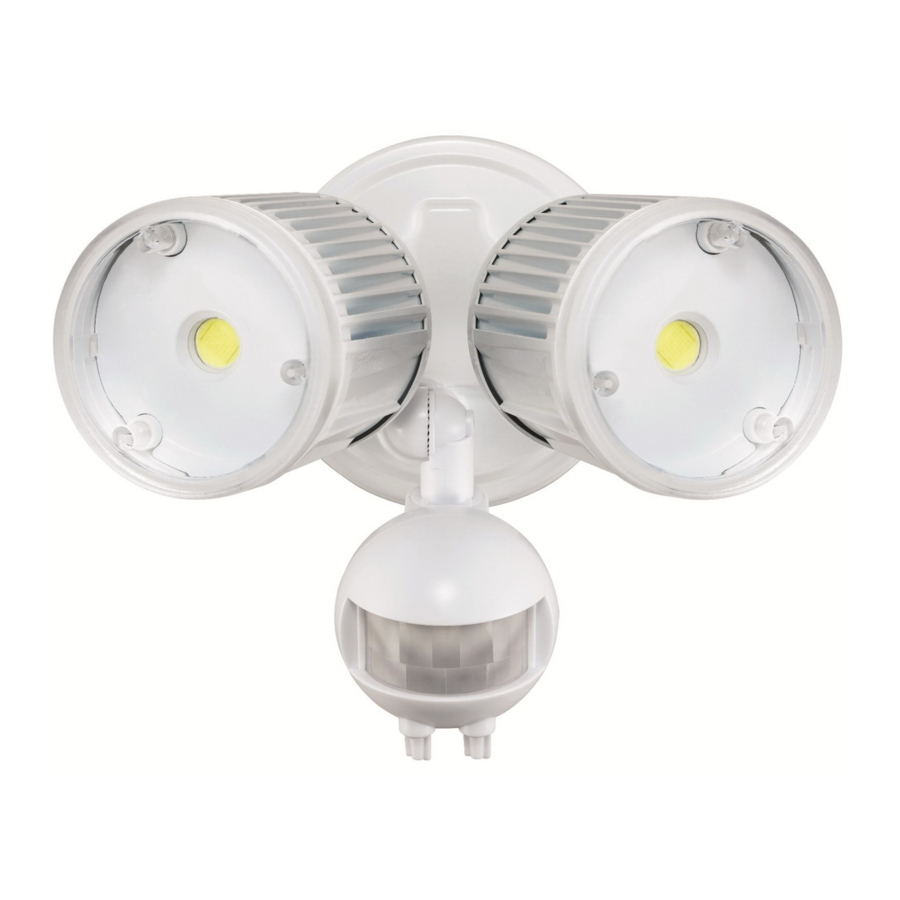
TWIN HEAD LED
MOTION SENSOR
SECURITY LIGHT
ITM./ ART. 767697
Model . AEC-326KA2-AC14W
ES00384G
Protect yourself. Please read these instructions carefully prior to installation and retain them for
future reference.
Failure to follow any of these instructions could void product warranties. Test Rite Intl assumes no
responsiblities for claims arising out of improper or careless installation or handling of it's products.
For questions regarding this product or warranty, please contact American Customer Service at 1-
855-232-6427, Monday through Friday, 8am to 8pm Eastern Time. Outside of Business hours you
can reach us by e-mail 24/7 at
acs@americancustomerservice.com
and we will reply to you on the
next business day. Please enter the Costco ITM/ART # in the subject line.
Revised 5.27.14
1
Advertisement
Table of Contents

Related Manuals for Home Zone Security AEC-326KA2-AC14W


Summary of Contents for Home Zone Security AEC-326KA2-AC14W
- Page 1 TWIN HEAD LED MOTION SENSOR SECURITY LIGHT ITM./ ART. 767697 Model . AEC-326KA2-AC14W ES00384G Protect yourself. Please read these instructions carefully prior to installation and retain them for future reference. Failure to follow any of these instructions could void product warranties. Test Rite Intl assumes no responsiblities for claims arising out of improper or careless installation or handling of it’s products.
-
Page 2: Important Safety Instructions
IMPORTANT SAFETY INSTRUCTIONS To reduce the risk of death, personal injury or property damage from fire, electric shock, falling parts, cuts/abrasions and other hazards read all warnings and instruction included with and on the fixture box and all fixture labels. ... -
Page 3: Pre-Installation
PRE-INSTALLATION Before beginning assembly of the product, make sure all parts are present. Compare parts with package contents list and hardware contents. If any part is missing or damaged, do not attempt to assemble the product. Estimated Assembly time: 30 minutes. Note: Fixture should be installed by persons with experience in household wiring or by a qualified electrician. - Page 4 PRE-INSTALLATION (Continued) FIXTURE PACKING LIST Part Description Quantity Light Fixture Back plate Screw Screw nut Wire Nut Cross Bar Mounting Screw Plastic masonry plug Rubber Ring Sponge foam User Manual Mounting Hardware included. Silicone Sealant is required (but not provided). Tools Required for Installation:...
-
Page 5: Installation
INSTALLATION 1 Installing the cross bar Before installing the Cross Bar ( E ) to the junction box, Screw the two Back Plate Screws ( B ) to the Cross Bar ( E ) first. Line up the holes on the cross bar with the holes on your junction box. -
Page 6: Mounting The Light Fixture
INSTALLATION (Continued) 3 Mounting the Light Fixture Install the Light Fixture ( A ) to the Sponge foam ( I ) and Cross Bar ( E ) with affixed back plate Screws ( B ) and Screw Nuts ( C ) and rubber ring ( H ). Note: Make sure all the wires are inside the junction box or the light before attaching the light to the junction box. -
Page 7: Operation
OPERATION 1 Adjusting the Lampheads Loosen the Screw Knob and adjust the lamp direction by up and down with range of 90 degree. You may also hold the lamp to adjust around with max 350 degree to get the desired lamp direction. -
Page 8: Specifications
OPERATION (Continued) Dusk Level/ Lux Setting This setting is used to control the ambient light level for the motion security light to turn on. You can set the light to turn on only in the darkness by turning the setting to full clockwise position , or allow the security light to trigger even during daylight by turning the setting full counter-clockwise position... -
Page 9: Care And Cleaning
ADVANTAGES OF LED’S 1. Energy saving – much lower power consumption 2. Ultra extended life of LED’s 3. Solid State lighting – no filament to break 4. No forward heat & low fitting heat. Much safer. CARE AND CLEANING To prolong the original appearance, clean with clear water and a soft, damp cloth only. -
Page 10: Troubleshooting
TROUBLESHOOTING Problem Possible Cause Solution The light will not come on. The light switch is turned Turn the light wall switch off. The fuse is blown or the Replace the fuse or turn circuit breaker is turned the circuit breaker on. -
Page 11: Fcc Information
FCC Information This device complies with Part 15 of the FCC Rules. Operation is subject to the following two conditions: (1) This device may not cause harmful interference, and (2) This device must accept any interference received, including interference that may cause undesired operation. Warning: Changes or modification to this unit not expressly approved by the party responsible for compliance could void the user’s authority to operate the equipment.
Need help?
Do you have a question about the AEC-326KA2-AC14W and is the answer not in the manual?
Questions and answers
the red wire is for what the black wire is for what two white wires are for what these wires are off the motion detecter
the red wire is for what? the black wire is for what? two white wires are for what?