Table of Contents
Advertisement
Quick Links
User Instructions
IMPORTANT SAFETY INSTRUCTIONS
• Never let children use unsupervised.
• Use equipment only for the intended purpose, as outlined in these User Instructions.
• CAUTION: As with any new exercise program, consult with your physician prior to using the P3.
If you have one or more of the below contraindications, you maybe still be able to use the P3; however, you first
must obtain approval from your licensed physician. The following list of contraindications is not exhaustive, and
intended only as a reference.
• Bone weakness, recent fractures, and skeletal implants
• Weakness or instability of the shoulder.
STRETCHING with the P3
Decompress with the P3
TM
Reduce Pressure. The gentle, user-controlled traction allows joints
to open, encouraging realignment, rehydration of vital nutrients,
and reduced pressure on nerves. Stretching every weight-bearing
joints from between the shoulder blades to the ankles, the P3
enhances cartilage nutrition and join lubrication. Regular reverse-
loading of the support structure that encases each joint can help increase ligament strength and improve flexibility and
shock absorption, resulting in overall Improved Performance from golfing to gardening.
A few minutes a day with the P3
bearing joints.
• Promotes Alignment
• Strengthens Ligaments
• Relieves Nerve Pressure
• Improves Shock Absorption
and Range of Motion
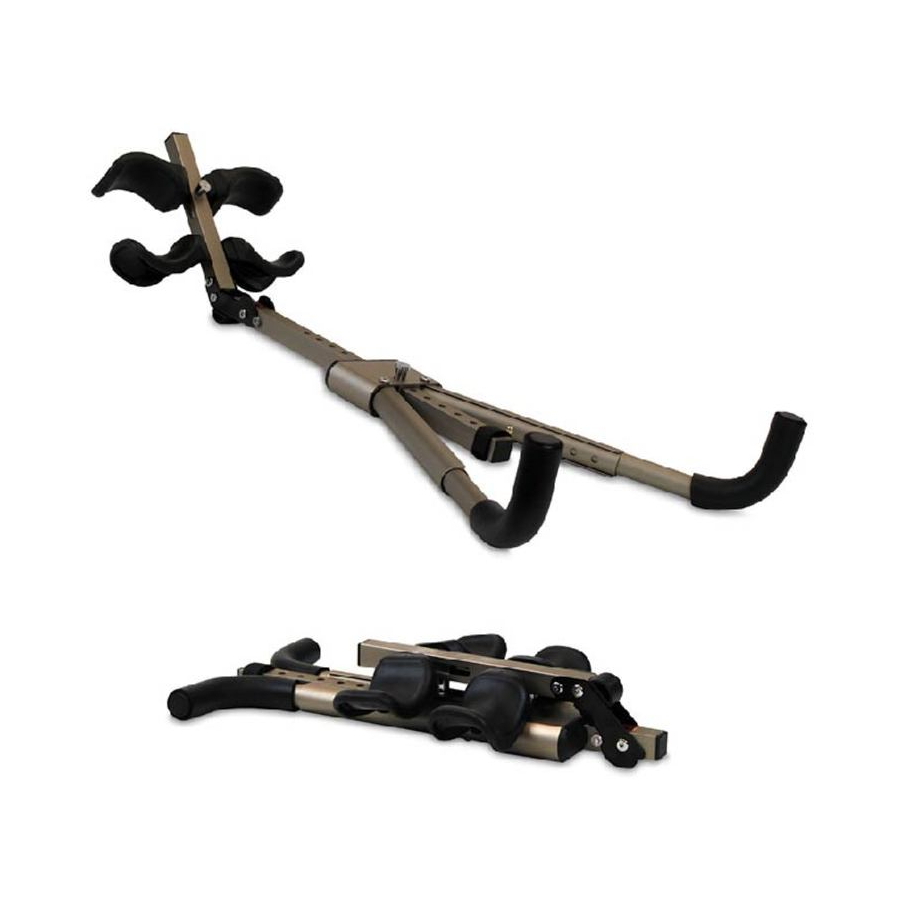
Figure 1
Step One:
Open the Ankle Supports
• Fig. 1 shows the P3 folded for storage.
• Press the Ankle Support Shaft Release (green bulls-eye target button) (Fig. 2) to release the Ankle Support Shaft.
• Rotate the Ankle Support Shaft 135 degrees; the Release will lock into place when the shaft is fully rotated.
• Ensure that the Ankle Support Shaft is locked in the ready-to-use position before continuing.
Warning: This operation may pinch fingers if not done slowly and carefully.
Step Two
: Open the Handles
• Release the Velcro strap that is wrapped around the Handles, and open the top of the handles outward (Fig. 3).
• Press the Handle Adjustment Pin, located underneath near the base of each Handle, to release from the storage
position.
• Extend and rotate each Handle so that the Hand Grips are pointing up.
• Allow the pin to re-engage in the shortest setting for both Handles.
Step Three:
Extend the Main Shaft
• Pull up on the Main Shaft Adjustment Pin (Fig.4).
• Slide the Shroud along the Main Shaft to its longest setting (#13 as indicated by the embossed markings.)
• Allow the Pin to re-engage.
Back Stretcher
TM
to help Relieve Pain and
can help target the source of your ache and facilitate better health in all your weight-
TM
Ankle Support
Ankle Support
Shaft Release
Figure 2
TM
R
RELIEVE PAIN
• Spinal Injury: Any severe spinal cord trauma
TM
Ankle Support
Adjustment Pin
Shaft
Shroud
Main Shaft
Figure 3
TM
•
•
REDUCE PRESSURE
IMPROVE PERFORMANCE
Ankle Supports
Main Shaft Adjustment Pin
Handles
Figure 4
Hand Grips
Advertisement
Table of Contents

Related Manuals for Teeter Hang Ups P3


Summary of Contents for Teeter Hang Ups P3
-
Page 1: User Instructions
• CAUTION: As with any new exercise program, consult with your physician prior to using the P3. If you have one or more of the below contraindications, you maybe still be able to use the P3; however, you first must obtain approval from your licensed physician. The following list of contraindications is not exhaustive, and intended only as a reference. - Page 2 Step Four : Adjust Handle Length • Standing, hold the Main Shaft of the P3, positioning the Hand Grips at your hips (Fig. 5). The Hand Grips should align with the outside seam of your pants. • If the Hand Grips do not fit to your hips properly you will need to adjust the Handle length. Depress the Handle Adjustment Pin on both handles.
Need help?
Do you have a question about the P3 and is the answer not in the manual?
Questions and answers