Table of Contents
Advertisement
Advertisement
Table of Contents

Related Manuals for Dahua Technology DHI-VTH1550CH-S


Summary of Contents for Dahua Technology DHI-VTH1550CH-S
- Page 1 VTH Series User’s Manual Dahua Technology Co., Ltd...
-
Page 2: Foreword
Foreword General This manual offers reference material and general information about the basic operation, maintenance, and troubleshooting for a Dahua security device. Read, follow, and retain the following safety instructions. Heed all warning on the unit and in the operating instructions before operating the unit. - Page 3 Dahua accepts no liability for damage resulting directly or indirectly from faults, incompleteness, or discrepancies between this guide and the product described. Dahua is not liable for any loss caused by installation, operation, or maintenance inconsistent with the information in this guide. All the designs and software are subject to change without prior written notice.
-
Page 4: Important Safeguards And Warnings
Important Safeguards and Warnings This chapter describes the contents covering proper handling of the device, hazard prevention, and prevention of property damage. Read these contents carefully before using the device, comply with them when using, and keep it well for future reference. Installation and Maintenance Professionals Requirements All installation and maintenance professionals must have adequate qualifications or ... - Page 5 The unit displays a marked change in performance. The unit does not operate in the expected manner when the user correctly follows the proper operating procedures. Ensure a service technician uses replacement parts specified by the manufacturer, or that have the same characteristics as the original parts.
- Page 6 Use a dry soft cloth to clean the unit’s housing. If the unit is particularly dusty, use water to dilute a mild detergent, apply the diluted detergent to a soft cloth, then gently clean the device. Finally, use a dry cloth to wipe the unit dry. Do not use a volatile solvent like alcohol, benzene, or thinner;...
-
Page 7: Cybersecurity Recommendations
Cybersecurity Recommendations Mandatory actions to be taken towards cybersecurity Change Passwords and Use Strong Passwords The number one reason systems get “hacked” is due to having weak or default passwords. It is recommended to change default passwords immediately and choose a strong password whenever possible. - Page 8 Change ONVIF Password Older IP camera firmware does not automatically change the ONVIF password when the system credentials are changed. Update the camera’s firmware to the latest revision or manually change the ONVIF password. Forward Only Ports You Need ...
- Page 9 Isolate NVR and IP Camera Network Ensure that the network for the NVR and IP cameras should not be the same network as a public computer network. Separate networks prevent unauthorized users accessing the same network the security system. Secure Auditing ...
-
Page 10: Table Of Contents
Cybersecurity Recommendations ......................VI Table of Contents ............................ IX 1 Overview ..............................1 2 VTH Panels ............................. 2 DHI-VTH1550CH-S / DHI-VTH1550CHW-2-S ................2 DHI-VTH5221D-S / DHI-VTH5221DW-S ..................4 3 Installation .............................. 6 Planning the Install ........................6 Inspecting the Device ........................6 Installing the VTH Device...................... - Page 11 6.2.3 Deleting Cameras ......................34 6.2.4 Monitoring Video from a Connected Device ..............34 Selecting Favorites ........................35 VTH Information .......................... 36 6.4.1 Reviewing Security Alarms ....................36 6.4.2 Reviewing Guest Messages ..................... 37 6.4.3 Reviewing Published Information ..................37 6.4.4 Viewing Stored Video .......................
-
Page 12: Overview
Overview Dahua VTH devices are indoor monitors that allow tenants to view and talk with visitors, record call sessions, monitor the surroundings from outdoor stations and IP cameras and remotely unlock doors. Visitors can also leave messages, which can be retrieved from the indoor monitor. -
Page 13: Vth Panels
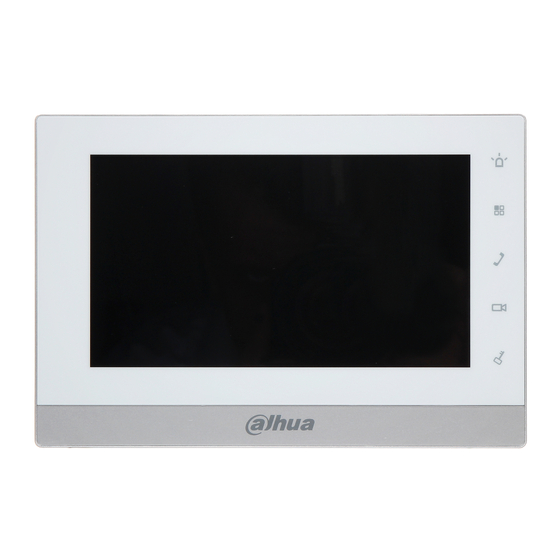
Use this process to plan, install, and configure the security network and the IP devices. DHI-VTH1550CH-S / DHI-VTH1550CHW-2-S The DHI-VTH1550CH-S indoor monitor allows tenants to view and talk with visitors, record call sessions, monitor the surroundings from outdoor stations and IP cameras, and remotely unlock doors. - Page 14 Rear Panel...
-
Page 15: Dhi-Vth5221D-S / Dhi-Vth5221Dw-S
DHI-VTH5221D-S / DHI-VTH5221DW-S The DHI-VTH5221-S Series indoor monitors allow tenants to view and talk with visitors, record call sessions, monitor the surroundings from outdoor stations and IP cameras and remotely unlock doors. Visitors can also leave messages, which can be retrieved from the indoor monitor. - Page 16 Rear Panel...
-
Page 17: Installation
Installation Planning the Install Inspecting the Device Sequence Item Content Appearance Overall Check for obvious damage and check that Package package the fittings and hardware are complete. Fittings Inspect whether it is consistent with order Device Model contract. Model Inspect whether the label is torn or and Label damaged. -
Page 18: Installing The Vth Device
Installing the VTH Device Install the device in an appropriate location. Avoid locations that experience condensation, high temperatures, dust, corrosives, and direct sunlight. Installation and commissioning shall be performed by professional integrators trained on the latest security devices. DO NOT dismantle or repair the device. -
Page 19: Commissioning
Commissioning Confirm that all devices are complete and that they work properly prior to installation and configuration. Setup Prior to commissioning and configuring the VTH unit, ensure the unit conforms to the following: Check that the unit is connected to the proper power supply. Power on the device only ... -
Page 20: Set Vth Network
Type your Password, then type the same password in Confirm Pwd box. Type a valid email address. Press OK. The system displays main interface if all credentials are input successfully. 4.2.2 Set VTH Network Configure the VTH network information. The VTH must be part of the same network segment as the VTO and the other VTH devices in the system. - Page 21 WLAN a) Press Off to enable the WiFi Function. The system list the available WiFi networks. b) Connect to a WiFi network in one of the following ways: • Select Wi-Fi, then press the Wireless IP tab. Enter the Local IP, Subnet Mask and, Gateway addresses.
-
Page 22: Configure The Vth
4.2.3 Configure the VTH Follow these steps to set VTH room number, type and, Master IP address. VTH devices can be configured as a master unit or as an extension unit. Typically, there is one master unit and each master can support several extension units. A master unit uses a four-digit room number. Press and hold Setting until the system displays the Password Verification dialog box. -
Page 23: Configure Sip Server
Press OFF to enable SSH (optional). After SSH is enabled, the debugging terminal connects VTH through SSH protocol, so as to operate and debug it. Press OK to save the configuration. 4.2.4 Configure SIP Server Configure SIP server on VTH and build connections. Press and hold Setting until the system displays the Password Verification dialog box. -
Page 24: Add Vto Stations
Set Enable Status to ON to activate SIP Server functions. Press OK to save SIP server configuration. 4.2.5 Add VTO Stations VTO stations are the external devices that VTH units connect to for two-way communication. VTO stations typically contain a camera to send video information and can unlock doors and gates from a command from VTH devices. -
Page 25: Monitoring A Vto Station
4.3.2 Monitoring a VTO Station Select Monitor > Door, and then select the VTO you wish to monitor. Press the Star icon to add this VTO to the Favorite List. -
Page 26: Vth Interface
VTH Interface Main Menu All interaction with the VTH features starts from the Menu. Name Description Room Number Number of the room where the VTH is located. • Call another VTH or a VTO unit. Call • Manage contacts. • View and manage call records. •... -
Page 27: Setting Vth Functions
Name Description • Displays the last unread alarm message. Arm/disarm • Press the icon to enter arming mode. Press here to access the VTH settings. Press and hold until Setting the Password Verification dialog box opens. Calls the Management Center. Monitor the Master VTO, VTO sub-station, IP camera, and Monitor other connected devices. -
Page 28: Setting Do Not Disturb
Press the tone name box to select the ring tone, then press the “+” or the “–“ button to set the volume. Setting Ring Tone Preferences Press and hold Setting until the system displays the Password Verification dialog box. Type your password and press OK. Select “Ring >... -
Page 29: Setting Alarms
Press and hold Setting until the system displays the Password Verification dialog box. Type your password and press OK. Press DND. Press OFF to activate the Do Not Disturb function. Press the Start box and enter the start time to activate Do Not Disturb. Press the End box and enter the time the VTH disables Do Not Disturb. - Page 30 Configuring Wired Alarm Zones Press and hold Setting until the system displays the Password Verification dialog box. Type your password and press OK. Select Alarm > Wire Zone. Press a corresponding position to set area type, NO/NC, alarm status, enter delay, and exit delay.
- Page 31 Press OK to save the settings. Configuring Wireless Alarm Zones Press and hold Setting until the system displays the Password Verification dialog box. Type your password and press OK. Select Alarm > Wireless Zone. Press Add. Press the wireless code button on the wireless device. Please refer to the documentation for the wireless device for instructions.
-
Page 32: Mode Setting
Press OFF to enable alarm output function. 5.2.4 Mode Setting Set area on/off status under different modes. Area mode can be set only in disarm status. Press and hold Setting until the system displays the Password Verification dialog box. Type your password and press OK. Press Mode. -
Page 33: General Settings
Input the VTH number in the corresponding forward mode; then press OFF to enable the forward function. Parameter Description Always All incoming calls will be forwarded to preset number. When the user is busy, incoming call from the third party is forwarded Busy to the preset number. - Page 34 Set the time parameter. Manual system time: a) Press ON. b) Press time text box to set system time. Set time zone: a) Press ON. b) Press the Time Zone text box and select the local time zone. Set DST: ...
- Page 35 Setting the Password Use this dialog box to set the login password. These parameters are set only on the Master VTH, and the Master VTH synchronizes the settings to its Extension VTH devices. Press and hold Setting until the system displays the Password Verification dialog box. Type your password and press OK.
- Page 36 Set the following parameters: Parameter Description Maximum time to monitor the video from a VTO, VTO sub- Monitor Time station, IP camera or another device. Maximum recording time of videos during call, talk, Record Time monitoring, and speaking. The system stops recording at the end of recording time.
-
Page 37: Product Info
5.2.7 Product Info This box lets you reboot the system and format the SD card, if installed. Press and hold Setting until the system displays the Password Verification dialog box. Type your password and press OK. Press Product Info. Press Reboot and press OK at the prompt to reboot the VTH. Press SD Format and press OK at the prompt to format the SD card. -
Page 38: Making And Receiving Calls
Scan the QR code with any code-scanning APP, bind your email box, send it by email to support_cpwd@htmicrochip.com, and thus obtain security code. Press Next. Enter “Password”, “Confirm Password” and obtained “Security Code”. Press OK to reset the password. 5.2.9 Making and Receiving Calls Adding Contacts Add and edit VTH and extension number. - Page 39 Calling Other VTH Units Make sure that resident-to-resident call function has been enabled. If both VTHs have a camera, bilateral video call can be provided. Select Call > Call User. Enter the room number for the VTH you wish to call. If VTO works as SIP server, dial room no.
- Page 40 Answering a Call When another VTH calls this VTH, the call interface will be displayed. Press to answer the call. Press to hang up. ...
- Page 41 Managing Recent Calls View and manage missed calls, accepted calls, and the call log of the VTH. To call back a recent contact, select Call > Recent Call. Select the list of all calls or a list of only missed calls. Select the recent call of required VTH, press Call to call the contact.
-
Page 42: Monitoring Locations
Monitoring Locations VTH master and extension devices are capable of displaying live video feeds from Main VTO stations, VTO sub-stations, and from IP cameras connected to the same network. Monitoring Video from a VTO Station VTH devices can monitor video from a main VTO station and from a VTO sub-station. In monitoring mode, you can press the Call Key ( ) on the VTH front panel to transmit audio to the monitored VTO. -
Page 43: Monitoring A Remote Camera
Icon Description Unlock the VTO remotely. The system provides 2-channel unlock function. If the icon is gray, then the unlock function for this VTO is not available. Take a snapshot. This key is gray if an SD card is not installed in the VTH. Start recoding video. - Page 44 Press +Add. Configure the camera parameters using the table below. Parameter Description Press this key to select the source of the incoming video feed: IPC, NVR, DVR, or HDCVI DVR (HCVR). • Select IPC if the video feed streams from a connected IPC directly. •...
-
Page 45: Modifying Camera Parameters
Press OK to accept and save the settings. Press the Star icon to add the device to the Favorite list. 6.2.2 Modifying Camera Parameters Select Monitor> IPC. Press for the connected IP camera or recording device. Modify IPC parameters. Refer to Table 6.2 for details. Press OK to accept and save the changes. -
Page 46: Selecting Favorites
Refer to Table 6.2 for camera monitoring functions. Selecting Favorites The VTH maintains a list of favorite VTO stations and IP cameras/recording devices so you can quickly display video from a device. Note, you must add devices to the Favorite list by pressing the Star icon on the device icon. Select Monitor>... -
Page 47: Vth Information
VTH Information 6.4.1 Reviewing Security Alarms The VTH plays a 15 second sound after an alarm is triggered and displays a prompt interface, as shown below. The VTH also uploads the alarm information to the alarm record interface and to the management platform. To view all alarm messages, select Info >... -
Page 48: Reviewing Guest Messages
6.4.2 Reviewing Guest Messages A VTH device with an installed SD card can store guest messages (all messaged stored on the SD card) recorded at a VTO station. The VTH can also retrieve messages from the VTO if the VTO device has FTP enabled and the “Video-audio Message Uploading” feature is enables. -
Page 49: Arm/Disarm Function
Press Edit to select a message. Press Delete to delete the selected message. Press Clear to delete all records after confirmation. Arm/Disarm Function 6.5.1 Arming an Alarm In case of triggering alarm after arm, produce linkage alarm and upload alarm info. Please ensure that the area has been added into arm mode. - Page 50 Press disarm symbol at the lower right corner of the main interface. Enter arm and disarm password; press [OK]. If you are forced to enter disarm password in case of emergencies, enter anti-hijacking password, which is the reversed arm password. The system will disarm, and at the same time, upload alarm info to management center/platform.
-
Page 51: Dss Mobile
DSS Mobile The VTH device is compatible with the Dahua DSS Mobile for VDP mobile application. From DSS you can unlock doors, talk to connected VTO devices, call the management center, and view call records and messages. Downloading the App Before start, make sure your VTO, VTH, and DSS server are properly connected. -
Page 52: Registering The App
Registering the App Run the app, accept the End-User License Agreement, and then allow the permissions for the app. The Registration interface is displayed. and then scan the Register code on the VTH. The IP address and port number of your DSS server is displayed. - Page 53 Tap Confirm, enter the user name and password you need, and then tap Registration. You can register 5 users on a VTH at most. Tap Login. Enter the user name and password you registered, and then tap Login. The Call Records interface is displayed.
-
Page 54: Call Functions
Call Functions 7.3.1 Configuring Call Forwarding The VTH device can forward incoming calls to your mobile device. Log into the app and tap Setting. Note the SIP ID. The Settings interface is displayed. The SIP ID is 3#1#1001#115. On the VTH main interface, press Setting. Enter your password and press Forward. -
Page 55: Calling Operations
Select one of the following forwarding options: Always: VTH forwards all calls. Busy: VTH forwards calls if the VTH is busy with another call. No Answer: VTH forwards any call that has not been answered within 15 seconds. ... -
Page 56: Monitoring Video From A Vto
You can also receive the call from the management center. Monitoring Video from a VTO The mobile application can display streaming video from an associated VTO device. Log into the app and tap Monitor. -
Page 57: Call Records
Tap Call Manager to call the management center. Tap the "+" sign, and then select the VTO video feed you want to display. Tap Open Door to unlock the door. Tap Speaking to communicate with a person at the VTO station. Call Records The mobile application stores call information from a VTO station or from the management center. -
Page 58: Settings
Settings Log into the app and tap Setting. to enable the specific function. Event Subscription: View the access and alarm messages. Sound: Phone rings when receiving a call. Tap About to view the version information and the online help. In addition, you can logout the current account. - Page 59 Dahua Technology USA 23 Hubble Irvine, CA 92618 Tel: (949) 679-7777 Fax: (949) 679-5760 Support: 877-606-1590 Sales: sales.usa@dahuatech.com Support: support.usa@dahuatech.com...
Need help?
Do you have a question about the DHI-VTH1550CH-S and is the answer not in the manual?
Questions and answers