Table of Contents
Advertisement
Quick Links
Advertisement
Table of Contents

Related Manuals for Toshiba Portege G710


Summary of Contents for Toshiba Portege G710
-
Page 2: Table Of Contents
AC charger safety 15 Emergency calls 15 European RF Exposure Information 16 Care and maintenance 18 General 18 Restarting your Toshiba phone 19 Resetting your Toshiba phone 20 Getting started 21 Unpacking 21 Phone layout and functions 22 Home Screen 26... - Page 3 Table of contents Messaging 46 Text messages 46 E-mail 48 MMS messages 53 General messaging options 57 Text input 59 Input modes and indicators 59 Text mode 59 Numeric/Symbol mode 60 Applications and multimedia 61 Internet Explorer 61 Tasks 64 Windows Media 65 Calendar 69 Messaging 71...
- Page 4 Table of contents Settings 100 Phone settings 100 Sound settings 106 Profile settings 106 Display settings 107 Clock & Alarm settings 108 Connections 109 Security settings 109 Remove Programs 113 Power Management 113 Regional Settings 114 Owner Information 114 Phone Information 114 Backlight level 115 Accessibility 115 About 116...
-
Page 5: Preface
Preface To use your Toshiba phone, you must have service from a wireless service provider. Many of the Preface features in your Toshiba phone depend on features in the wireless network to function. These network services may not be available on all networks, or you may have to make specific arrangements with your service provider before you can utilise network services. -
Page 6: Toshiba Corporation
If you do not agree with the terms of this EULA, do not use or employ the Software. 1. License Grant. Toshiba grants to you a personal, non-transferable and non-exclusive right to use the Software as set out in this EULA. - Page 7 Software and are subject to the terms of this EULA. All rights not expressly granted under this EULA are reserved to Toshiba, Toshiba's affiliates and/or their suppliers. 3. Reverse Engineering. You agree that you...
- Page 8 OPERATION OF THE SOFTWARE WILL BE UNINTERRUPTED OR ERROR-FREE. 5. LIMITATION OF LIABILITY. TO THE FULLEST EXTENT LEGALLY PERMITTED, IN NO EVENT SHALL TOSHIBA, TOSHIBA'S AFFILIATES OR THEIR SUPPLIERS BE LIABLE TO YOU FOR ANY DAMAGES FOR (A) LOST BUSINESS OR REVENUE, BUSINESS INTERRUPTION, LOSS OF BUSINESS DATA;...
-
Page 9: Eu Warranty
8. Third Party Beneficiary. You agree that certain suppliers of the Software to Toshiba have a right as a third party beneficiary to enforce the terms of this EULA against you as a user. -
Page 10: Licenses
Licenses Microsoft, Windows, Windows Mobile, Windows Licenses Live, Windows Media, ActiveSync, Internet Explorer, Outlook, Excel, PowerPoint and Word are either registered trademarks or trademarks of Microsoft Corporation in the United States and/or other countries. Java™ and all Java-based marks are trademarks or registered trademarks of Sun Microsystems, Inc. -
Page 11: Declaration Of Conformity
We, Toshiba Information Systems UK (Ltd), Mobile Communications Division, of Declaration of conformity Toshiba Court, Weybridge Business Park, Addlestone Road, Weybridge, KT15 2UL declare under our sole responsibility that the product (G710, Type (Model) Name SJ3-E01) is in conformity with the following standards and/or other normative documents: 3GPP TS 51.010-1, EN 301511, EN 301 419, EN 301 420, EN 50360, EN 50361, EN 300 328,... -
Page 12: Health And Safety
• Your phone contains metal that may cause skin irritation. • If your Toshiba phone has a flash unit, do not operate the flash too close to a person’s eyes - this may cause damage to their eyes. -
Page 13: Operating Environment
• Switch off your Toshiba phone when refuelling. • Do not handle your Toshiba phone when operating machinery. • Switch your Toshiba phone off if you are entering a hospital or health care facilities. Medical equipment may be affected by phone usage. -
Page 14: Electronic Devices
• Do not place your Toshiba phone alongside computer disks, credit cards, travel cards and other magnetic media. Information contained on disks or cards may be affected by the... -
Page 15: Battery Safety
• Stop using the battery if you detect any abnormalities, such as odour, discolouration or heat during use, charging or storage. • Do not use your Toshiba phone with a damaged battery. • When the charger is not in use, disconnect it from the power source. -
Page 16: Ac Charger Safety
• Do not touch the phone, battery or AC charger with wet hands while the phone is charging. Emergency calls When making emergency calls from your Toshiba phone, ensure that the phone is switched on and in service. Calls cannot be made to emergency services while data communication is being performed within a GSM area. -
Page 17: European Rf Exposure Information
Health and safety European RF Exposure Information Your Toshiba phone is a radio transmitter and receiver. It is designed not to exceed the limits for exposure to radio waves recommended by international guidelines. These guidelines were developed by the independent scientific... - Page 18 Health and safety The following Information is only for European Union Member States: The use of the above symbol indicates that this product may not be treated as household waste. By ensuring this product is disposed of correctly, you will help prevent potential negative consequences for the environment and human health, which could otherwise be caused by inappropriate waste handling of this product.
-
Page 19: Care And Maintenance
• Do not use or store your Toshiba phone in hot areas. High temperatures will shorten the life span of the phone, damage the battery, and warp/melt internal circuits. -
Page 20: Restarting Your Toshiba Phone
Toshiba phone. This is normal and the phone should operate as usual once you move away from the source of the interference. • If your Toshiba phone, or any of the accessories, are not working as they should, please consult your dealer, who can provide you with the expert assistance you require. -
Page 21: Resetting Your Toshiba Phone
Care and maintenance Resetting your Toshiba phone For details of resetting your Toshiba phone, refer to Master Clear in Settings. We recommend that you back up all of your data before resetting your Toshiba phone. IMPORTANT: It is recommended that you frequently back up the data on your Toshiba phone. -
Page 22: Getting Started
Getting started Unpacking Getting started Please ensure that the contents of your sales pack include: • Your Toshiba phone • Battery • AC charger • USB cable • Headset • User guide • CD (Getting Started) NOTE: If any of the items listed above are missing, contact the retailer where you purchased your Toshiba phone. -
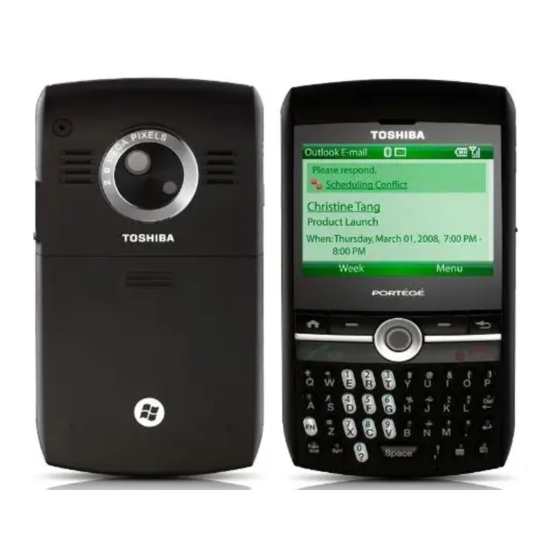
Page 23: Phone Layout And Functions
Getting started Phone layout and functions 1. Earpiece 2. Display screen 3. Left softkey and Right softkey - perform operations indicated on the display. 4. Back/Clear key - returns to the previous screen or deletes text. 5. End key - short press: ends calls/operations and returns to Home Screen. - Page 24 Getting started long press: used to enter upper case letters. See Text input section for details. 12. Function key - short press: toggles between text input modes when entering or editing text. See Text input section for details. long press: works in the same way as the Shift key on a PC.
- Page 25 Getting started 17. Volume Up key 18. Volume Down key 19. Cable, phone charging and headset connector 20. Removable antenna interface 21. Camera key - launches Camera application. If Camera application is already running, captures a photo or begins recording of a video clip.
- Page 26 Getting started 23. Camera flash 24. Battery cover 25. Camera lens...
-
Page 27: Home Screen
Getting started Home Screen The Home Screen displays important information, such as upcoming appointments, status indicators, current time, date and profile, and icons for frequently used programs. You can open an application by selecting the relevant icon. To access the Home Screen, press the Home key. -
Page 28: Common Display Indicators
Getting started Common display indicators Type Icon Radio signal icons Notification icons Call icons Description Signal strength Call in progress GPRS in use EDGE in use No radio signal Phone set to Off. Refer to Switching radio transmission on/off in Connectivity for details. GPRS available EDGE available Roaming... - Page 29 Getting started Type Other icons Volume icons Battery icons Text input mode (see Text input section for details) *The type of voice mail message indicator displayed is dependent on your service provider. Your service provider may also allow you to select the type of voice mail notification that you receive.
-
Page 30: Installing The Sim Card And Battery
Getting started Installing the SIM card and battery WARNING: There is a danger of explosion if the battery is incorrectly replaced. To reduce risk of fire or burns, do not disassemble, crush, puncture, short external contacts, expose to temperature above 60°C (140°F), or dispose of battery in fire or water. - Page 31 Getting started 3. With the gold connectors facing downwards, align the SIM card the correct way, as shown in the diagram below. Push down lightly while sliding the SIM card into place. 4. Insert the battery into the battery compartment with the gold connectors facing towards the SIM card.
- Page 32 Getting started 5. Gently slide the back cover upward into place.
-
Page 33: Installing A Microsd Card
Getting started Installing a microSD card A microSD card is a removable storage card that can be used to increase the memory of the phone. IMPORTANT: Do not remove the microSD card while the phone is reading data from, or writing data to, the card. 1. - Page 34 Getting started 2. Push down lightly while sliding the card into place. 3. When successfully installed, the microSD card sits on top of the SIM card. 4. To remove the microSD card, push down lightly while sliding the card towards the battery.
-
Page 35: Charging The Battery
Getting started Charging the battery You will need to fully charge the battery before you can switch your Toshiba phone on for the first time. This may take at least 10 hours. The battery will only achieve optimum performance after two or three complete charges. -
Page 36: Battery Information
Toshiba phone, the features and/or settings you select and use, items attached to your phone's connecting ports, and your voice, data, and other program usage patterns. -
Page 37: Switching The Power On And Off
PUK as your SIM card will be rendered permanently inoperative following ten consecutive unsuccessful attempts. To switch your Toshiba phone off, press and hold down the Power key. Quick List The Quick List offers convenient access to a small selection of functions, which include locking the phone keypad and changing the profile. -
Page 38: Call Functions
Making an emergency call You can make calls to emergency service numbers under almost any circumstances, even if you have locked your Toshiba phone or if you have not enabled your SIM. Making a call from Contacts To make a call from Contacts: 1. -
Page 39: Making A Call From Call History
Call functions 2. Scroll to the required contact, then press the Send key. TIP: If you have a long list of contacts, enter the first few letters of the contact's name. The phone will display only the matching contact. To call the contact, press the Send key. -
Page 40: Speed Dial
Call functions Speed Dial Creating a speed dial You can create a speed dial for a phone number that is stored in Contacts. To create a speed dial: 1. From the Home Screen, select Start > Contacts. 2. Select the required contact. 3. -
Page 41: Special Dialling
Call functions Special dialling Inserting an automatic pause in a dialling sequence When an automatic pause is added to a dialling sequence, the numbers before the pause are dialled and the call connects. There is then a 3 second pause before the remaining numbers are dialled. -
Page 42: Receiving A Call
TIP: When you have the headset connected to your Toshiba phone, you can do the following: • Answer an incoming call by pressing the headset button. -
Page 43: In-Call Options
Putting a call on hands-free To put a call on hands-free: When hands-free equipment is attached to your Toshiba phone, the item Menu > Turn Hands- free On will be enabled. Answering or ignoring a second call • To answer a second call, press the Send key or Answer. -
Page 44: Creating A Conference Call
2. Dial the second number, then press the Send key. The first call will remain on hold. Creating a conference call With two calls active on your Toshiba phone, one active and the other on hold, select Menu > Conference. The calls will be joined together, and each party will be able to hear the other. -
Page 45: Call History
Call functions Call History Call History displays a list of calls that you have missed, received and dialled recently. Viewing Call History To view Call History: 1. From the Home Screen, select Start > Call History. 2. If required, you can filter the list by selecting Menu >... -
Page 46: Resetting Call Timers
Call functions Viewing Call Timers To view Call Timers: 1. From the Home Screen, select Start > Call History. 2. Select Menu > View Timers. NOTE: The length of waiting calls is not recorded. Resetting Call Timers To reset Call Timers: 1. -
Page 47: Messaging
For information on setting up your text message service centre, refer to Viewing and editing text messages service centre in Settings. Your Toshiba phone supports the sending of more than the standard 160-character limit. If you enter more than 160 characters, the message is split into linking text messages. -
Page 48: Receiving Text Messages
Menu > Message Options. 2. Press the Navigation/Action key to tick the Request message delivery notification checkbox. 3. Press Done. Your request is sent to your service provider. Receiving text messages Your Toshiba phone will alert you when a new text message arrives. -
Page 49: E-Mail
2. Select the message to delete and select Menu > Delete. E-mail Before you can send or receive e-mails, you need to set up an e-mail account. Your Toshiba phone supports the following types of e-mail accounts: • Internet e-mail (POP3/IMAP). • Exchange server (Outlook). - Page 50 8. Tick the Save password checkbox if you wish to save your password to your Toshiba phone. This will mean that you do not need to enter it each time you connect to your e-mail server.
- Page 51 Messaging 11. Tick the Outgoing server requires authentication checkbox if the outgoing server requires authentication. This authentication will use the user name and password that you have already entered. 12. Tick the Use the same name and password for sending email checkbox if required.
-
Page 52: Creating An E-Mail
Messaging Creating an e-mail To create an e-mail: 1. From the Home Screen, select Start > Messaging. 2. Select an e-mail account. 3. Select Menu > New. 4. With the cursor in the To: field, add recipient(s) using one or more of the following methods: •... -
Page 53: Sending And Receiving E-Mail
Messaging. 2. Select the e-mail account that you want to send and receive messages. 3. Select Menu > Send/Receive. Your Toshiba phone connects to your Internet e-mail server and sends and receives your messages. TIP: To stop this process, select Menu >... -
Page 54: Configuring Mms Settings
Configuring MMS settings If your Toshiba phone has not been preconfigured, you will need to manually enter the details of the MMS account. These details are available from your service provider. -
Page 55: Creating An Mms Message
Messaging 3. Select Menu > MMSC Settings. Current MMSC settings will be listed. 4. If there are no settings displayed, select Menu > New. 5. Enter the following MMSC details: • Name: - enter a descriptive name, such as the name of your service provider •... -
Page 56: Inserting Text
Messaging • Enter mobile phone number(s) in the To: field. Use a semicolon to separate multiple recipients. 4. Enter a subject for the message in the Subject: field if required. 5. Enter a message. 6. Press Send when the message is ready. TIP: To preview the message before sending, select Menu >... - Page 57 Messaging Inserting audio To insert audio in the message: 1. Scroll to the Insert Audio... area, then press the Navigation/Action key. A list of all audio files in the current folder is displayed. TIP: To select an audio file from another folder, select Menu >...
-
Page 58: General Messaging Options
Messaging Receiving MMS messages Your Toshiba phone will alert you when a new MMS message arrives. Depending on your settings, the message contents may download a few moments later, when the message will be ready to view in your MMS Inbox. - Page 59 Messaging Inserting a signature For each Messaging account, you can specify a signature to be automatically inserted into messages that you send. To create a signature and insert it in messages: 1. From the Home Screen, select Start > Messaging. 2.
-
Page 60: Text Input
Text input Input modes and indicators Text input Your Toshiba phone has text input modes for text, number and symbol entry. The input mode will be automatically updated depending on the type of text normally entered in a particular field. For example, for fields that usually contain phone numbers, Numeric/Symbol mode will be automatically activated. -
Page 61: Numeric/Symbol Mode
Text input Numeric/Symbol mode When using Numeric/Symbol mode, you can enter characters that are displayed on the top part of keys on the keypad. To enter a character that is displayed on the bottom part of a key without having to change the input mode, hold down the Caps Shift key while pressing the key for the required character. -
Page 62: Applications And Multimedia
Applications and multimedia The following items are available from the Start Applications and multimedia menu of your Toshiba phone: • Internet Explorer • Tasks • Windows Media • Calendar • Messaging • Contacts • Office Mobile • Call History • Settings •... -
Page 63: Showing Or Hiding Pictures On Web
Favourites. 2. Edit the details if required. 3. Press Add. TIP: You can also add Favourites from your PC to your Toshiba phone using ActiveSync. For more information, see Microsoft ActiveSync Help on your PC. Creating a folder in Favourites To create a folder in Favourites: 1. -
Page 64: Viewing The History
Go. Clearing temporary files, cookies and History When you use the Internet, your Toshiba phone stores data that uses up some of the storage capacity of the phone. You can delete these files to free up storage. -
Page 65: Tasks
TIP: You can synchronise tasks on your Toshiba phone with your PC. This will keep tasks up to date in both locations. If you create a new task with a reminder on... -
Page 66: Deleting A Task
Mobile You can use Windows Media Player 10 Mobile to play digital audio and video files that are stored on your Toshiba phone, a storage card or on the Internet. Windows Media Player Mobile can play files with the following extensions by default: •... - Page 67 • Library - to switch between libraries. • Update Library - adds new items to the library by searching your Toshiba phone, and storage card if available. • Open File - enables you to play files that are stored on your phone or storage card but are not in the library.
- Page 68 Applications and multimedia Now Playing screen menu items • Library - switches to the Library screen. • Move Up - moves the highlighted item up in the playlist order. • Move Down - moves the highlighted item down in the playlist order. •...
-
Page 69: Playback Screen Controls
Use the Library to find and play music, videos, and playlists that are stored on your Toshiba phone or storage card. To play an item stored on your Toshiba phone: 1. From the Home Screen, select Start > Windows Media. -
Page 70: Calendar
The Calendar application works like an electronic diary. You can keep track of your appointments, including meetings and other events. You can display reminders on your Toshiba phone, as well as synchronising your phone with Outlook on your PC. Scheduling an appointment To schedule a new appointment: 1. -
Page 71: Updating An Appointment
Applications and multimedia Updating an appointment To update an appointment: 1. From the Home Screen, select Start > Calendar. 2. Select the required appointment. 3. Select Menu > Edit. 4. If the appointment is recurring, select All to edit all occurrences, or select One to edit only the next occurrence. -
Page 72: Messaging
Applications and multimedia 4. In the Week view: field, select 5-day week, 6-day week or 7-day week as required. 5. Press Done. Viewing your agenda for a specific date To view your agenda for a specific date: 1. From the Home Screen, select Start > Calendar. -
Page 73: Contacts
Applications and multimedia Contacts Creating a new contact To create a new contact: 1. From the Home Screen, select Start > Contacts. 2. Press New. 3. Select the contact type to create (Outlook Contact or SIM Contact). NOTE: SIM contacts only support a single name and phone number. -
Page 74: Assigning A Ring Tone To A Contact
Applications and multimedia TIP: To save an Outlook contact to the SIM card, select the contact, then select Menu > Save to SIM. TIP: To save a SIM contact to the phone, select the contact, then select Menu > Save to Contacts. TIP: You can also copy contacts between the phone and the SIM card using SIM Manager. -
Page 75: Assigning A Category To A Contact
Applications and multimedia 4. In the Custom ring tone: field, select a ring tone for the contact. 5. Press Done. Assigning a category to a contact You can use categories to help organise your contacts. To assign a category to a contact: 1. -
Page 76: Word Mobile
Many presentation elements built into the slide shows, such as slide transitions and animations, will play back on your Toshiba phone. If the presentation is set up as a timed slide show, one slide will advance to the next automatically. Links to URLs are also supported. -
Page 77: Call History
For details of Settings, refer to the Settings section. Games Your Toshiba phone comes preloaded with two games. To access the games on your Toshiba phone: 1. From the Home Screen, select Start > More > Games. 2. Select the required game. Voice Notes... -
Page 78: Pictures & Videos
Menu > Delete. 3. Press Yes to confirm the deletion. Pictures & Videos Camera Your Toshiba phone is equipped with a digital camera which can be used to capture photographs and video clips. Starting the Camera To launch the Camera application, do one of the following: •... -
Page 79: Capturing A Video
Applications and multimedia Capturing a video To capture a video: 1. Start the Camera. 2. Press the Right softkey, then select Video. 3. Aim the camera at the subject, then press the Navigation/Action key or Camera key to start recording the video. 4. -
Page 80: Viewing Pictures And Videos
Viewing pictures and videos You can view pictures and videos stored on your Toshiba phone or storage card using the Pictures & Videos application. To view pictures and videos: From the Home Screen, select Start > More >... - Page 81 • Play Slide Show - to play all pictures in the current folder as a slide show. • Folders - to view pictures and videos stored in other folders on your Toshiba phone. • Options - to access settings for configuration of the Pictures & Videos application.
-
Page 82: Accessories
Applications and multimedia Accessories The Accessories item contains the following applications: • Calculator • GPS Antenna Setting • Master Clear • SIM Manager • System Info • Task Manager Calculator To access the Calculator: 1. From the Home Screen, select Start > More >... -
Page 83: Task Manager
Clear in Settings. SIM Manager SIM Manager enables you to copy contact information from your Toshiba phone to your SIM card, or from your SIM card to your Toshiba phone. System Info System Info displays information about the phone memory. -
Page 84: Internet Sharing
PC. However, you cannot synchronise remotely to a PC using a modem or network connection. You can connect to your Exchange server using a cellular connection, or you can connect your Toshiba phone to your PC as a way of connecting back to the Internet. -
Page 85: Installing And Setting Up Activesync
ActiveSync from http:// www.microsoft.com/windowsmobile/activesync/ activesync45.mspx. Once the software has been installed and your Toshiba phone is connected to your PC, the ActiveSync Setup Wizard is started. Simply follow the on-screen instructions. NOTE: If you have a PC which is already... -
Page 86: File Explorer
3. To stop synchronisation, press Stop. File Explorer File Explorer enables you to view and manage files saved in your Toshiba phone, or on the memory card. To access File Explorer: From the Home Screen, select Start > More >... -
Page 87: Messenger
• My Documents - to return to the My Documents folder. Messenger Windows Live Messenger on your Toshiba phone enables you to: • send instant messages or join group chats. • set your status and see the presence of friends and colleagues. -
Page 88: Speed Dial
Applications and multimedia Speed Dial You can create a speed dial for a phone number, e-mail address or web page address that is stored in your Contacts directory, or for an application in the Start menu. For information about creating and using a speed dial for a phone number, refer to Speed Dial in Call functions. -
Page 89: Windows Live
(know as MIDlets) that are written for mobile devices. MIDlets include games and utilities. Your phone supports Java 2 Edition, J2ME. The Java application on your Toshiba phone enables you to download, install and manage MIDlets. To access the Java application: 1. -
Page 90: Connectivity
Manager. Switching radio transmission on/off You can switch the telephony radio transmission of your Toshiba phone On and Off. When the radio transmission is Off, it is in 'flight mode'. In this mode, you will not be able to make or receive calls, send or receive messages, or access the Internet. -
Page 91: Bluetooth
Off, On and Visible. In Off mode, you cannot send or receive data using Bluetooth. In On mode, your Toshiba phone can search for and connect to other devices. However, your phone will not be visible in searches by other devices. -
Page 92: Pairing Devices
• Your Toshiba phone and the other device are within 10 metres of each other. • Bluetooth on your Toshiba phone is set to On or Visible. • Bluetooth on the other device is set to Visible. -
Page 93: Connecting A Bluetooth Headset
6. Press Next. 7. Wait for the other device to accept the pairing. If a passcode has been set on your Toshiba phone, then it will need to be entered on the other device. 8. A confirmation will be displayed when the devices have been paired and connected. -
Page 94: Unpairing Devices
Bluetooth Devices. The headset icon will be displayed on the status bar of the Home Screen. Unpairing devices To unpair your Toshiba phone from another device: 1. From the Home Screen, select Start > More > Settings. 2. Select Connections > Bluetooth >... -
Page 95: Internet Connections
Connectivity Configuring your Toshiba phone to receive beamed data To configure your Toshiba phone to receive beamed data: 1. From the Home Screen, select Start > More > Settings. 2. Select Connections > Beam. 3. Tick the Receive incoming beams checkbox, then press Done. -
Page 96: Setting Up A Dial-Up Connection
Connectivity To set up a GPRS connection: 1. From the Home Screen, select Start > More > Settings. 2. Select Connections > GPRS. 3. Select New... or Menu > Add. 4. In the Description: field, enter a name for the connection. -
Page 97: Setting Up A Vpn Connection
Setting up a proxy connection Depending on your service provider's configuration, you may need to add a proxy connection to allow your Toshiba phone to access the Internet or WAP services. Your service provider will be able to advise whether you need to create a proxy connection... -
Page 98: Connecting To Intranet Urls
Connectivity 2. Select Connections > More... > VPN. 3. Select New... or Menu > Add. 4. In the Description: field, enter a name for the connection. 5. In the VPN type: field, select the type of VPN. 6. In the Server: field, enter the name of the VPN server. -
Page 99: Advanced Settings
Menu > Options. Internet Sharing Internet Sharing enables you to use your Toshiba phone as a modem for your PC. NOTE: This functionality is only available if it is supported on your SIM card. Please contact your service provider for information. -
Page 100: Usb To Pc
Connectivity USB to PC Setting up USB to PC To set up USB to PC: 1. From the Home Screen, select Start > More > Settings. 2. Select Connections > More... > USB to PC. 3. Tick the Enable advanced network functionality checkbox. -
Page 101: Call Barring
Settings Auto Answer The Auto Answer feature enables you to automatically answer a call when you are using your Toshiba phone hands-free. To activate Auto Answer: 1. From the Home Screen, select Start > More > Settings. 2. Select Phone > Auto Answer. -
Page 102: Call Forwarding
Busy - forwards calls when your line is busy. Unavailable - forwards calls when your Toshiba phone is off or out of service range. Data Calls - not supported. Fax Calls - forwards all fax calls. NOTE: You can select multiple conditions for forwarding calls, but each will need to be activated separately. -
Page 103: Any Key Answer
Settings Show SIM contacts - enables contacts stored on your SIM card to be displayed in Contacts. Phone number: - displays the phone number of your SIM card if it is available. Voice mail number: - your voice mail number. You may need to enter this to enable Call Forwarding and set up voice mail speed dial. -
Page 104: Service Centre
Settings Viewing and editing text messages service centre To view and edit the text messages service centre: 1. From the Home Screen, select Start > More > Settings. 2. Select Phone > Call Options. 3. Edit the number in the Text messages service centre: field if required. -
Page 105: Fixed Dialling
Fixed Dialling Fixed Dialling restricts the numbers that you can call from your Toshiba phone. When Fixed Dialling is activated, you can only call predefined numbers or area codes. These numbers are stored in a list that you can set up and edit using your Toshiba phone. -
Page 106: Connecting To A Network
If you have selected the Automatic network select type, following any failure in connection to your home network, your Toshiba phone will attempt to connect to the first network in the list of Preferred Networks. If this fails, the phone will attempt to connect to the next network in the list, and so on. -
Page 107: Sound Settings
> Settings. 2. Select Sounds. 3. Select the sounds you would like for each type of event. Your Toshiba phone will play a preview of each sound as you scroll through them. Select None if you want no sound for an event. -
Page 108: Display Settings
Settings Customising a profile To customise a profile: 1. From the Home Screen, select Start > More > Settings. 2. Select Profiles. 3. Scroll to the required profile, then select Menu > Edit. 4. Modify the settings as required, then press Done. -
Page 109: Date And Time
3. Set your current time zone, and the date and time. 4. Press Done. NOTE: These settings are only lost if you reset your Toshiba phone. Your settings are saved if you power off the phone, or if the battery is fully discharged. Alarm To set the alarm: 1. -
Page 110: Connections
For connection settings, refer to the Connectivity section. Security settings It is advisable to apply certain security features in the event that your Toshiba phone is lost or stolen. You can apply the following security to prevent unauthorised use: • Device Lock - this feature prevents unauthorised use of your Toshiba phone. - Page 111 Settings NOTE: Emergency calls can be placed at any time, without requiring deactivation of any security feature first. Activating Device Lock To activate Device Lock: 1. From the Home Screen, select Start > More > Settings. 2. Select More... > Security > Device Lock. 3.
-
Page 112: Unlocking The Keypad
Settings 3. Enter the SIM PIN, then press Done. WARNING: If you enter the incorrect PIN for your SIM card three consecutive times, you will need to contact your service provider to obtain the PUK. Do not attempt to guess the PUK as your SIM card will be rendered permanently inoperative following ten consecutive unsuccessful attempts. -
Page 113: Master Clear
4. Scroll to the required certificate, then select Menu > View. Master Clear Master Clear resets all settings on your Toshiba phone to their factory defaults and deletes all of your data. You should only use this procedure as a last resort. -
Page 114: Remove Programs
Remove Programs enables you to delete any applications that you have installed. NOTE: Programs that were pre-installed on your Toshiba phone cannot be removed in this way. To remove a program: 1. From the Home Screen, select Start > More >... -
Page 115: Regional Settings
Settings Regional Settings Regional Settings enables you to change the language of the phone, as well as specify the styles in which dates, times, numbers and currency are displayed. To edit Regional Settings: 1. From the Home Screen, select Start > More >... -
Page 116: Backlight Level
4. Press Done. Accessibility Accessibility enables you to make it easier to see and hear items when using your Toshiba phone. To edit Accessibility settings. 1. From the Home Screen, select Start > More > Settings. -
Page 117: About
1. From the Home Screen, select Start > More > Settings. 2. Select More... > More... > About. Error Reporting Error Reporting sends data from your Toshiba phone to Microsoft technical support groups. The data is used to diagnose program errors for devices running Windows Mobile software. -
Page 118: Customer Feedback
Settings Customer Feedback Customer Feedback sends anonymous information to Microsoft for use in helping improve Windows Mobile software. NOTE: You will not incur any data charges to send this information. To enable/disable Customer Feedback: 1. From the Home Screen, select Start > More >... -
Page 119: Specifications
Specifications Specifications System Information Processor Memory Operating System GSM/GPRS/EDGE Frequency Range Within GSM 900 Within DCS 1800 Within PCS 1900 Continuous Talk Time Continuous Standby Time Dimensions (H × W × D) Weight Display LCD (HxW) Resolution AC Charger Input Voltage Texas Instruments™... - Page 120 Specifications Audio/Video Audio Video Bluetooth Interface Cable and Phone Charging Headset Connector Expansion Slot AAC, MIDI, MP3, WAV, WMA H.263, H.264, MPEG4, WMV Bluetooth™ ver 1.2 (Power Class 2) Advanced Audio Distribution Profile (A2DP) Audio/Video Remote Control Profile (AVRCP) ActiveSync Generic Access Profile (GAP) General Audio/Video Distribution Profile (GAVDP) Generic Object Exchange Profile (GOEP)
-
Page 121: Troubleshooting
Troubleshooting Troubleshooting Problem Possible cause Cannot switch Battery out of power phone on Battery not installed correctly Phone switches Battery out of power off automatically Cannot charge Battery not installed correctly battery AC charger not connected Connectors are dirty Battery has worn out Battery or AC charger is damaged Replace the battery or charger. - Page 122 Troubleshooting Problem Possible cause Network not SIM card not installed correctly displayed Contacts between SIM card and phone are dirty Network signal is weak SIM card is damaged Cannot make a You are outside of your network call service area Phone or SIM card is locked Call Barring is active Cannot answer a...
- Page 123 Troubleshooting Problem Possible cause Poor call quality Network signal is weak Network signal is changing frequently, e.g. when travelling on a train. Other party in a Phone is muted call cannot hear Cannot send or Your service provider is not receive text enabling this service messages...
- Page 124 Troubleshooting Problem Possible cause Cannot access Your service provider is not the Internet enabling this service Network settings are missing or incorrect Storage memory Too many items stored on the is low phone Storage card is Storage card not installed correctly Ensure that the storage card is inserted not recognised Storage card is damaged If these suggested solutions do not solve your problem, please consult your dealer, or call our...
-
Page 125: Purchase Record
Purchase record For your future reference, we recommend that Purchase record you fill in your purchase details in the form below. Serial Number*: Dealer Name: Purchase Date: * The serial number is printed on the bottom of the battery compartment. -
Page 126: Menu Tree
Menu tree Start Menu tree Internet Explorer Tasks Windows Media Calendar Messaging 1 Text Messages 2 MMS 3 New Email Account... Contacts Office Mobile 1 Excel Mobile 2 PowerPoint Mobile 3 Word Mobile Call History More Settings 1 Phone 2 Sounds 3 Profiles 4 Display 5 Clock &... -
Page 127: End User License Agreements (Eulas)
TERMS FOR WINDOWS MOBILE 6 SOFTWARE These license terms are an agreement between you and TOSHIBA. Please read them. They apply to the software included on this device. The software also includes any separate media on which you received the software. - Page 128 3. SCOPE Of LICENSE. The software is licensed, not sold. This agreement only gives you some rights to use the software. TOSHIBA and Microsoft reserve all other rights. Unless applicable law gives you more rights despite...
- Page 129 End User License Agreements (EULAs) as expressly permitted in this agreement. In doing so, you must comply with any technical limitations in the software that allow you to use it only in certain ways. You shall not: • work around any technical limitations in the software;...
- Page 130 You may choose not to use this feature. TOSHIBA and/or your Mobile Operator may not support this feature or an update for your device.
- Page 131 9. PRODUCT SUPPORT. Contact TOSHIBA for support options. Refer to the support information provided with the device. 10. LINKS TO THIRD PARTY WEBSITES. If the...
- Page 132 To be valid, this label must be affixed to the device, or included on or in TOSHIBA's software packaging. If you receive the label separately, it is not valid. You should keep the label on the device or packaging to prove that you are licensed to use the software.
-
Page 133: End User License Agreement For Arcsoft Software
End User License Agreements (EULAs) This limitation applies to: • anything related to the software, services, content (including code) on third party internet sites, or third party programs, and • claims for breach of contract, breach of warranty, guarantee or condition, strict liability, negligence, or other tort to the extent permitted by applicable law. - Page 134 End User License Agreements (EULAs) assemble, decompile, disassemble or otherwise attempt (i) to defeat, avoid, bypass, remove, deactivate or otherwise circumvent any software protection mechanisms in the Software, including without limitation any such mechanism used to restrict or control the functionality of the Software, or (ii) to derive the source code or the underlying ideas, algorithms, structure or organization from the...
- Page 135 End User License Agreements (EULAs) PROVE DEFECTIVE, YOU, AND NOT ARCSOFT OR AN AUTHORIZED RESELLER, ASSUME THE ENTIRE COST OF NECESSARY SERVICING, REPAIR, OR CORRECTION. SOME STATES DO NOT ALLOW THE EXCLUSION OF IMPLIED WARRANTIES, SO THE ABOVE EXCLUSION MAY NOT APPLY TO YOU. THIS WARRANTY GIVES YOU SPECIFIC LEGAL RIGHTS, AND YOU MAY ALSO HAVE OTHER RIGHTS THAT VARY FROM...
- Page 136 Software or failure to comply with the restrictions contained in this license agreement. Upon termination of the license, you shall cease to use thereof. [Toshiba comment: This is a ROM based product and there is no way for the end user to return or uninstall the Software thereof.]...
-
Page 137: Index
Index Index AC charger safety 15 Accessibility 115 Accessories 81 ActiveSync 83 Alarm 108 Any key answer 102 Attachments 52, 53 Auto Answer 100 Backlight level 115 Battery 113 Battery safety 14 Beam 93 Bluetooth 83, 90 Calculator 81 Calendar 69 Call Barring 100 Call Forwarding 101 Call History 38, 44... - Page 138 Index Date and Time 108 Deleting messages 48 Device Lock 110 Dial-up connection 95 Digital signing 52 Display indicators 27 Draft messages 47 Editing contacts 72 E-mail 48 Emergency calls 15, 37 Error Reporting 116 Excel Mobile 75 Exchange server 48, 83 File Explorer 85 Fixed Dialling 104 Flight mode 89...
- Page 139 Index Language 114 Live Search 61 Making a call 37 Master Clear 112 Messaging folders 57 Messenger 86 MMS messages 53 Network settings 104 Office Mobile 75 Operating environment 12 Owner Information 114 Phone Information 114 Photographs 77 Pictures 79 Pictures &...
- Page 140 Index Sending a contact 74 Sending a text message 46 Sending and receiving e-mail 52 SIM card 29 SIM Manager 82 SIM PIN 110 SMS 46 Speakerphone 42 Speed Dial 39, 87 Starting and stopping synchronisation 85 Storage card 79 System Info 82 Task Manager 82 Tasks 64...
Need help?
Do you have a question about the Portege G710 and is the answer not in the manual?
Questions and answers