
Related Manuals for Technika 32-2010


Summary of Contents for Technika 32-2010
-
Page 1: Operating Instructions
OPERATING INSTRUCTIONS 32-2010 COLOUR TELEVISION WITH REMOTE CONTROL For assistance, please call our Tesco Electrical Helpline on 0845 4566767... -
Page 2: Table Of Contents
Contents Accessories ... 2 Features ... 2 Introduction ... 2 Preparation ... 2 Safety Precautions ... 2 Power Source ... 2 Power Cord ... 2 Moisture and Water ... 2 Cleaning... 3 Heat and Flames ... 3 Lightning ... 3 Replacement Parts ... -
Page 3: Accessories
Accessories Batteries: 2 X AAA Remote Instruction Book Controller Features • Remote controlled colour LCD TV. • Fully integrated digital TV (DVB-T). • HDMI connectors for digital video and audio. This connection is also designed to accept high definition signals. •... -
Page 4: Cleaning
If any solid object or liquid falls into the cabinet, unplug the TV and have it checked by qualified personnel before operating it any further. Cleaning Before cleaning, unplug the TV set from the wall outlet. Do not use liquid or aerosol cleaners. -
Page 5: Environmental Information
Environmental Information • This television is designed to consume less energy to save environment. You not only help to save the environment but also you can save money by reducing electricity bills thanks to the energy efficiency feauture of this TV. To reduce energy consumption, you should take the following steps: •... -
Page 6: Overview Of The Remote Control
Overview of the Remote Control Standby Yellow (Feature menu) / Current language (in DTV mode) (*) Blue (Install menu) Previous programme Cursor up Cursor right Cursor down TV / Digital TV Mono/Stereo - Dual I-II Programme up / Page down (in DTV mode) / Programme down / Page up (in DTV mode) Numeric buttons Exit (in DTV mode) -
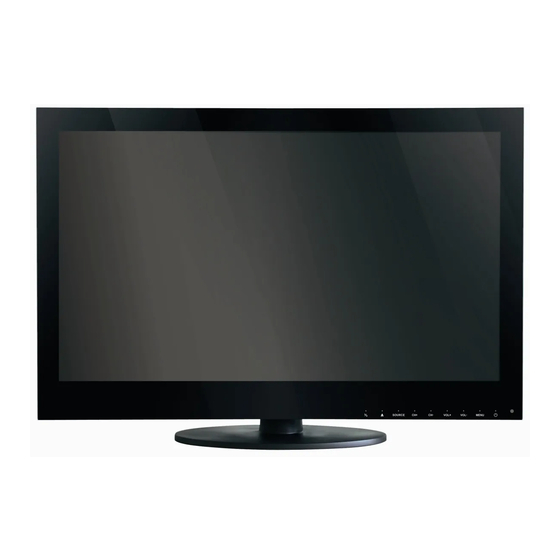
Page 7: Lcd Tv And Operating Buttons
LCD TV and Operating Buttons FRONT and REAR VIEW Viewing the Connections- Back Connectors SCART socket inputs or outputs for external devices. Connect the SCART cable between SCART socket on TV and SCART socket on your external device (such as a decoder, a VCR or a DVD player). -
Page 8: Viewing The Connections - Side Connectors
Viewing the Connections - Side Connectors CI Slot is used for inserting a CI card. A CI card allows you to view all the channels that you subscribe to. For more information, see “Conditional Access” section. Component Video Inputs (YPbPr) video.You can connect the component video and audio sockets with a device that has component output. -
Page 9: Connecting The Lcd Tv To A Pc
Connecting the LCD TV to a For displaying your computer’s screen image on your LCD TV, you can connect your computer to the TV set. • Power off both computer and display before making any connections. • Use 15-pin D-sub display cable to connect a PC to the LCD TV.Use an audio cable between audio inputs of the TV (side) and audio output of your PC to enable sound connection. -
Page 10: Using Side Av Connectors
Using Side AV Connectors You can connect a range of optional equipment to your LCD TV. Possible connections are shown below. Note that cables shown in the illustration are not supplied. • For connecting a camcorder, connect to the VIDEO IN socket and the AUDIO SOCKETS. -
Page 11: Input Selection
Input Selection Once you have connected external systems to your TV, you can switch to different input sources. • Press “ ” button on your remote control for directly changing sources. • Select “Source” option from the main menu by using “... -
Page 12: General Operation
After Automatic Search is completed, the following message asking for analogue channel search appears on the screen: To search for analogue channels, select “Yes”. TV switches to the analogue TV mode. The menu is displayed to search for analogue channels. Select your Country, Language and Text language by using “... -
Page 13: Digital Teletext (** For Uk Only)
Digital Teletext (** for UK only) • Press the “ ” button. • The digital teletext information appears. • Operate it with the coloured buttons, cursor buttons and OK button. The operation method may differ depending on the contents of the digital teletext. Follow the instructions displayed on digital teletext screen. -
Page 14: Deleting The Channels In The Channel List
Note: If you enter the same programme number of the channel that you want to move, “... channel services will be replaced. Do you want to continue?” On Screen Display (OSD) will be displayed. Press OK to confirm or select “No” to cancel. Deleting the Channels in the Channel List •... -
Page 15: Removing A Channel From Favourite List
How to Add a Channel to a Favourites List • By pressing “ ” or “ ” buttons, highlight the channel that you want to add to the favourite list. • By pressing “OK” button, the highlighted channel is added to the Favourite List. •... -
Page 16: Setup
Setup The adjustments in this menu are given as the following: Configuration You can configure the settings of your TV. Select Configuration from Setup menu and press “OK” to view this menu. Press the “RETURN” button on the remote control to exit. Dolby D Digital (* for EU countries only) (optional) In the Configuration Menu, highlight the Dolby D item by... -
Page 17: Audio Description (Optional)
ALL MENUS : All Menus are accessible only with the correct lock key. So the user cannot add, delete, rename, channels, cannot set timers. INSTALLATION MENU: Installation menu is locked. So the user can’t add channels. Changes will be updated after exiting ‘Configuration Menu’. Set PIN Use “... -
Page 18: Language Settings
Preferred These settings will be used if available. Otherwise the current settings will be used. • Audio: by pressing “ ” or “ ” keys change the audio language. • Subtitle: alter the subtitle language with “ ” or “ ”... -
Page 19: First Time Installation
Select your Country, Language and Text language by using “ ” or “ ” and “ ” or “ ” buttons. Press “OK” or RED button to continue. To cancel, press BLUE button. The following menu will be displayed during the automatic tuning: After APS is finalized, the programme table will appear on the screen. -
Page 20: Analogue Tv Menu System
Analogue TV Menu System Picture Menu Mode For your viewing requirements, you can set the related mode option. Press “ ” or “ ” button to select Mode. Press “ ” or “ ” button to choose from one of these options: Cinema, Dynamic and Natural. -
Page 21: Feature Menu
Press “ ” or “ ” button to change the preset. In equalizer menu, the preset can be changed to Music, Movie, Speech, Flat, Classic and User. Select the desired frequency by pressing “ ” or “ ” button and increase or decrease the frequency gain by pressing “... -
Page 22: Install Menu
Menu Background Press “ ” or “ ” button to select Menu Background. You can set menu background level by pressing “ ” or “ ” button. Power Save Mode Use “ ” or “ ” button to select Power Save Mode. Press “... -
Page 23: Colour System
Install Menu in AV Modes The following screen appears in the install menu when the TV is in AV modes. Note that limited options will be available. Switch to TV mode for viewing complete version of the Install menu. Colour System Press “... -
Page 24: Source Menu
Source Menu Press “ ” or “ ” button and select the sixth icon. Then press “ ” or “OK” button. Source menu appears on the screen: In source menu, highlight a source by pressing “ ” or “ ” button and switch to that mode by pressing “... -
Page 25: Displaying Tv Information
Displaying TV Information Programme Number, Programme Name, Sound Indicator and Zoom Mode information is displayed on the screen when a new programme is entered or “INFO” button is pressed. Mute Function Press “ ” button to disable sound. Mute indicator will be displayed in the upper side of the screen. -
Page 26: Teletext
Teletext Teletext system transmits information such as news, sports and weather on your TV. Note that is the signal degrades, for example in poor/adverse weather conditions, some text errors may occur or the teletext mode may be aborted. Teletext function buttons are listed below: “... -
Page 27: Appendix A: Pc Input Typical Display Modes
Appendix A: PC Input Typical Display Modes The display has a maximum resolution of 1600 X 1200. The following table is an illustration of some of the typical video display modes. Your TV may not support different resolutions. Supported resolution modes are listed below. If you switch your PC to an unsupported mode, a warning On Screen Display (OSD) will appear on the screen. -
Page 28: Appendix B: Av And Hdmi Signal Compatibility (Input Signal Types)
Appendix B: AV and HDMI Signal Compatibility (Input Signal Types) Source EXT-1 (SCART) YPbPr HDMI1 HDMI2 Note: In some cases a signal on the LCD TV may not be displayed properly. The problem may be an inconsistency with standards from the source equipment (DVD, Set-top box, etc.). If you do experience such a problem please contact your dealer and also the manufacturer of the source equipment. -
Page 29: Specifications
Specifications TV BROADCASTING RECEIVING CHANNELS MHEG-5 ENGINE compliant with ISO/IEC 13522-5 UK engine Profile 1 Object carousel support compliant with ISO/IEC 135818-6 and UK DTT profile Digital Reception NUMBER OF PRESET CHANNELS CHANNEL INDICATOR RF AERIAL INPUT OPERATING VOLTAGE AUDIO AUDIO OUTPUT POWER (W POWER CONSUMPTION (W) PANEL... -
Page 30: Important Instruction
Important Instruction For your own safety read following instruction carefully before attempting to connect this unit to the mains supply. The wires in the mains lead are coloured in accordance with the following code : GREEN & YELLOW (Earth) (if there is earth cable) BLUE (Neutral) IMPORTANT...
Need help?
Do you have a question about the 32-2010 and is the answer not in the manual?
Questions and answers